Tuesday Tutorials- The Mighty Macaron!

tumblr_inline_n2nl6keU3L1qfrmur.jpg

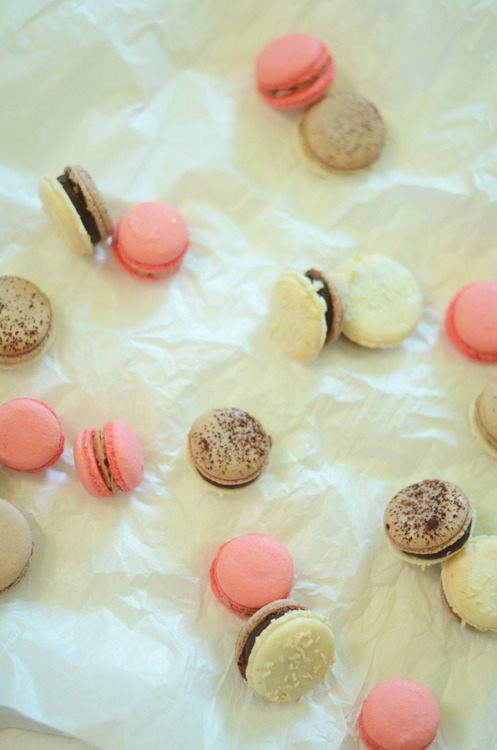
Oh le macaron. Those perfect jewel toned cookies that take you entirely out of where you are standing and promptly in front of Pierre Herme in Paris.

They are a glorious little things aren’t they?

Except when they’re not. And sometimes they really, really aren’t.

Sometimes they are dry little meringues with a sad dollop of filling that makes the whole thing downright miserable.

Macarons done right are magnificent. Done poorly, are no good at all.

So today, I’m going to show you how to make macarons, the proper way.

I have made literally every mistake I think it is possible to make with a macaron. I have sat on the floor and wept not understanding what it is I have done wrong, and that is sadly, not at all an understatement. I’m not being dramatic. I have wept.

But here’s the good news. I have made every one of those mistakes so that you don’t have to. I can tell you every trick I’ve learnt so that you can do them perfectly.

Let’s get started shall we?
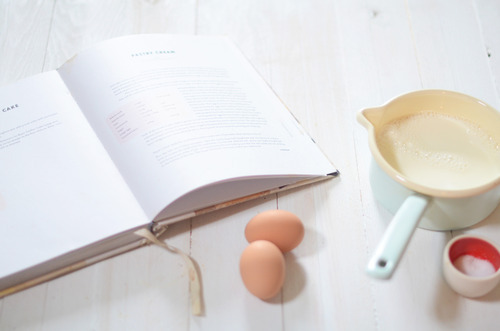
Macarons

Recipe from Pierre Herme

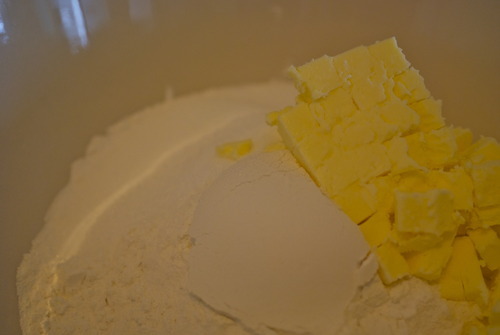
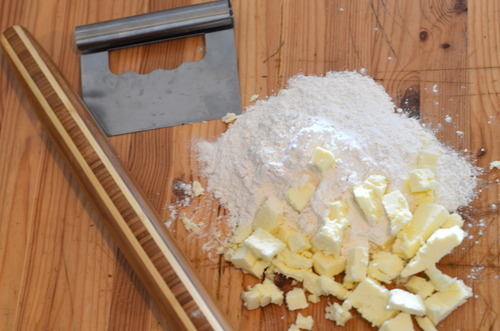
  • 300g Sifted Ground Almonds
  • 200g Icing Sugar
  • 110g Egg whites
  • 300g Sugar
  • 110g Egg Whites

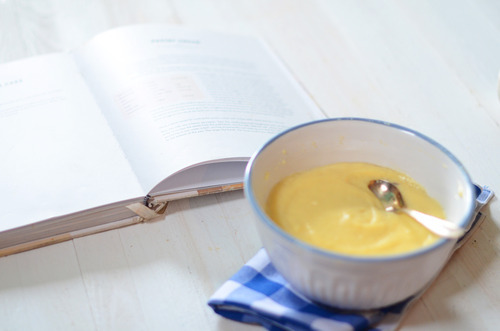
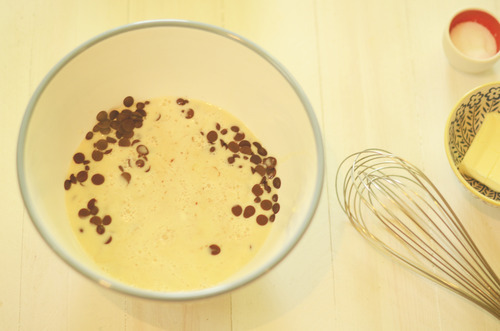
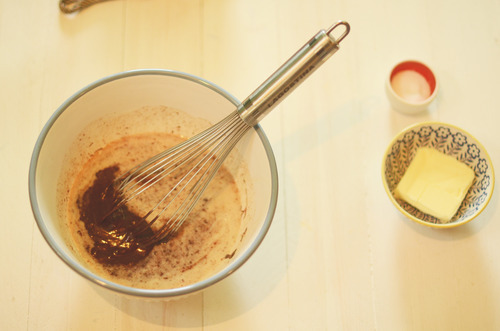
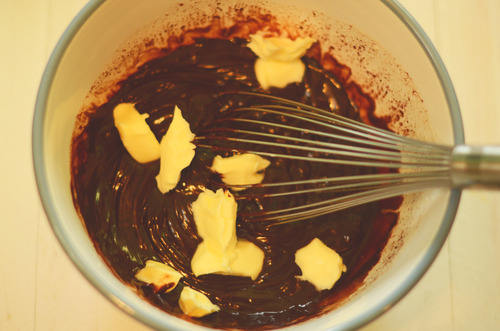
Filling of your choice (I’m a sucker for ganache- try this recipe!)

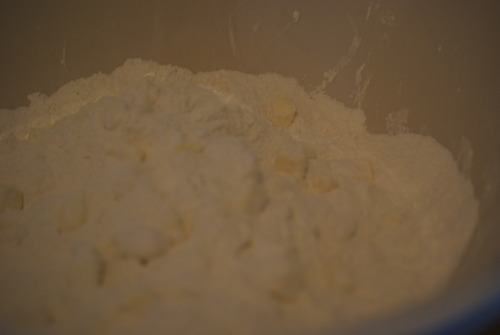
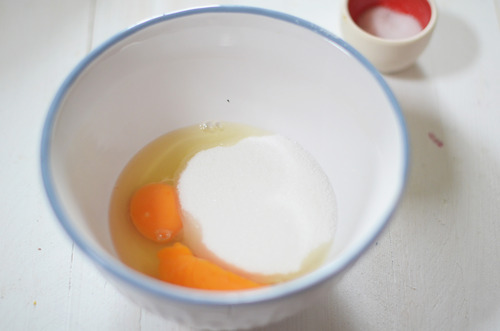
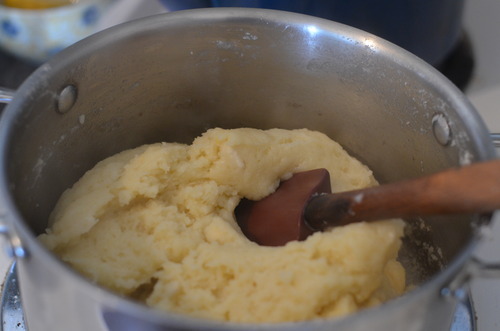
Sift the ground almonds and icing sugar into a large bowl.

Add the 110g of egg whites but do not mix them.

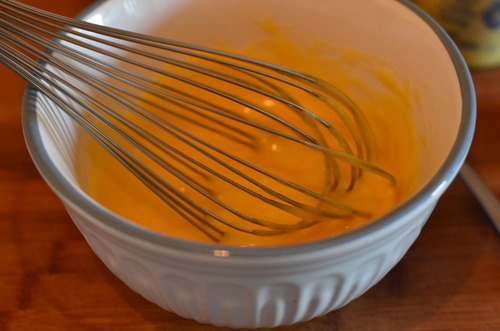
Put the remaining egg whites into the bowl of a standing mixer fitted with the whisk attachment.

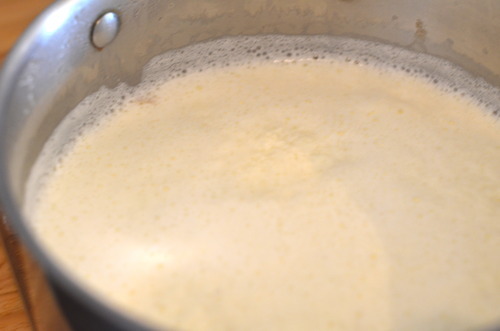
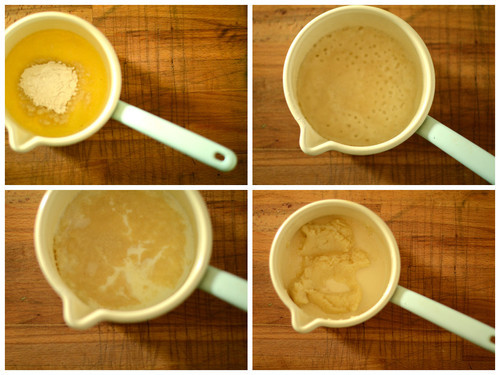
In a small pot mix the sugar with a small amount of cold water so that the sugar has the texture of wet sand. Put a lid on it (if you don’t have a lid an upside down frying pan works well!) and put it on a burner over medium low heat.

When the mixture is boiling rapidly and all the sugar has dissolved you can remove the lid. You’re doing this so that the sugar doesn’t crystallize. By keeping the lid on, which encourages condesation in the pot, the sugar won’t crystallize against the edges. It’s a bit of a cheaters trick, and it works brilliantsly.

Now put your candy thermometer into the pot and turn the temperature up to medium high.

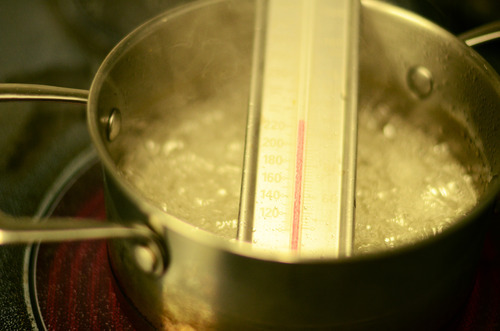
Cook the sugar mixture to 118C.

When the sugar get’s to 115C turn the mixer on medium and whisk the egg whites.

When the sugar gets to 118F carefully remove it from the heat and slowly pour it into the mixer with the motor running. You want to make sure you’re not pouring the sugar onto the whisk which it turn is splashing it on the side of the bowl. You’ll lose too much sugar, instead drip it down the side of the bowl in a thin stream.

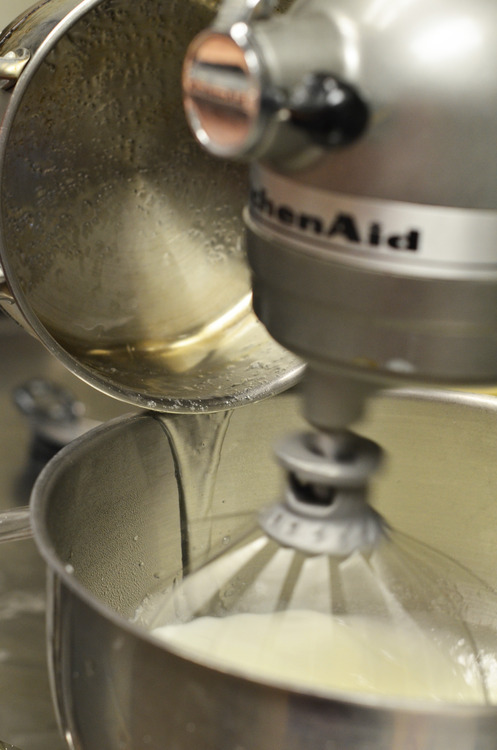
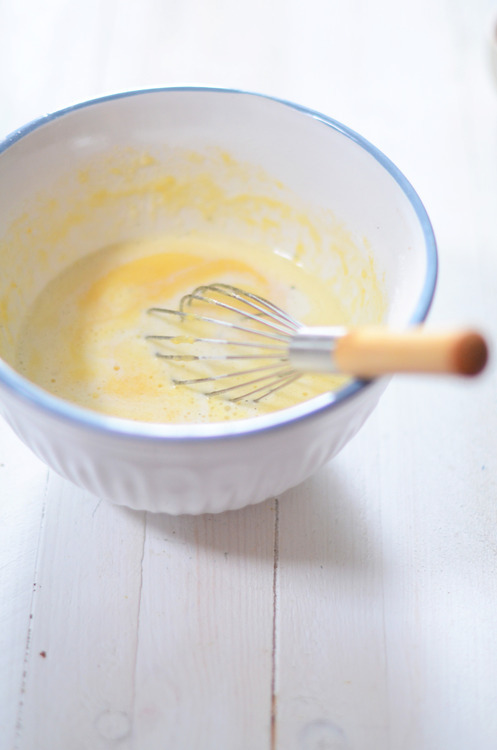
Once the sugar mixture is all in, keep the mixer running until it is very thick, but still slightly warm when you touch the side of the bowl. You want it to be just about body temperature.

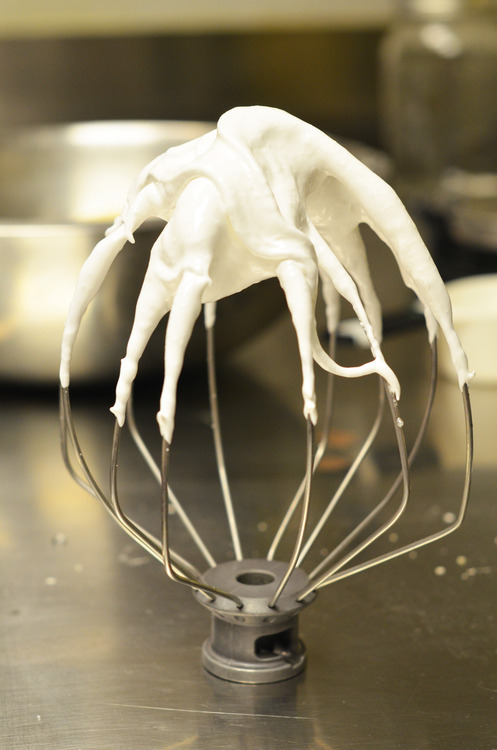
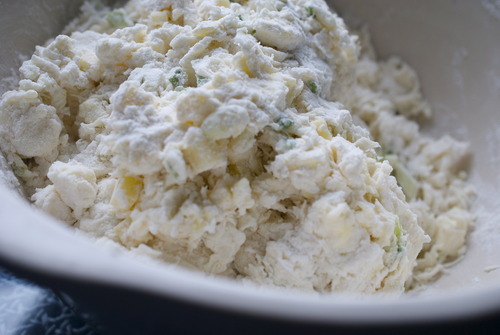
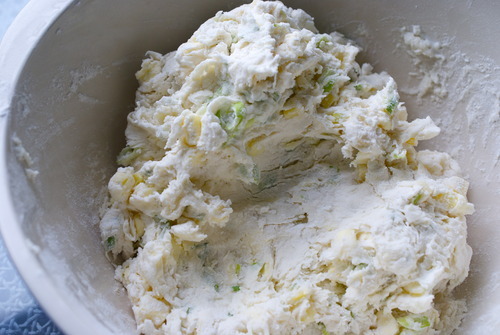
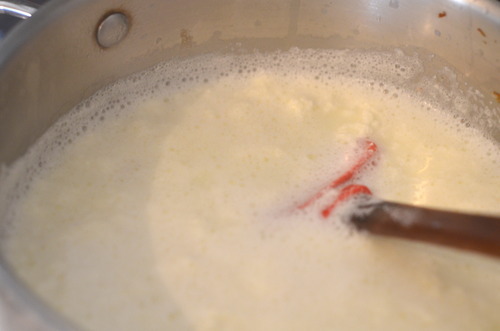
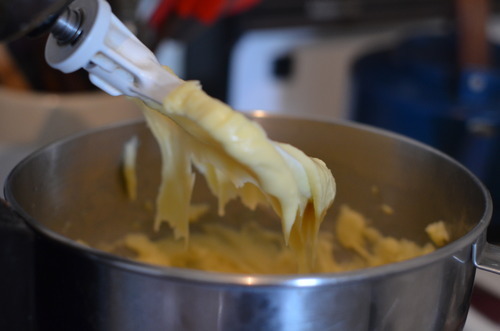
Now you can fold the two mixtures together. This is the trickiest part. This isn’t like normal folding egg whites in where you want to deflate it as little as possible. Instead you’ll actually whip them together with a spatula. The trick is deflating it just enough.

You want the batter to still be thick, but when you life your spatula up and let the dough fall back down, you’ll want it to melt back into the batter, although not too quickly.

That sounds tricky but here’s the nice thing; as soon as you start piping your macaron shells you’ll be able to tell if you did it right or not. If you didn’t, you can just scrape up the batter, mix it up a bit more and then pip it again. No problem. Don’t stress okay?

Good.

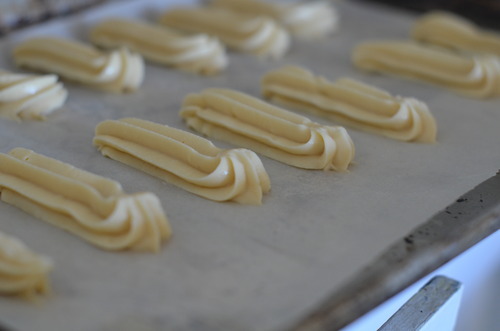
Now that you’ve made your batter it’s time to pipe. Fit your piping bag with a round tip about 5mm wide.

Line 4 baking trays with 4 silpats. If you don’t have silpats you can use parchment paper, but the parchment is likely to bend a bit when you’re baking and they won’t be quite as perfectly round.

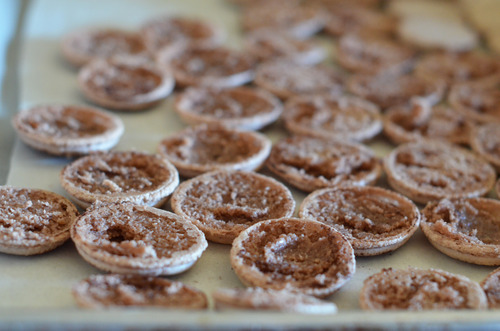
Pipe your macaron shells to be about 1.5 inches and space them about an inch apart.

Now let them sit. You want to wait roughly 30 minutes, or until the soft shiny-ness of the macarons has dulled slightly and turned a bit more opaque. This hardens the shell and ensures that the shell won’t crack.

Preheat your oven to 350F.

Bake your shells one tray at a time, for about 4 minutes, then turn them, then another 3 minutes in a convection oven. In a standard oven it would be more like 5 minutes turn 4 minutes.

When you think they’re done gently wiggle the top of one with your finger: it should still wiggle but also be a little bit firm. Take them out and let them cool completely.

Cook the other trays the same way.

When they are fully cooled use an offset spatula to pick them up off the silpats, they shouldn’t stick too much.

Match them up in rows of two with ones that they are closest to in size (uless your piping skills are totally spot on there will be a few differences in size!)

Now gently push in the base of each shell- this will make more room for the filling.

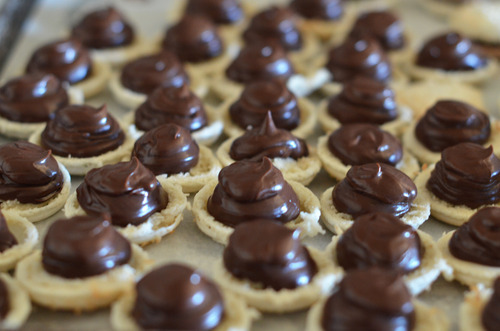
Pipe in your filling, and turn the tops over and gently sandwich them together.

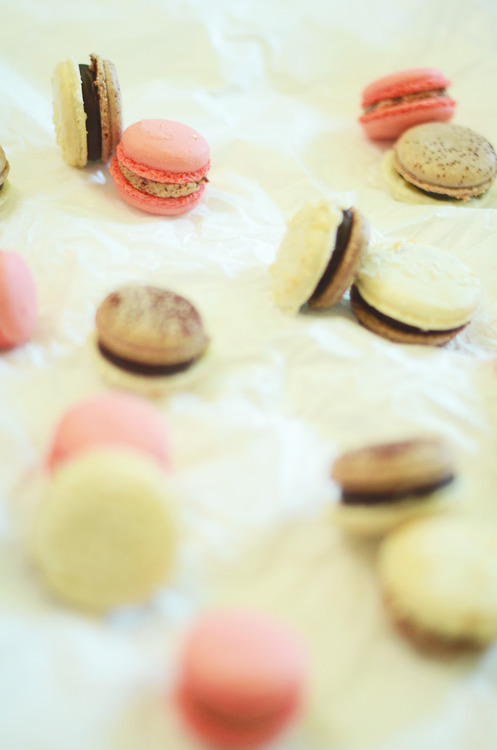
Le macarons! C’est Finis!
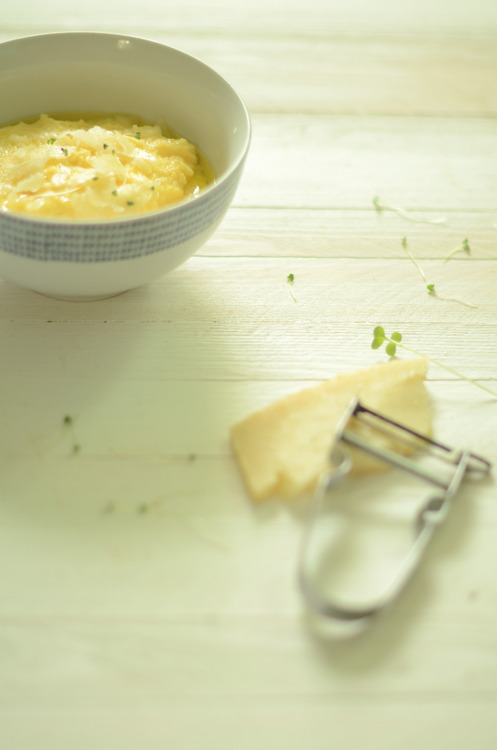
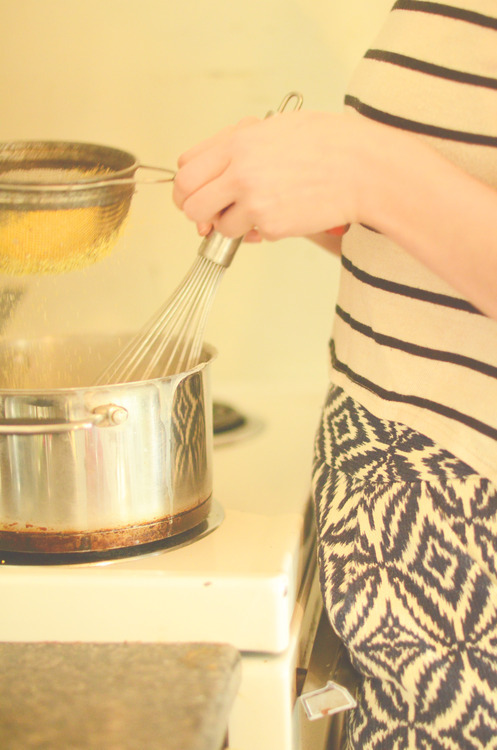
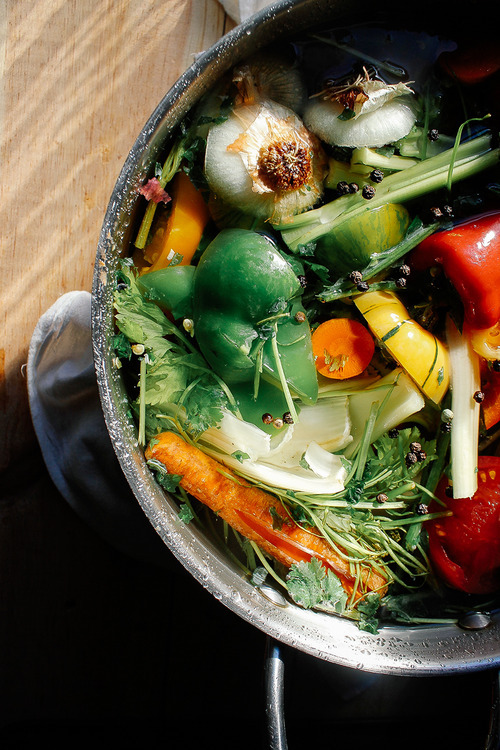
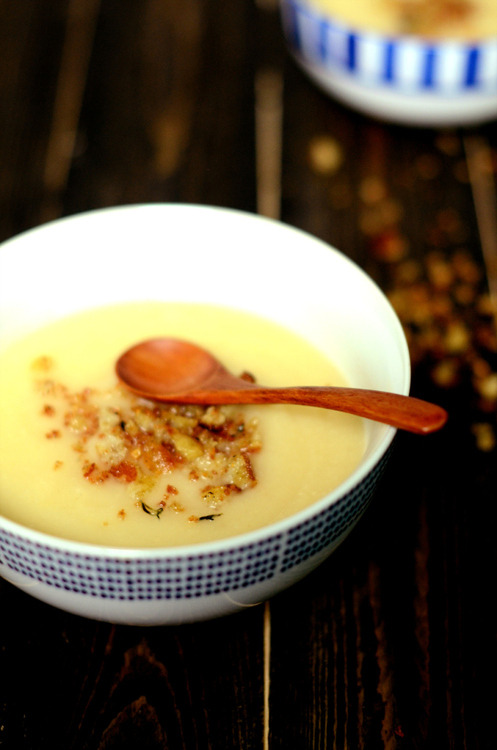
 

Tuesday Tutorials- Pastry Cream

Pastry cream is one of those things that I hated as a kid.  I was totally obsessed with these cinnamon danishes a local café made, only the cinnamon ones, because all the fruit ones had pastry cream in them, or as I called it as a kid “sweet mayo”. It was creamy, it was flavorless, and it was unessesary. Not into it.

And then I started working for pastry chef who made the most incredible blueberry tarts. Extraordinary blueberry tarts. They were made with the most beautiful wild blueberries, the softed shortbread crust, and the thinnest layer of the creamiest pastry cream known to man that had just had a hint of vanilla and lemon. It was a total revelation.

Now, pastry cream is a staple for me. They add a sophistication to tarts,  to pies, to cookies. To danishes.  The best part is that it is super easy to make.  You can make it with cornstarch or flour, if you’re gluten free, and you can easily change the milk to coconut milk if you’re dairy free. If you want a bit of a caramel flavour, you can change the sugar to brown sugar. It’s a wonderful thing.  Get into it!

Pastry Cream

(adapted from the Tartine Bakery)

2 cups Milk (or coconut milk)

2 Eggs

½ cup Sugar (or brown sugar)

3 tbsp Flour or Cornstarch.

½ tsp Salt

½ Vanilla Bean, or 1 tbsp Vanilla Extract

Zest of ½ a lemon

In a medium pot  bring the milk, vanilla, and lemon to a simmer.

Meanwhile crack the eggs into a medium bowl. Mix with the sugar, and then add in the flour or cornstarch.

Slowly add in the hot milk mixture, whisking constantly, until it is all combined.

Pour this mixture back into the pot, and stirring constantly, cook over low heat until it has thickened consistently.

Strain into a clean bowl, cover with plastic wrap and cool completely. 

Tuesday Tutorials- Ganache and Coconut Truffles

Today, let’s take about Jordan.

He’s handsome, and charming. He’s so kind, sometimes it blows me away. He also has no problem saying no to me, which I find to be an incredibly great thing about him. He will bend over backwards to do anything for me, but if I’m bring a brat, he won’t hesitate to tell me.

He’s tall, but not too tall. He makes great cocktails.

Generally, he is an exceptional guy. I’m very fond of him.

His greatest fault though, is his lack of a sweet tooth. I am constantly shoving pastries around him, and he’ll eat a bite or two, and then move on. He’s supportive, he tells me if it’s great, but he’s not into eating a huge bowl of something.

Unless it’s chocolate. That man can down chocolate. Brownies, ice cream, cookies, consider it gone.  And above all, he has absolutely zero control when it comes to ganache.

He gets a sneaky look in his eye, and if I leave him near a bowl of it for an hour, the bowl will be scraped clean when I return. It’s actually kind of crazy.  And for that reason, I don’t make it often.

Except after Valentines. I always feel like guys have a rough go on Valentines, I mean, no one wants to be told that they have to be extra nice one day or they’ll get in trouble, even though no one really knows why they have to be extra nice. But none the less, off they go. Jord bought me some gorgeous flowers, made me a beautiful meal of pistachio roasted lamb and wild mushroom risotto, and took me to an awesome show. It was a wonderful night. And as such, I made some ganache.

This is the ganache recipe to end all ganaches. It is perfect in every way. I so wish that I had come up with it, but the geniuses at Eleven Madison Park did.

To make a ganache you are basically emulsifying chocolate with fat and liquid, and it can be a bit finicky. This one uses honey (well, if we’re being totally real here it uses cornsyrup, but I use honey because it’s more delicious and non GMO) and it helps the whole thing stay together. The butter we whisk in at the end makes it just the tiniest bit richer, and the whole thing has the perfect consistency for making truffles, or glazing cakes, or eating by the spoonful out of the bowl.

Sometimes, you have to give the man a treat.


Honey Ganache

2 2/3 cup Heavy Cream (or Coconut Milk)

1/3 cup Honey

½ cup Butter

4 cups Chocolate chips, 60% cocoa or higher

1 tsp Salt


In a medium pot bring the honey, salt, and cream to a simmer.  Milk is apt to boiling over so be mindful.

Pour the cream mixture over top of the chocolate and let sit for 1 minute.

Use a whisk and gently stir the ganache to emulsify it, working just in small twirls in the center of the bowl until it is all mixed in together.

Add the butter piece-by-piece whisking until each piece is emulsified in before adding the next.

Use immediately if you are glazing a cake, if you want to make truffles or use it as a frosting allow to sit, covered with seran wrap at room temperature for at least 12 hours.  For these ones I used coconut milk instead of cream, and rolled the set truffles in toasted coconut. 

Tuesday Tutorials- Polenta!

Let’s talk about polenta.

I love polenta. I love it a lot.

It is, for me, the ultimate comfort food. It’s smooth and creamy and, perhaps most importantly is super cheap. I pretty well lived off of polenta for a couple years. Breakfast? Put an egg on it. Lunch? Some tomato sauce. Dinner? My favourite is with sautéed mushrooms and onions. You can serve it with steak, or Bolognese sauce, or darn near anything.

But when I was young and ever so broke, mostly I ate it with straight up tomato sauce. When I was feeling rich I would buy some parm and add some in, but most days it wasn’t so fancy. I could make a big batch and feed myself for a few meals for under $3.00. Mega cheap.

And, even in my intense poverty, it was a deeply satisfying meal. It takes only a few minutes to make and it is rich and as comforting as any dish could be.

And it is almost ridiculously easy to make. It is a no fuss sort of a dish. You simply bring some liquid to a boil (stock, milk, or a combination of both) whisk in the polenta and let it simmer for half and hour or so.  That’s it.  Unless you’re trying to keep your costing at a minimum, you should add in cheese and a little nub of butter for a bit of flavour.

Once it’s cooked it becomes a creamy porridge, but your left over’s will harden up in the fridge and become something that you can bake or fry and give it some crispy texture. But I like it best hot out of the pot, eaten with a spoon, feeling like a kid again.


Polenta.

Serves 4

3 cups Chicken Stock, or water

2 cups Milk

1 cup Polenta

½ cup Parmesano Reggiono, or Granda Padana (optional)

2 tbsp Butter (optional)

In a medium pot over medium heat bring a pinch of salt, the stock/water and the milk up to a boil.

Reduce the heat to medium low.

Pour the polenta into a fine sieve and shake it over the pot whisking the whole time- this will prevent lumps from forming.

Keep whisking until the polenta starts to thicken, about 2 minutes.

Switch from a whisk to a spatula or wooden spoon and stir on occasion for 25-35 more minutes, adding a bit of water if it starts to look too thick.

Add in the cheese and butter and stir until it is totally incorporated. Check for seasoning and add more salt if you need it. 

Tuesday Tutorial- Vegetable Broth with Shelly from Vegetarian 'Ventures

Hi All! 

I’m so excited today, because instead of me writing for you, you get the fabulously talented Shelly from Vegetarian ‘Ventures is here instead! She’s going to do a much needed Tuesday Tutorial on veggie broth, and next week you can see what I made with it! So here we go. 

Heyyya! My name is Shelly and I usually blog over at Vegetarian ‘Ventures. I’m filling in for Claire today and am going to teach you my favorite kitchen tutorial.

Today I’d like to talk about my favorite winter kitchen secret: homemade vegetable broth! Excuse me while I nerd out a little but this really is one of my favorite kitchen topics. I know, I know - broth?! But really - it’s one of the easiest and most practical ingredients in the kitchen.  How many times have you bought a can of broth only to throw half of it away? Or let those cartons sit in your fridge until they start to expand so much they are going to explode? Well, I’m here to tell you that it doesn’t have to be like that. You can make your own broth by the gallons and freeze it to hold you over all winter. Homemade veggie broth lasts for two months in the freezer! No more letting those cartons explode after a week and a half!

Not sold yet on why this is the best winter kitchen trick? Here is another reason why it’s great: you don’t have to spend any extra money on ingredients (except if you factor in a small part of your water bill). I just freeze leftover veggie scraps (ends of carrots, celery after it’s gone limp, kale stems, slightly wilted cilantro, etc) until I’ve filled up a freezer bag full. Once the bag is crammed with vegetables, herbs, stems, and spices, I know it’s time to whip up some broth.

Use whatever kind of vegetables you have on hand – there are no wrong veggies here! But don’t limit yourself to just vegetables. Here are some non-vegetable ingredients that also add depth to your broth:

- Herbs (or the sprigs from herbs once you’ve used the leaves for other recipes)

- Whole peppercorn

- Garlic

- Tomato paste 

- Bay leaves

Okay, so let’s make some broth! There is no exact science to this and no real wrong / right way. I love the way no two batches of broth turn out the same. In the summer, my vegetable scraps reflect a light broth with red hues from tomato chunks. In the winter, my broths tend to be dark brown with loads of root vegetables and leftover rosemary. As I keep stating, use what you have on hand and experiment. It’s going to turn out delicious no matter what.

Homemade Vegetable Broth

1 gallon-size freezer bag full of vegetable scraps (stems, ends, peels, etc)

1 gallon of water (or enough to cover the vegetable scraps and fill up your pan)

OR

1 pound of carrots, chopped

1 pound of celery, chopped

2 large parsnip, chopped

2 large onion, chopped

2 Tablespoons whole black peppercorn

1 gallon of water (or enough to cover the vegetable scraps and fill up your pan)

And I usually also throw in (just because I can):

Any lingering vegetables in my fridge that won’t be used otherwise

A bay leaf

An assortment of herbs from my garden

A splash of soy sauce (OPTIONAL, to give it a salty tang at the very end)

Place all vegetables in a large stockpot and cover with water. Heat over high until boiling. Lower heat to a simmer and let simmer for one hour. Remove from heat and strain the broth into a large saucepan to let cool. Add a splash of soy sauce if you’d like (completely optional).

Okay, cool - I made vegetable broth! Now what?

Well, let’s talk about freezing. You could freeze it in a block but it sure is a hassle when trying to break off only a cup full. I recommend you freeze it in ice cube trays and then transfer them to zip log bags once frozen. The amount will completely depend on how full you make the trays, but 6 ice cubes = a half cup for me. If you want to figure out an equation for you, fill a measuring cup with 1/2 cup of vegetable broth and pour it into ice trays. Easy. Done. Now you can pull exactly the right amount out next time you are looking to make that certain soup recipe.

You may think ‘well, I don’t use that much broth… there is no way I’ll use up a gallon of it in 2 months.” Oh, you’d be surprised! Especially once you have it on hand and taste how delicious it is. Not only can you incorporate it into warming soups and stews but you can also use it in risotto, pot pies, and even slurp it by itself for an afternoon boost. And now is a great time to make some broth to have on hand for the holidays coming up!

Still need some more inspiration? Check out these delicious recipes from Claire and I that use plenty of broth:

Barley Risotto

Cauliflower Soup with mint Almond Pesto

Chickpea Tomato Minestrone 

French Onion Soup

Thanks so much for reading my rant about vegetable broth! I hope I’ve inspired you to try it out for yourself. Feel free to come visit me over at Vegetarian ‘Ventures if you’d like to be friends!

Tuesday Tutorial- Homemade Ricotta Cheese

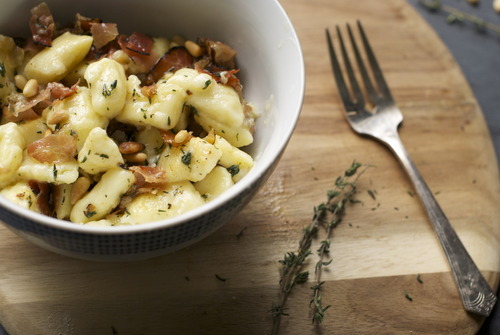
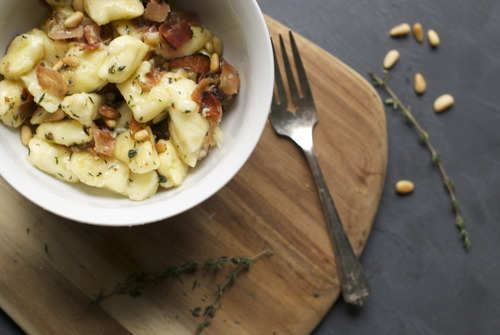
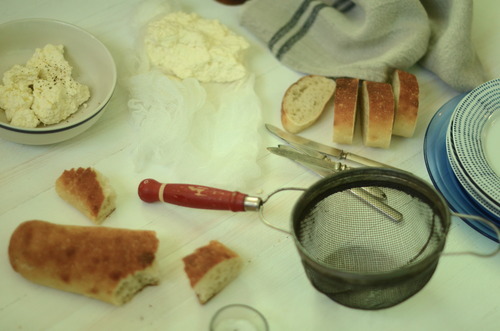
,I live in a very Italian neighbourhood, and my local market makes the most outrageously good ricotta cheese. The thickest, creamiest, most glorious ricotta I’ve ever had. It’s so good.

It’s also $12.00 for 500mL. The deliciously is directly linked to the price tag.

I have made a lot of ricottas in my life. Sometimes for restaurants, sometimes for home, and it’s always good. It is. But it’s never as good as the kind I can buy at the market. So I gave up for a while, I didn’t want to go through the trouble. I forked over the cash when I had a craving.

The trouble, is that to fully appreciate ricotta you have to eat it at room temperature, or slightly warmer. When it has just been made, slathered on good bread, and dipped in olive oil and sprinkled generously with maldon salt- it is the best and simplest snack ever. Put a salad beside it and you’ve got a downright brilliant lunch.

So I started experimenting with recipes, trying to make one as good as the Italian brand down the street, but that I could make at home and then eat while warm. Ricotta isn’t hard to make, you just bring some milk to a boil, add in some lemon, stir it until it occurs, and strain it. It’s a funny thing really, because traditionally ricotta is made by reboiling the whey of other cheeses, the whey of course being nearly completely fat free (the word ricotta literally means twice cooked), but ricotta is ever so much more delicious when you add in fat.

A lot of recipes call for 1 litre of milk and one cup of cream, but I add just a half cup more cream, and it makes a world of difference. Such a difference in fact, that I prefer it to the store bought kind down the street that costs twice as much. Small miracles my friends, small miracles.

Ricotta Cheese

1 litre Whole Milk (or homogenized)

1 1/2 cups Whipping Cream

Juice of 1 Lemon

1 1/2 tsp Salt

Line a large sieve with cheesecloth

Bring the milk and cream to a roaring boil.

Add in the lemon juice and stir, still over the heat, until thick curds have formed.

Pour the liquid into the prepared sieve, put the sieve over a bowl and allow to cool at room temperature for about an hour. You can make it a bit thicker by letting it sit longer if you’d like.

Remove the cheese from the cloth, and serve immediately, or store in an airtight container in the fridge for up to a week.  

Tuesday Tutorial- Bechamel Sauce (and Mac and Cheese)

image

When I was little, and us kids were feeling picky, my mom would make pasta with red sauce and white sauce. Which is to say, she would boil up a big pot of spaghetti, make tomato sauce and cream sauce and let us mix it up as we liked. It was a staple.

And we would pray that there would be leftover cream sauce, because that would mean we would be getting baked potatos with cheesy sauce the next day. Or mac and cheese. Or lasagna.

There are a million uses for cream sauce, or bechamel.

Rich and creamy, it is a simple sauce thickened with flour and made mostly of milk. It’s considered a “mother” sauce in French because it spawns so many others and it is the base for so many dishes.

Once you get the technique down, which won’t take long at all, you’ll find that cooking a bit of flour in butter, and slowly adding in liquid, is the base for stews, soups, and sauces all over the place.

It is one handy trick to have up your sleeve.

image

Bechamel Sauce

2tbsp Butter

2tbsp Flour

2 cups Milk

1 tsp Salt

image

In a medium pot over medium heat melt the butter.

Add in the flour and stir for a couple minutes, until the mixture is very thick.

Add in a quarter cup of milk and don’t stir. Wait until the whole thing is boiling, and then whisk. Waiting before stirring will ensure that you get no lumps.

It will get super thick. That’s good!

Now add another quarter cup of milk, wait until it boils and stir it.

Keep doing this- the pouring, the waiting, the stirring, until all of the milk is mixed in.

And you’ve mastered a French Mother Sauce! Congrats.  

Tuesday Tutorial- Homemade Mayo!

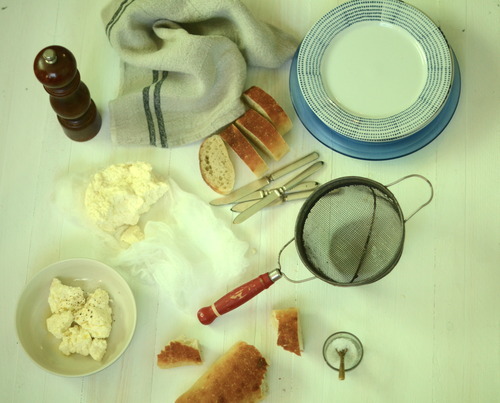
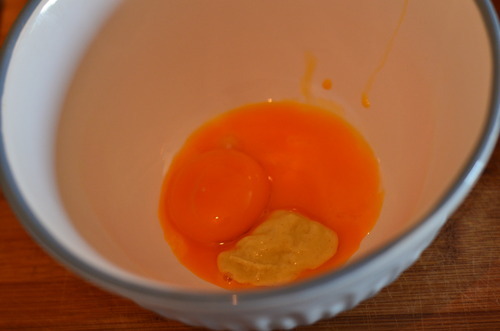
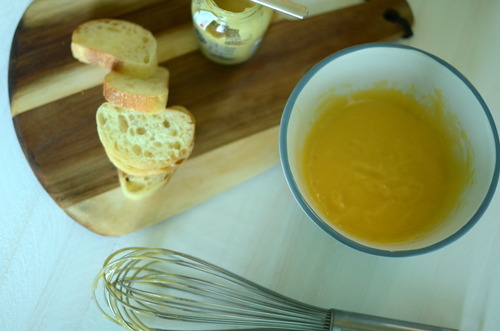
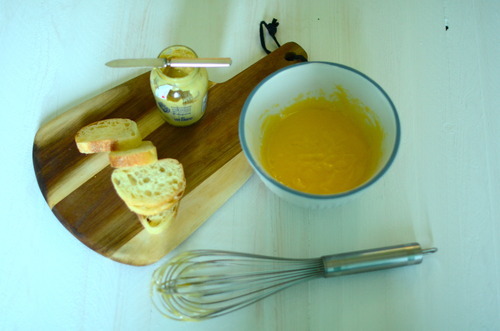
The very first thing I learnt at the very first restaurant I ever worked at, was how to make mayo. Specifically this herb laden, lemon spiked, garlicky mayo that we served with the frites. The sous chef at the time swears to this day that when he tried mine, and I had made it taste just like he showed me, he decided to take a chance on me and mentor me.

So when I say my life was changed by mayo, I am not even kidding a little bit.

Career altering mayo. Fact.

I still make mayo pretty regularly- the idea of keeping egg yolks and oil at room temperature for months at time creeps me out, so I try to do it myself as much as possible. It takes only minutes, is preservative free, and tastes just a world better than the jarred variety.

And once it’s made the fun comes in. Adding roasted garlic? Squeezing in some more lemon? Flecking in some parsley and thyme? Maybe mixing in chipotle spice, or smoked paprika, or Old Bay seasoning.The options are limitless, and nearly all of them are delicious.

Homemade Mayo

1 Egg Yolk

1 tbsp Dijon Mustard

2 tbsp Lemon Juice

1/2 tsp Salt

1 cup Vegetable Oil

Mix together the yolk, dijon, salt, and lemon juice.

Very slowly drip in the oil and whisk vigorously.  

When it starts to get very shiny, add in a few drops of the lemon juice. 

Repeat this- adding oil, and then lemon juice, until all the oil is mixed in. 

Taste it and check for seasoning. I like mine pretty lemony but you can play around with it and add less if you’d like. 

And you’re done! Easy isn’t it?

Tuesday Tutorial- Quick Puff Pastry

The rains have started. We’ll probably have a couple more sunny days, but mostly it’s Fall here. Our mountains won’t turn red and orange, they’ll stay a blackish green, but the tops will fall under a fog. Even though it’s still warm now, it will be sweater weather soon. As much as I love summer, and I still have a small vacation to take, I’m looking forward to the cold. The cozy feeling of watching the rain fall with a cup of tea in your hands. The gentle scratcing of wool scarves at your neck. New boots.

The time of year to take things a little bit slower, and to make pastries by hand.

This is my absolute favourite kind of dough to make, I remember my mom teaching me as a little girl. Gently breaking up the butter with my hands and kneading the dough were two of my favourite things as a kid. I have since made it hundreds, if not thousands of times in my life. It is the kind of pastry that normally takes a few tries to get right, but this little trick- curtesy of the Tartine Bakery Cookbook- in which you roll the butter, makes all the difference.

I like to call this dough a rough puff pastry, it’s not quite as light as a puff, but it’s not far off, and while the method is closer to a pie dough, it’s much flakier and crisper than that. I rarely have the energy or patience for puff pastry, and almost any recipe that calls for it gets this instead. I use it for pies, tarts, cookies, savoury tarts, mini cinnamon buns. Nearly anything that calls for pastry, you could use this. It’s the ultimate pastry in my books.

Rough Puff Pastry

2 cups AP Flour

1 cup Butter, unsalted, cut into cubes

1 tsp Salt

1/2 cup – 3/4 cup Ice Water

On a clean flat surface sprinkle the flour and salt.

Break the butter apart into the cubes and toss to coat them in the flour.

With your rolling pin begin to roll the butter out. It will stick to your rolling pin and the counter but don’t worry. Use a pastry scraper, or a spatula and scrape the pastry off. Then keep rolling.

Push the butter bits from the outsides in to make sure all of the butter has been rolled into thin strips.

Pour about 1/4 cup of water on top of the flour mixture and, again using the pastry scraper or spatula, fold the dough on top of it’s self.

Add more water, a couple table spoons at a time, and keep folding the dough over, pushing it down, and folding it again until some flour remains on the surface but it’s holding together. It shouldn’t be sticky to the touch but it shouldn’t be falling apart either.

Keep folding the dough, pushing it out, and folding it again. This is putting the layers into your pastry that will make it so light and crisp.

The dough should be soft to work with, as soon as you start to notice it resisting your touch stop.

Wrap with plastic wrap and refridgerate for at least an hour. I usually make two batches and keep one in the freezer, so I always have some on hand.

It will last 2 days in the fridge, or a month in the freezer.

Tuesday Tutorial- Challah!

It’s funny, the kind of food you fall in love with. I grew up in a pretty Christian neighbourhood, but not too far away was a big Jewish area, and that always had a strong pull for me. Early Sunday mornings were spent buying bagels, and words do not begin to describe my love of lox. But it wasn’t until high school, when I became friends with a Jewish girl and started being invited regularly to Sabbath dinners when I really started to appreciate the food of that culture.

I don’t ever eat Jewish food now, because there pretty much are no Jewish people in Vancouver.

I mean, there are a few. But it’s slim pickings.

Which is why I found myself on a hot summer day making challah.

Oh challah.

Challah is brioches sister, the prettier sister.

The main difference is that there is no dairy in challah, instead the eggy dough has olive oil added to it, instead of butter- this keeps it Kosher, but as I don’t keep Kosher (as I’m not Jewish) I slather butter on mine once it’s cooked.

This will also make the best damn French toast you have ever had.

Challah Tutorial

(adapted from Smitten Kitchen)

1 1/2 tbsp Dry Yeast

1 3/4 cup Luke Warm Water

1 tbsp Honey

3/4 cup Olive Oil

5 Eggs

1 tbsp Salt

7-9 cups AP Flour

1/4 cup Sesame or Poppy Seeds (optional)

In a large bowl mix together the yeast, water and honey. You can also do this in the bowl of a standing mixer.

When it starts to get foamy add in the oil and 4 eggs, stir to combine.

Slowly add in the flour.

I only needed 7 cups, but you may need more. Once the flour is combined, begin to knead.

If you use you’re Kitchenaid it may be a bit much for your machine- I am lazy and didn’t want to knead it, so I split the dough in two and did it that way.  

I drank a glass of wine. 

Put the dough in a greased bowl. Let is rise for an hour, then punch it down, and let is rise for another half hour. 

Divide the dough into two portions. You can make them into loaves, braided loaves, buns (the best hamburger buns!). 

I did a 6 piece braid, which is the classic way to make challah. I could try to explain it to you, but I would probably nto do a very good job.  does a great one though- at about 2;12 the braiding part of the tutorial starts. 

Preheat the oven to 375F.

Mix together your remaining egg with a pinch of salt. Brush it on the top of your loaf. Allow it to sit for another 20 minutes, and then brush again. Sprinkle with the sesame seeds or poppy seeds, if using. 

Bake for about 45 minutes, until the top is nicely browned and it feels hollow when you tap it. 

Allow to cool completely before slicing into it!

Tuesday Tutorials- Choux Paste + Strawberry Rose Eclairs

image

Choux paste is magical stuff. It’s a simple mix of eggs, flour, butter and milk, but the result is glorious. Mix some cheese into it and once it’s baked it becomes gougeres. Boil small pieces of it and it’s Parisienne gnocchi. Add some apples to the mix and fry it and it’s a fritter. Pipe it into little balls and your nearly at a profiterole, or cream puff. Pipe it a bit longer and you’ve nearly made an eclair.

Seriously, there is little that choux paste can’t do. It’s pretty amazing. You should learn how to make it. Stat.

I don’t know if this happens to everyone, but people always make professional jokes about me, the most common is calling me eclair. This is the lame joke that every man over the age of 65 says when I say I’m a baker

“Oh, really? Should we call you Eclair?” No dude, Claire will do just fine.

But to avoid being bitter and I’ve decided I just need to get crazy good at making eclairs. Somehow this feels like retaliation, even if almost no one knows how good I am at them but me. This way I can chuckle to myself and think at how awesome my eclairs are when old men say this to me.

It’s silly, I know it. But it makes me feel better.

This eclairs are pretty fantastic, if I may. They are super fresh tasting, filled with a whip cream that’s spiked with crushed strawberries, and a bit of vanilla. Then they are carefully dipped into fondant that’s scented with rosewater.

These are kind of ridiculously good. I ate an astonishing number of them.

So many in fact, that I lied to my boyfriend about how many I made. And then I felt no guilt. About the eating or the lying. They were that good.  

image

Rose Eclairs

Adapted from the Bouchon Bakery Cookbook

1 1/4 c AP Flour

2tbsp Sugar

1cup Water

4oz Butter

1 tsp Salt

1cup Eggs

Strawberry filling:

1 cup Whipping Cream

1 cup Strawberries

2 tbsp Icing Sugar. 

Glaze:

1 cup White Fondant

1 tsp Rosewater, or as needed. 

In a medium pot, melt the butter. 

Add in the water and bring to a boil. 

Mix in the salt and flour and stir for about 4 minutes, until it is very thick and the flour is cooked. 

Put the flour mixture into the bowl of a standing mixer fitted with the paddle attachment. 

Start beating on medium speed. Add in one egg.

Wait until it is fully combined before adding the next, continueing this until all the eggs are combined and the mixture is soft, shiny and smooth. This is your choux paste!

Fit a piping bag with a large star tip, and transfer the choux paste into it. Pipe the shape of an eclair onto your prepared trays, being as careful as you can to make them the same sizes. 

Bake for about 25 minutes, rotating the tray half way through baking. 

Allow to cool. 

Meanwhile make the filling:

Mash up strawberries as finely as you can- this can be done in the food processor or simply with a fork. Strain them through a fine seive. 

Whip the cream to stiff peaks, mix in the icing sugar.  

Fold the strawberry puree in. Transfer to a piping bag with a thin round tip and move to the fridge until ready to use. 

Glaze:

In a double boiler melt the fondant. 

Add in the rosewater and stir to combine. Check for taste. 

image

image

image

Tuesday Tutorial- Pasta Dough!

I love pasta. I used to think I would be happy eating pasta every day. It is my ultimate comfort food. When I’m sick I want pasta, when it’s cold I want pasta, when I’m celebrating I want pasta, when it’s hot out I want pasta. I love pasta.

Then I worked at a high end Italian restaurant here in town, that shall remain nameless, where we had pasta every day for staff meal. It was always spaghetti with whatever we had kicking around left over. Except that there was never anything left over, so it was always spaghetti with butter and parm. We also had a salad of leftovers alongside it, except there was never any leftovers, so he ordered in iceberg lettuce for us. It was a sad sad meal, and everyone who worked there was significantly plumper when they left than when they had arrived.

It was a restaurant full of flaws, full of some extraodinarily cruel people, and full of beautiful food for the guests, and iceberg lettuce for the staff. I felt really crappy about myself when I worked there. And for quite a while I stopped eating pasta. I had just gotten my fill.

Slowly though, it came back, and it ought to. I’m a tiny bit Italian and it manifested itself into my diet when I was very small and it never left. I love, passionately, food that uncomplicated, unfussy, that used very few ingredients, but uses the best ones possibly, to make simple beautiful food. That’s what Italian food is all about.

Which brings us back to pasta. Pasta for me is the epitimy of simple food. The combination of essentially just flour, salt and eggs makes the most gorgeous textured noodle that, at it’s best, is just graced with a sauce made of only a very few things. It is simplicity done right.

Making pasta is not complicated, it just takes a bit of patience. You don’t need any fussy equipment, you can easily do it by hand, in fact it’s very satisfying to do it that way. But in a pinch you can do it in a kitchenaid, although the dough is a bit tough and I wouldn’t recommend doing it regularly in your mixer. Apparently old ladies in Italy roll theres out by hand too, but I’m not that skilled so I have a pasta roller, a little handhelp device that costs about $30.00. It’s not a huge expense, and it’s not very large either, so it’s not too hard to store. This batch makes quite a bit, I like to dry out about half of it for later, but you could of course,

Pasta Dough

Adapted from the French Laundry Cookbook

7 Egg Yolks

1 3/4 cup (8 oz) AP Flour

2 tbsp Olive Oil

1 tbsp Milk

1 tbsp Salt

In a large bowl mix together the flour and salt. Create a well in the centre of it and add in the yolks, oil and milk. Mix together until it combines. Now put the dough onto a clean surface and knead it- push the dough out flat, fold it over and push it again with the base of your hand, pushing and folding over and over again. When the dough is ready you will be able to do the window test- Pull a small piece of dough and gently stretch it with your fingertips. If it is ready you will be able to get the dough to become so thin it is slightly translucent. If not and the dough rips, keep kneading. If you doubt at all whether or not it is done, keep kneading.

When it is done, wrap it up in plastic wrap and let it cool rest for at least half an hour, or up to overnight.

Once it’s rested set up your pasta roller. Cut the dough into quarters and cover the others carefully. On a very well floured surface roll out the dough by hand with a rolling pin to about 1/2 cm thick.

On the pasta machine on the thickest setting roll out the dough.

Now on the second thickest roll out the dough again. Keep going until the pasta machine is on setting number 3.

Flour the dough again and fold it into thirds and cut into strips for linguine. Either coat them heavily with more flour and wrap them up to use within a couple days or while they are still soft hang them up. I used my towel rack, but you can also hang them up (clean) hangers and dry them that way.  

Tuesday Tutorials- Danishes!

When I was little my parents had it all figured out. They decided when we were very young, that we could make our own breakfast. And on Saturdays, starting when perhaps parents would decide was too young today, we walked the block and a half to Second Cup and bought breakfast. It was a tiny cafe, part of a larger franchise in Canada, but one where they did all the baking in house. And every Saturday in the summer we would get a cinnamon danish with peach drink, and every Saturday in the winter we would get a peach danish and a hot chocolate. We were creatures of habit.

The couple that owned it were endlessly sweet to us, and we adored this little tradition. Then they hired an extremely rude girl who would serve the adults instead of us and be mean to us kids, so we wrote a very stern letter and we wrote each line in a different colour marker, so you know we meant business. And we never went back. For a few months we tried different cafes that were close to us, but it was never the same. Not long after we started making our own elaborate breakfasts which was, in fact, the beginning of a whole other exciting era. BUT there was a very sweet couple of years in which my sister, my next door neighbour and I ate danishes every Saturday. And it was a wonderful time.

Which is all a long way of saying that I love danishes. An awful lot.

Danish dough is what’s called a laminated dough, because you roll out the dough with a big block of butter in the middle. And then you fold the dough, and roll and fold and roll and fold, and as you do this the butter laminates the layers of dough. This is the same premise behind puff pastry, but here the dough is also yeasted so it rises even more, and has more flavour. The dough is similar to a croissant dough, which I might do a tutorial for soon -let me know if you’d like that in the comments!

Danishes

Makes 32 danishes

3 1/2 tsp Dry yeast

1/2 cup Sugar

1 cup +2 tbsp Milk, warmed

7-8 cups AP Flour

1 tbsp Salt

1/2 cup Butter, soft

2 Eggs

1 1/2 lb (3 cups) Butter

Egg wash (1 egg yolk and 2 tbsp milk/cream)

And your filling! I used raspberry jam- about 2 cups of it.

*This makes a very large batch, which I like because then I freeze half of it, but you can half this easily as well.

Make sure the milk is not to warm, it should just be body temperature. If it’s too hot it will kill the yeast.

Mix the milk, yeast and sugar together. Let it sit until it gets foamy on the top, about 5 minutes. If it doesn’t get foamy it means the yeast is dead, start over!

In the bowl of a standing mixer or in a large bowl if you’re planning on doing it by hand, combine the dry ingredients, only 6 cups.

Add in the yeast-milk mixture in and combine until it starts to come together. If it is still very wet add in a bit more of the flour until the mixture is still soft but not sticky.

Add in the 1/2 cup soft butter bit by bit until it is fully combined, and keep mixing until the dough does the window test- when you take a small bit of dough and stretch it slowly in your hands, it gets so thin you can see through it. If it doesn’t keep mixing!

Now form the dough into the a ball and put it in a clean bowl, cover it with a clean tea towel and let it rise until it has doubled in size, about an hour.

In between two sheets of parchment roll out the butter into a square about 1 1/2 inches thick, put it in the fridge.

On a well floured surface place the ball of dough. Cut 4 slits into the dough at 12-3-6-9 o clocks, about half way in.

Now roll it out- so that you form a large x shape.

Put the block of butter into the middle

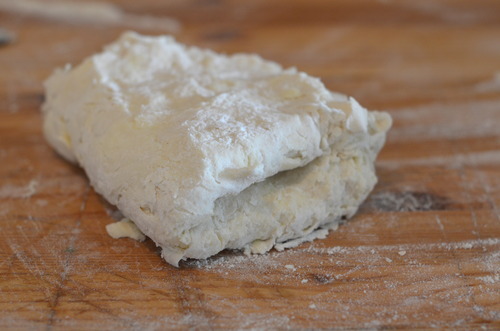
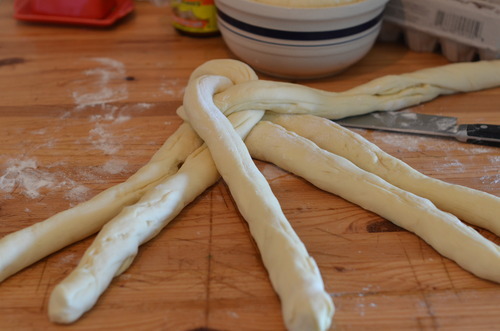
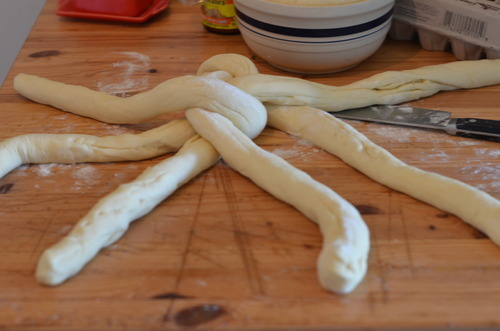
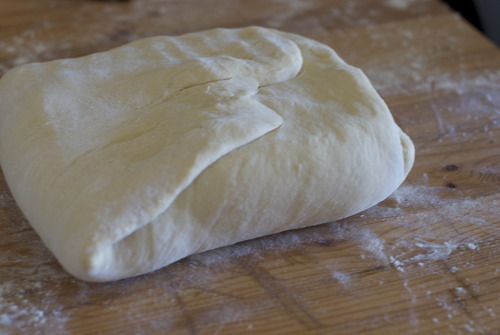
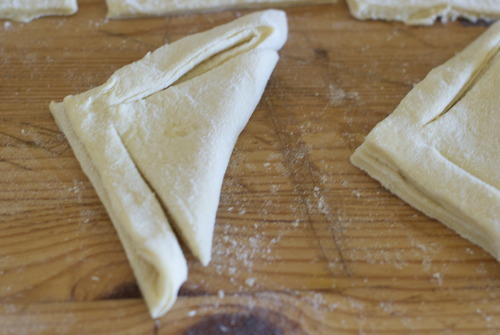
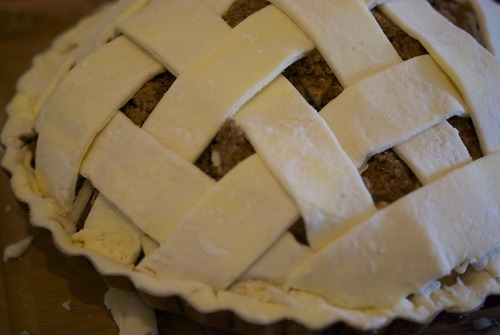
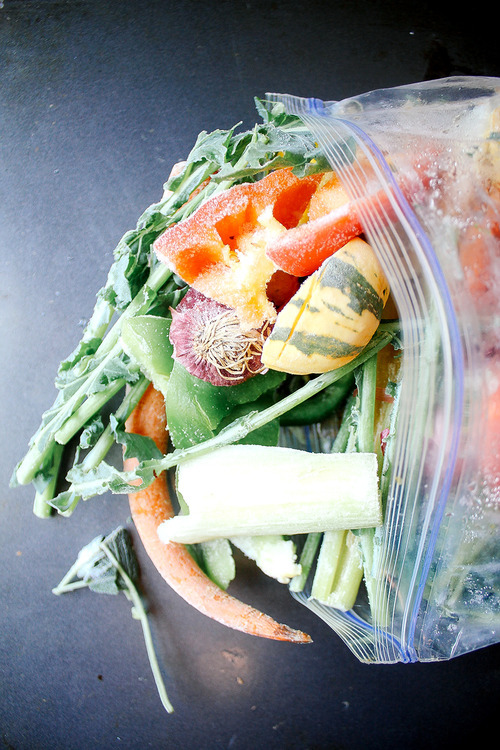
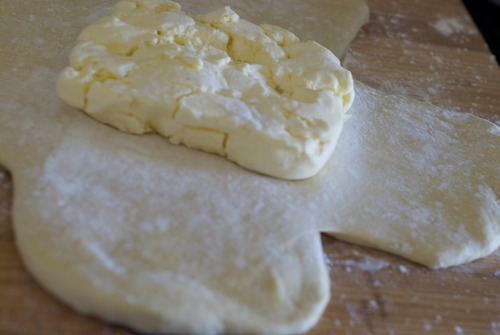
and fold the other pieces on top of it to seal it in.

Flour your surface again and place the folded side down.

Roll out the dough to a large rectangle, being careful to make sure the dough is rolled evenly and keeps it’s rectangular shape.

Now fold the dough in thirds like you were folding a letter.

Wrap up this piece of dough, put it on a baking sheet and put it in the fridge for twenty minutes.

After it has chilled repeat this twice more, rolling, folding, and chilling.

Let the dough chill for another 40 minutes.

At this point I cut the dough in half and put half of it in the freezer, but if you are making a large batch you can use it all!

Now roll out the dough! Roll it until it’s about 1/3 inch thick into a large rectangle. You can make any number of shapes with this dough now. Here is how I like to do it best.

Cut it into squares- half a batch of this dough will make 16 danishes.

IMPORTANT! The way you cut the dough will make or break your danishes. You must cut straight down. DO NOT twist a cutter or slice through. Cut straight down. Otherwise your layers will be sealed together.

SO I cut them into squares, then fold them diagonally.

Cut slits in them so that the outsides are disconnected from the middles except on two opposing corners. Unfold them and put them on a parchment lined baking sheet.

Brush with egg wash like I’ve shown here

And fold the pieces over.

Now fill them up with whatever filling you have. I used raspberry jam.

Let them sit until they have puffed up nicely, about another 45 minutes.

If there are some scrappy bits of dough from the edges, I recommend sprinkling some cinnamon and sugar on them and rolling them up into straws. You can proof and cook them along with the others no problem.

Meanwhile, preheat the oven to 375F

Use your egg wash once again to brush the tops of the danishes.

Bake until the dough is nicely browned, about 20-30 minutes.

Allow to cool a bit before eating- and I like to top up the middle with some more jam!

And that’s that!

Tuesday Tutorials- Gnocchi

I wish that I had a cuter story about gnocchi. I wish my Nona had taught me to rice the potatoes, that she had shown me just how much flour you need to bring the dough together. I wish, to be honest, I could even remember her gnocchi, but I don’t. Although I’ve heard my mom and cousin talking about how incredible they were, the only time I remember her serving us gnocchi I also remember her apologizing for not making them from scratch.

But such is memory I guess, flawed.

So instead I learnt how to make gnocchi from reading the French Laundry Cookbook, where Thomas Keller goes to great length to explain how to make them. There are many ways to make gnocchi, and many debates on how to do it best, should you use starchy russets potatoes, or waxier Yukon golds? Should there be cheese added, or just on the top? If you use another starch, a squash, or a sweet potato, is it still gnocchi?

Over the years since I first forayed into the world of homemade pastas I have tried just about every possible method and every possible ingredient, and this is the recipe I always come back to. I use Yukon golds- waxier, so that you get more control over the starch content, no cheese in the gnocchi, it’s an unnescessary flavour, and it detracts from what is darn close to perfection to begin with. And you can call it a squash gnocchi, or a sweet potatoe gnocchi, but again- if it ain’t broke, don’t fix it.

Gnocchi are surprisingly simple to make, you roast the potatoes, push them through a potato ricer or through a seive, to get very fluffy potatoes, and then you add in a few eggs and a touch of flour and knead it together until it barely forms, and then roll it, cut it, and boil it. It’s also wonderful because it freezes brilliantly, so if you make a bigger batch you can keep some for later.

While it is simple, and just about anyone can do it, I should note that it takes a quick hand, and the first time you do it you should stick to a small batch and just practise the technique. Gluten, the protein in wheat, forms at 55C and you want the dough to come together before it cools down past that temperature, so you must work quickly and keep a cloth over your dough as you go. And always have a pot of water boiling so you can test the little pastas, and make sure the consistently is just right.

,

Gnocchi

Adapted from Thomas Kellers The French Laundry Cookbook

2lbs Yukon Gold Potatoes

1- 13/4cups AP Flour plus lots more for rolling 

3 Egg Yolks

2 tbsp Salt

Preheat the oven to 450F

Poke some small holes in the potatoes with a fork on every side, and then lay them on a baking sheet and bake until an inserted knife goes in and out without any resistance, about 45 minutes to an hour.

Bring a small pot of water to a boil.

As soon as the potatoes have cooled just enough to touch, put a towel over the rest of the potatoes, take one and cut it in half. Without peeling it, put it flesh side down in the ricer and press it in until no more potato comes out. Repeat with the rest. If you don’t have a potato ricer you can take a sieve and press it the potatoes through with the back of a large spoon, this is a bit more time consuming, but totally effective- I have done it many times.

When the potatoes are all riced make a well in the middle of the bowl.

Add in the eggs and a bit of the flour, and the salt. Mix until it has barely come together. If the dough is sticking to your hangs you need some more flour.

Again add in a bit more and check again, making sure your hands are clean.

One the dough is supple, but not sticky your in business.

Take about a cup of the dough out. Put a tea towel over the rest.

Flour the surface of your counter generously and roll out the reserved dough. I roll mine with both hands, and when it starts to feel a bit too long, I just cut it in half and do each hald seperately, the dough will break if you are too rough with it.

With a pastry cutter or a knife cut the dough ito small logs. You can at this point roll them to get ridges on a gnocchi board or the back of a fork but I find this to be not too important. Now put them on a ery well floured tray and shake the tray a bit so that each piece is totally covered in flour. They will stick together if you are not diligent about thi.

Now put a couple in your boiling water to test. If you haven’t added enough flour they may break apart. If they do just mix in another small handful. If they don’t keep going!

Repeat with the rest of the dough until you have lots of lovely little gnocchis all ready to go.

If you are planning on freezing some/all your gnocchi put them in the freezer as they are on the tray covered in flour. After a couple hours take them apart and put them in a freezer bag and put them back.

Bring a very large pot of water to a boil. If you are using frozen gnocchi use the biggest pot you have and do it in batches, otherwise they will bring down the water temperature too much and won’t cook properly.

Salt the water generously and put your gnocchi in!

When they rise to the top they are ready to be put in your favourite sauce and eaten with abandon.

Here I have sauteed some garlic and shallots in some olive oil, added in some pancetta, and topped it off with toasted pine nuts. The simplest and most delicious dinner!

Tuesday Tutorials- Better Than a Restaurant Steak with Wild Mushroom Sauce

image

About a year ago I wrote an article for a local online magazine on finding the best steak in the city. I ate some great steaks, and had an extremely happy boyfriend who came along with me. But while I was eating my way through the city, I realized something; there is no reason to order steak at a restaurant.

I’m going to tell you something else; I don’t buy expensive steaks.

I’ve never been a big tenderloin fan, I find sometimes the tenderness verges on mushy and that totally freaks my mouth out. I like something with a bit more chew, although not too much. Mostly though, what I like in the cheaper cuts of meat is the flavour.

The rich beefy flavour comes from muscles that have moved and been worked, which means cuts like the flank, the flatiron, the sirloin are all great cuts of meat, if you give them a little love.

And to back up this argument, I encourage you to think of steak frites in France, where the steak is always a bit tough.

The easy way to get the sinue out is to marinade it. It takes nothing but planning your meal 12 hours in advance, which, well, I know that doesn’t always happen. In that case, buy a ribeye.

But if your feeling prepared, and thought about dinner the night before, marinade your steak.

The other thing that is easy to do at home is make a super fantastic sauce. It requires not much money, and about 15 minutes of your time. And the rest, as they say, is gravy. Sorry, I couldn’t help it.

image

Seared Steak with Wild Mushroom Red Wine Sauce

1 Steak, Flat Iron, Flank, or some Sirloin

2 tbsp Balsamic Vinegar

2 tbsp Soy Sauce

1 tbsp Salt

1tsp Black Pepper

Sauce:

1 pckg Dried Wild Mushrooms (I found dried chanterelles!)

1 lb Cremini Mushrooms, thinly sliced

1 Large Onion, thinly sliced

2 cloves Garlic, minced

1c Red Wine

1 tbsp Flour

3 cups Chicken Stock

2 tbsp Tomato Paste

Olive Oil

Salt and Pepper

Mix all the ingredients in a medium sized bowl. Cover with seran wrap and put in the fridge overnight.

Put the dried mushrooms in a small bowl and cover with 1 cup of water.

In a large saucepan over medium high heat, warm a big glug of olive oil and start sauteeing the cremini mushrooms. You want to get them nice and browned.

When they’re brown push them to the edges to the pot and in the middle, put in the onions and brown them. Add the garlic and the tomato paste and and stir them until the middle as well.

Push that to the outside of the pot and put in another glug of olive oil and the flour. Stir that for a minute.

Now mix it all up and add the red wine and stir to make sure there are no lumps.

Add in the chicken stock.

Season with salt and pepper and simmer for 10 minutes.

Once your sauce is simmering, start getting ready to cook your steak.

Bring a large saute pan on a medium-high heat and let it get hot for about 3-4 minutes.

Pour in a glug of canola oil, and tilt the pan to spread the oil all over the whole pan. Carefully put the steaks into the pan, making sure you face it away from you so no oil will splash at you.

Cook until it is deep brown and then flip it and do the same.

Here is a trick for telling how done your meat it: Relax your hand, and then bring your index finger to your thumb. With your other hand press the meaty bit of your hand at the base of your thumb. That is what your steak should feel like when it’s rare.

When you do the same with your middle finger your steak is medium rare.

When you do the same with your ring finger your steak is medium.

When your do the same with your pinky finger your steak is medium-well

Anything past that is well done.

BUT If your not sure pull it off and let it rest for a minute and then cut into a corner of it.

If your steak is cooked let it sit for at least 5 minutes before you cut.

Then, slice it into thin strips, and serve with your perfect sauce!image

Tuesday Tutorials- No Knead Margherita Pizza

I live in what was traditionally Little Italy, an area called Commercial Drive. There are two big pizza places, a divorced couple who hate each other and own two competing, but equally horrible overpriced restaurants across the street from each other. There were a couple cheap slice joints, you those weird ones that put sesame seeds on the crust? Those kinds of cheap slice joints.

Then a couple years ago there was a bit of an outcry that there was no good proper pizza in Vancouver. And then two years ago was the year pizza came to the city. In droves. There is pizza everywhere.

Here’s the thing of it. I love pizza. Good proper Neopolitan pizza is hard to beat. And I eat it all the time.

The best pizza joint in the city is now 3 blocks away from my house. And a totally reasonably good place is 1 block from my house. And it has this lunch special, and I am there all the time. All the time!

And while pizza isn’t expensive, I have decided that this year is the year to not go out for cheapy lunches and to make dinner at home more.

So I’m going to start making pizza at home. Partly to save money, yes, I’ll admit to that, but largely because I can make proper pizza at home. And it’s unbelievably easy.

Heres the thing of it, you don’t knead the dough. And you don’t cook the sauce.

Are you ready to make wonderful pizza at home without kneading the dough or cooking the sauce?

I thought so.

No Knead Margherita Pizza

Adapted from the Sullivan St. Bakery

Dough

31/2 cups AP Flour

1tsp Dry Active Yeast

2tsp Kosher Salt

1 1/2 cups lukewarm Water

Sauce

1cup Strained Tomatoes

A good glug of Olive Oil

Sea Salt

4 balls of Fresh Mozzarella

A Handful of Fresh Basil

1/4 cup Grated Parmesan or Grana Padano

With a wooden spoon mix all the dough ingredients in a large bowl. When it’s all combined cover it with plastic wrap and leave it. Forget about it for 18 hours! This is sort of a loose measure of time, I make mine before I go to bed and it works out beautiful when I make dinner, but I have also been impatient and used the dough and made pizza for lunch and it worked really well too. I’d say 13-20 hours is the range really.

When your ready the dough will make 2 big pizzas.

Preheat your oven as hot as it will go. Mine is 500F. If you have a pizza stone, use it. If not, just take an old baking sheet and put that in your oven and let it get toasty hot. Once the oven is hot enough let it sit at that temperature for at least 15 minutes before you start working on the dough.

The dough will be very soft and sticky so use lots of flour. The first rule of dough is not to roll it. Carefully with your fingers streth the dough out, I find it easiest to hold the dough in the air put your clenched fists under it and gently pull them apart. The dough will get thin, then put it on a well floured surface and use your fingertips to stretch out the edges.

Generously flour a rimless baking sheet or the bottom of a rimmed baking sheet.

Put the dough on top of that.

Use half the strained tomatoes and spread over the dough leaving a half inch of space around the edges for the crust.

Drizzle the olive oil on top and sprinkle with salt (you could mix all the these things ahead of time, but then you’d have to clean another bowl, which is something I avoid like the plague.)

Cut the cheese thinly and put 2 balls worth on each pizza.

Take out your pizza stone or baking sheet. With quick jerking motions slide the pizza off your cold tray and onto the hot one. Immediately put it in the oven.

I have what might possibly be the worst oven of all time. If your oven cooks as unevenly as mine you’ll have to rotate your halfway through cooking, although if you can keep the oven shut that’s the best thing.

After 2 minutes of baking turn the broiler on for 2 minutes. This should help the dough get a bit charred. After 4 minutes your pizza should be done.

Get it out of the oven, sprinkle with parm and torn basil and eat while it is still piping hot!

Tuesday Tutorials- The Best Biscuits

The second instalment in my new weekly column, where I talk about food basics, and give you the step by step know-how to do it at home.

The restaurant where I work recently started to do brunch, and before we opened I was chatting with the chef about what kinds of pastries he might want. The original idea was croissants which, despite obviously being delicious, are also so tedious to make, especially in a kitchen with as little counter space as ours, so I threw out the idea of making biscuits.

This did not go over.

Biscuits are dry, biscuits are bland, biscuitsare over done, and never delicious.

So I, being the super competitive person that I am, decided to make him some. I made savoury biscuits, ones with chunks of cheddar and dots of scallions, and let the restaurant fill up with the smell of cooking butter and melting cheese. And then I dared him not to like them.

He is not the first person I have converted to a biscuit lover, but if we’re being real here, most of this credit can go to my Grammy.

Grammy made “Cloud Biscuits”, light, airy, full of layers and always moist. Growing up they were always made with fish chowder, or if we were lucky, for breakfast. Hers was a different recipe than this, because hers was a different time. In the Great Depression butter was a serious luxury, so the cloud biscuits were always made with shortening, and just a tablespoon or so of the good stuff to give it flavour. But it was the texture that got me hooked.

Which is funny, because most people complain about the texture, they think dry, over cooked, bland. So here is THE way to make the perfect biscuit.

Let’s start out with a couple basics first

  • The way you get layers is by using big chunks of really cold butter. When that cold butter goes into the hot oven it produces steam, and if you have the right formations of butter you get perfect light fluffy biscuits.

  • You need to knead, but not too much. Flour has gluten in it, and gluten will make your biscuits tough. But you need to knead your dough in order to get in the layers. This means really feeling the dough, as you knead it when it starts to get tough, it’s time to stop.

  • Use good ingredients. If your going to add cheese to your biscuit, make it good aged cheese. There are only a few things in your biscuits, make sure they’re adding something.

  • Be creative! There are a million things you can do to a biscuit, don’t limit yourself and have fun with the possibilities!

Biscuits

(Adapted from the Tartine Bakery Cookbook)

4 1/2 cups All Purpose Flour

1tbsp Baking Powder

1tsp Baking Soda

11/2 tsp Salt

1/4 cup Sugar

1cup Unsalted Butter, very cold, cut into cubes

1 3/4 cup Buttermilk

Eggwash

1 Egg Yolk

1tbsp Cream, milk, or buttermilk

Option

1 1/2 cup Aged Cheddar, chopped

1 bunch Scallions

In a large bowl mix together all the dry ingredients.

Add in the butter and with your hands, or a pastry scraper, break the butter up into lima bean sized pieces, or about the size of your pinky finger nail.

Add in any flavourings, in these ones I used cheddar and scallions, but the world is your oyster on this one.

Carefully pour the buttermilk in and mix it with a spatula or spoon until it just begins to come together.

Push the dough down with the palms of your hands and then fold the dough in half. Continue doing this 4-6 times or until you just start to feel resistance.

Put the dough onto a lightly floured surface and roll out to about 3/4 inch thick.

Cut the dough out into whatever shapes you like, traditionally savoury are round and sweet ones are cut into triangles.

Put them on a baking sheet lined with a silpat or parchment paper and put them in the freezer for 15 minutes.

While the biscuits are chilling preheat your oven to 400F

Take the biscuits out of the freezer and brush the tops with your egg wash.

Put them in the oven and immediately turn the temperature down to 350F

Don’t open the door for the first 12 minutes, afterwards you can open it and turn the pan so that it cooks evenly.

After about 20 minutes the tops should be nicely browned and you should be able to see a significant rise. Allow to cool before eating.

Tuesday Tutorials- Perfect Lattice Top Apple Pie

've been doing a lot of thinking about this little spot in the blogosphere lately. About what makes this little piece of the pie (no pun intended) more special, more worthy of your attention than any other, and the thing that kept coming to mind, is that I am a professional. I have not only gone to school to be a baker but I have worked for countless talented people who have shown me so many tricks along the way. Most people who write on the internet don't have that advantage, and so begins “Tuesday Tutorials” in which I share these tricks of the trade with you, my loyal readers. The idea being that once a week I will write something kind of fundamental, a basic, and show you how I make it, and the way I do that makes it so good.

And to start, pie.

There are few things better than the smell of homemade apple pie. It is so quintessentially North American, so perfectly Fall, so designed for November weather. Apple pie is darn near perfect.

My mother makes a mean apple pie. A mean pie in general really, despite her absolute failings on many a cake, my mom kills pie. Seriously.

This is a recipe for a pie that is both hers and mine, I make mine with more butter than hers, she adopted her recipe from her mother, and growing up in The Depression, shortening was easier to come by than butter, but in these modern times I have no trouble at all with the subsition.

There are two ways of making pie filling though. You can cook the fruit before hand, add in corn starch or flour and thicken up the juices or you can put it all in raw. You get very different results with these methods, and in bakeries you almost always get the cooked before variety. And while I think this method is great for juicy berry pies, when I make an apple pie I put in the fruit raw, then top it all with brown sugar, cinnamon, and flour to thicken it up. It’s how my mom made it, and so it tastes like home to me. And that, good friends, is what apple pie is all about.

The real tutorial here though is how to make a perfect lattice top to your pie, the kind that friends will ooh and ahh over, and you can revel in self satisfaction when you sit it on the counter to cool. A lattice top pie is not something to brush off, it takes some skill, and it demands it when you put it on the counter. Unless of course, you follow this tip, which just makes it so easy.

The thing to do is freeze it. Make the lattice on a baking sheet and freeze it, it will only take about half an hour, just enough time to cut up all the apples and make yourself a cup of tea. And then slowly put the top of the pie onto the pie crust, you get a perfect crust every time, and you save the stress of making the lines perfect on an imperfect surface like a rounded pie top. And you get to schedule yourself tea making time, and that friends, is always a perk.

Lattice Top Apple Pie

2c AP Flour

1c Cold, salted Butter, cubed

Ice water

Filling:

8 cups of chopped apples, a mix, I used ambrosia, pink lady, granny smith and macintosh.

1c AP Flour

2c Brown Sugar

1tbsp Cinnamon

topping

1 egg yolk mixed with 1 tbsp cream or milk

3 tbsp Coarse Sugar

In a large bowl mix together the flour and butter. Using either a pastry cutter or, like I do, your hands, break apart the butter into lima bean sized pieces.

Slowly incorporate the water, stirring with a fork, adding just enough for the dough to follow to fork as you stir.

With your hands bring the dough together and knead it gently- squish it out with your palms and then fold it over. Repeat this 4-5 times or until the dough gets even the slightest bit tough. Wrap with plastic wrap and keep it in the fridge for at least 30 minutes.

Unwrap the dough and cut in in half.

On a lightly floured surface roll out one half of the dough in a large circle until it will fit your pie dish. Gently place your rolling pin the center of the circle, then drape one side of the dough over top. Pick up the rolling pin and place it on the pie dish and smooth out the dough.

Put this in the fridge.

Put a silpat of a piece of floured parchment paper on a baking sheet.

Roll out the other piece of dough in a long strip, making sure that it is as wide as your pie dish.

Cut this into strips widthwise.

On the silpat arrange the strips as you see in the picture below, and slowly start weaving them together,

one over one under until you get a nice basket weave.

Now put this in the freezer and let it get nice and cold and hard. This is the trick- once the dough is hard you can just slide it on your pie, no finicking the edges or getting filling on the topping.

Preheat the oven to 400F

Pull out the bottom of the pie and shake half the flour onto the bottom of the crust.

While the top is freezing start chopping your apples. Peel and core then and slice them thinly and put them into the bottom shell, layering different kinds.

Top with the rest of the flour, the brown sugar and the cinnamon.

Take the lattice top out of the oven and gently put your hand underneath it and place it upon your pie.

Push the edges down into the corners and cut off any edges of your pie, or fold them over to create a a scalloped edge.

Wash with the egg wash and sprinkle with the coarse sugar.

Put in the oven and immediately bring the temperature down to 325F.

Do not open the oven door for at least the first 20 minutes or cooking.

After twenty minutes rotate the pie and cook for another half hour or until the juices start bubbling in the center an an inserted paring knife meets little resistance when pushed into the center of the pie.

And there you have it, the easiest most delicious apple pie.

Hot Pepper Strands

This is the part of the year where I turn into a crazy person and start thinking about Christmas. Not, you know, where I’m going to put my Christmas tree or what kind of lights I’m going to buy. I’m not that nuts.

But this is the time of year when I start canning and preserving so that stocking stuffers are cheaper and half of it’s done by the time Christmas rolls around. And you get to give the gift of fresh produce in December.

When my sister called the other day and I told her I was drying peppers for stockings for Jordans family she simply said 

"Oh, your one of those people now" 

That scares me a bit. 

So this isn’t a recipe so much as a technique. Traditionally when making pepper strands you tie them with string, but I have found this to be very laborious and not very effective (read: after an hour of tying them last year I picked up the whole strand and every single pepper fell off in a splash of red). So I learnt that cheaters have tools- needles and thread.

With this method this couldn’t really be easier. You simply thread a needle, tie one side up and thread the peppers through. The only thing that can get finicky is that the peppers have a tendancy to not go all the way down, so make sure as you thread them they push down all the way or you’ll have a long and sparse looking pepper strand. But that’s it!

Pepper Strands

Needle

Thread

1lb peppers, I used ring of fire peppers, but birds eye chilis would also be a good substitute

thread the needle with at least 1/2 meter of thread

tie a knot at one end

Thread the peppers through the stem, one at a time being careful to push them all the way through so they are stacked tight.

When your finished tie a loop at the top with the extra thread and hang to dry.

They will last at least a year.