
Tuesday Tutorials (sort of)- Wild Wreath
/
I lied in this title. Friends, it’s not Tuesday. In fact it’s Thursday. It’s two days past Tuesday, and yet, here is this post. To say I’m busy is a giant under statement, but I’m not going to complain here, I know you all have your stresses, especially this time of year.
Instead I’m going to just show you how to make a wreath.
If you talk to me for about 5 minutes, you probably know that I’m borderline obsessed with Design*Sponge. The wonderful online design magazine that inspires me daily with it’s ideas. One of the editors there is the incredible Amy Merrick, and someone recently pointed out to me the unbelievably gorgeous wreaths that she makes.
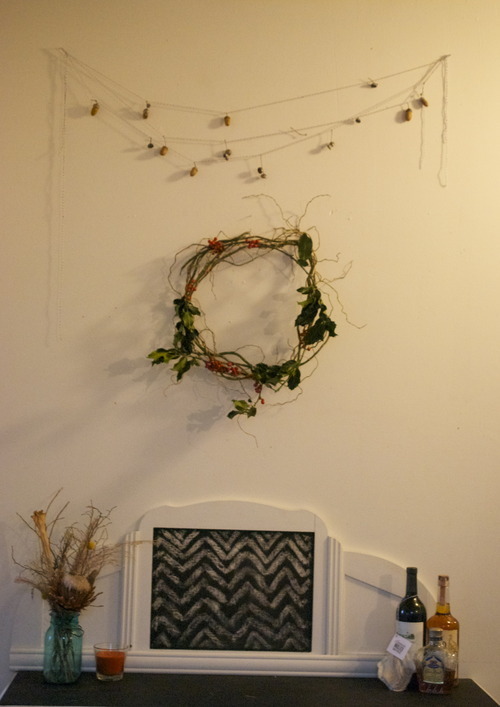
I tend not to like things that look too perfect, especially when it comes to things that are made out of nature. I like flower arrangements that look a bit wild, I like furniture that uses the natural shape of the wood, and, apparently, I like wreaths that look like they’re still growing a bit. Like they still have a bit of life left in them.
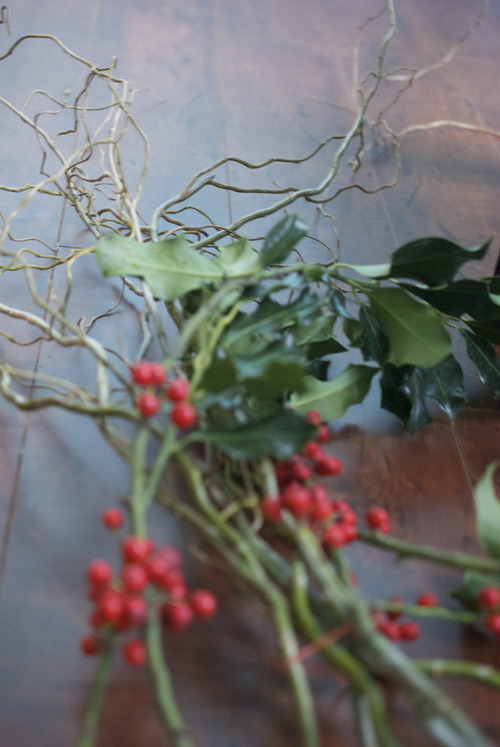
So here is my super easy DIY for just such a wreath. This requires no fancy equipment, just thin wild branches, some string, some scissors and some holly if you so please. I’m fond of a bit of greenery in a wreath, but I think after Christmas I’ll take that out and let it dry just as the branches. Then maybe in the spring I’ll add in something bright and green, and in the fall maybe some of the gorgeous deep red japanese maple branches that grow all over my neighbourhood.
You Will Need:
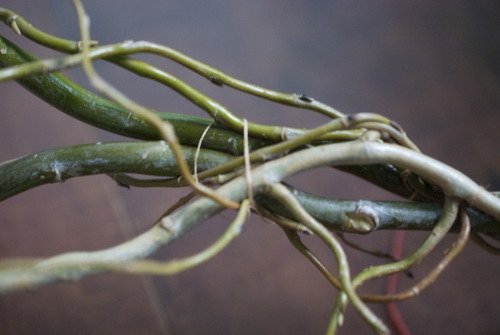
5 thin branches
2 meters of light brown string
scissors
3 branches of holly
Prep yourself by taking lots of little
Take your branches and wrap it in a large circle, and tie it to keep it there. This is much easier if someone holds them together for you, but with some McGivering you can do it without. I sat on the floor and held it together with my knees, but do what works for you. If you had clamps that would be great, but I, alas, am rarely in posession of such practical things.
Hold the wreath so that the base of the stem as at 12 o clock.

At 6 o clock tie a second branch. Then wrap that around and tie it to the previous branch. Keep doing this, attaching branches and tying them with string. Play around with where you put each piece to make it as circular as possible, but don’t get to hung up about it being perfect. This is supposed to look rustic and wild, so embrace that!
Once the branches are on and you like it, put the pieces of holly on top and arrange them as you like them, and then tie them in. It sounds like I’m rushing through these instructions but it really was that simple. Just take your time to make sure all the knots are very tight.
