Stocking Stuffer Sundays- Homemade Irish Cream with FREE downloadable labels

image

Oh I’m so excited for Stocking Stuffer Sundays! They were easily one of my favourite series I’ve ever done on the blog and, perhaps because I am such a huge lover of all things Christmas, I’m so jazzed to be starting it up again!

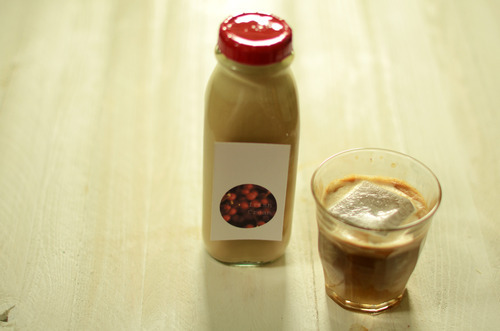
Just like last year every Sunday I’ll post a fun edible gift that you can make and give. And just like last year there will be a cute fun free downloadable gift tag option! Only this year, with my mad new photoshop skills that I learnt at Blogshop a couple weeks back, I was able to design the tags myself.

On a side not, how fun is photoshop? I was so intimidated for so long, but no longer!

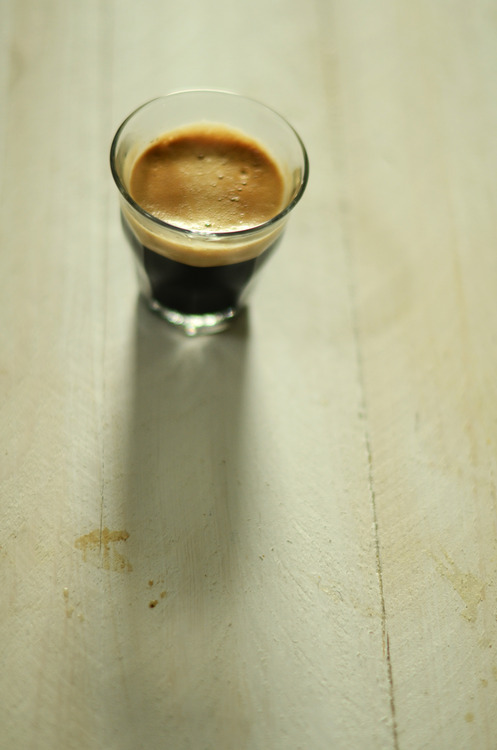
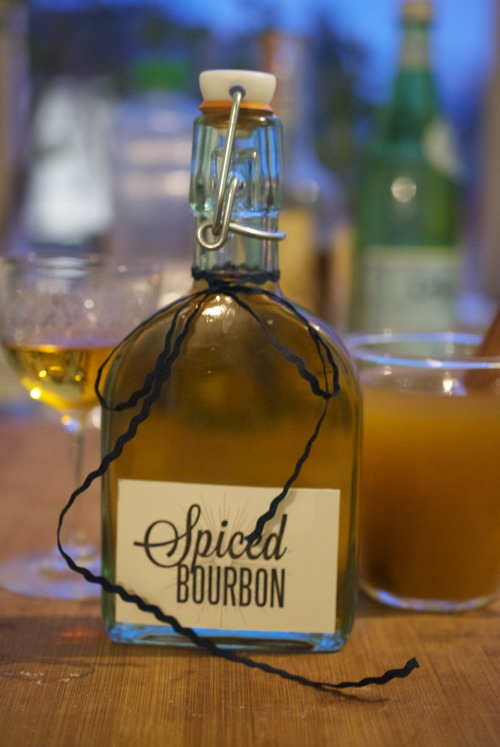
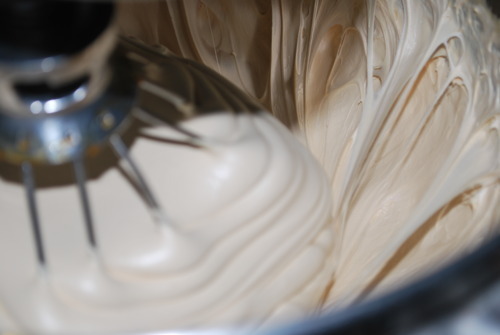
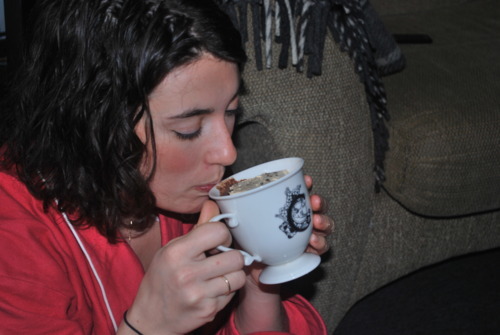
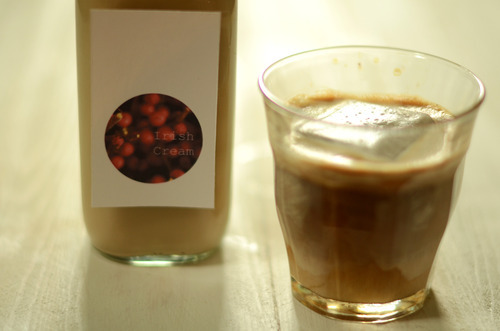
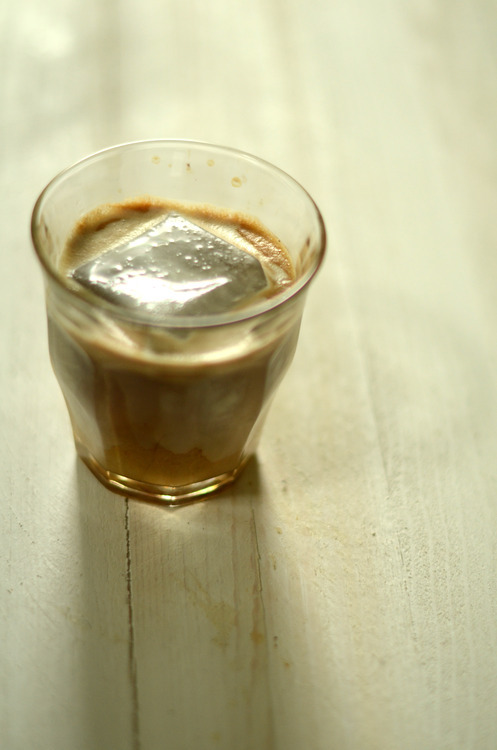
So without further ado here is one of the easiest recipes you’ll ever find on this site- Irish Cream. Sometimes known as Bailey’s, it literally takes 5 minutes to make, but instead of being full os preservatives this stuff is just cream, condensed milk, whiskey, vanilla and coffee.

But I hope you look at this as a jumping point- add in more coffee if you want a darker flavour, stir in some melted chocolate, or caramel for a more dessert flavour. Basically, mix it up as you like, this is just the beginning!

image

Click here to get the FREE downloadable labels!

image 

Irish Cream

1 cup Cream

1 cup Whiskey

1 can Sweetened Condensed Cream

1 tbsp Vanilla Extract

1 oz. Very strong coffee, or a shot of espresso

pinch of salt

Mix all your ingredients into a blender and mix for 30 seconds. Don’t over mix of it 

image

Stocking Stuffer- Last Minute Edition- Chai Mix

image

Merry Almost Christmas!

Oh I love Christmas. I really do. The lights, the family, the warmth, the present buying. It’s all wonderful thing.

Christmas is also hectic. It’s running around, it’s trying to see everyone, and in my industry it’s Christmas baking for the masses and making cakes for Christmas parties, and this year there was also a huge winter wedding that required two wedding cakes just a couple days ago. Which has made this holiday season a little more crazy even than the usual.

So this is a bit last minute, which is too bad, not only because it’s acknowledging my total break in organization, but it’s also dissapointing because this is one of my favourite in this line of Stocking Stuffers that my amazing friend Jen and I did together.

I am not a coffee drinker. It kills my stomach and gives me terrible acid reflex, and it’s just generally a terrible idea for me. But when I was waking up at 4am to bake bread a few years ago I needed something that would give me a kick and wake me up that was just a bit more gentle on my belly, and that’s when I became obsessed with Chai.

It’s a potent mix of flavours, the cardamon meddling with the cinnamon , balancing off the dark black tea, it’s a truly wonderful thing. Traditionally it’s served very strong and steeped in milk, but I will happily drink it black, and even, often, with soy instead of cows milk- because my sensitive stomach doesn’t like dairy much either. It’s the perfect thing first thing in the morning for someone like me.

Once again Jen Cook has blown the packaging out of the water, these little bags are so charming and so easy I’m just blown away, as I have been every week as we’ve been making these stocking stuffers. So please, even if you’ve made all your Christmas presents already, make this as a gift to yourself, to keep you warm on cold mornings.

image

Chai Tea Mix

4 5” Cinnamon Sticks

40 Green Cardamon Pods

3tbsp Black Peppercorns

3tbsp Whole Cloves

1 cup Ceylon Tea

In a small pan over low-medium heat toast the spices seperately, until they are fragrant but not smoking. 

Pulse them in a spice grinder until they are just broken up but not ground finely. 

In a bowl mix the spices with the black tea and then evenly put them into four bags. 

Tape the bags shut and put them into the boxes and give them out at will- or keep all the chai for yourself!

image

Stocking Stuffer Sundays- Apple Spiced Bourbon

At the restaurant I work at I recently served a couple who were seeing each other for the first time since they had broken up. It wasn’t going well, and the guy was clearly trying to combat this the way, let’s be honest here, many of us do, by drinking. He wasn’t drunk by any means but he was definitely out pacing the pretty girl across the table, and after one particularly long silence between them he decided he wanted a shot. She said she didn’t want to join him in that, so I did instead, and when he asked what I wanted to drink I said bourbon.

“Oh, uh, okay… bourbon. Man I’m emasculated right now.”

He shuddered but took it down like a champ, albeit an unhappy one.

I love bourbon. Don Draper drinks Old Fashioneds, and you always read about Hemmingway in his pre-Cuban years sitting down with a bottle of the brown stuff. I’ll confess here, I decided I wanted to be the kind of girl that went to a bar and ordered bourbon, so I drank it until I liked it. This stubborn method has also made me like blue cheese and olives, tastes that are a bit harsh to the uninitiated. I now thoroughly enjoy it, it’s what I always order when I go out, and it’s what disappears the fastest from out liquor cabinet.

Good bourbon is very smooth and round and soft , but also very pricey, so here’s the trick to make even Wild Turkey palatable: you spice it. Several years ago this was told to me by a very talented pastry chef, who said if you bought cheap bourbon and stuck a vanilla bean in it for a day, at the end you would get significantly smoother bourbon, and over the years I have learnt that the more you add, the mellower it gets.

Spices cover a magnitude of sins when it comes to bourbon.

It also, with these spices, tastes just like the holidays. The warmth, the cinnamon, the hint of apple, all makes me forget my tiny messy apartment and fills my head with visions of crackling fireplaces, deep voices, and someone else making dinner. Add a little apple cider to the mix, and you’ve just about got Christmas in a glass.

Once again, the amazing Jen Cook has kindly made us some beautiful labels which you can download for free here. She is all kinds of talented, she made my site here, and she sells vintage clothing here

Apple Spiced Bourbon

1x 750mL Bottle of Cheap Bourbon

2 Apples

1 Cinnamon Stick

1 Vanilla Bean 

1 Black Cardamon Pod

1 Clove

Wash the apples thoroughly, I used soap to make sure all the pesticides were off, or you can buy organic. Either way make sure the flavours of the sprays they use aren’t going into your drinks.  

Chop them up and put them in a large jar. Cover with the bourbon, close the jar firmly and let sit for 2 days.

Carefully split the vanilla bean in half, and scrape the seeds out with a small knife. Put the seeds and the pod into the jar with the cinnamon, clove and cardamon. 

Let these meld in there for another 6 hours, and then strain out, pour into jars. Print up the labels, these can be used as stickers, like I did, or you can tie them on with string. 

Tuesday Tutorials (sort of)- Wild Wreath

I lied in this title. Friends, it’s not Tuesday. In fact it’s Thursday. It’s two days past Tuesday, and yet, here is this post. To say I’m busy is a giant under statement, but I’m not going to complain here, I know you all have your stresses, especially this time of year.

Instead I’m going to just show you how to make a wreath.

If you talk to me for about 5 minutes, you probably know that I’m borderline obsessed with Design*Sponge. The wonderful online design magazine that inspires me daily with it’s ideas. One of the editors there is the incredible Amy Merrick, and someone recently pointed out to me the unbelievably gorgeous wreaths that she makes.

I tend not to like things that look too perfect, especially when it comes to things that are made out of nature. I like flower arrangements that look a bit wild, I like furniture that uses the natural shape of the wood, and, apparently, I like wreaths that look like they’re still growing a bit. Like they still have a bit of life left in them.

So here is my super easy DIY for just such a wreath. This requires no fancy equipment, just thin wild branches, some string, some scissors and some holly if you so please. I’m fond of a bit of greenery in a wreath, but I think after Christmas I’ll take that out and let it dry just as the branches. Then maybe in the spring I’ll add in something bright and green, and in the fall maybe some of the gorgeous deep red japanese maple branches that grow all over my neighbourhood.

You Will Need:

5 thin branches

2 meters of light brown string

scissors

3 branches of holly

Prep yourself by taking lots of little

Take your branches and wrap it in a large circle, and tie it to keep it there. This is much easier if someone holds them together for you, but with some McGivering you can do it without. I sat on the floor and held it together with my knees, but do what works for you. If you had clamps that would be great, but I, alas, am rarely in posession of such practical things.

Hold the wreath so that the base of the stem as at 12 o clock.

At 6 o clock tie a second branch. Then wrap that around and tie it to the previous branch. Keep doing this, attaching branches and tying them with string. Play around with where you put each piece to make it as circular as possible, but don’t get to hung up about it being perfect. This is supposed to look rustic and wild, so embrace that!

Once the branches are on and you like it, put the pieces of holly on top and arrange them as you like them, and then tie them in. It sounds like I’m rushing through these instructions but it really was that simple. Just take your time to make sure all the knots are very tight.  

Stocking Stuffer Sundays- Malted Chocolate Marshmallows

I am very very lucky to have such a wide network of incredibly creative people. And I am even more lucky to have a wide network of creative people with whom I barter. I make cakes for my friend who cuts my hair and I baked for a friends gallery opening in exchange for a photo shoot. In high school I traded my (admittedly limited) seamstress-ing skills for clothes at a vintage shop, but recently I’ve noticed that if I just ask, people will just help out.

Which is what I did with my graphic designer when I started thinking about doing “Stocking Stuffer Sundays” and that is what the super talented Jen Cook did. She helped out.

Jen made my beautiful website, and now she’s made some beautiful labels for you.

Every year I make marshmallows for stocking stuffers. Every year there a fan favourite. There is something that is all kinds of wonderful about homemade marshmallows. For starters they are completely unlike the store bought variety, they are softer, denser, and you can flavour them with just about anything. Anything, that is, that you want to put in hot chocolate.

I like marshmallows plain, I do, but the real home of a marshmallow is in hot chocolate. Let’s be clear on that.

These are chocolate marshmallows, with lots of cocoa powder in them, but they also have a bit of malt, which for me is very nostalgic. Partly because I drank ovaltine as a kid, and partly because I used to listen to the song “Malted Milk” by Eric Clapton all the time. So it’s twice the memories plopped into a steaming mug of hot chocolate.

So basically what I’m saying here, it tastes like happiness. 

For Labels Click Here

Chocolate Malted Marshmallows

Adapted from Shauna Server

2 tbsp unflavored powdered gelatin
1/3 c cold water
1 cup granulated sugar
1/2 cup corn syrup, divided
Pinch of salt
1/4 c unsweetened cocoa powder
1/2 c malted milk powder
6tbsp boiling water
1tbsp vanilla extract

For Rolling

2/3 c Icing Sugar

1/3 c Cocoa Powder


Mix the gelatin and the cold water in a small bowl. Let sit for at least 5 minutes. 

In the bowl of a standing mixer, fitted with the whisk attachment, dissolve the cocoa and malted powders in the boiling water. Add in the vanilla. Mix in the gelatin mix. 

In a small pot mix the corn syrup with the corn syrup, the sugar, and 1/4 cup water. put the lid on it and on medium heat bring to a boil. When all of the sugar has dissolved take off the lid, turn it up to high heat and put in a candy thermometer. Bring the sugar mix to 242F. 

When the sugar is at 253F turn the mixer on medium. When the sugar mixture has come to 242F slowly pour into the mixer, creating a slow and stead stream down the side, being careful not to let it splash around the sides. 

Turn the mixer to high and let it run for 10-15 minutes or until it is thick and pale. 

While this is happening line a 10 inch square baking pan with cling wrap and grease it liberally. You can do with this with Pam or another spray or with some canola oil and a paper towel. 

When the marshmallows are ready pour the mixture into the prepared baking pan and  smooth with an offset spatula. Allow to sit for at least 8 hours. 

Cut up into whatever size you like, squares are most effective but I’ve seen really cute snowflakes and all sorts of shapes. Roll them in the sugar and cocoa mixture and package them up as you please!


Stocking Stuffer Sundays- Mulled Wine Kits with FREE downloadable labels

Jordan introduced me to mulled wine many years ago. The slow cooking of red wine with spices and congac that makes any amount of snow dissapate instantly has been a favourite of mine for some time now, but my love of it really cemented a few years ago when I was in France.

I was just puttering about feeling a bit lonely, it was near the end of my trip, when I stumbled across the most incredible Christmas market. They had closed down about ten blocks of the Champs Elysee and had lined both sides with little white cottages filled with the most wonderful little treats. Candy makers, nut roasters, cutting board sanders, and doll sewers all had stands filled with gorgeous things to eat and buy, but all of it was made better by the vendors who sold “vin chaud”. Hot wine, or as we call it here Mulled Wine is all kinds of wonderful, it’s the most soothing thing I can think of it tastes exactly like Christmas.

Jordan makes a great mulled wine, so we thought we would make these little packages of all the spices you need and sew them together with these sweet tags and attach them to wine bottles, which makes a lovely stocking stuffer or a slightly more personal hostess gift.

So with this recipe also comes a free download for the labels, which are double sided, because of the wonderful generosity of a very dear and extremely talented friend, one Miss Jen Cook. Jen is the genius behind my entire website and my logo, and shes is just about the most patient person I know to put up with me as a client. And when I casually mentioned this project to her she jumped at the chance to do some labels for me.

So, without further ado, here is the recipe, the methodology and the free printable downloads for Mulled Wine Kits. If you do make it I’d love to hear about it so let me know in the comments!

Mulled Wine Kits

Click here for your FREE downloading label

Per Pouch:

1 Long Cinnamon Stick, broken in half

2 Cloves

1/2 Star Anise

1/2 Vanilla bean

1 Long strip of orange zest

Cheesecloth

Fold a long thin rectangle of cheesecloth in half, making a shorter rectangle.

Place all the ingredients on top.

Fold the Cheesecloth over the spices creating a pocket.

Sew carefully around the spices in a square.

Tie a piece of twine onto the pouch and tie the other end to your label.

Tie around a bottle of wine and c’est finis!

If I Only Had A Fireplace...

A few years ago I threw my back out very badly. There were torn ligaments and much pain and I was forced to take several months off work. I couldn’t stand for more then an hour or so at a time so it was hard to much of anything. Except bake. Did you know you can bake almost anything and then sit down for a while. Baking is by nature the art of patience, you have to wait for things to bake, to cool, to rest. Baking is made for people with bad backs (this is only true of at home baking, professional baking requires lifting 20kilo bags of flour, kneading enormous pieces of dough, and standing on your feet for at least 12 hours a day.) So I baked. I baked and I baked and I baked. Christmas fell in that time period and I made every single thing from the Martha Stewart Christmas magazine. Every single thing. There were some hits, like her shortbreads, some misses, like the pomegranate jelly, but most things have faded into the recesses of my brain along with the other million things I’ve baked. The one thing I remember most accurately are the marshmallows.

If you’ve never made your own marshmallows before you might not know that they have a delicious flavour.

You might not know that they are lighter and less chewy then store bought ones.

You might not know of the amazing flavours you can give them.

You might not know a lot of things that you probably should know. So you should probably make them promptly.

I have played around with my marshmallow recipe lately and so I am giving you the basic recipe which you can make but I have been caramelizing the sugar first so that it hints of the roasted marshmallows, and I have been putting salt on them because I’m trendy like that. If your wondering what the black stuff is on top of the marshmallows it’s vanilla salt because I am compelled to buy things like 17 dollar salt. But regular old salt is more then fine, and you’ll be $17 the richer. Which is a plus. I do wish I had your self control.

Marshmallows

2 tbsp + 1/2 tsp Unflavoured Powdered Gelatin

2 cups Sugar

1/2 cup Corn Syrup

2 egg whites

1 tbsp Vanilla

1 tsp salt

Sprinkle gelatin over 1/2 cup cold water

Line an 8inch square pan with parchment and oil it generously.

In a pot mix 1/4 cup water with the sugar

On medium heat stir until sugar is dissolved.

Bring heat to high and let caramelize to an amber colour

Immediately bring off heat and add in half cup of water and the corn syrup. (it will boil up like crazy so be careful!)

Put in your candy thermometer and bring to 240F or the soft ball stage. Don’t be alarmed at how dark it gets at this stage, but do stir it to prevent it from burning at the bottom.

Meanwhile in a mixer fitted with the whisk attachment whip the egg whites until soft peaks

As soon as the caramel is at 240F add in the gelatine and vanilla.

With the mixer on high pour the sugar mixture into the whites pouring down the side of the bowl so the whisk doesn’t whip it around.

Keep the mixer going until the mixture looks, well, like marshmallows. If in doubt give it another minute.

Pour into the prepared pan and sprinkle salt on top.

Allow to rest for at least 3 hours and up to overnight.

Cut them in the shapes you want and dust them in corn starch and put into airtight containers or bag them up and give them as goodies!