Acorn Garland DIY

 have this friend, her name is Tash, and she is all kinds of wonderful.

We met about 5 years ago when we were both going through devastating breakups, and she ended up moving into my building. There was this 10 month window of time when we did nearly everything together. A window of being single, working in restaurants, going out dancing, and gossiping about it all the next morning. It was a time that, even though I’m not sure either of us have cried more in that short a period of time, I’m not sure we’ve ever laughed that much either. It was a wonderful moment in my life that I will always smile when I think of.

After that 10 months we were both in relationships again (within about a week of each other I think), and we got real jobs, and Tash ended up moving to Kingston for 2 years to get her masters. People would sometimes ask me if we were still close, if we talked reguarly and I would have to stop myself from laughing, with the benefits of a My5 plan, we literally talked at least once a day, and often more. When she moved back a couple years ago she moved in with her man in Port Moody, a small distance away, and we still talk every day. We still hang out all the time. Although our boyfriends have banned the term, we used to call each other our “hetro-sexual lifemates” and that’s still pretty accurate. If you had to make me decide between Jordan and Tash, I would be hard pressed to choose.

What I’m saying here, is that Tash is an incredible friend who I just love.

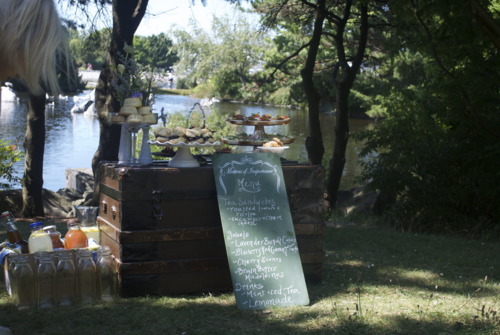
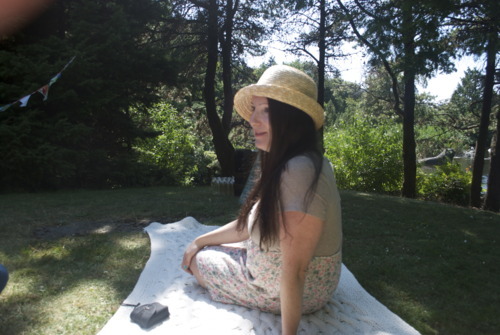
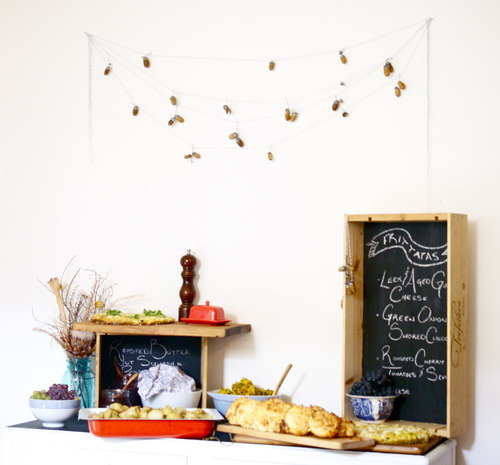
So when she asked if for her birthday we could have a brunch party at our apartment, the answer was obviously yes.

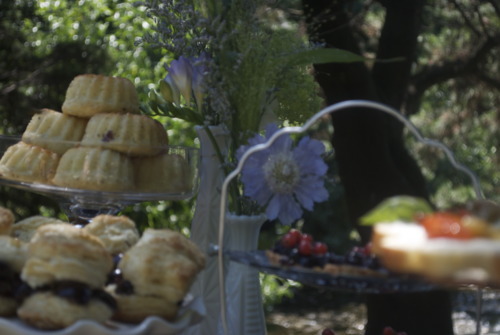
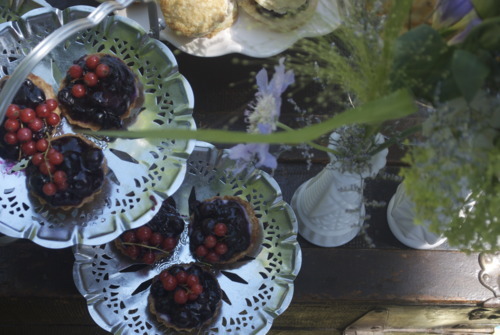
It was a simple breakfast, roasted root veggies, frittatas, cheddar bisquits.

I also made a little garland for the wall, I kept looking online for cute fall set ups, and all I could find was things covered with orange and pumpkins, I wanted something a little less fussy, so instead I went with acorns. I went with wood, I went a little hipster and I threw in some chalkboards.

And it was super cute.

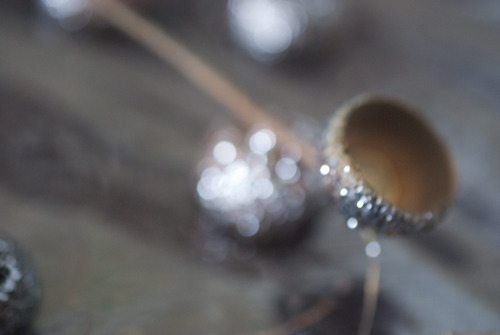
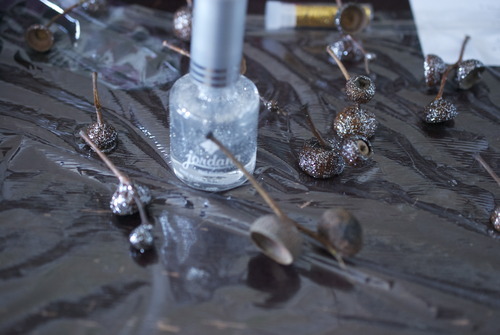
Silver Acorn Garland DIY

20 Acorns

Bakers Twine, or equivalent

Cheap Sparkly Silver Nail Polish

Glue Gun

I just went down the street and found acorns. Almost all of the tops were seperated from the bottoms so it made painting them super easy. BUT if yours are holding together you will just need to be a bit more careful making sure the paint doesn’t get on the body of the nut.

Lay a sheet of plastic wrap down on your work surface.

Paint the tops of the acorns with the sparkly polish, getting as thick or thin a coat as you like. Place them on the plastic wrap when your done so they don’t stick to anything.

When they are dry use your glue gun to place the bottoms to the tops. Be liberal with the glue, the acorns are a bit heavy.

Tie your bakers twine to each of the twig tops and hang them where ever you like. I am totally saving mine and going to wrap them around my Christmas tree!

Waffle Party

It is no secret that I love planning parties. I love baking with a color theme, I love being able to actually use all the little pitchers and cake stands that I collect, and I love all the little crafty details. So I can’t tell you how pleased I was when my dear friend Beth called me up and said “I’ve decided I want to get all the girls together for mimosas and waffles for my birthday, and I’ve decided this should be at your house”.

I really do love making brunch (I ran a brunch restaurant for a couple years) and I also really love my friend Beth. It was great fun, and a total perk was that a few of the guests were photographers.

I’ll put up some of the recipes soon, I promise, but in the short term, here’s a glimpse at the day. Most of the photos are from my fabulously talented friend Shannyn , a couple are mine!

The spread:

For sauces I made coconut milk chocolate ganache, salted caramel sauce and maple syrup, and I served pots of preserves I made last summer, like vanilla soaked mandarins, earl grey canned peaches, and blackberry compote.

(c.o Shannyn Higgins Photography)

(c/o Shannyn Higgins Photography)

Coffee and a cookie:

(c.o Shannyn Higgins Photography)

The birthday girl:

(c.o Shannyn Higgins Photography)

More bubbly?

(c.o Shannyn Higgins Photography)

(c.o Shannyn Higgins Photography)

(c.o Shannyn Higgins Photography)

Baby Showers!

I have a very beautiful friend Laura who has a very beautiful 7 month old little girl in her belly. We are very excited. So this weekend I hosted a baby shower!

We ate lots of little goodies (lots more on that soon!) and made baby shoes, and hung out in the prettiest little park. So I thought I’d share some fun photos of our day, and I promise soon, there will be lots of recipes coming.

Isn’t this spot just the sweetest? Its deffinately got people around it’s pretty quiet considering how close it is to the seawall.

Laura in her prego glory!

Because Laura has more shoes than anyone I have ever met, I thought it would be fun to make baby shoes! I made cut out the patterns in felt and put them in mason jars with pin cushion tops. Then brought tins full of ribbon, buttons, sparkles and more!

I always get my flowers from The Flower Box, it has the most beautiful selection and Sasha, the owner, makes the most amazing bouquets! She made a bunch of wildflower bouquets for me in my collection of milk glass vases. I think it really tied everything together.

And I just love how the bunting looks on the trees blowing in the wind. It was such a fun day, I just love hosting and planning.

Such a great day, I’ll be back soon with recipes! xo

DIY- Cheaters Bunting

I would say I’m a pretty crafty person. I see things on Etsy and in fancy shops and think to myself “I could make that!” and I often do. I also often go and buy the stuff get half way through and then get excited about another project and leave the remnants on my desk for months. This happens all the time actually.

Anyways.

My hatred of buying things I know I can make is why I’ve been avoiding buying bunting, even though I think it’s the cutest thing ever. It just seems so easy, you cut out triangles sew them together, turn em inside out and sew them onto ribbon.

So I thought this would be a perfect crafty decoration for a baby shower I’m throwing next weekend. Until my sewing machine broke.

So I made things even easier. I cut out triangles and glued them onto ribbon. In fact it was so easy that it took my less then an hour to make 10 meters which I think is kind of amazing. I had loads of pretty fabric in my scrap bin so I just mix and matched it all but you could of course use any material and colour scheme you like.

Just cut out your trianges. I’d be lying if I said I measured any of them.

Lay out the ribbon and glue each triangle in place with the “right” side of the fabric face down.

And continue until you have all your desired length! As you can see, I made tons!

Let the glue dry and then hang it up or store until your ready to use it! It is actually that simple.