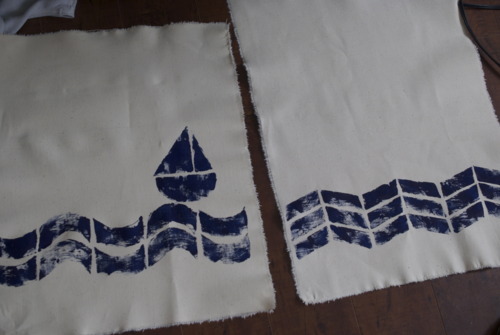
Valentines Breakfast for Dinner- Pancakes with Raspberry Rose Syrup

Here’s the thing of it, guys just don’t like Valentines Day. I have never heard a man sound excited about buying flowers that are suddenly double the price two weeks into February. I have never been told that a male friend is really excited to take their girl out for dinner, or to a show, and I think that’s mostly because men really don’t like being told what to do. So they don’t like being told they have to be romantic. They’re stubborn like that.

Here’s the other thing, all girls like Valentines. Even the tomboy-est of ladies wants a day of the year where the door is opened for her, and roses are sitting out on the table when she gets home. It’s a silly day, but it’s also wonderful. It’s a day of romance, and it’s a day for pink. And I will make no claims pretending to be above it.

It’s just fun.

But what isn’t fun is how expensive it is to go out on Valentines, how much more restaurants charge for things, and how busy it is. Which is why, when I’m not working, Jordan and I make dinner in on Valentines. And this year, I’m proposing pancakes.

I love breakfast for dinner. It is my absolute favourite. It is simple, and not fussy, but it feels special. It feels indulgent, and it feels a little bad for you, and if you have pancakes for dinner, you’ve already had your sweets and you don’t need dessert!

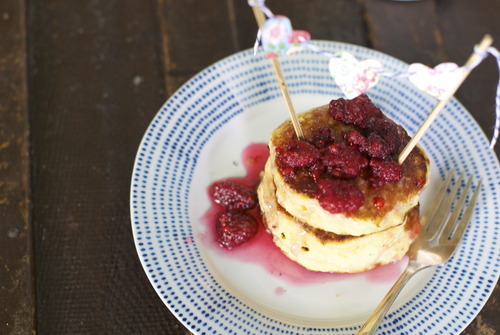
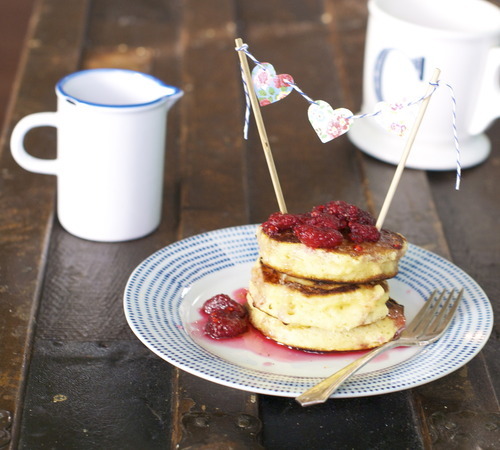
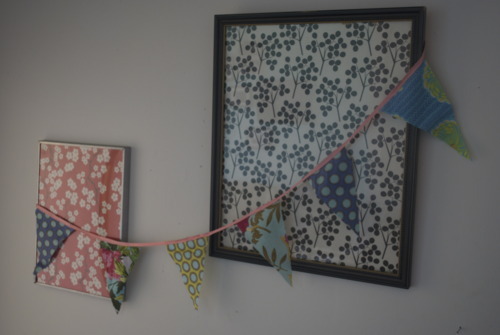
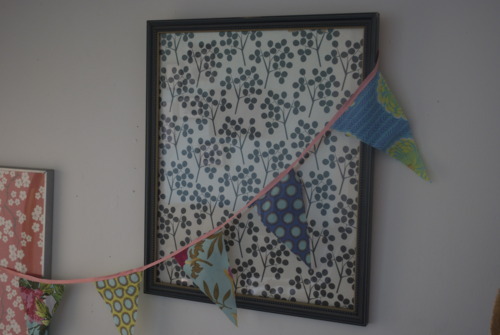
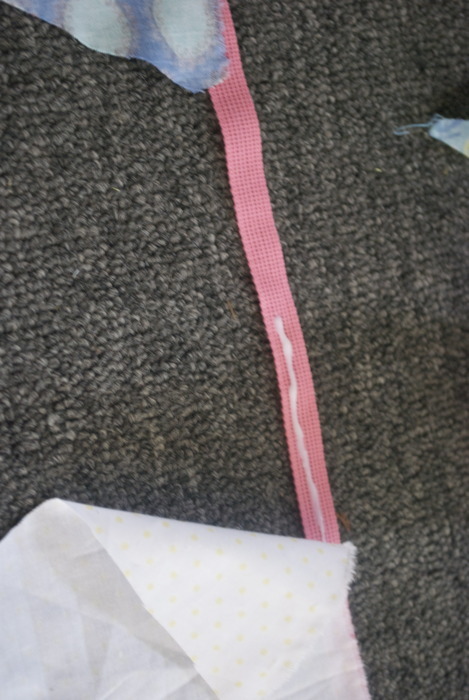
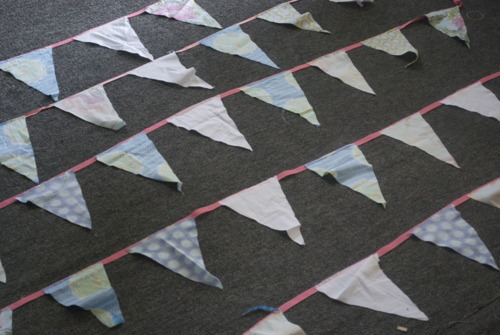
It’s extra festive if you cut out some hearts from pretty paper and sew them onto string, and tie that string onto a couple of skewers so that you have heart bundting on your pancakes. But you don’t have to.

These pancakes are incredibly good, they are the lightest fluffiest pancakes I have ever encountered, and they are best when they are smothered with this raspberry-rose sauce. Just please don’t go and buy the raspberries that are imported from Argentina (unless you live in Argentina, in which I’m super jealous) I used some lovely frozen local ones and they are all kinds of delicious.

Super Fluffy Pancakes with Raspberry Rose Syrup

Syrup:

1 1/2cups Sugar

1/3 cup Water

1cup Raspberries

1 tsp Rosewater- or to taste

Pancakes:

(adapted from Oh So Sinfully Delicious)

2cups AP Flour

1 tbsp Baking Powder

1/2 tsp Salt

1/4 cup Sugar

1 cup Buttermilk, or regular milk with a tsp of lemon juice mixed in.

1/4 cup Melted Butter

2 Eggs

In a small saucepan mix the water and sugar, and over low heat allow all the sugar to dissolve. Add in the raspberries and bring to a boil. Add in the rosewater, adding more depending on your preference and how strong your rosewater is- just don’t add so much it gets perfumey.

In a medium sized bowl mix together all the dry ingredients.

In another bowl mix together the milk, butter and eggs.

Quickly pour the wet ingredients into the dry ingredients and mix until barely combined and still lumpy.

Warm a frying pan to a low heat and add in the oil. Add in big spoonfuls of the batter into the pan. When bubbles start to appear in the top fly the pancakes over.

Cook over low heat- the batter is very thick and they will take a little longer to cook then you may be used to, but don’t rush it by raising the temperature or they will burn.

Just put them on a plate and smother then with syrup and eat up!

Acorn Garland DIY

 have this friend, her name is Tash, and she is all kinds of wonderful.

We met about 5 years ago when we were both going through devastating breakups, and she ended up moving into my building. There was this 10 month window of time when we did nearly everything together. A window of being single, working in restaurants, going out dancing, and gossiping about it all the next morning. It was a time that, even though I’m not sure either of us have cried more in that short a period of time, I’m not sure we’ve ever laughed that much either. It was a wonderful moment in my life that I will always smile when I think of.

After that 10 months we were both in relationships again (within about a week of each other I think), and we got real jobs, and Tash ended up moving to Kingston for 2 years to get her masters. People would sometimes ask me if we were still close, if we talked reguarly and I would have to stop myself from laughing, with the benefits of a My5 plan, we literally talked at least once a day, and often more. When she moved back a couple years ago she moved in with her man in Port Moody, a small distance away, and we still talk every day. We still hang out all the time. Although our boyfriends have banned the term, we used to call each other our “hetro-sexual lifemates” and that’s still pretty accurate. If you had to make me decide between Jordan and Tash, I would be hard pressed to choose.

What I’m saying here, is that Tash is an incredible friend who I just love.

So when she asked if for her birthday we could have a brunch party at our apartment, the answer was obviously yes.

It was a simple breakfast, roasted root veggies, frittatas, cheddar bisquits.

I also made a little garland for the wall, I kept looking online for cute fall set ups, and all I could find was things covered with orange and pumpkins, I wanted something a little less fussy, so instead I went with acorns. I went with wood, I went a little hipster and I threw in some chalkboards.

And it was super cute.

Silver Acorn Garland DIY

20 Acorns

Bakers Twine, or equivalent

Cheap Sparkly Silver Nail Polish

Glue Gun

I just went down the street and found acorns. Almost all of the tops were seperated from the bottoms so it made painting them super easy. BUT if yours are holding together you will just need to be a bit more careful making sure the paint doesn’t get on the body of the nut.

Lay a sheet of plastic wrap down on your work surface.

Paint the tops of the acorns with the sparkly polish, getting as thick or thin a coat as you like. Place them on the plastic wrap when your done so they don’t stick to anything.

When they are dry use your glue gun to place the bottoms to the tops. Be liberal with the glue, the acorns are a bit heavy.

Tie your bakers twine to each of the twig tops and hang them where ever you like. I am totally saving mine and going to wrap them around my Christmas tree!

DIY- Grow your own micro greens in vintage tins!

Here’s the thing, at the end of the day, all I really want to do with my life is have a garden and make jam. That is my ambition. I would like to write about having a garden and making jam, and if people read what I wrote I would be on cloud 9. But that would be icing on the cake, and in a pinch I could live without it. What I long for and crave and yearn for, is a garden and a kitchen big enough to make jam.

Currently, I live in a 600 square foot apartment with a teeny tiny kitchen and no outdoor space.

I’m not trying to get your sympathy, honestly, I’m way to young to have my lifes ambitions fufilled yet. I know this. I mean, anyone who has it all figured out at my age must get so bored.

So I plug along in my little space, and I make jam for my friends and I plant herbs in tins and place them on my window sills and I’m pretty happy. Which is all one can ask for I suppose.

DIY Micro Greens in Vintage Tins

Heres a quick way to get those expensive microgreens from the farmers market at home for only a couple dollars! And they last longer.

Supplies

Potting Soil

Tins- vintage tins, tea tins, whatever you so wish.

Ziploc sandwhich bags

double sided tape

Seeds, arugula, mustard, swiss chard, sunflower, and romano beans are all good options,

Paper Towel

Pebbles.

Get 2 squares of paper towel damp and place them on a plate.

Sprinkle a tablespoon or so of seeds on it, and then cover with another damp piece of paper towel.

Keep this damp for a day or so until the seeds start to sprout.

Take your double sided tape and put a few pieces on the inside of your tin around the opening.

Place your ziploc bag inside the tin and press the edges into the double sided take getting it as close to the opening as you can without having the plastic come over the edge.

Place a small handful of pebbles at the bottom- this will allow for better drainage.

Put the potting soil on top and press it in so it is pretty well packed but not hard.

Sprinkle the sprouted seeds on top and water.

Keep the sprouts well watered and watch them rise up, once there a couple inches tall cut them and put them in salads, sandwiches, on top of fish or anywhere else you might like!

Hand Printed Tea Towel DIY

When I was in high school I became obsessed with a store called Peach Berserk on Queen West in Toronto. It was an outrageous store with very loud bright cloths that were all hand silkscreened. It was always out of my budget, but I had Peach Bekerk undies and scarves. At one point I inherited a skirt from my sister that made me unordinately happy.

So one year for my birthday my Mom had me go to a silkscreening workshop that the owner put on, and while my Mom even bought me the photoemulsion needed to silkscreen like a professional without a light table it was a hobby that fell by the wayside pretty quickly. Which is too bad because I love printed fabrics- I in fact have 3 beautiful handprinted tea towels framed on my walls.

I have accepted that my dreams of silkscreening are probably not going to happen in my 1 bedroom apartment but with all my free time in my new found unemployment I figured I could at least do some kind of fabric printing. And so I did.

If silkscreening as at the end of the spectrum that involves machinery and fancy chemicals than this is way on the other side. You make stamps out of cardboard and you could use nearly any fabric you have kicking around to make these. I used a soft canvas and though I’m thrilled with how it looks, but I think next time I’ll use something softer and more absorbent, like linen.

Materials

Soft and absorbent fabric cut to the size of a tea towel or an unprinted tea towel.

Fabric Paint

Cardboard

Tape

Hot Glue gun

Iron

Iron your fabric

First decide on your design. I made a chevron pattern first and then made the waves with the boat, the shapes were all very simple.

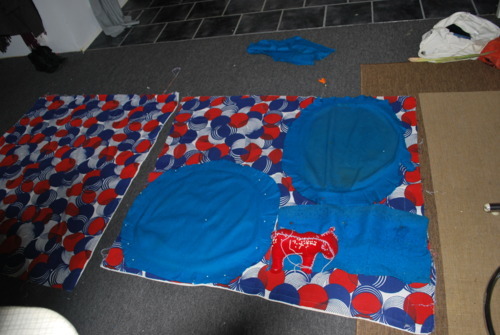
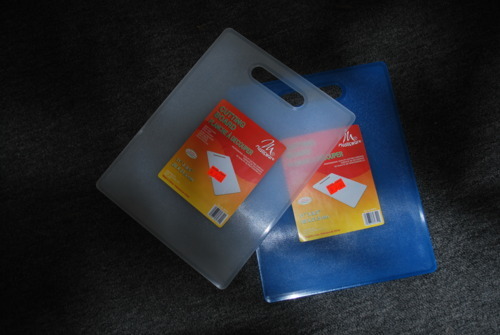
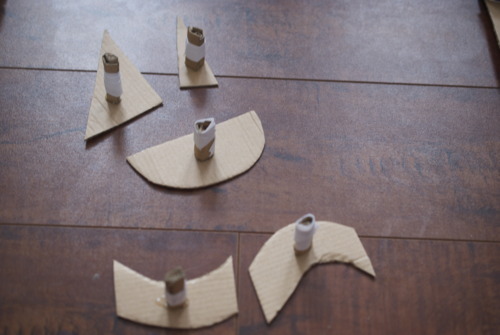
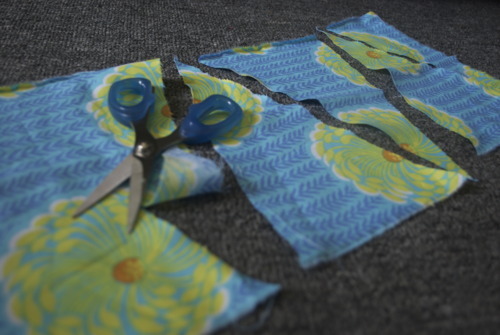
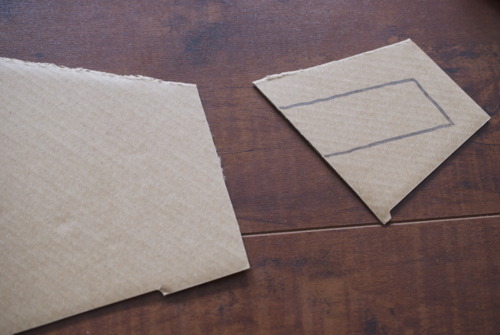
Draw them on the cardboard and then cut them out. 

Take a thin piece of cardboard, roll it up, and tape it shut.

Use the glue gun to attach it to the backs of your stamps to use as a handle.

On a palate put down lots of paint and make sure it is really spread into every corner of the shapes.

Start stamping!

Let the paint dry for at least an hour and then iron it once again to seal the paint. And there you have it, hand stamped tea towels.

Floating Vases DIY

Big changes are about to start happening around here. Not quite yet, but pretty soon. 

In preparation for this I’ve baked some cakes and had some pictures taken and I’ve been working with some very talented people. I’t pretty exciting.

One of the things that will change soon are the wedding cake pictures, and so recently I filled my house with baked goods and crafted my little heart out, and had a friend come by and take some pictures. And while I’m not quite ready to but those up yet, here is a sneak peak and a little DIY!

I really wanted to have lots of flowers for the shoot, but I also really wanted to keep it looking clean and crisp and a little minimal. I’ve been seeing some floating vases lately and loved that idea but I didn’t have the right sized vases… and then…

Sometimes you just need to look around! I found these at my local Italian grocery store, and they cost 79 cents each. So I bought 8 of them, poured out the juice (FYI the peach pulp+bubbly=bellini!), soaked them well and then washed them off, which was pretty easy actually. 

Then I tied a string around the lip of each of them.

Then I nailed a few holes in my wall. With very very thin nails. Sorry landlord.

After that just tie them to the nails and the length you wish- I like them when they’re mis matched but that’s just me. Now fill them with water and flowers!

Baby Showers!

I have a very beautiful friend Laura who has a very beautiful 7 month old little girl in her belly. We are very excited. So this weekend I hosted a baby shower!

We ate lots of little goodies (lots more on that soon!) and made baby shoes, and hung out in the prettiest little park. So I thought I’d share some fun photos of our day, and I promise soon, there will be lots of recipes coming.

Isn’t this spot just the sweetest? Its deffinately got people around it’s pretty quiet considering how close it is to the seawall.

Laura in her prego glory!

Because Laura has more shoes than anyone I have ever met, I thought it would be fun to make baby shoes! I made cut out the patterns in felt and put them in mason jars with pin cushion tops. Then brought tins full of ribbon, buttons, sparkles and more!

I always get my flowers from The Flower Box, it has the most beautiful selection and Sasha, the owner, makes the most amazing bouquets! She made a bunch of wildflower bouquets for me in my collection of milk glass vases. I think it really tied everything together.

And I just love how the bunting looks on the trees blowing in the wind. It was such a fun day, I just love hosting and planning.

Such a great day, I’ll be back soon with recipes! xo

DIY- Cheaters Bunting

I would say I’m a pretty crafty person. I see things on Etsy and in fancy shops and think to myself “I could make that!” and I often do. I also often go and buy the stuff get half way through and then get excited about another project and leave the remnants on my desk for months. This happens all the time actually.

Anyways.

My hatred of buying things I know I can make is why I’ve been avoiding buying bunting, even though I think it’s the cutest thing ever. It just seems so easy, you cut out triangles sew them together, turn em inside out and sew them onto ribbon.

So I thought this would be a perfect crafty decoration for a baby shower I’m throwing next weekend. Until my sewing machine broke.

So I made things even easier. I cut out triangles and glued them onto ribbon. In fact it was so easy that it took my less then an hour to make 10 meters which I think is kind of amazing. I had loads of pretty fabric in my scrap bin so I just mix and matched it all but you could of course use any material and colour scheme you like.

Just cut out your trianges. I’d be lying if I said I measured any of them.

Lay out the ribbon and glue each triangle in place with the “right” side of the fabric face down.

And continue until you have all your desired length! As you can see, I made tons!

Let the glue dry and then hang it up or store until your ready to use it! It is actually that simple.

I Have A Kitchen Table Again!

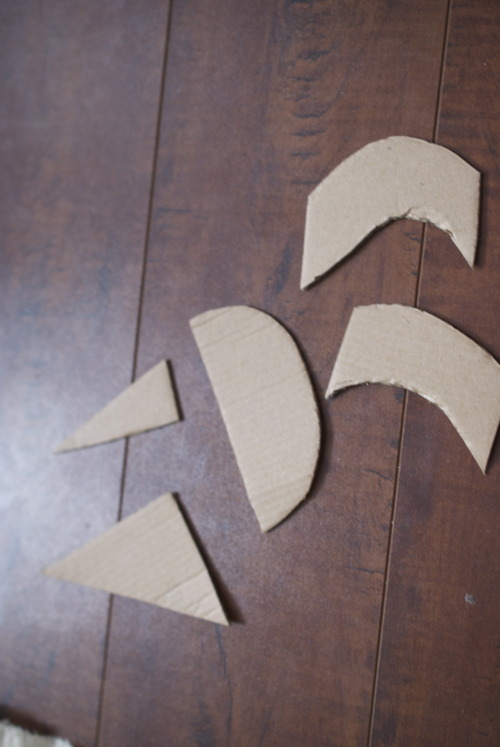
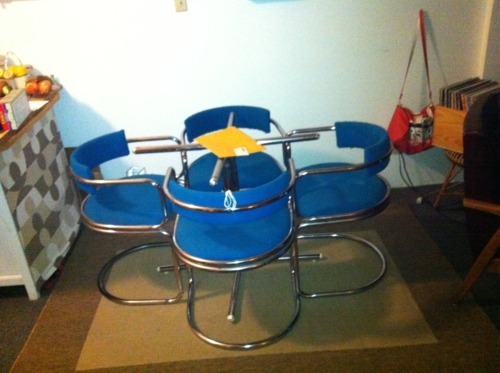
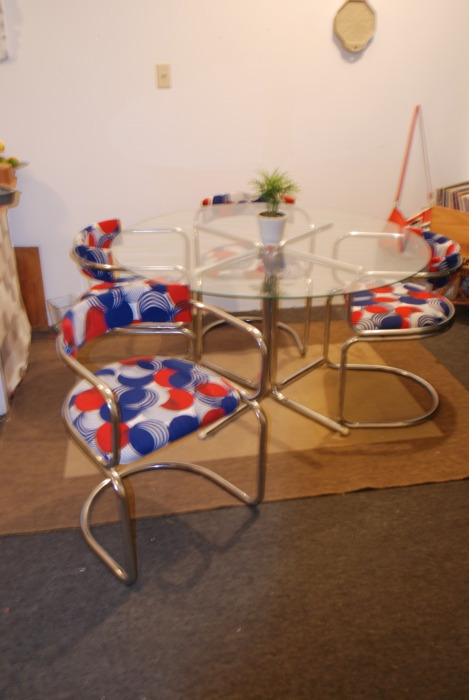
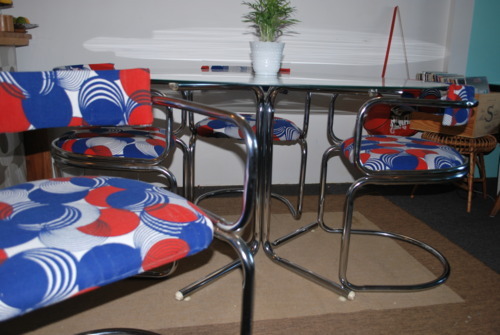
I smashed my dining room table a couple months ago. I feel compelled to say that it wasn’t very dramatic in fashion, I just put something hot on it forgetting it was glass and it shattered.

I also feel compelled to say that I loved that table.

Everything I own is second hand. Most of it came from the “free section” of my building where people leave things to nice to throw out but that they don’t want (my couch, my rug, my bookcase) a few things came from my best friend who used to live upstairs when she moved across the country (a bookshelf, a bedside table) and a few things came from my mom and sister when they visisted and realized how shabby my place was (my desk, my kitchen island). The one thing I actually bought was my kitchen table and chairs. I got some Christmas money and pooled it together and bought it. It’s an awesome mid century modern chrome and glass table with low round chairs. It wasn’t in the best of conditions- the steel was a little rusty and the upholstery was definitely pilling, but it was mine. When I broke that table I cried.

Mostly I cried because Jordan hates that table and I figured if he would make a big push for us to get rid of it, but I didn’t give him enough credit. We kept the table and chairs with the agreement that I would reupholster the chairs and he would get us a new glass table top. So I found me some gorgeous vintage curtains and voila! Well, not entirely voila, I had never reupholstered anything in my life but I took out a book, read a few blogs and I’m feeling like an old pro now (although I bought fabric to redo my couch and I am now terrified all over again.) It took a little longer for him to find a proper sized glass table top but he did and now we have a kitchen table again!

So to celebrate we are having friends over for dinner tomorrow night and I will let you know all about the desserts I made but in the mean time, here’s my DIY reupholster.

My chairs just unscrewed in the backs, so I took off the cushion-y parts. Then i painstakingly took them apart (and by me, I mean me and Jordan who was very bribed with cookies to help) You will need to use them as a pattern so be patient. This involved using a flat-ended screw driver to pull out the staples and needle nose pliers to pull out nails. We learnt that we weren’t the first to reupholster these chairs, they were a terrible brown corduroy before!

Lay out your fabric and pin the old pieces on top like a pattern.

 Lay out your fabric and pin the old pieces on top like a pattern.

Cut them out! Then pin them to the original cushions.

Staple staple staple. This will take time. Start at the back to get used to it. You need to get the tension right so that it’s very stable but won’t buckle. That very important.

For the tops of the chairs I just sewed the sides together and stapled the bottom again.

Then I scrubbed the hell out of the chairs. That was a lot of work.

And then I screwed them back together, and look! I have a new kitchen table set! and It really only took me one night to do it. So you can do it too!

Chalkboards and Children

I have two obsessions right now. Chalkboard paint and Jordan’s nephew Jackson. Obsessed. So, when I decided to make Jackson a Congratulations-on-your-new-baby-sister present I didn’t really have to think about it. Chalkboards. BUT my local home hardware doesn’t sell wood! I was terribly disappointed, especially because I wanted them to use a mechanical sander to make the edges round, and if I found scrap wood I would have to do it myself. And that didn’t sound fun at all. So I went to the discount kitchen store next door and bought a cutting board. It already has rounded edges and a hole for hanging it. Perfect! This would also work really well in the kitchen with a “Things We Need From the Store” or a “Don’t Forget” by the front door. I have a beautiful chalkboard by the wonderful Regional Assembly of Text by my front door that says “Matters Of Importance” in much more elaborate scroll then I have the patience to cut out! So this is a slightly simpler version, and here’s the how to:

Take your chalkboard and wash and dry it very carefully

Paint it with chalkboard pain, let it dry and then paint it again. The paint is really thick so I had to sand it at the end and wipe it down again, to make it as smooth as possible.


On your computer decide on a font and type the name or words your want on your board. I would suggest a simple font, because you will have to cut it out!. I changed the O in Jackson to a soccer ball using a template I found online.

Use spray adhesive or plain old tape to stick a piece of wax paper on top of your template.

Carefully use an exacto to cut out the letters,

Use that spray adhesive or tape again to very carefully stick down the letters. I used a lot of tape here, and its better to have to much then to little I think.

Take your paint (I used white to make it pop but you could use any colour!) and brush it onto your template.

Let your paint dry completely then peel back the stencil.

I had a few smudged parts so I just did a little fix up with some more chalkboard paint, but if you are more careful then me then you won’t have to!

Allow to dry completely and then hang it up and start using it!