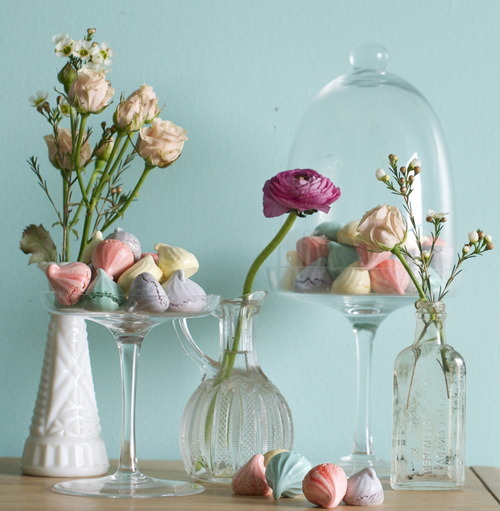
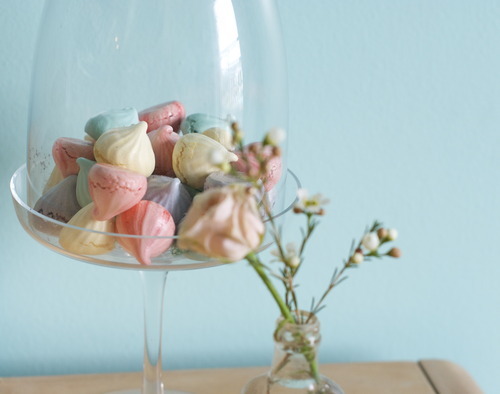
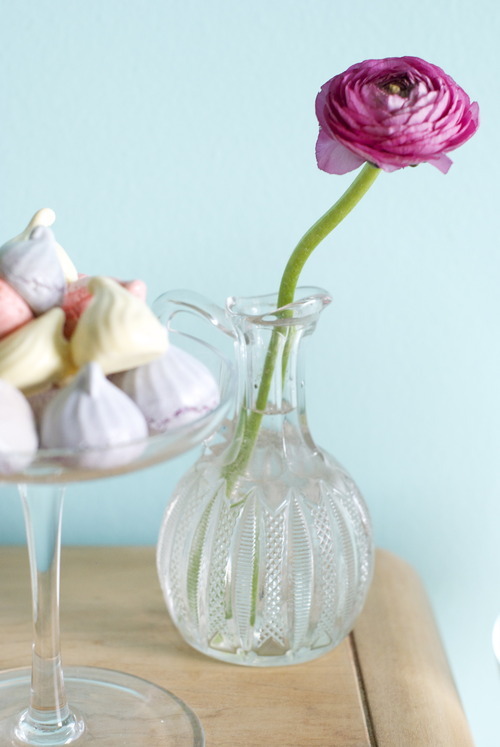
Spring Coloured Meringues
/
When I first moved into this little apartment it was all sorts of crazy colours, there was purple, and lots of yellow and the living room was a bright Tiffany’s blue. And I hated all of them, I painted it all white, but the blue. For some reason I just needed the blue. After living here for 5 years, I think I’ve finally figured it out- it reminds me of the sky that we only get a couple months here.
See, Vancouver does this thing, this dreadful thing where it rains all the bloody time. It starts in late September, early October if we’re lucky and it keeps raining until May, or June, or sometimes, even July. I’m not joking, we sometimes only get 3 months of sunshine. Last year was one of those years, and maybe that’s why I feel like I’m struggling so much with it right now.
My saving grace in all this rain is the flower shop I live on top of. It regularly wins best florist in the city and with good reason, it has the most gorgeous blooms in every imaginable colour, all the time. And even when everything is grey and gloomy and damp when I walk out my door I see heaps and heap of fresh flowers. They even take the old roses and sprinkle their petals half way down the block, to bring a bit of colour even further. They really are the best.
So lately I’ve become obsessed with their colours, the soft peachy ranoculous, the bright red of the tulips, and these soft yellow roses, oh those roses. They give me hope that it is sunny somewhere in the world. And so I made these meringues to bring some more of that colour in, because in this dreary grey city, sometimes you just need colour.
Spring Coloured Meringues
6 Egg Whites
1/4 tsp Salt
2/3 cup Sugar
1 cup Icing Sugar
1 Vanilla Bean, OR 1 tsp Vanilla Extract
Food colouring
Preheat your oven to 200F
In the bowl of a standing mixer fitted with the whisk attachment, whisk the egg whites and the salt until they hold soft peaks.
Tablespoon by tablespoon add in the granulated sugar, letting the sugar you added before be mixed in completely before adding in the next.
Now let it keep running until it holds very stiff peaks, if you’re unsure just keep it on for another 20 seconds or so. It’s very important that it is very stiff.
Add in your vanilla bean or extract.
Now dump in all the icing sugar and mix that in- bring the speed down to low so the sugar doesn’t fly everywhere.
Divide the meringue into as many bowls as you want colours- I did 4.
Add the colouring and mix until they are all combined, or not and let it be swirly- it’s up to you!
You can use any piping tip you want to here, star tips are popular, so are just a plain circle. It’s up to you!
Now just pipe them onto trays lined with parchment or a silpat (don’t grease the trays though!! Your meringues will ruin if you do!) and bake for about an hour and a half until they are completely dried out. Check them every 25 minutes or so to make sure they aren’t getting any colour. If they are browning turn down the heat and rotate the trays.
Allow to cool completely then eat, decorate, or put in baggies for gifts- these will store for up to a month in an airtight container.