Tuesday Tutorial- Challah!

It’s funny, the kind of food you fall in love with. I grew up in a pretty Christian neighbourhood, but not too far away was a big Jewish area, and that always had a strong pull for me. Early Sunday mornings were spent buying bagels, and words do not begin to describe my love of lox. But it wasn’t until high school, when I became friends with a Jewish girl and started being invited regularly to Sabbath dinners when I really started to appreciate the food of that culture.

I don’t ever eat Jewish food now, because there pretty much are no Jewish people in Vancouver.

I mean, there are a few. But it’s slim pickings.

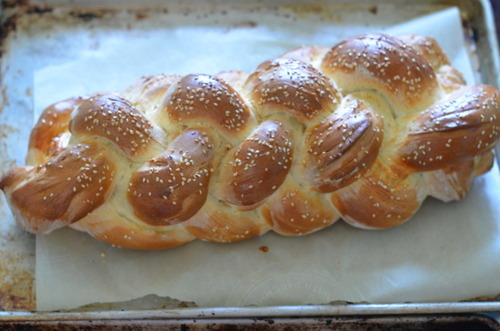
Which is why I found myself on a hot summer day making challah.

Oh challah.

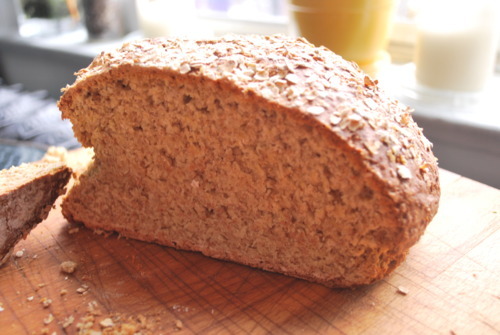
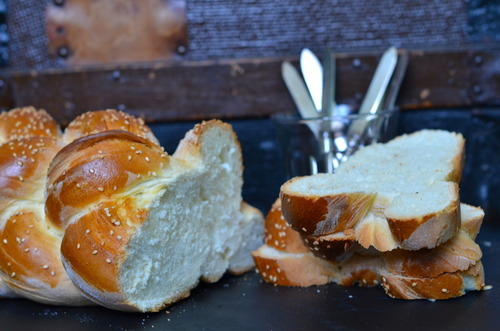
Challah is brioches sister, the prettier sister.

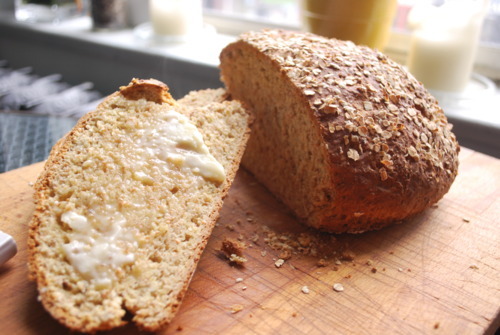
The main difference is that there is no dairy in challah, instead the eggy dough has olive oil added to it, instead of butter- this keeps it Kosher, but as I don’t keep Kosher (as I’m not Jewish) I slather butter on mine once it’s cooked.

This will also make the best damn French toast you have ever had.

Challah Tutorial

(adapted from Smitten Kitchen)

1 1/2 tbsp Dry Yeast

1 3/4 cup Luke Warm Water

1 tbsp Honey

3/4 cup Olive Oil

5 Eggs

1 tbsp Salt

7-9 cups AP Flour

1/4 cup Sesame or Poppy Seeds (optional)

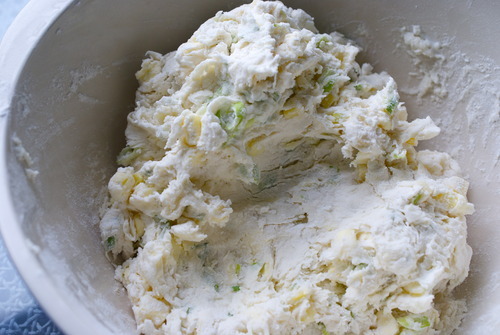
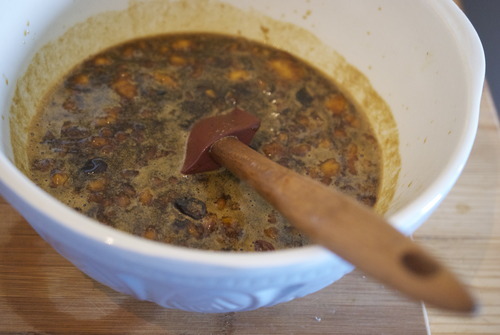
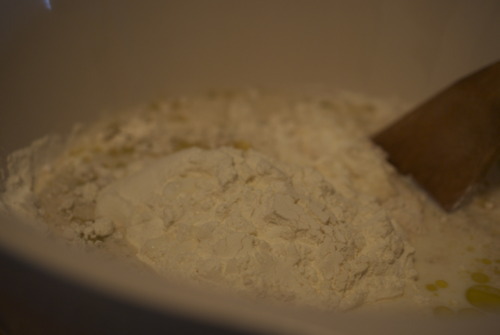
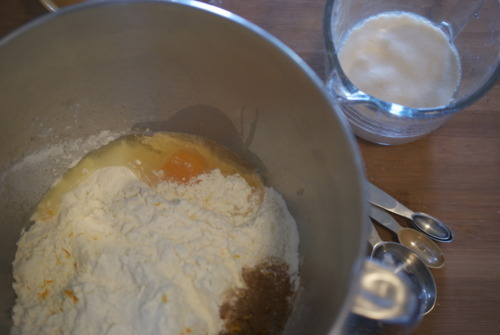
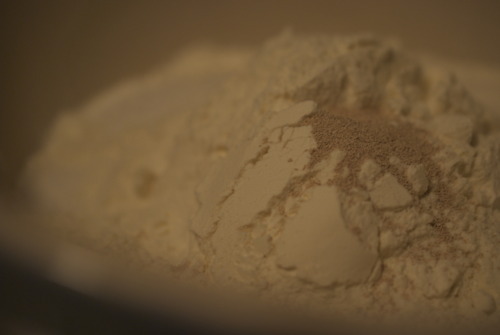
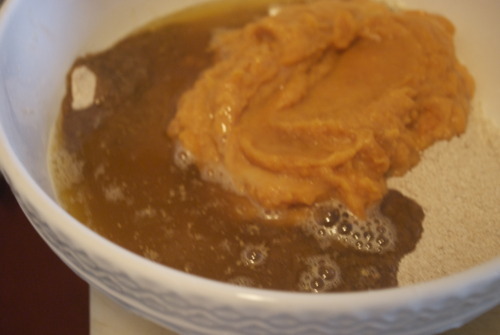
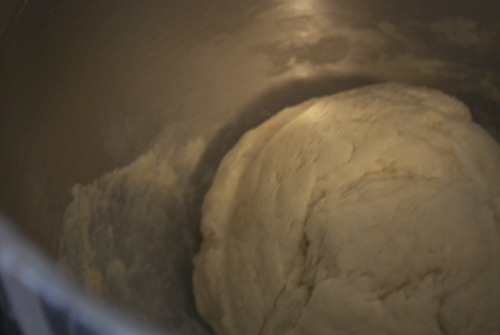
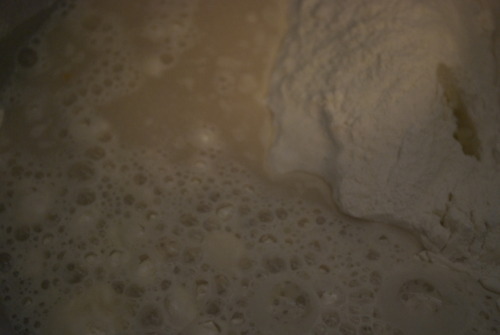
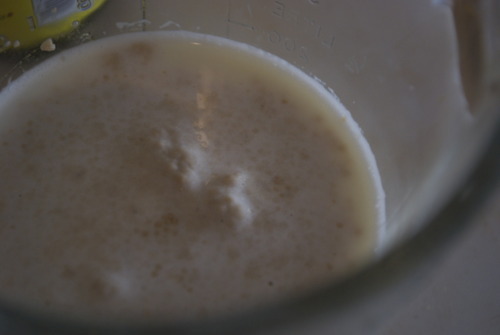
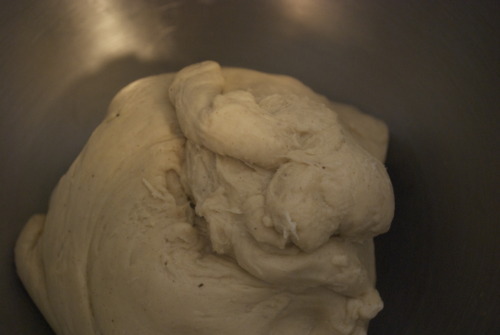
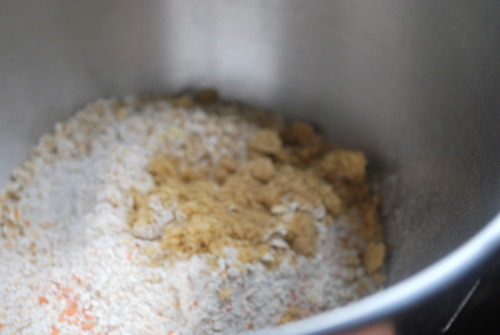
In a large bowl mix together the yeast, water and honey. You can also do this in the bowl of a standing mixer.

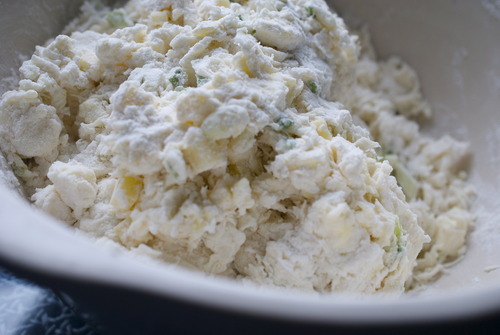
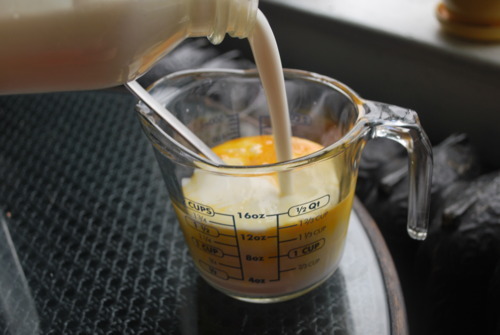
When it starts to get foamy add in the oil and 4 eggs, stir to combine.

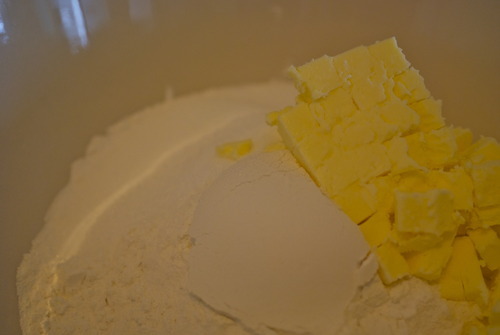
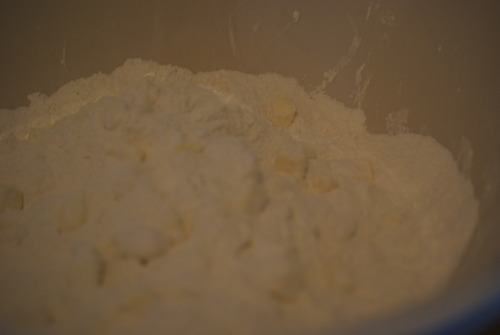
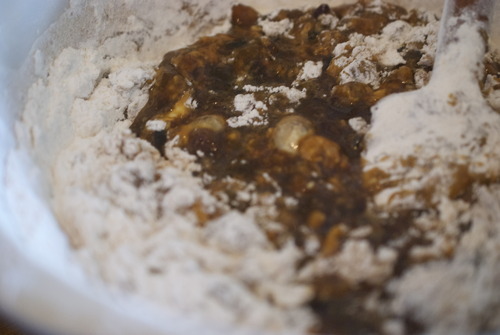
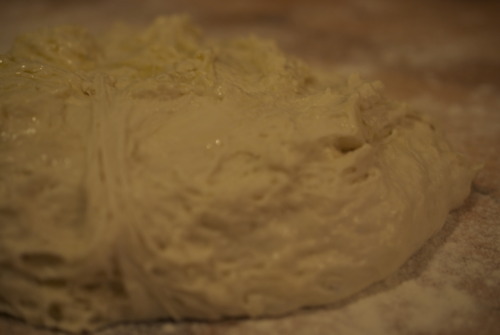
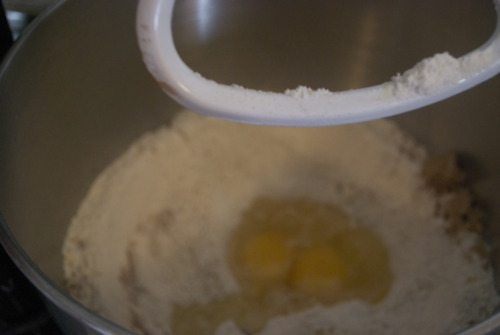
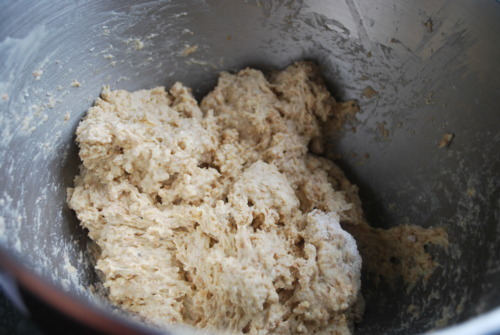
Slowly add in the flour.

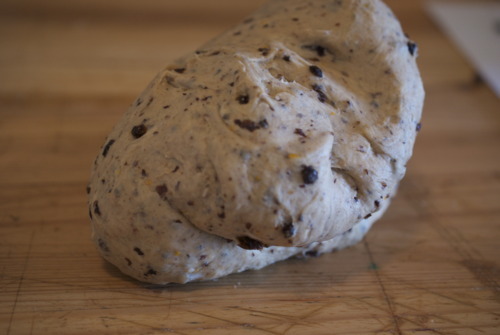
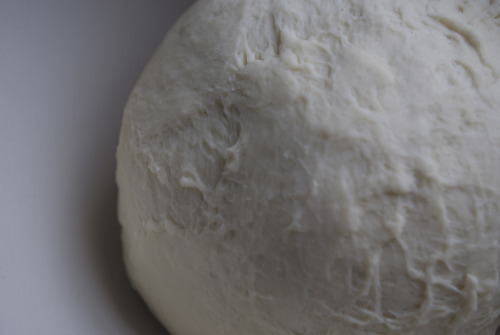
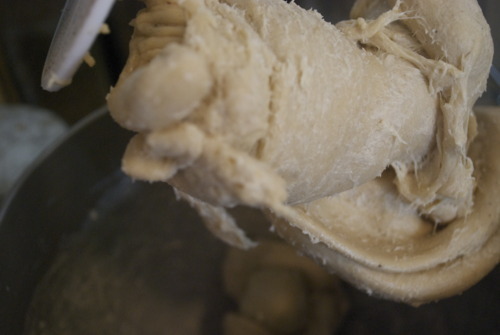
I only needed 7 cups, but you may need more. Once the flour is combined, begin to knead.

If you use you’re Kitchenaid it may be a bit much for your machine- I am lazy and didn’t want to knead it, so I split the dough in two and did it that way.  

I drank a glass of wine. 

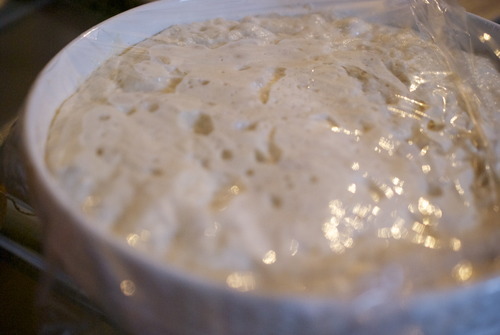
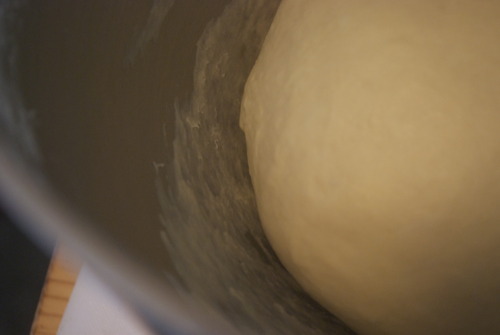
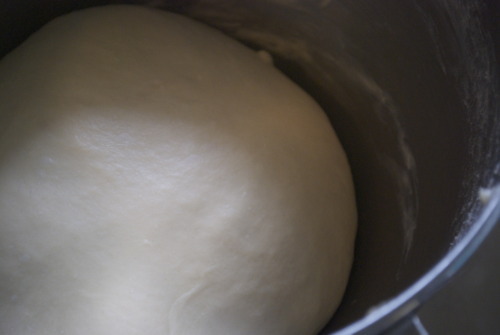
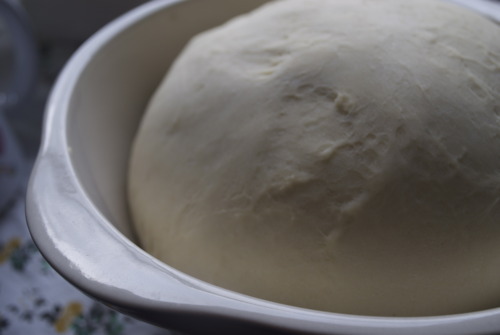
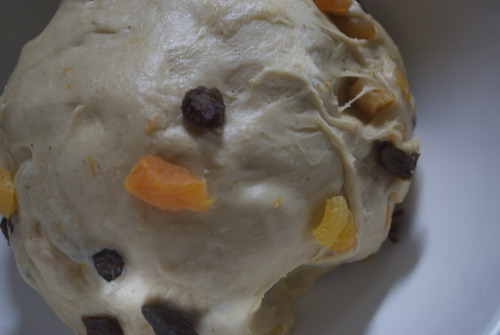
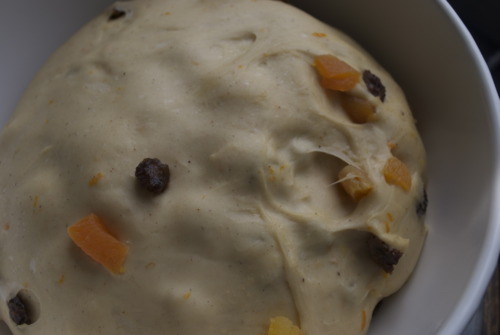
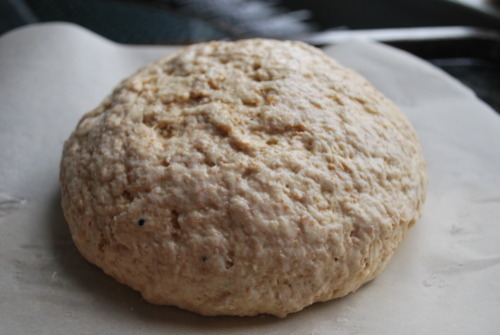
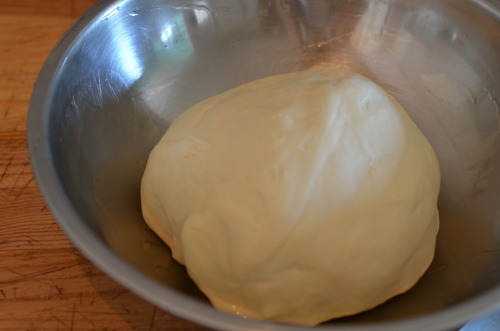
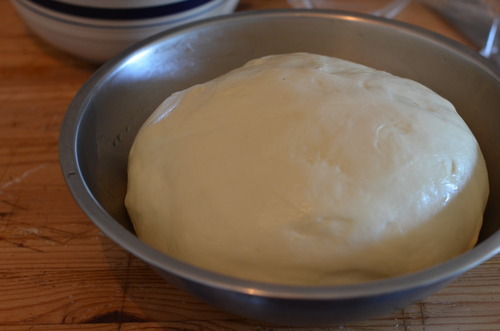
Put the dough in a greased bowl. Let is rise for an hour, then punch it down, and let is rise for another half hour. 

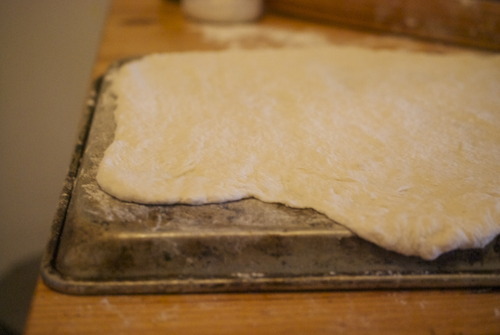
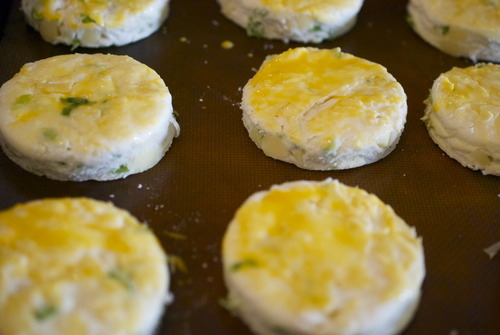
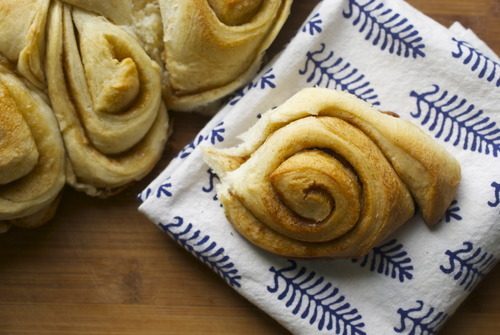
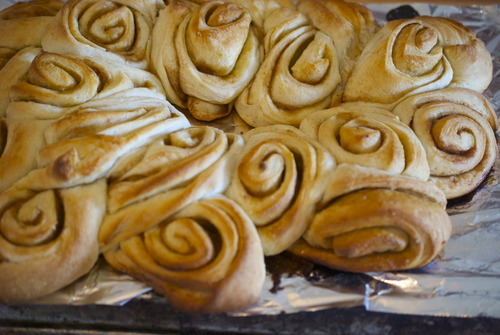
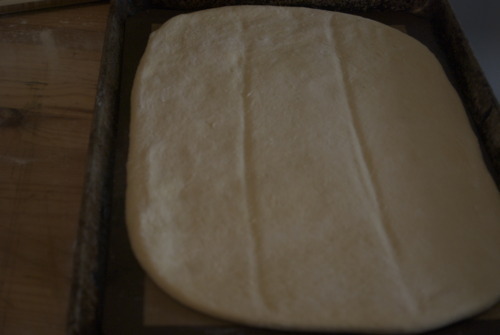
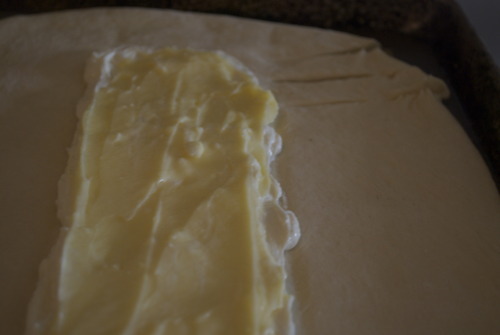
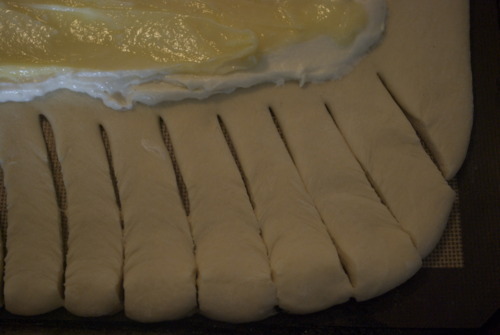
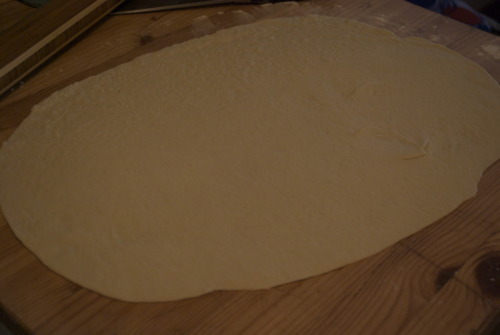
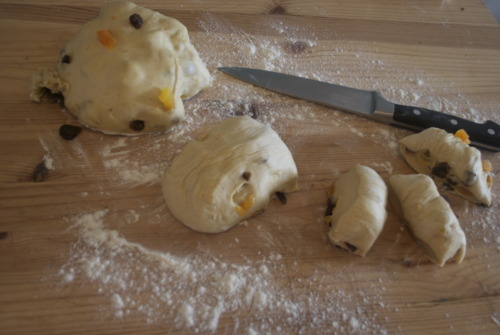
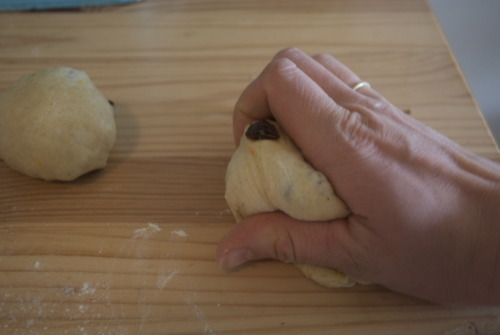
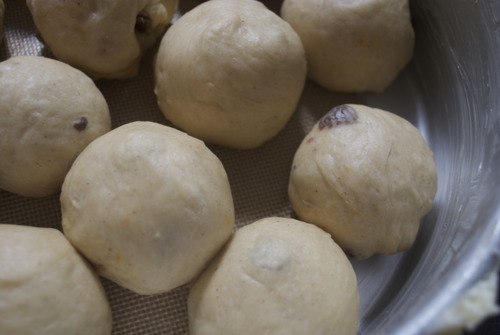
Divide the dough into two portions. You can make them into loaves, braided loaves, buns (the best hamburger buns!). 

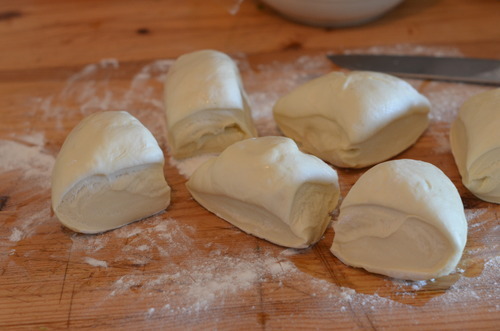
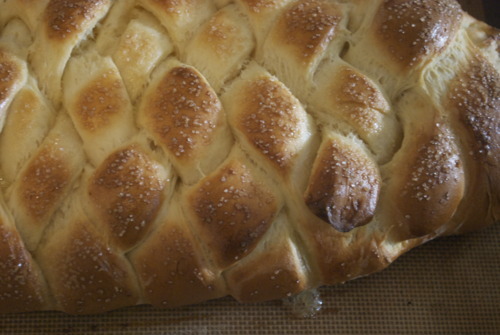
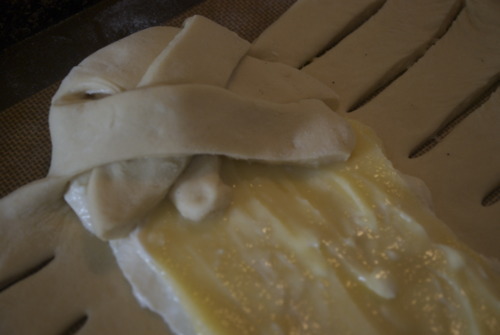
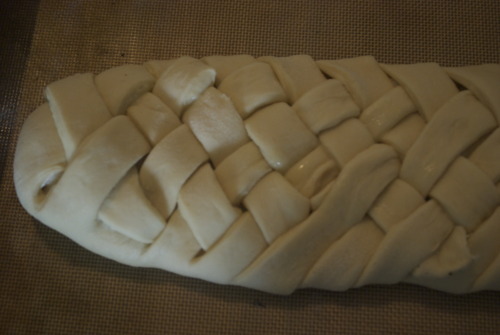
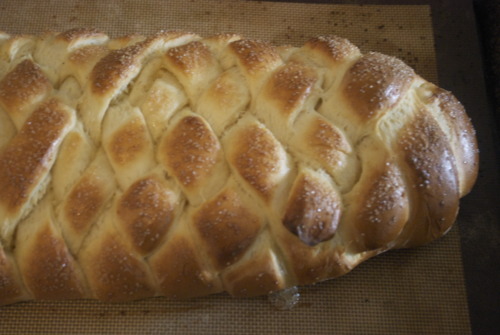
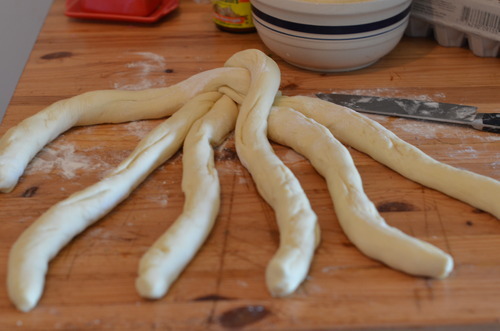
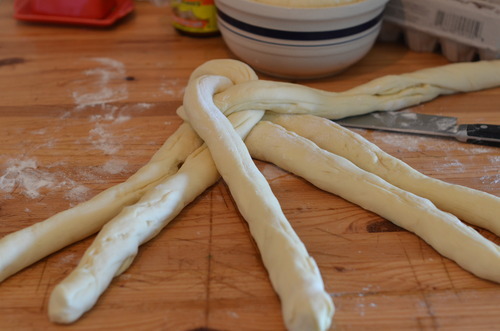
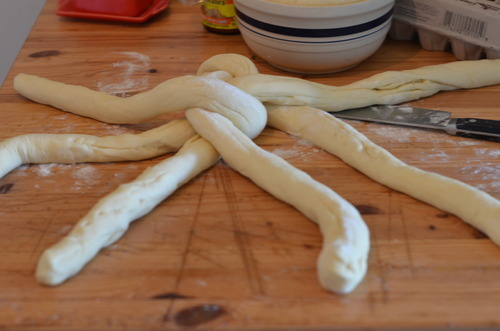
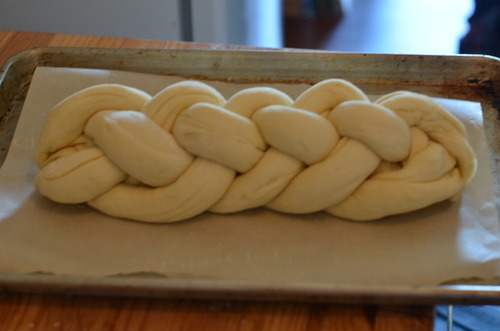
I did a 6 piece braid, which is the classic way to make challah. I could try to explain it to you, but I would probably nto do a very good job.  does a great one though- at about 2;12 the braiding part of the tutorial starts. 

Preheat the oven to 375F.

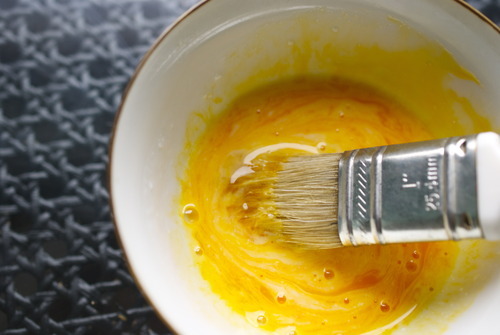
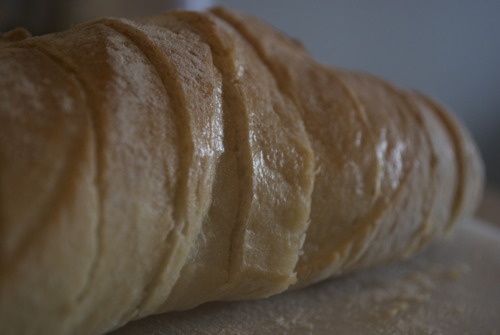
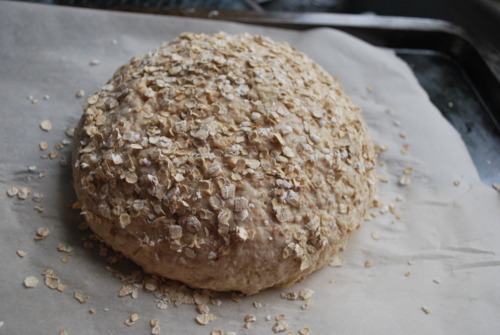
Mix together your remaining egg with a pinch of salt. Brush it on the top of your loaf. Allow it to sit for another 20 minutes, and then brush again. Sprinkle with the sesame seeds or poppy seeds, if using. 

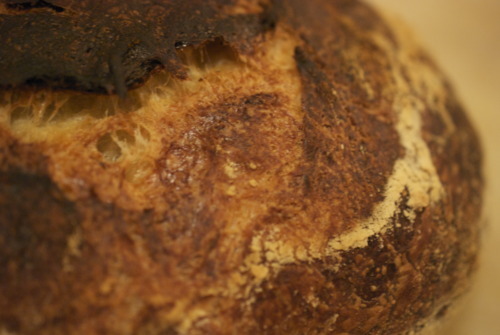
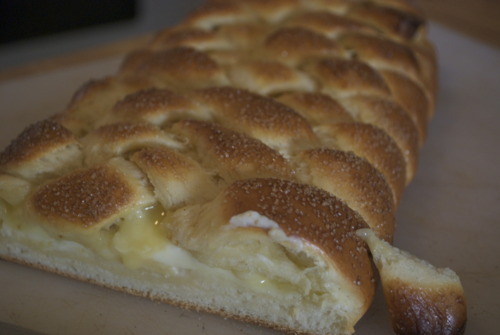
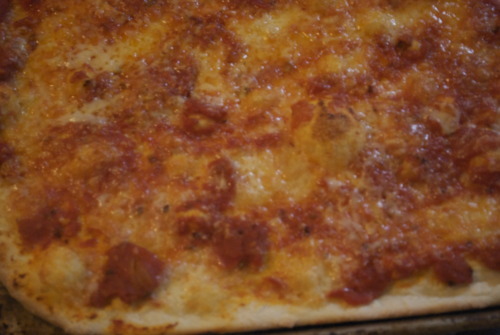
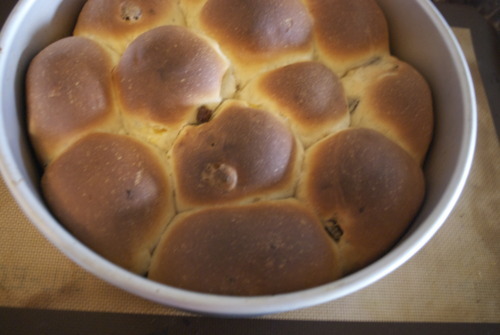
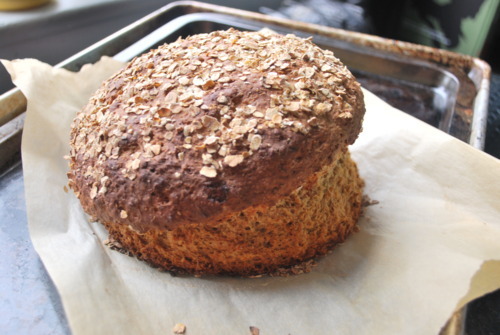
Bake for about 45 minutes, until the top is nicely browned and it feels hollow when you tap it. 

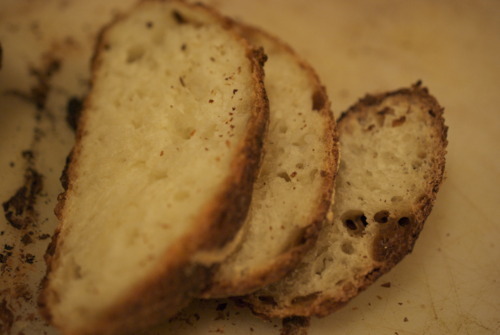
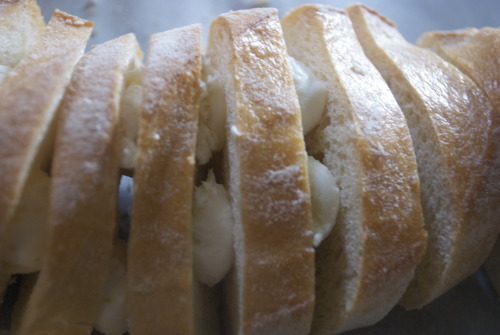
Allow to cool completely before slicing into it!

Olive Oil Banana Bread with Pecans and Chocolate

When you work at a high end restaurant you have to have everything available at all times. I once worked at a restaurant that required me to make ceasar dressing from scratch every 3 days in case someone came in and ordered a caesar salad, a dish that was assuredly not on the menu. This always struck me as a bit wasteful, but that’s the way it is in fine dining. You have to be prepared.

A couple of years ago, when I worked at a high end resort, it was the exact same, but much trickier because, as we were on a remote island, you had to order everything in advance and usually in huge quantities. One such thing was bananas. They weren’t on the menu, but if someone wanted a banana with their yoghurt in the morning we had to be prepared. I think we were asked twice in 6 months for a banana.

The real problem with this was that we could only order them in in 20kL boxes.

So every two weeks 20 kilos would come in, and somehow I was in charge of dealing with them. Lord knows why.

Fact: I hate bananas. Like, seriously, truly hate bananas. I hate their texture, I hate their taste, and I hate the way they smell. They are, indesputably,the worst fruit.

My theory on this hatred is that I got strep throat to often as a kid, and as such had to take too much banana flavoured liquid penicilin. But that is just a theory, and I know people who loved that medicine when they were little. I was not one of those people.

So when I realized that part of my job description was to cook up something with that many bananas every, well, let’s just say I was less than pleased.

But here’s another fact. I love cooked bananas. Everything I hate about them raw becomes a totally different thing when they are cooked up. When they are mixed with sugar and flour and scented with cinnamon they are just about the best things ever.

I have made a lot of banana breads in my life, so many when I was at the resort in fact, that at the end of the season everyone on staff (all 60 people!) got to go home with a banana loaf that I had frozen. It was a bit nuts.

I’ve made ones with chocolate, ones with nuts, ones with icing, ones with crispy bits of brown sugar in the center. But I had never tried making it without butter, until now. I’m never going back guys. Olive oil is the perfect tamer for banana bread.

This is my new standard banana bread recipe, it is the moistest, softest, most beautifully flavoured banana bread I have ever made.

Olive Oil Banana Bread with Chocolate and Pecans

2 cups AP Flour

3/4 cup Brown Sugar

3/4 tsp Baking Soda

1/2 tsp Salt

1 cup coarsely chopped dark chocolate

3/4 cup Toasted pecans, coarsely chopped

1/3 cup Extra Virgin Olive Oil

2 large Eggs

1 1/2 cups mashed very ripe bananas

1/3 cup Yoghurt, or buttermilk

1 tbsp Vanilla Extract. 

Preheat your oven to 350F

Butter and flour a baking pan, I used a bundt pan, but you could easily use a loaf pan. 

In a large bowl mix together the oil and sugar.

Stir in the eggs one at a time until they are totally incorporated.

Add in the bananas, vanilla, and yoghurt. 

Sift in the flour, when it is nearly combined add in the nuts and chocolate. Stir to comine being careful not to over stir. 

Pour the batter into the prepared pan and baked until an inserted skewer comes out with only a few moist crumbs, about 30-45 minutes. 

Allow to cool at least 10 minutes before eating. 

Raspberry and Mascarpone Brioche Galette with Almond Crumble

Now is the time of year I start to miss summer fruit. In the fall there are quinces and apples to get me through, and then the fun of Christmas takes over and I can get excited about mashed potatoes, but by mid January I am sick of it. I want red berries.

It was glee, pure, unadulterated glee that took over me when, at my local market, I noticed some local raspberries in the freezer.

Apparently this dive-y rundown market that I frequent for their unbelievable deals on pecans just froze all of the berries that they didn’t sell this summer. Firstly, this makes perfect sense. Secondly, how did I only just see them?

Oh lord. My week has been made.

We had some friends over recently, and as Jordan and I were flipping through cookbooks deciding what to make, he made several pointed comments about a brioche tart in the Ottolenghi book.. So I, being that lovely charming girlfriend that I am, (self proclaimed at least) decided to make it.

This is the most perfect breakfast. We ate it for dessert, and it was great, but for serious friends, eat this for breakfast. Next time you have people over for brunch, put this out on the table. I promise, they will be friends for life. The whole thing is somewhere between a coffee cake, a tart, and yet so much better. So very much better.

Raspberry, Mascarpone, Brioche Tart

Adapted loosely from Ottolenghi

Brioche:

2tbsp barely warm water

1tsp Dry Active Yeast

1 1/2 cups AP Flour

1/2 tsp Salt

2 tbsp Sugar

2 Eggs

1/2 cup Butter

Filling

3/4 cup Mascarpone

3 tbsp Icing Sugar

1 tsp Vanilla Extract

Zest of 1 Lemon

2-3 tbsp Cream

1 1/2 cup Raspberries, or other red berry

Almond Crumble

1/2 cup Ground Almonds

1/2 cup AP Flour

1/3 cup Brown Sugar

1/3 cup Butter, cut into small cubes

In the bowl of a standing mixer fitting with the dough hook combine all ingredients except butter and mix until it comes together. Continue mixing until you can take a small piece of the dough and, when you stretch it carefully, it will stretch so thin you can see through it. This is called the window test. If the dough rips then keep kneading the dough until you can.

OR You can do this in a food processor fitted with a dough blade, OR by hand. If doing it by hand just mix it all into a bowl until it comes together, then move the dough to a lightly floured surface and push your heels of your hands into the dough. Then fold it onto itself, and repeat this pushing and folding motion until you do the window test.

Put the dough into a clean bowl and let it rise until it has doubled in size, this should take about an hour.

Punch the dough down. You can use the dough right away, but if you’ve planned long enough in advance, the dough will be even better if you put it in the fridge overnight.

If you do put it in the fridge, you will need to take the dough out about an hour before you start to bring the dough back up to room temperature.

When the dough is ready put it onto a lightly floured surface and with your hands stretch the dough out into a large circle. Using a rolling pin will flatten lots of the air bubbles that the dough has been working so hard on producing, so instead use your hands to push from the center out. It does not have to be perfect. This is a free formed galette, and it being a little rough around the edges is totally okay. Pick up the dough carefully and put it on a well floured cookie pan.

Preheat oven to 375F

In a small bowl mix the mascarpone, icing sugar, lemon zest and vanilla together. Add in the cream, tablespoon by tablespoon until you get a texture that is thin enough to spread, but not so thin it will be runny.

Spread this on the brioche dough leaving about an inch around the edges.

Now top with the raspberries.

In another small bowl mix together all the ingredients for the crumble, and with your hands break the butter into the other ingredients. You don’t want to form a cohesive dough, just a crumbly mixture.

Sprinkle this on top of the raspberries. 

Let this sit out for about 20 minutes as a last proof, and then bake until the crust is nicely browned and the center just barely wiggles when you shake it. Take it out of the oven and let it cool for at least 20 minutes before serving.

Tuesday Tutorials- No Knead Margherita Pizza

I live in what was traditionally Little Italy, an area called Commercial Drive. There are two big pizza places, a divorced couple who hate each other and own two competing, but equally horrible overpriced restaurants across the street from each other. There were a couple cheap slice joints, you those weird ones that put sesame seeds on the crust? Those kinds of cheap slice joints.

Then a couple years ago there was a bit of an outcry that there was no good proper pizza in Vancouver. And then two years ago was the year pizza came to the city. In droves. There is pizza everywhere.

Here’s the thing of it. I love pizza. Good proper Neopolitan pizza is hard to beat. And I eat it all the time.

The best pizza joint in the city is now 3 blocks away from my house. And a totally reasonably good place is 1 block from my house. And it has this lunch special, and I am there all the time. All the time!

And while pizza isn’t expensive, I have decided that this year is the year to not go out for cheapy lunches and to make dinner at home more.

So I’m going to start making pizza at home. Partly to save money, yes, I’ll admit to that, but largely because I can make proper pizza at home. And it’s unbelievably easy.

Heres the thing of it, you don’t knead the dough. And you don’t cook the sauce.

Are you ready to make wonderful pizza at home without kneading the dough or cooking the sauce?

I thought so.

No Knead Margherita Pizza

Adapted from the Sullivan St. Bakery

Dough

31/2 cups AP Flour

1tsp Dry Active Yeast

2tsp Kosher Salt

1 1/2 cups lukewarm Water

Sauce

1cup Strained Tomatoes

A good glug of Olive Oil

Sea Salt

4 balls of Fresh Mozzarella

A Handful of Fresh Basil

1/4 cup Grated Parmesan or Grana Padano

With a wooden spoon mix all the dough ingredients in a large bowl. When it’s all combined cover it with plastic wrap and leave it. Forget about it for 18 hours! This is sort of a loose measure of time, I make mine before I go to bed and it works out beautiful when I make dinner, but I have also been impatient and used the dough and made pizza for lunch and it worked really well too. I’d say 13-20 hours is the range really.

When your ready the dough will make 2 big pizzas.

Preheat your oven as hot as it will go. Mine is 500F. If you have a pizza stone, use it. If not, just take an old baking sheet and put that in your oven and let it get toasty hot. Once the oven is hot enough let it sit at that temperature for at least 15 minutes before you start working on the dough.

The dough will be very soft and sticky so use lots of flour. The first rule of dough is not to roll it. Carefully with your fingers streth the dough out, I find it easiest to hold the dough in the air put your clenched fists under it and gently pull them apart. The dough will get thin, then put it on a well floured surface and use your fingertips to stretch out the edges.

Generously flour a rimless baking sheet or the bottom of a rimmed baking sheet.

Put the dough on top of that.

Use half the strained tomatoes and spread over the dough leaving a half inch of space around the edges for the crust.

Drizzle the olive oil on top and sprinkle with salt (you could mix all the these things ahead of time, but then you’d have to clean another bowl, which is something I avoid like the plague.)

Cut the cheese thinly and put 2 balls worth on each pizza.

Take out your pizza stone or baking sheet. With quick jerking motions slide the pizza off your cold tray and onto the hot one. Immediately put it in the oven.

I have what might possibly be the worst oven of all time. If your oven cooks as unevenly as mine you’ll have to rotate your halfway through cooking, although if you can keep the oven shut that’s the best thing.

After 2 minutes of baking turn the broiler on for 2 minutes. This should help the dough get a bit charred. After 4 minutes your pizza should be done.

Get it out of the oven, sprinkle with parm and torn basil and eat while it is still piping hot!

Tuesday Tutorials- The Best Biscuits

The second instalment in my new weekly column, where I talk about food basics, and give you the step by step know-how to do it at home.

The restaurant where I work recently started to do brunch, and before we opened I was chatting with the chef about what kinds of pastries he might want. The original idea was croissants which, despite obviously being delicious, are also so tedious to make, especially in a kitchen with as little counter space as ours, so I threw out the idea of making biscuits.

This did not go over.

Biscuits are dry, biscuits are bland, biscuitsare over done, and never delicious.

So I, being the super competitive person that I am, decided to make him some. I made savoury biscuits, ones with chunks of cheddar and dots of scallions, and let the restaurant fill up with the smell of cooking butter and melting cheese. And then I dared him not to like them.

He is not the first person I have converted to a biscuit lover, but if we’re being real here, most of this credit can go to my Grammy.

Grammy made “Cloud Biscuits”, light, airy, full of layers and always moist. Growing up they were always made with fish chowder, or if we were lucky, for breakfast. Hers was a different recipe than this, because hers was a different time. In the Great Depression butter was a serious luxury, so the cloud biscuits were always made with shortening, and just a tablespoon or so of the good stuff to give it flavour. But it was the texture that got me hooked.

Which is funny, because most people complain about the texture, they think dry, over cooked, bland. So here is THE way to make the perfect biscuit.

Let’s start out with a couple basics first

  • The way you get layers is by using big chunks of really cold butter. When that cold butter goes into the hot oven it produces steam, and if you have the right formations of butter you get perfect light fluffy biscuits.

  • You need to knead, but not too much. Flour has gluten in it, and gluten will make your biscuits tough. But you need to knead your dough in order to get in the layers. This means really feeling the dough, as you knead it when it starts to get tough, it’s time to stop.

  • Use good ingredients. If your going to add cheese to your biscuit, make it good aged cheese. There are only a few things in your biscuits, make sure they’re adding something.

  • Be creative! There are a million things you can do to a biscuit, don’t limit yourself and have fun with the possibilities!

Biscuits

(Adapted from the Tartine Bakery Cookbook)

4 1/2 cups All Purpose Flour

1tbsp Baking Powder

1tsp Baking Soda

11/2 tsp Salt

1/4 cup Sugar

1cup Unsalted Butter, very cold, cut into cubes

1 3/4 cup Buttermilk

Eggwash

1 Egg Yolk

1tbsp Cream, milk, or buttermilk

Option

1 1/2 cup Aged Cheddar, chopped

1 bunch Scallions

In a large bowl mix together all the dry ingredients.

Add in the butter and with your hands, or a pastry scraper, break the butter up into lima bean sized pieces, or about the size of your pinky finger nail.

Add in any flavourings, in these ones I used cheddar and scallions, but the world is your oyster on this one.

Carefully pour the buttermilk in and mix it with a spatula or spoon until it just begins to come together.

Push the dough down with the palms of your hands and then fold the dough in half. Continue doing this 4-6 times or until you just start to feel resistance.

Put the dough onto a lightly floured surface and roll out to about 3/4 inch thick.

Cut the dough out into whatever shapes you like, traditionally savoury are round and sweet ones are cut into triangles.

Put them on a baking sheet lined with a silpat or parchment paper and put them in the freezer for 15 minutes.

While the biscuits are chilling preheat your oven to 400F

Take the biscuits out of the freezer and brush the tops with your egg wash.

Put them in the oven and immediately turn the temperature down to 350F

Don’t open the door for the first 12 minutes, afterwards you can open it and turn the pan so that it cooks evenly.

After about 20 minutes the tops should be nicely browned and you should be able to see a significant rise. Allow to cool before eating.

Finnish Cardamon Bread

Sometimes in Vancouver it rains. Some might say that most of the time it rains but I’m feeling optimistic so I’m going to say sometimes.

Sometimes in Canada it gets bloody freezing. That doesn’t happen much in Vancity, but it has this deep humid chill that gets into your bones. It’s a wet cold that creeps into your shoes, and blows down your neck, and sneaks behind your ears.

Sometimes around here you wake up and think “I can’t possibly go outside, it is to cold, what can do to justify just not leaving the house.”

Sometimes, you need to stop feeling guilty and just make Finnish Cardamon Bread.

You need to have your whole house smell like rising bread, and you need to feel that comforting squish of yeasted dough between your fingers, and you need to sprinkle cardamon on it, which seems at first a wee bit crazy, but very quickly becomes the best idea you’ve had all day.

Sometimes you just need to let it rain, you need to make a strong cup of tea, and you need to eat Finnish cardamon bread.

And you need to be happy.

Finnish Cardamon Bread

Adapted from Pure Vegetarian By Lakshmi

2 cups Lukewarm water

1 1/2 tsp Dry Yeast

1 cup Sugar

1 tbsp Cardamon, ground

5-6 cups AP Flour

1 cup Butter

Brown sugar and cinnamon for sprinkling

In a small bowl mix together the water, yeast and a pinch of the sugar.

Let this get foamy on the top- that’s how you know your yeast is still alive. If after about 5 minutes you see no movement start over. Make sure the water is about the temperature of your hand- much hotter and you’ll kill it, much colder, and you’ll make it dormant.

In the bowl of a standing mixer fitted with the dough hook, OR in a food processor with the dough attachment, OR in a bowl with some serious arm muscles, put the remaining sugar, salt, cardamon and flour and mix in the yeast mixture.

Continue kneading the dough until it all comes together, and when you stretch a small piece of it, it gets thin enough to see light through.

Shape it into a ball, put back in the bowl and cover it. Wait until the dough has doubled in size, about an hour- an hour and a half.

Prepare a pan by covering it with parchment paper.

On a lightly floured surface roll out the dough into a large rectangle, about a foot and a half by 3/4 of a foot.

Sprinkle the brown sugar and cinnamon on top- use as much or as little as you want, I used about a cup and a half of sugar and a teaspoon of cinnamon.

Roll the dough a long the long end so that you have a long thin roll.

You can either cut them into rounds and place them on a pan, or you can cut slices almost all the way through, on a diagaonal. Then flip every other slice to the other side side so that going left right left right and you can see all the pretty slices.

This is easier to do on the pan then on a board and then have to move it.

Cover the dough with a tea towel and wait until it has doubled in size again, another hour or so.

Preheat the oven to 350F.

Bake your bread until it is golden brown.

Wait at least 15 minutes before getting into them! (Bread that is still hot is hard to digest!)

Apple Donuts at Edible Vancouver

Last week I threw out my back. I could barely walk, I couldn’t work, and mostly I just moped around, and the handsome man I live with was unbelievably nice to me. Made me dinner every night, helped me in and out of baths, brought me ice packs, and hot packs, and just generally got a lot of bonus boyfriend points. 

So I thought I should throw some love his way, and when I was feeling a bit better I woke him up with homemade apple donuts. 

To see the recipe, check out a (self proclaimed) charming story about my dad, and see some more pictures you can head over to Edible Vancouver. 

Grilled Corn Panzanella

Corn for me is the quintessential high summer vegetable.

As a kid my oldest and dearest friends had a cottage in Muskoka that my family used to go to many times a summer. The kind of cottage that’s hard to find these days in Muskoka, amidst all the monster homes that people summer in, this is a real cottage (or as we say on the west coast, a cabin). It was built by my friends great-great-aunt and uncle, from scratch all the way. They even built some of the furniture and sewed the quilts. It was the home to our most elaborate games and biggest adventures as kids, and I loved it.

Since moving to BC I haven’t been back, which is alarming and hard as it’s been nearly 6 years now, one of my friends was recently up there and Instagraming pictures and it broke my heart a bit. Food was never a big priority up there; besides hot dogs, one great bakery, and traditional Thanksgiving dinner, my food memories from the cottage are few and far between. But I do remember stopping along the way at farmers stands and getting corn. Corn before “peaches and cream” corn, that was savoury instead of sweet and had a much stronger flavour that the kind you can pick up at the grocery store these days, at least where I live.

But I found some at the farmers market the other day, bright yellow and deeply flavoured. I grilled it and put it in this salad and it tasted like summer, the idyllic kind you can only have when your on school break and have nothing to do the next day but swim.

Grilled Corn Panzanella

2 cobs Corn

1 cup Cherry Tomatoes, halved

2 cups Bread, cubed

1 handful Basil

1/4 cup Olive Oil.

half Lemon

Salt and Pepper

Grill the corn- for me this means on a grill pan on my stove top. You could do this on a BBQ or under a broiler. You want to get it nice and charred.

Once cooked take a serated knife and cut the kernels off the cob.

In a frying pan over medium heat, warm the olive oil. Toss in the bread cubes and toast until it starts to darken on the edges. Salt.

Add the corn and the tomatoes, toss a couple times. Add in the basil and the lemon, adjust the seasoning and serve!

Survivor Cake

I have alway thought, and some people are going to hate me for this, but that the best thing about Vancouver is getting out of it. Thats not to say that I don’t love my neighbourhood, or that I haven’t had many a great night at great restaurants and bars downtown, but it is to say that when you look around Vancouver the most amazing things aren’t the buildings or the culture, but the mountains and ocean that surround it. And the best part of the mountains and the ocean is just how easy it is to get there.

And while lots of people make the most of the mountains in the winter time, skiing and snowboarding, I hate the cold and tend to shine in the summer. Which is how I found myself on Savary Island last weekend.

I have never seen so many eagles, or starfish, and I’ve never seen such long strips of white sand beaches in Canada. It was exactly what I needed. A quick refresh before all the excitement of my new website took over. Life is feeling pretty good right now friends.

On this getaway I took a brought a cake. Something I found in a Maida Heatter book called the Survivor Cake, it’s not too sweet, very dense and moise and this weekend help up to 2 ferry rides and a water taxi each way, and paired beautifully with both coffee in the morning and a glass of red mid afternoon.

Survivor Cake

(Very loosely adapted from Maida Heatter)

1/2 cup Butter

1/3 cup Brown Sugar

1/2 cup Fancy Molasses

1/2 cup Coffee or water

2 Bananas, mashed

3 Eggs

1 cup Raisins

1/2 cup dried Cranberries

1/2 cup Walnuts

1/2 cup Shredded Coconut

1/2 cup Dark Chocolate Chips

2 cups AP Flour

1 tsp Baking Soda

1 tsp Baking Powder

1/2 tsp Salt

2 tsp Cinnamon

1/2 tsp Nutmeg

In a small pot over medium heat bring the sugar, molasses, bananas, coffee (or water) raisins, cranberries and butter to a boil. Making sure the bottom doesn’t melt keep it on the heat until the butter is completely melted.

Take it off the heat, pour it into a bowl and let it cool to room temperature.

Preheat the oven to 350F

Line a 9 inch square pan with parchment paper.

Into the bowl with the butter mixture add in the eggs mixing with a wooden spoon. Slowly sift in the dry ingredients and stir until almost combined.

Add in the coconut, chocolate and the walnuts. Mix until their are no more streaks of flour but not any more and pour into the prepared pan.

Bake until an inserted skewer comes out with only a few moist crumbs, about 45 minutes.

Allow to cool and then wrap tightly, it will keep moist for nearly a week!

Oat Soda Bread with Herbed Ricotta and Scrambled Eggs

We might be moving to the country. It’s not for sure yet, but there is a real chance we might pick ourselves out of the most expensive city to live in in North America and curl up on Vancouver Island. This appeals of me on many levels, mostly because when I think of living in the country and I don’t think of isolation or hard winters. Instead I day dream about long summer days in the garden. I fantasize about growing my own veggies and taking long walks in the fields at sunset. I get a glazed over look when I think about hanging my sheets out to dry or having a fire place or having enough room to build the bed I’ve always wanted to make. And when the logical man I would be moving with tells me I’m absolutely ridiculous and there are other things to consider when making a move like this I simply make this wonderful rustic bread, and strain some ricotta cheese and imagine that my eggs came from my yard, and I slip back into my imaginary world. Because fresh eggs and oat stuffed soda bread arecompletely at home there.

Oat Soda Bread with Herbed Ricotta and Soft Scrambled Eggs

(The bread recipe is adapted from 101cookbooks)

For the Bread

2 1/4 cups AP Flour

2 cups Rolled Oats

1 3/4 tsp Baking Soda

1 1/4 tsp Salt

1 3/4 cup Butter milk, more if needed

Herbed Ricotta

2/3 cup Ricotta cheese

1/4 cup chopped herbs, I used parsley, thyme, and rosemary, although tarragon or mint would be right at home there too)

Zest of 1 lemon

Salt and Pepper

1 tbsp Olive Oil

Soft Scrambled Eggs

4 Good Quality free range eggs, splurge and get the good ones if you can. It really does make a difference.

1 tbsp Butter

1 tbsp Heavy cream (Optional)

To start preheat the oven to 425F

In a food processor blitz 1 cup of the oats to a fine powder. If you don’t have a food processor don’t worry. Your bread will be delicious anyways, I promise.

Mix it in a bowl with everything else except 2 tbsp of the whole oats. Mix it all together until just combined.

Gently knead it a few times and then form it into a ball.

Put it on a baking tray lined with parchment and sprinkle the remaining oats on top. ( I ran out of oats so I missed this step!)

Cut a deep X on the top with a sharp knife and put it in the oven! Bake until it is cooked all the way through, about 45 minutes. It will have a thick crust and sound hollow when you knock on it.

Meanwhile mix together your herbed ricotta. Just mix it all up in a bowl and check the seasoning.

When the bread is out of the oven, let it cool for a few minutes. Slice it up and slather it with the ricotta.

Now, seconds before your ready to eat your ready to cook your eggs. Here is how I cook mine, and how I like my eggs best.

Crack your eggs into a bowl and whisk them very well. How fluffy they are is a direct correlation to much you beat them. Whisk in the cream if using.

Get a small frying pan hot.

Add in the butter and swirl it around for a second then, before it has fully melted add in the eggs. Now stir them slowly. I like my eggs with big pieces of scramble, and to do that you need to work the eggs slowly but throughally. When they are still a little shiny take them off the heat give them one last stir and quickly scrape them onto the ricotta slathered slices of bread.

And then eat it quickly and happily, and imagine your sitting on a farm in the country!

Hot Cross Buns

My mom does not like to bake. I don’t remember her ever making bread or pizza dough, there was a good bakery near us growing up and that was good enough for us. The only time she ever got the yeast out and used it, was for hot cross buns.

She would make it right before bed and put it in the fridge over night. In the morning she would wake up before all of us and pull it out, and let it proof and we would wake up to the incredible smell of freshly baked bread. It was such a treat.

My mom loyally made Marion Cunningham’s for years, and they are darn good. But I had some at a friends house a few years ago that had more of a spice to them, and when I saw this Jamie Oliver recpie I just had to try it.

These are beautiful hot cross buns, with more then a vague hint of spice they are very soft and gently sweet. I made a few changes, I use honey instead of sugar, and I added salt, because everything tastes better with a bit of salt, and they are splendid. And officially my new go to hot cross bun recipe!

Hot Cross Buns

(adapted from Jamie Oliver)

1/4 cup Honey

2 1/4 tsp Yeast

2/3 cup Water- warm but not hot, about the temperature of your body.

3 cups Flour

1 tsp Cinnamon

1/2 tso Ginger

1/2 tsp Nutmeg

1/2 tsp Cardamon

1/2 tsp Salt

1 cup Currants

Zest of 1 Orange

1/4 cup Butter- melted

1/4 cup milk- warmed slightly

1 Egg

Egg wash

1 Egg Yolk

2 tbsp Milk or Cream

Icing

1 cup Icing Sugar

1-2 tbsp Cream or Milk

Make Hot Cross Buns

Mix 1 tablespoon of the sugar with the yeast and water, and let it sit until it gets frothy on the top.

Meanwhile, in the bowl of a standing mixer fitted with dough hook mix all the other ingredients.

Make a well in the middle and Pour the yeast mixture into it.

On slow to medium speed mix the dough until it becomes soft and elastic, and if you stretch a little piece of it with your fingers you can get it so thin you can almost see through it.

Put it in a bowl and let it sit in a nice warm place for about an hour or until it has doubled in size.

Once it’s nice and big take it out of the bowl, put it on a work space- if it’s sticky you can add a bit of water but you shouldn’t need to.

Cut it in half and then roll out each half into a log and cut into 6 equal pieces.

Roll them into balls- put the palm of your hand over each piece, apply a decent amount of pressure and slowly move your hand in circles. After about 4 circles flip the piece upside down- it should be sealed on the bottom. If it isn’t, push it into a few more circles. This takes some practice, but don’t worry if they’re not perfect.

Put them into a buttered baking dish- I used an 8x8 inch square pan.

(Note: If you want to bake these the next day, cover with saran wrap and put them in the fridge. The next day take them out and let them come to room temperature and double in size- this will take about 2 hours.)

Cover with seran wrap and let sit until they’ve doubled in size again.

Preheat your oven to 350F

Mix your egg wash and gently brush it on top of the buns.

Put into the oven and cook until the buns are gently crisped on the top, have turned a nice brown colour, and are cooked inside- about 25 minutes

Once they have cooled mix your icing- Combine 1 tbsp of milk or cream with the icing sugar and mix until they’re totally combined and lump free. If it’s too thick add a little more cream, if it’s too thin add a little more icing sugar. You want it to be reasonably thick so it will stay in nice lines.

Put the icing in a piping bag and pipe on the crosses.

C’est Finis!

No Knead Bread

know, I know, I’m slow to the trend here. In my defense, when the Sullivan Street Bakery Cookbook came out a few y ears ago, I did make the famous no-knead bread a few times, and I thought it was great, honest, but somehow it got pushed to the back of my mind and I forgot about it. I tried a few other kinds of bread, the kinds that are laborious and time consuming and rarely work with my crappy oven anyways and then out of the blue I remembered.

I am going to make this bread ALL THE TIME.

Seriously it’s delicious. It’s also so simple, so easy, so entirely something I can throw in a bowl before I go to work and finish when I get home so I can have freshly baked bread with my supper. And there are very few breads I have time to make on a work day, so that’s no small miracle in my books.


No Knead Bread

(Adapted from the Sulivan Street Bakery)

3 cups AP Flour

1 1/2 cups Water

1/4 tsp Yeast

1 1/4 tsp Salt

2 tbsp Rye Flour, optional

Mix all the dry ingredients in a bowl

Add the water and mix for about a minute or until it’s lump free and starting to feel very soft.

Put the dough into another bowl that has been brushed with olive oil. Cover it with cling wrap and let it sit for 12 hours. I’d be lying if I said I did this. It was 10 max and my bread was still wonderful.

Once all this time has elapsed put the dough on a well floured surface, fold it  few times and let it sit for 15 minutes. Now form it into a ball (don’t be too fussy with it) and let it double in size. This took over 2 hours for me but my apartment it a little chilly.

Preheat your oven to 450F and put a 4 quart pot into the oven to get hot.

Once the oven is totally preheated and the pot is scalding take your dough, flip it upside down into the pot, put a lid on it and slide it into the oven for 30 minutes. After your timer goes off take the lid off and cook it for another 15-30 minutes until it gets a deep aubourn brown. Mine got a little further then brown and it was still delicious.

Take it out of the pot (careful now, don’t burn yourself!) and let it sit for at leaste 20 minutes before you carve into it. The bread will be better and you will be able to digest it better once it sits. Cest Finis!

Pumpkin Muffins

A couple nights ago I put on black tights under my dress and put on a scarf and a sweater before leaving the house. Around midnight the rain started. I guess that means it’s fall.

I’m not quite ready for it yet, to give up the beach and the warmth, but none the less I find myself looking longingly at apples and argyle sweaters and knitted blankets. I want to go apple picking and drink mulled wine and wear thick knitted socks and brown leather boots. But instead, as I was by myself for the day without a car, or the budget to go boot shopping, I made pumpkin muffins.

Soft, warm, buttery pumpkin muffins that long for hot chocolate and a good book. And with the rain pouring, sitting in my little apartment, I drank hot chocolate and finished my book, and welcomed in Fall.

Pumpkin Muffins,

Loosely adapted from Smitten Kitchen

1 1/2 cups all-purpose flour, or whole wheat pastry flour (which is what I used)
1 teaspoon baking powder
1 cup canned solid-pack pumpkin
1/2 cup Butter

1 cup Brown Sugar
2 large eggs
1/2 teaspoon Nutmeg
1/2 teaspoon baking soda
1/2 teaspoon salt
1 teaspoon cinnamon

Coarse sugar for sprinkling

Preheat oven to 350F

Line a muffin tin with liners of butter and flour them.

In a small frying pan over medium low heat brown the butter- melt it and then continue to cook it until the milk solids turn brown and it develops a nice hazelnut smell. Be careful not to burn it.

Meanwhile measure all the dry ingredients into a large bowl and make a well in the middle.

Pour the eggs and pumpkin and butter into it and mix it quickly to make sure the butter doesn’t cook the eggs.

Mix until just combined- do not over work it.

Spoon the batter into the tins, filling them up 3/4 of the way up.

Sprinkle sugar on top, bake until an inserted skewer comes out clean, about 15-20 minutes.

Aunt Loretta's Tomato Panzanella Salad


My Aunt Loretta is an amazing cook. Truly terrific. The sort of woman who teaches healthy cooking classes to cancer patients, raised an incredible cook for a son, and makes the marshmallows from scratch that she uses on top of her sweet potato cassorole for Thanksgiving. She does this all with a huge smile on her face, immaculate nails and hair, perfect clothes and just the right amount of southern sass. She is a force to be reckoned with, let me tell you.

She emailed me a while back about a tomato bread salad that she did up with cod, and it sounded amazing because, well, I’ve never had anything shes made that wasn’t spot on.

So when my favourite neighbours dropped off some tomatoes from their community garden last week I could think of nothing else beside big chunks of bread fried in olive oil, big juicy pieces of local tomatoes and big leaves of basil all bound with lemon juice and capers. I bought some local mackerel because I love mackerel and it’s local here and cod isn’t but use whatever you can get!

So here it is, Aunt Loretta’s Panzanella.
Serves 2

1/2 a thin Baguette of 1/3 of a big one

2 Roma tomatoes, 1 beefsteak, or a big handful of cherry tomatoes cut into wedges.

1 tbsp Capers, I like the teeny tiny ones but use whatever you like best

Half a bunch of Basil

Juice of Half a Lemon

A handful of Arugula

2 Herring, Mackerel, or good fresh fish

1/4 cup Flour

Zest of half a lemon

Salt and Pepper

Olive Oil
Turn your oven onto warm or 180F

Mix together the flour, the zest and a tespoon of salt. Dredge the fish in it.

In a small frying pan over medium high heat and add in a tablespoon of olive oil and fry the fish. Put the skin side down first and cook it almost all the way through then flip them and finish cooking the flesh side. Keep them warm in the oven.


Cut the baguette into 1 inch cubes

Warm a large skillet over medium heat. Add in 1/4 cup olive oil and fry up the bread flipping it reguarly until the bread is a glorious golden brown.

Meanwhile Mix the lemon juic, 1 tbsp olive oil, capers in the bottom of a large bowl.

Add in the tomatoes, arugala, and the basil and toss to combine.

Add in the bread and toss again, serve immediately with the fish on the side.

Lemon Braided Bread

It’s probably fair to say that I’m a little obsessive with baking. There are so many baked goods that I make that don’t get up on this blog because they weren’t quite fluffy enough, or moist enough or pretty enough. I’m constantly tinkering with recipes here, a little more of this, a little more of that. Or sometimes I just have to spend a little more time on the presentation, I don’t like putting things up here that don’t look great.

Which is why it’s so surprising to make a recipe and go, goodness, I don’t need to change a thing. It is rare and unusual and wonderful, and it happened this week.

The amazing Smitten Kitchen had a recipe for lemon braided bread and hot damn was it good. The bread is very moist and very butter, and the cheesy layer is the perfect amount of sweetness without really being all that sweet and the lemon sets the whole thing over the edge. And it’s shockingly easy for something that turns out as beautiful as this bread.

A girlfriend of mine was coming over for lunch and, despite us both being pretty small girls, we ate two thirds of it in one sitting. Oh just one more slice, maybe a little bit thicker, oh come on thicker still, yes there we go

.

Sponge

6 tablespoons (3 ounces) warm water
1 teaspoon sugar
1 1/2 teaspoons instant yeast

1/4 cup (1 ounce) unbleached all-purpose flour

Dough

Sponge (above)
6 tablespoons (3 ounces) sour cream or yogurt
1/4 cup (4 tablespoons or 2 ounces) unsalted butter, softened
2 large eggs, 1 beaten for dough, 1 beaten with 1 teaspoon water for brushing bread
1/4 cup (1 3/4 ounces) sugar
1 teaspoon salt
1 teaspoon vanilla extract
2 1/2 cups (10 5/8 ounces) unbleached all-purpose flour

Egg Wash

1egg yolk

1 tbsp Water

Lemon Cream Cheese Filling

1/3 cup (2 1/2 ounces) cream cheese, softened
2 tablespoons (5/8 ounces) sugar
2 tablespoons (1 ounce) sour cream
1 teaspoon fresh lemon juice
2 tablespoons (1/2 ounce) unbleached all-purpose flour
1/4 cup (2 ounces) Lemon Curd

Mix all the sponge ingredients together and let sit until bubbly, about 15 minutes

In a standing mixer fitted with the dough hook attachment, or with some strong arms add in the dough ingredients except the salt and the butter and need until it becomes a shaggy mass. (Yes that actually is the technical term) and then add the salt.

Work it until a nice dough has formed and it pulls away from the side of the bowl.

With the motor still running add in the butter piece by piece until it’s all combined and the dough is smooth and elastic.

Cover it with a tea towel and let it rise in a warm place for about an hour or maybe a little longer until it’s doubled in size.

On a lightly floured surface roll out the dough into a long rectangle, roughly the size of the baking sheet your going to bake it on. Lightly press in two lines that divide it in thirds lengthwise.

Carefully transfer it to your lined baking sheet.

Mix together all the ingredients for your filling except the lemon curd.

Spread the sour cream layer onto the middle section of the dough, then spoon on the lemon curd.

Cut dough on either side of the lemon layer into strips, trying to get as many on both sides.

And you can either fold them over, or weave them through.

And let it proof, again, in a warm place covered with a tea towel, until it has doubled again in size.

Preheat your oven to 350F

Mix an egg yolk with a couple tablespoons of water and brush them onto of your bread.

Sprinkle with your coarse sugar and get it in the oven!

You want to, because when it comes out, it comes out like this:

And it smells like heaven and no matter what else you might serve, if you make this for brunch no one will eat anything else.

Roman Crostini-nini

My “Aunt” Silvia is an endlessly chic Roman woman who fell in love with a brilliant Canadian man, my “Uncle” Frank. The best job for him was at McMaster University in Hamilton Ontario and thats where they lived throughout my childhood.  Aunt Silvia was not like anyone else I knew.

She has an immaculate salt and pepper bob, wears nothing but black, and is looks endlessly chic smoking like a chimney, the way only French and Italian woman can.She had a beautiful husky voice, and a fiery temper.

When my Dad was doing his PhD Uncle Frank was his Professor and my Mom ended up becoming very good friends with his wife. I picture them in the late 70’s, both beautifully dressed, making wonderful meals and talking about literature.

We didn’t visit all that often, they lived about an hour or so away from us, and while I remember eating well when we went to visit, mostly I remember so many of the staple things my Mom used to make that were recipes from Aunt Silvia. Those really simple Italian meals that just take four or five ingredients but turn into something magical.

The one I remember most is Roman Crostini. It’s one of my all times favourite things, in fact, if you look in my grade 2 yearbook you’ll see that “crostini-nini” is listed as my favorite food. The best par of crostini (nini) is that it literally takes 5 minutes. It’s a perfect h’or deurve and it’s always a crowd pleaser. It’s super cheap and, once again, it literally takes 5 minutes.

It doesn’t take much, just good bread, good mozzarella, and fresh parsley. The secret ingredient is anchovies, which are so prevelent in Roman food and so absent in ours. I have served this to people who swear they hate anchovies, (after making sure there are no allergies) and they’ve loved it. The anchovies just disintegrate into the olive oil leaving this rich deep flavour without any fishiness. And then the cheese oozes in and the bread crusts up and the parsley just makes it all snap together. It’s amazing, and it takes 5 minutes to make.

Roman Crostini

1 good quality Baguette, it can be stale!

3 Anchovy Fillets, get the good ones, packed in olive oil.

1/4 cup Olive Oil

3-5 Balls of Boconccini, depending on the size

A Small Handful of Flat Leaf Italian Parsley

Preheat the oven to 400F

Line a baking tray with parchment paper.

Cut the baguette into slices, leaving the bread just barely attached at the base so that the loaf still looks like a loaf afterwards. If you cut through the bottom a couple times, don’t worry about it, just keep going.

Slice the boconccini into slices and then stick them in between the bread slices like so:

Cut up the anchovies in the smallest little strips and then cook them in butter or olive oil on medium low heat, squishing them with the back of a spoon periodically to help them fall apart.

Then take it off the heat, chop up that parsley and add that in too.

Then pour it on top of the bread. You can let it sit like this for a while too, if your making dinner, and then pop it in the oven just as friends are arriving. Or you can make it right away and eat it right away.

Then pop it in the oven until the cheese is oozing, the bread has browned, and your house smells amazing.

Throw it on a plate and eat promptly.

Pizza

Restaurants are funny places. You work 12 hour days, you work every night and every weekend and are made to feel terribly guilty if you ever take a holiday. You make absolutly no money and but you become intoxicated by this world. You work for complete sociopaths and thats a good thing. It gives you bragging rights.

So when I was 19 and had big lofty ideas of being a famous pastry chef I worked at a very fine dining Italian restaurant in Vancouver, that shall not be named. It was the sort of place where you were encouraged to do nothing but show up on time and follow orders. The sort of place where he had 10 different ways to do everything, so he could come up to you at any point and tell you you were doing it wrong. The sort of place where recipes were not given to cooks, and cooks were not encouraged to ask questions. It was without question the worst job I have ever had.

I have nearly no recipes from that time but strangely I have one from something he made only once; pizza. It’s not a complicated recipe, but the dough is wonderful, its soft and pliable and it rolls easily and it crisps up beautifully in the oven. He also put a lot of ingriedents on the pizza after it had cooked, like arugala, or proscuitto, or salami. I had never seen that before.

It makes a wonderful very fresh tasting pizza. It’s not greasy, and it’s not heavy, but its very satisfying all the same.

Pizza:

Pizza Dough, recipe folows

Tomato Sauce, recipe follows,

200g Asiago or Parmesano

4 Large bocconcini balls

a big handful of baby arugula and basil

100g super thinly sliced prosciutto

Tomato Sauce

1 large onion, diced

2 cloves of garlic, minced

1 can of Tomatoes, try to find a brand without added citric acid.

Salt

A good glug of olive oil

In a medium sized pot on medium heat, add the olive oil and the onion, cook for a few minutes then add the garlic. Stir until the onions are translucent and the garlic is fragrant.

Add in the tomatoes and cook until it gets thick and saucey, about 15 minutes. Season to taste.

Pizza Dough- Makes 2 Pizzas

51/2 cup Bread Flour

2 tbsp Extra Virgin Olive Oil

2 1/2 tsp Salt

2 tbsp Sugar

1 1/2 tsp Dry Yeast

1 1/3 cup Warm Water

Mix the water, sugar and yeast together until the yeast gets foamy on top, about 10 minutes.

 In the bowl of a standing mixer fitted with the dough hook mix all the ingredients. You can also do this by hand if you have more patience and arm strength then me.

Mix it until it becomes a smooth elastic dough.

Place dough in a bowl, covered, in a warm place until it’s doubled in size, about an hour and a half.

Preheat oven to 500F or the hottest it will go.

Cut the dough in half and roll out to the size of your pans, the bigger the better.

Top with the sauce, and the cheese, breaking apart the boconccini and grating the asiago. 

bake for about 10 minutes until the cheese is brown and the crust is cooked.

Tear the basil and prosciutto on top and sprinkle the arugula. Eat and be happy!

Easter Morning

Heres the thing, aside from the year my mom made a tomato based lamb stew and my sister had a fit thinking it was chunks of lamb in blood, I don’t remember what we ate for Easter dinner. I’m sure it was great, my mom is an amazing cook, but all I remember about Easter is painted eggs and hot cross buns.

Hot cross buns made quite an impression.

My mom never made bread or cinnamon buns or anything like that, the sweet yeasty smell of fresh bread in the morning was a pretty foreign thing, and it was wonderful. Those little buns, dotted with candied fruit and currants still warm. My mom would wake up early and let them proof so they were just cooled enough to pipe the X on them in the before we ate them.

And now, because I live 3500km away from her,  I bake them myself at Easter and think of her.

¾ cup warm milk

1 package of dried yeast, or 7 grams

1 tbsp Sugar

3 cups All Purpose Flour plus more for sprinkling

¼ cup Brown Sugar

1 ½ tsp Cinnamon

¾ cup Butter, softened.

Zest of half an Orange

½ cup dried fruit, I used currants and apricots, but if you could find dried cherries or blueberries you’d really be in businsess.

Mix together the yeast, milk, and white sugar and let stand for about 10 minutes or until foamy.

In the bowl of your standing mixer fitted with your dough hook put your flour, cinnamon, brown sugar, eggs and salt.

Add in your milk mixture and beat until it comes together. (sorry I forgot to take a picture of this stage!)

Then add in the butter in bit by bit, it might look like a big hot mess but don’t worry it will come together

See? I told you it would be fine.

Now add in your dried fruits, you may have to do this by hand.

The let it sit, covered, somewhere wam for about an hour to an hour and a half and let it rise.

Now  put the dough on a floured board and cut it in half. Cut it in half again, and then cut each quarter into thirds.

Take each piece, and off the flour, squish it down with the pal of your hand, while keeping your fingers wrapped around it, push it in circles until there is no seem on the bottom and it’s a nice tight round ball.

When they’re all rolled put them in a greased pan and let them proof. I like mine to stick together like sticky buns but if you want yours individual you can just space them out more. Also if you want to bake these off the next morning just stick them in the fridge wrapped, and pull them out about 2 hours before you want to bake them.

Preheat the oven to 375F

Once your buns have doubled in size stick them in the hot oven and cook for about 15 minutes, or until they are golden brown on top. I cooked mine a little to much, so make your slightly lighter then mine.

Pop them out of the pan and let them cool on a rack.

Ice them with an x once they’ve cooled and your done!

Bread and Butter

Sometimes all you need is this life is some fresh bread. Good homemade hot out of the oven fresh bread. You need your house to smell like browning flour and you need to watch it grow in the oven into something magical. You need to slather it with butter and jam and you need to not feel guilty about that because you made the bread and your eating the fruits of your labor. You need homemade bread.

But sometimes you don’t have 2 days to make good bread, or 2 weeks to make sourdough. Sometimes you need instant gratification. Or at least, 2 hour gratification. Sometimes you need Irish Soda Bread.

Irish soda bread is the denser, more rustic but very charming cousin to French or Italian bread, and maybe a sibling to cornbread.It is usually made with brown flour, although I did some research and found that white bread would be special occasion bread. It’s leavened with baking soda (hence the name) and it’s delicious. Seriously delicious. It’s also seriously easy to make. You simply mix the wet, mix the dry and mix it together. Like making cornbread. But this is a recipe where the whole is greater then the sum of it’s parts because out of this simple mix comes nuttier, moist, completely wonderful brown bread that begs for butter.

I think this is the sort of bread not to over complicate. There’s a great article in Epicurious about the origins of soda bread and it says that there should only be buttermilk, soda, flour and salt in it, but this recipe has some brown sugar and some oats as well, mostly because I like oats and brown sugar. So there.

@font-face { font-family: “MS 明朝”; }@font-face { font-family: “MS 明朝”; }p.MsoNormal, li.MsoNormal, div.MsoNormal { margin: 0cm 0cm 0.0001pt; font-size: 12pt; font-family: “Times New Roman”; }.MsoChpDefault { font-size: 10pt; }div.WordSection1 { page: WordSection1; }1 3/4 cups all purpose flour

1 3/4 cups whole wheat flour

2 tablespoons old-fashioned oats plus more for coating

2 tablespoons (packed) dark brown sugar

1 teaspoon baking soda

1/2 teaspoon salt

2 cups (about) buttermilk

Preheat oven to 425F

Combine the dry ingredients

Combine the wet ingredients

Mix together until just combined

Roll into a ball and place on a parchment lined baking tray

Wet your hands with water and pat the dough gently then sprinkle oats ontop

Bake for about 40 minutes or until it’s nicely browned and an inserted skewer comes out with only a couple moist crumbs.

Let it cool off the pans for about 10 minutes before slicing and eating!