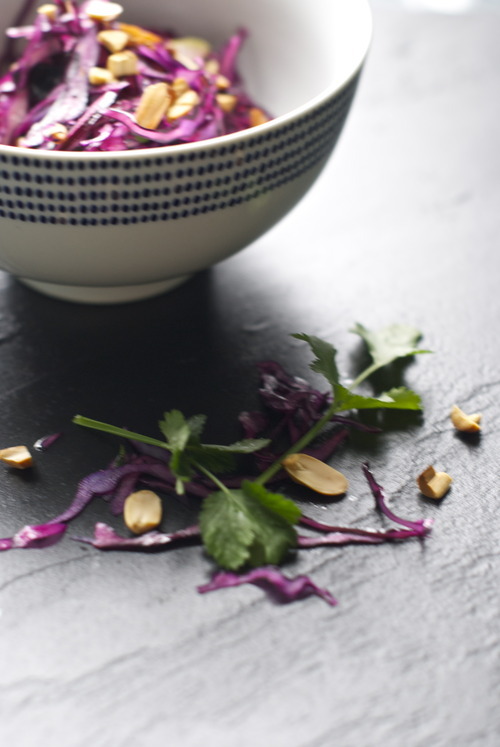
Sunday Salads- Thai Style Coleslaw with Lime and Peanuts

Here’s the thing of it: I work almost all the time, and always at weird hours. It’s just the way my life is these days. Somedays I start at 5am and some days I finish work at midnight, which has lead me to some very strange eating patterns. Most of them involve a whole lot more sugar than I will ever admit to on this very public forum because, if we’re being real here, I’m totally unwilling to admit it to myself.

But I struggle, as I know a lot of people do, with working long hours and trying to eat vegetables at the same time. Some people, like my sister, buy their veggies pre-cut because it saves time. But you get totally subpar vegetables if they were cut 5 days ago, so I’ve resisted this, and instead, I’m getting into salads and things that aren’t full of delicate greens, but instead are full of hearty veg that stay crisp even when you dress them. The sort of salads that you can make in a big bowl and continue eating for a couple days. The kind of salad that eat with dinner on Sunday night and eat left overs for Tuesday lunch in between your baking shift and your serving shift when your too exhausted to much of anything but eat and sleep.

And if you’re that tired, as I seem to be an awful lot lately, I figure it’s better to eat coleslaw than it is to eat left over meringues. Especially if said coleslaw isn’t the Southern mayo kind, but the Asian sort, dressed in nothing but lime, soy, and peanut oil.
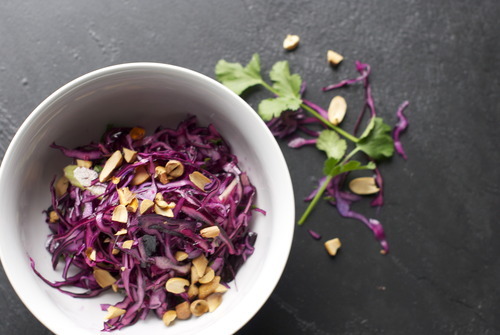
Thai-Style Coleslaw

1/2 head Purple Cabbage

1 bunch Green Onions

1/4 cup Cilantro

1/2 cup Roasted Peanuts, peeled

Juice of 1 lime

2 tbsp Peanut Oil, or other neutral oil, like Canola

1 tbsp Soy

Fish Sauce, optional, to taste.

Mix together the lime, soy, and fish sauce if using in a large bowl. Add in the oil and taste to check the seasoning. Adjust if you need it (I used a bit more soy, but I am a salt fiend…)

Thinly slice the cabbage by hand, using a mandolin, or the slicing attachment of a food processor.

Add it into the bowl with the dressing.

Thinly slice the green onions on a bias and mix them in too.

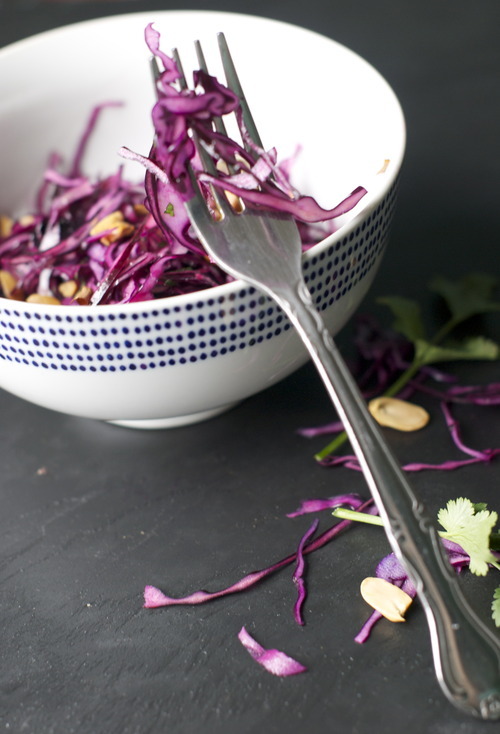
Chop the cilantro and the peanuts and put them on the top.

C’est finis, so simple, and so delicious, and it will keep getting better for about 3-4 days in the fridge.  

Wunderbar Tart

While I am not a big fan of my birthdays, nearly ever, I get borderline obsessed with other peoples. I will always go overboard.

I love giving presents, I love cards (seriously, I can spend days this shop) and, not surprising to any of you I’d guess, I love making cakes. A lot.

So you can imagine that there is a serious amount of planning in making Jordan’s birthday cake.

I deliberate over flavours-it has to be chocolate, but chocolate hazelnut? Chocolate caramel? Chocolate pumpkin?

And textures, are we wanting dense and rich? Or light and whipped? Maybe with a crunchy layer somewhere, perhaps a praline?

Basically, I go on like this for a long time. I write notes, then I doodle pictures of what I want it to look like. I check online for inspiration, then later then I should, I make something and barely get it done in time, if I’m being honest here.

This year it wasn’t a cake per say, it was a mousse tart, a chocolate base, a thick layer of creamy caramel, a whipped mousse of peanut butter just firm enough to hold it’s shape when sliced, and topped with a layer of chocolate ganache gently sprinkled with maldon salt.

It’s an extremely grown up version of a Wunderbar, which just so happens to be Jordans favourite.

It’s also happens to be extremely good.

Wunderbar Tart/Peanut butter, Caramel Chocolate Tart

Adapted from this recipe

Crust

16 oz Chocolate wafers, or Oreo Crumbs

8tbsp Butter, melted

Caramel

1 cup Sugar

3/4 cup Whipping Cream

4 tbsp Butter

1 tbsp Vanilla Extract

Peanut Butter Mousse

1 cup Peanut Butter

3/4 cup Whipping Cream

4 tbsp Sugar

1 tbsp Vanilla Extract

Chocolate Mousse

8oz Chocolate

1/2 cup Cream

1tsp Salt-because I’m the sort of person who keeps vanilla salt around I used that and it was wonderful, but regular fleur de sel or maldon salt it lovely. Just make sure it’s a flaked salt not a chunked salt.

Caramel:

*Make sure you have everything you need for this measure out as caramel can go from light brown to black within seconds. Also, use an extremely clean pot.

Put sugar in pot with just enough cold water to give it the texture of wet sand.

On medium heat cook this mixture stirring occasionally until sugar dissolves.

Take out spoon and bring heat up to high. Shake pot occasionally and watch it carefully.

When it turns amber color immediately pour in the cream. It will bubble up and splatter so be careful!

Add in the butter and vanilla. Allow to cool completely.

Make Crust:

Preheat oven to 350F

Mix butter and crumbs together

Press into a 10inch spring form pan, or a pan with a removable bottom, or 10 small tart shells

Bake until the crust just begins to firm, about 10 minutes. Cool completely.

Make Mousse:

Bring a couple cups of water to a boil.

Slowly add the water a few tablespoons at a time to the peanut butter stirring well until it is smooth, easy to stir and forms slowly dissolving ribbons when you pick up a spoon and let the mixture fall back in. It took more water then I thought it would, don’t be alarmed!

Let cool.

Meanwhile whip the cream and sugar to stiff peaks.

Once the peanut mixture is cooled fold in the whip cream and the vanilla.

Make Ganache:

Bring cream to a boil

Pour over the chocolate and stir until it is smooth.

Assemble:

Pour the caramel into the cooled tart shell. Let it set in the fridge for at least 10 minutes.

Pour the mousse over the caramel and smooth with an offset spatula.

Pour the chocolate over the mousse and smooth.

Sprinkle with the salt.