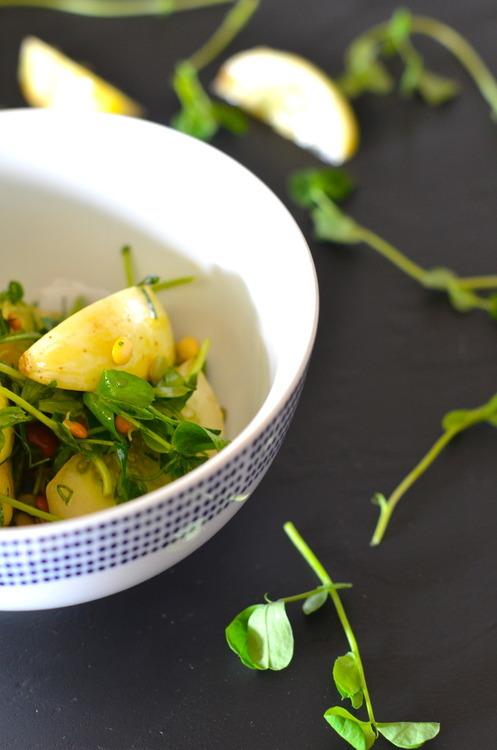
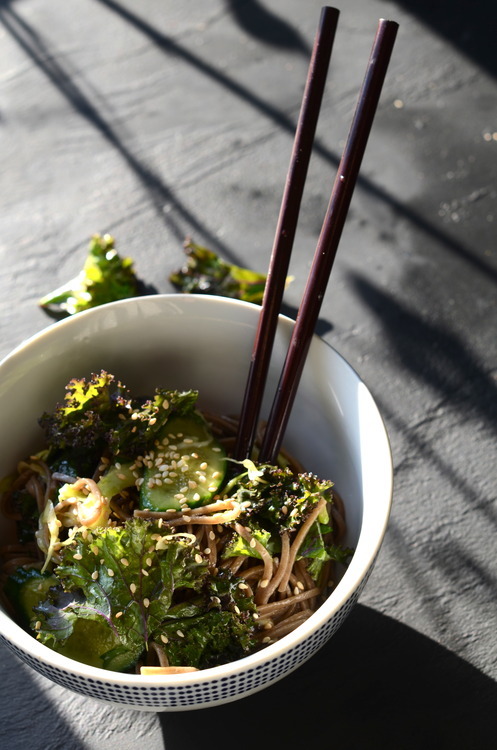
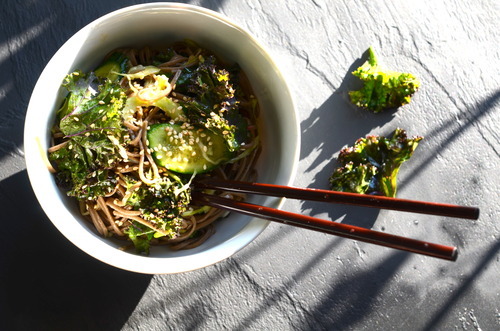
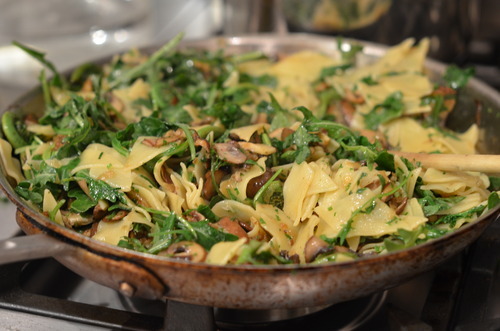
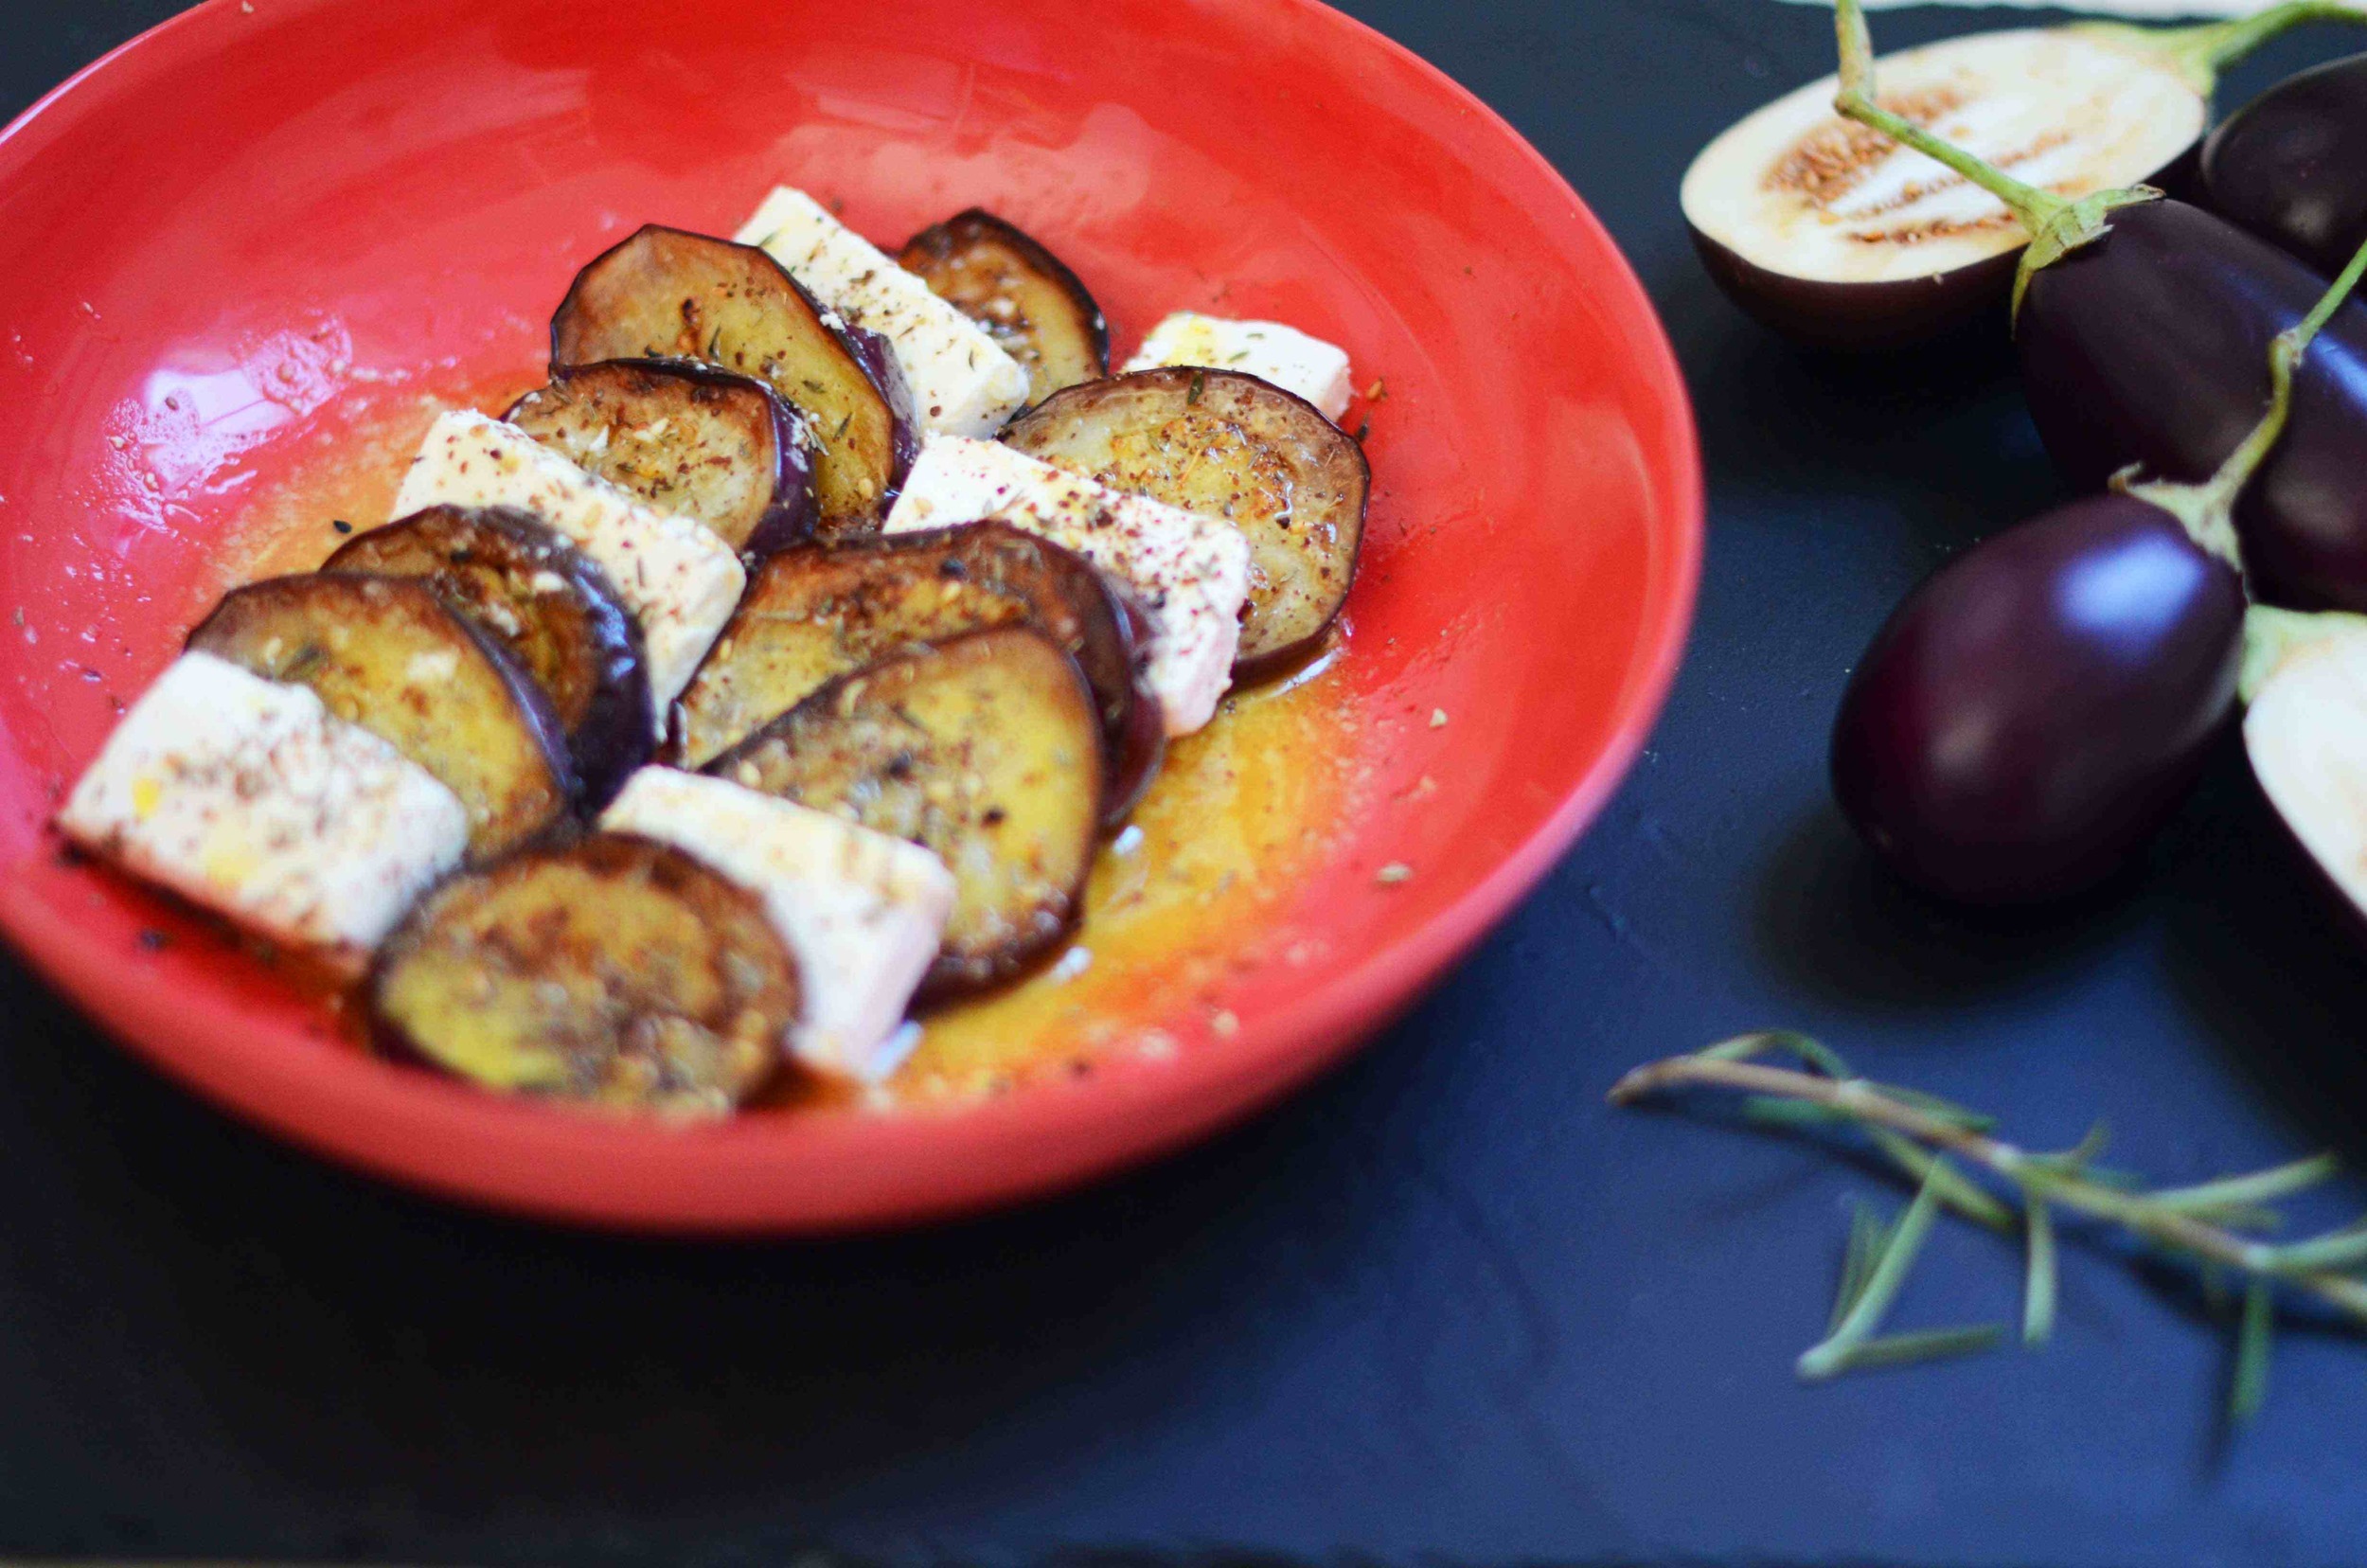
Soba Noodle Salad with Citrus and Ginger

soba-1.jpg

Well friends, I’ve finally done it. Done that simple thing that nearly all the adults in the world can do, that, well,  most teenagers can do. That thing that I have been avoiding like the plague for over a decade. I learnt to drive.

I spent the money, took the classes, practiced in our manual car, nearly broke up my pending nuptuals, but in some small miracle, I learnt how to drive.  I’m feeling pretty pleased with myself.

soba-7

Jordan however decided to celebrating by getting  a vicious flu. The kind that makes his workaholic self completely stop. He has probably slept for 20 of the last 24 hours.   I on the other hand, am currently spending most of my days mind-over-matter-ing it, in an attempt not to get what he’s getting. And to aid in my attempt to refuse to allow bacteria into my body, I’m also eating kind of insane amounts of vitamin C.

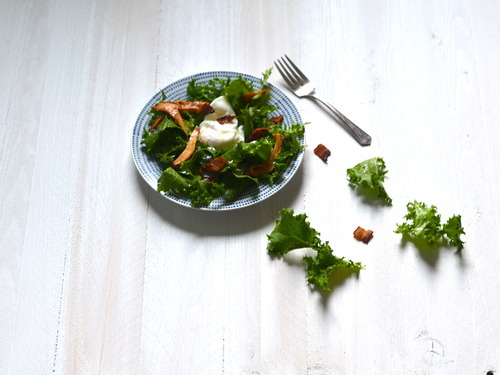
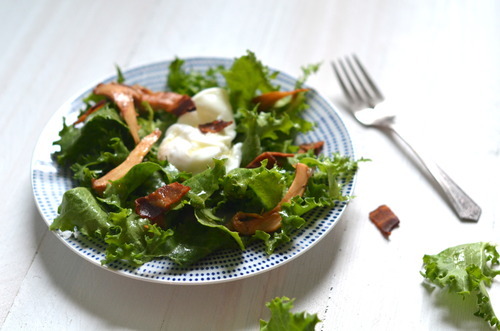
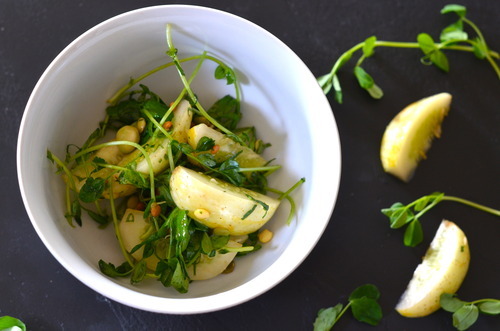
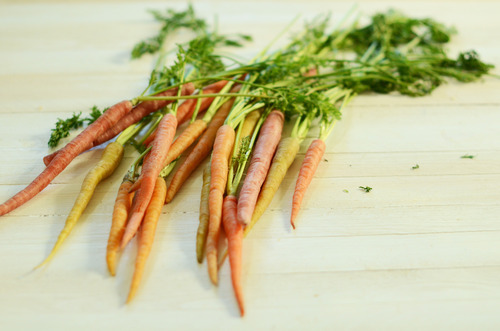
Not just vitamin C though, the internet has led me to believe that I need not only citrus in IV form, but also garlic, ginger, and spicy food. So here is the garlick-iest, ginger-iest, spiciest, and citrus-y salad you’ll ever need. It’s all the immune boosters in one so that we all don’t end up curled up in a ball watching terrible TV.  I for one like to be in fine form when I watch bad TV.

Soba-5

Citrus and Ginger Soba Noodle Salad

2 bundles of Soba Noodles

Juice of 1 Lime

2 Oranges, segmented.

4 Radishes, thinly sliced.

2 stalks Celery, sliced on a bias.

1 clove of Garlic, minced

1.5 inches of Ginger, grated finely

2 tbsp Siracha, or other chili sauce

¼ cup Sesame Oil

3 tbsp Soy Sauce

2 tbsp Sesame Seeds (black or white)

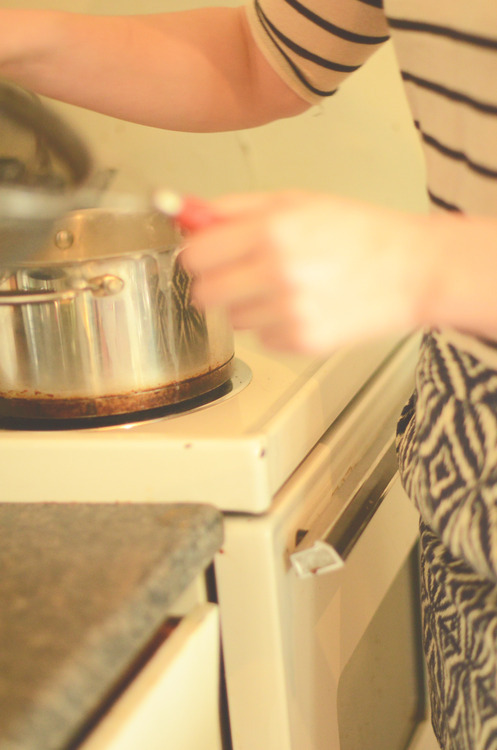
Bring a large pot of water to a boil. Season liberally with salt.

Cook soba noodles according to package instructions, or until al dente.

Strain, and immediately pout cold water over top and woosh it around with your hands or a spoon to cool it all down. Set aside.

Meanwhile, take your minced garlic put it near the edge of your cutting board. Sprinkle a small mount of salt on top. With the side of your knife, crush the garlic until it is pureed. Put it in a large bowl.

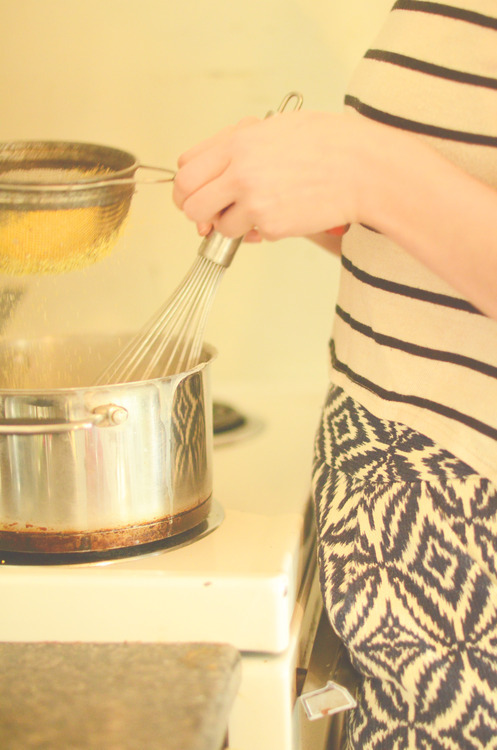
Add in the ginger, lime juice, soy sauce, and chili sauce.

Whisk to combine, then slowly add in the sesame oil. Taste, and add more citrus, oil, or soy as needed.

Add in all the remaining ingredients. Toss to fully combine and serve immediately, or cover and keep in the fridge for up to 2 days.

xo

soba-and-kitten

Seared Eggplant with Macedonian Feta and Za'atar

eggplant-8-LQ.jpg

Eggplants are a wildly underestimated vegetable.  

Here’s the thing of it: I love eggplants.

Here’s the other thing of it: I’m one of the few.

Here’s why: There are a lot of bad eggplants out there.

There are a lot of hothouse eggplants, a lot of flavourless eggplants, a lot of eggplants that pretty much just taste like soggy bitterness.

Here’s the other reason why: There are a lot of people who don’t know how to cook eggplants properly. They cook them until they get stoggy, or they don’t cook them enough. Or they cook them with water so they lose any hope of a nice texture.

And all of this may have led you to thinking that you don’t like eggplants and that it’s hard to cook, and the thing of it is, it’s super easy, the trick is lots of olive oil, high heat, and a healthy pinch of salt.

I’ve known this all for a while, but it took Jordan eating eggplant at our favourite Palestinian restaurant to convert him. There it comes grilled with halloumi, and the most puckeringly perfect lemon and za’atar dressing that you soak up with loads of extra pita. (Za’atar is a middle eastern spice mix with dried savary, thyme, sumac and sesame seeds.) It’s perfect in every way.

This is my version of that dish. I sear the eggplant instead of grilling it, because I don’t have a grill. Knock you’re socks off and use the BBQ if you have one. I also use Macedonian feta instead of halloumi, because I am royally obsessed with the Macedonian feta at my local cheese shop, and I want to put it on everything. But if you can’t find it (it’s a thousand times creamier than regular feta) feel free to use the halloumi.eggplant-6 LQeggplant-4 LQ

Eggplant with Macadonian Feta and Za’Atar

6 Small Eggplants, ot 1 Large, sliced into inch thick slices.

250g Macedonian Feta, or Halloumi

1 Lemon

¾ cup Olive Oil

¼ cup Canola or Avacado Oil

1tbsp Za’atar

1 small clove of Garlic, minced or pureed.

Salt and Pepper

Heat a cast iron pan over medium heat .

Mix together the canola oil with ¼ cup of the olive oil.

Pour a good splash of that into the pan, and put in a layer of the eggplant, salt it generously.

Let it cook until the eggplant browns then flip it and let it brown on the other side salting it too, adding more of the oil mixture if neccessary. The eggplant should now be very soft.

Remove it, add more oil into the pan and cook the remaining eggplant.

Slice the feta and layer it with the eggplant on a dish.

Make the dressing: mix the juice of half the lemon, garlic, and a good pinch of salt.  Slowly add in the remaining olive oil. Check for seasoning, and add a bit more olive oil, salt or lemon as needed.

Pour that generously over the eggplant, sprinkle the za’atar over top and serve!

Sunday Salads- Roasted Butternut Squash with Pomegranate and Za'atar

tumblr_inline_n3mtj2AZGf1qfrmur.jpg

The Italian in me just wants to make the simplest food. It doesn’t want to be fussy. It doesn’t want spend hours cutting things just so or mixing 25 ingredients into a salad dressing. My Italian side also pretty much just wants to make gnocchi and tomato sauce all day, which, though delicious, would not make for the most interesting blog. Fortunately, I have fallen deeply in love with Middle Eastern food. The rich flavors, the complex spice mixes, the vegetable forward way of eating.  The more I cook like this, the more I realize that the Italian way of eating simple food, not doing too much to it, that totally unfussy way of cooking seems to fit right in.

It’s actually been kind of exciting to me, to try new spices and spice blends and treat them to the ways I’ve always cooked food. This salad is a great example. I love squash, and roasting it up with red onions and tossing it with some greens and nuts in a simple vinaigrette is something that I would always do. But in this Middle Eastern update, I toss the onions in pomegranate molasses before roasting them, and add fresh pomegranate on top. I toss everything together with some salt and lemon and za’atar, an amazing spice blend of oregano, cumin and sesame seeds, that you can buy already blended and ready to go. Then I put a bowl of garlicky yoghurt on the side to dip the salad in.

The result is something so much more complex and rich than I would have ever made before, but is still incredibly simple and easy to do.

Small miracles friends. They do happen.

Squash and Pomegranate Salad with Za’atar

  • 2 small Kombucha or Butternut Squash
  • ¼ Pomegranate
  • 1 Red Onion
  • 2 tbsp Pomegranate Molasses*
  • ½ Lemon
  • 1 tbsp Za’atar
  • Olive Oil
  • Salt and Pepper

For Garlicky Yoghurt:

  • ¾ cup Greek Yoghurt
  • 2 large clove Garlic
  • 1 tsp Salt
  • 1 tsp Lemon Juice

Preheat your oven to 425F

Peel the squash- butternut squash can be peeled with a peeler, the kombucha squash will need to be done with a knife and some patience. Be careful!

Cut the squash in half and scoop out the seeds. Wash the seeds and toss them with some salt and a good glug of olive oil. Put them on a tray and bake for about 20 mintues, stirring every 5 mintues.

Cut the squash into ½ inch wedges and lay them out on a baking tray. Toss with a good glug of olive oil and a healthy pinch of salt. Bake for about 45 minutes, or until the squash is fully cooked.

Peel the red onion and cut it in half. Cut into thin strips and toss with salt and the pomegranate molasses. Put them on a baking tray and roast them for about 20 minutes, or until they are soft and a little bit caramelized.

Phew! No more roasting!

Meanwhile make the garlicky yoghurt:

Smash up the garlic as small as you possible can. Mix it with the yoghurt, salt and lemon juice.

When the squash are still warm sqeeze the lemon juice on top and toss to mix. Check your seasoning and add some salt if you need.

Put the squash on a platter. Top with the onions and roasted squash seeds, and break apart the pomegranate and sprinkle the seeds on top.

image

Poached Eggs with Seared Trout and Minty Pesto

tumblr_inline_n2szi49T9a1qfrmur.jpg

My Mom grew up with what she calls “Depression Era” food. The sort of get-as-much-fat-in-you-while-you-can-because-you-don’t-know-when-food-will-be-around-next. The sort of food inspired by the hardships her parents faced when they were young. She had never had a green bean not cooked in cream sauce until her twenties. It wasn’t food that was based around quality ingredients, or fresh ingredients, or local produce, except incidentally. In fact I’ve only really heard her talk about a handful of things she ate as a kid. Mostly we talk about her moms “cloud” biscuits, which are legendary in my family. They are outrageously good. As are Grammy’s gingerbread cookies and her pies. The other food-things that my mom talks about from when she was wee, is corn and trout, which are things her dad made.

For corn, my Grampy would have a pot of water boiling on the stove, and then, and only then, would he go outside and cut the corn, shuck it, and bring it inside to boil. The pot had to be boiling. It’s the only way to eat corn.

The other thing my Grampy did was go trout fishing. He’d wake up at the crack of dawn and escape the kids and watch the sunrise. And then he’d fry up trout for breakfast for the family. My mom starts smiling when she talks about those trout.

I’ve been thinking an awful lot about Grampy lately. I cleaned out my desk the other day and found a slew of cards I’ve written him and never sent. Which is ridiculous. I’ve got stamps, I’ve got envelopes. I’ve got cute little cards. They have thoughtful notes written out. Why haven’t I sent them? They do no good here.

The other thing I found was all these letters that he’s sent me. His is so witty, and smart, and funny and charming. There is so much of his personality in those letters, a personality I don’t know very well because we live so far apart.

So the other day I was thinking about him, still kicking it at 94, when I walked by my local fishmonger and there were the most beautiful little trout in the window. And I knew I had to get some for breakfast.

I’m sure this is not how my Grampy made trout. I can’t imagine him making a pesto or poaching an egg, although it’s possible that those are two skills he has that I don’t know about. But it’s a very me breakfast, poached eggs and beans and pesto, with a bit of him thrown in, in the form of little river fish.

And it was wonderful.

Poached Eggs with Seared Trout and Minto Pesto and Green Beans

Serves 2

  • 1/2lb Green Beans, cleaned with the woody ends picked off
  • 2 small Trout, or one larger one. Gutted and filleted.
  • 2 good quality Free Range Eggs
  • 1 small Handful of Mint
  • 1 large Handful of Parsley
  • 1 small clove of Garlic, peeled and coarsely chopped.
  • 1 Lemon
  • 1/3 cup Olive Oil
  • Salt and Pepper

In a food processor blitz together the parlsey, mint, garlic and ¼ cup of the olive oil. Zest half of the lemon in and add in a healthy pinch of salt. Pulse a couple times. Check for seasoning. Put aside.

Fill a medium pot with water and bring to a boil. Add a pinch of salt.

Meanwhile bring a small frying full of water to a boil. Add the beans and cook for 2 minutes. Strain and set aside.

Rinse out the frying pan and put it back on the stove over medium heat.

Let it warm up and then add the remaining olive oil.

Season the trout liberally with salt.

When the pan is quite hot (but not smoking) put the fish fillets in skin side down. Immediately shake the pan a bit to move the fish around. That will make sure they don’t stick.

Cook the trout on the skin side until it’s about ½ way cooked. Flip them over, and cook for 30 more seconds.

Put the fish on a plate.

Once you’ve flipped the fish crack your eggs into your boiling water. Turn the water down to a simmer. And cook for about 3 mintues for nice runny eggs.

Put them on top of the fish with the beans and spoon the sauce on top. Serve Immediately.

Arugula and Harissa Frittata

Breakfast is not my favorite meal of the day, at least during the week. During the week it’s an apple, maybe some green juice if I was on top of things to buy it (I don’t have a jucier, not do I have space in my tiny kitchen!). On a good day I’ll scramble and egg and throw some salsa on top. Totally premade, store bought crappy salsa. I’m too busy. I’m not organized enough to make overnight oats. Every few months I’ll make a batch of homemade instant oatmeal and think “I should do this more often!” and then I eat them all and don’t make it again for 4 months.

Breakfast is not my place to shine on a weekday.

Weekends though? That’s another story.

I love brunch, in a major way. Soft poached eggs, potatoes, vegetables cooked in interesting ways. Bacon. Sausages.

I have two qualms with most brunches though, the first, is that, unless I got too deep into some bourbon the night before, I want my brunch to be light enough that I still want to move afterwards. I love me some bacon, but maybe I need some salad with it, so shoot me. The second is that, and I am totally tooting my own horn here, but I’m pretty good at cooking brunch. If I go out I want those eggs to be perfect. And if they aren’t I’m going to feel a bit jilted. A good brunch doesn’t come cheap, and I want it flawlessly.

Which means I end up making brunch at home a lot of the time. I’m just a bit finicky about some things, especially in the mornings.

So this is the sort of thing I end up making. It’s incredibly simple, very satisfying, rich without being heavy, and almost foolproof to execute. It’s just the ticket for an no fuss brunch in .


Arugula and Harissa Frittata

Serves 2

1 Shallot, peeled and thinly sliced

4 cups Baby Arugula

1 tbsp Harissa Paste*

2 tbsp Olive Oil

4 Eggs

Salt and Pepper

  • Harissa is a Moroccan spice hot sauce. You can find it at most meditteranean stores, but in a pinch you can mix1 tsp  Sambal (rooster sauce) with 1 tsp ground cumin for this recipe.

Preheat your oven to broil.

Crack the eggs into a small bowl and mix vigorously for 2 minutes.

In a small frying pan over medium heat warm up the olive oil.

Put in the shallots and let cook slowly for about 10-15 mintues until they start to color.

Add in a healthy pinch of salt and stir in the harissa.

Cook the harissa for about a minute and then add in the arugula, a handful at a time so it doesn’t overflow in the pan.

Let it start to wilt and then add in the next handful, You don’t want to cook the arugula entirely, just let it start to wilt.

Add in the eggs with another pinch of salt and stir it up, like your making scrambled eggs. Keep stirring until it’s about half way cooked- but the top still is still smooth.

Take the pan off the heat and put it under the broiler.

Cook until the top gets puffy and the edges are a little bit browned.

Serve immediately. 

Sunday Salads- Potato, Lox, and Boiled Egg Salad

image

Last night was girls night. I kicked Jordan out of the apartment for the evening, and had some quality girlfriend time. 

It’s hard to come by these days I think, we’re all so busy all of the time and it’s so much easier it seems to get together when the guys are with us, but man did I need some girl time. 

We danced around to the Pointer Sisters, we cried, we watched the Brene Brown TedTalk on vulnerability, and we cried some more. We played the Dirty Dancing soundtrack, and watched the scene at the end where they do the lift. 

We talked about the totally unrealistic relationship expectations we have because John Hughes created Jake Ryan. We laughed. We laughed a lot.

And we drank wine. Cleaning up this morning made me realize just how much wine. And sake. And mojitos. I don’t feel terrible this morning, I’m actually not feeling bad at all. But I do feel like I need to eat something substantial. Something that’s going to soak up some booze. Something a bit heartier, not not greasy, not heavy. 

Enter the smoked salmon, potato, boiled egg, salad.

A salad that is filling and rich and just what is required of a hangover salad.

It’s a salad to eat for supper. Or at 10 am after girls night.

Sometimes, that’s just the thing.

 image

Boiled Potato Salad with Lox, Dill and Eggs

4 cups Fingerling Potatoes, or waxy Nugget Potatoes

4 Free Range Eggs

150g Smoked Salmon or Lox (I like lox best)

1 Lemon

½ cup Olive Oil

1 tbsp Dijon Mustard

¼ cup Dill

Salt and Pepper

 image

Scrub the potatoes. Cut them in half and put them in a pot. Cover with cold water and a healthy pinch of salt and put the pot on a burner with medium high heat.

Bring to a boil.

Reduce heat to simmer and cook until the potatoes are fork tender, but still holding their shape- about 15 minutes.

Strain and run cold water on them, stirring often until they are cooled.

Meanwhile bring a small pot filled with water to a boil.

Put the eggs in with a slotted spoon, first dipping them in, and then putting them in entirely- this will help prevent the shells from cracking.

Reduce the heat to medium and set a timer for 7 minutes. When the timer goes off remove the pot from the heat, strain off the hot water and fill with cold running water, stirring often until the eggs are cooled.

Peel and quarter them.

Meanwhile make the dressing- in a large bowl juice the lemon.  Mix in the Dijon with a pinch of salt.  Slowly add in the olive oil whisking vigorously to emulsify it in (it will still be tasty if it splits though so don’t worry too much if it does)

Taste for seasoning and add more lemon, olive oil, or salt as you see fit.

When the potatoes are cooked and cooled toss them into the dressing with the dill. To serve toss in the arugula, portion onto plates and tear pieces of the lox on top.  Place 4 quarters of eggs per plate seasoning each with salt.

Serve immediately. 

image

Coriander Roasted Carrots

My life right now is filled with butter. Like crazy, up to the ears filled with butter.

I’m testing recipes. Recipes for my company. The company that I am setting up, for the cafes I’m working with. It’s very exciting. 

My company.

Eek!

However, at some point rationale has to take over. And my poor little up to the ears with butter body has needed a break from butter. So this week, I went macrobiotic. Nothing too crazy, just no dairy, sugar, wheat, or red meat for a week, a mini cleanse. A sort of cleanse.

Guys, I feel good right now. My skin is better, my stomach isn’t aching.  I didn’t even yell at anyone at the Apple Store yesterday when I went in for the 5th time to get my 3 month old computer fixed. I am feeling good.

I think this is because I really like vegetables. I like veggies as much as I like cookies. I’m lucky like that. Also, because instead of going on a cleanse where I only eat steamed broccoli I went on a cleanse where I ate a whole lot of roasted carrots. Coriander roasted carrots in fact. Carrots that were so sweet, with just a tiny bit of lemon juice and olive oil, more salt that GOOP would tell me to use I think, and a healthy pinch of ground coriander. Carrots that I am going to continue to make long after this cleanse, because they are devilishly delicious.

That it’s healthy is just a happy coincidence.


Coriander Roasted Carrots

1 bunch of really good Carrots

1 ½ tsp Coriander

2 cloves Garlic

1 tsp Salt

1 tbsp Lemon Juice

1 tbsp Olive Oil

Preheat oven to 450F

Clean the carrots well- I find with good carrots you don’t need to peel them, but you can if you want.  Cut them I half lengthwise.

Squish the cloves of garlic with the side of a knife. Mix the garlic, coriander, salt, lemon and olive oil in a bowl. Toss in the carrots.

Place them in a single layer on a parchment lined tray.

Roast for 15-20 minutes, or until they are wrinkly and slightly browned but still crunchy. Serve immediately. 

Tuesday Tutorials- Polenta!

Let’s talk about polenta.

I love polenta. I love it a lot.

It is, for me, the ultimate comfort food. It’s smooth and creamy and, perhaps most importantly is super cheap. I pretty well lived off of polenta for a couple years. Breakfast? Put an egg on it. Lunch? Some tomato sauce. Dinner? My favourite is with sautéed mushrooms and onions. You can serve it with steak, or Bolognese sauce, or darn near anything.

But when I was young and ever so broke, mostly I ate it with straight up tomato sauce. When I was feeling rich I would buy some parm and add some in, but most days it wasn’t so fancy. I could make a big batch and feed myself for a few meals for under $3.00. Mega cheap.

And, even in my intense poverty, it was a deeply satisfying meal. It takes only a few minutes to make and it is rich and as comforting as any dish could be.

And it is almost ridiculously easy to make. It is a no fuss sort of a dish. You simply bring some liquid to a boil (stock, milk, or a combination of both) whisk in the polenta and let it simmer for half and hour or so.  That’s it.  Unless you’re trying to keep your costing at a minimum, you should add in cheese and a little nub of butter for a bit of flavour.

Once it’s cooked it becomes a creamy porridge, but your left over’s will harden up in the fridge and become something that you can bake or fry and give it some crispy texture. But I like it best hot out of the pot, eaten with a spoon, feeling like a kid again.


Polenta.

Serves 4

3 cups Chicken Stock, or water

2 cups Milk

1 cup Polenta

½ cup Parmesano Reggiono, or Granda Padana (optional)

2 tbsp Butter (optional)

In a medium pot over medium heat bring a pinch of salt, the stock/water and the milk up to a boil.

Reduce the heat to medium low.

Pour the polenta into a fine sieve and shake it over the pot whisking the whole time- this will prevent lumps from forming.

Keep whisking until the polenta starts to thicken, about 2 minutes.

Switch from a whisk to a spatula or wooden spoon and stir on occasion for 25-35 more minutes, adding a bit of water if it starts to look too thick.

Add in the cheese and butter and stir until it is totally incorporated. Check for seasoning and add more salt if you need it. 

Orecchiette with Yoghurt, Spinach, Hazelnuts and Feta

Sometimes I just get stuck on a recipe. I’ll see it in a book and think, that’s weird/different/crazy/maybe delicious but I’m not sure yet, and I won’t make it for fear that what ever is weird/different/crazy/or maybe delicious will actually be awful and I’ll have wasted time and money on something I’m going to end up pushing to the back of my fridge so I can’t pretend I forgot about it until it’s too old and I have to throw it out.

I do this a fair bit. Because usually when I think something is weird and might not turn out, it doesn’t. And there are few things more frustrating than making something you think might not work, and then having it not work for just the reason you thought before you started. I’m learning to trust my gut on this.

The exception to this rule is Ottolenghi. Because he puts some things together and I think “I’m not sure about this” and then it’s always amazing.

And so with this proven track record of exceeding my expectations, I made pasta with a yoghurt based sauce.

I have been staring at this recipe since I bought the Jerusalem cookbook over a year ago.  My love affar with yoghurt is logn and well documented, but on pasta? I’m a little bit Italian and that seems pretty sacreligious to me.

Guys. I should not use my head, and instead to use Ottolenghis. I shouldn’t pretend I know better.

I don’t.

This pasta is wonderful. It’s light and creamy and tangy- the way you would expect from the yoghurt, but it’s also crunchy from the nuts, and super salty in certain bites from the feta.

I had to make a few changes to the recipe- I switched the pine nuts from the original to hazelnuts, because I had them kicking around, and inexplicably my local shop was out of frozen peas (seriously, who runs out of frozen peas?) so I used spinach instead.

The result was a pasta that was totally unexpected, and one that you should probably make right away. Seriously. Do it now.


Orrecciette with Yoghurt, Spinach and Hazelnuts

1lb Orecciette

2 cups Greek Yoghurt

4 cups Baby Spinach

¼ cup Basil, roughly torn

½ cup Toasted Hazelnuts, coarsely chopped

½ cup Feta, crumbled

2 tbsp Olive Oil

Salt and Pepper

Bring a very large pot of water to a boil. Salt generously.

Cook pasta to directions on box.

Meanwhile, in a food processor pulse the yoghurt with 2 cups of spinach, the olive oil and some salt.  Mix until smooth.

Pasta is cooked, strain. Immediately mix together with the yoghurt mixture, and then toss in the basil, hazelnuts and feta.

Eat immediately. 

Green Olive and Orange Tapenade

I’m not sure why, but I’ve been thinking a lot about my trip to New York last year. Maybe it’s because it was this very date, last year, when we were there, or maybe it’s because  I’ve been flipping through the pages of of the Ann St Studio blog lately and she has the most gorgeous pictures of that fabulous city. Or maybe, and mostly likely, it’s because I have felt like I haven’t left Vancouver in too long. I’m feeling wistful and dreaming about hoping on a plane to go somewhere, anywhere maybe. Thinking about it, I’ve realized that I’m often somewhere else in the fall. It might be my favourite time to travel. 

Not that I’m complaining or wining, I’m going to be in Seattle not once, but twice next week for workshops, and I think that will push this feeling out of my system. 

But in the interim, I’m going to sit here and think about New York. 

I’m going to imagine my next trip and plan it in my head and pretend I’m going to visit my sister and that we’ll go to galleries, and drink cocktails, and just hang out and catch up. In this dream she isn’t working full time and doing her MBA but would have time to show me her favourite spots and introduce me to her friends and let me see the life she’s building there. A life I would love to see. 

And I’m imagining going back to this wonderful little restaurant called Left Bank where I ate the most amazing chicken of my life last year. 

The chicken itself was nothing crazy, just roasted simply with some lemon and thyme, but the sauce was revelation. 

And also, possibly the most basic sauce I’ve ever had on a meal at a restaurant. 

It was simply the most gorgeous bright green olives that were torn into small pieces and mixed with lemon and orange zest and bound in a very loose way with olive oil. 

But these olives. They were the best olives, and the orange was just this hint in the back that brightened the whole thing. 

There was absolutely nothing fussy about any of it, but it was perfect. 

Just perfect.

So I was thinking about this the other day when I was panning on having some friends over, and I made this sauce, only I made a great pile of it and we slathered it on baguettes and ate it with our wine. 

I’ve never had a tapanade with green olives but that’s basically what this was. 

With the left overs, I have dolloped it on top of poached eggs, put spread it on toast and made a chicken sandwich, served it along side pork. 

It’s just the most lovely sauce, that is both deeply savoury and a little bit fruity. 

And it’s wonderful. 

Green Olive and Orange Tapenade

500mL Green Olives*

1 large Orange

1 Lemon

3/4 cup Olive Oil 

*do not bother making this with the canned green olives you get at the store, you will be disappointed. Instead go to an Italian grocer and try a couple different kinds. I like the dark green nocarella olives the best. 

Pit the olives- if you have an olive pitter this will be fast work. If you don’t use the palm of your hand to press the olive down and squish it. Then from the squished olive pull out the pit. If you have bought pitted olives (and I would recommend you don’t, they are often of a worse quality) still go through them and make sure there isn’t a pit to be found. There is nothing worse than turning on your food processor and realizing that there was a pit that you missed and it is now splintered throughout your sauce.)

Put them in a food processor and zest the orange and half of the lemon in. Now cut the orange and squeeze in the juice of half.

Add in half of the olive oil and pulse. You don’t want it to grind into a paste. You want a loose consistency. 

Taste. Does it need a bit more orange or lemon? Add it if you think it does. 

Now stir in the rest of the olive oil, put it in a bowl and serve!

Tuesday Tutorial- Homemade Ricotta Cheese

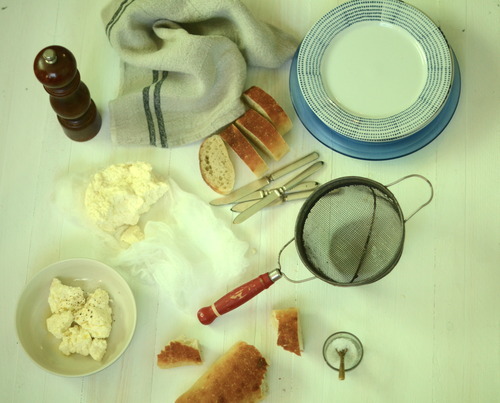
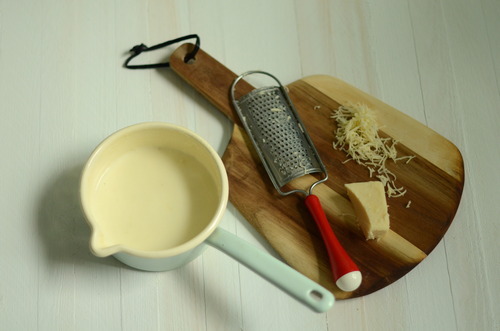
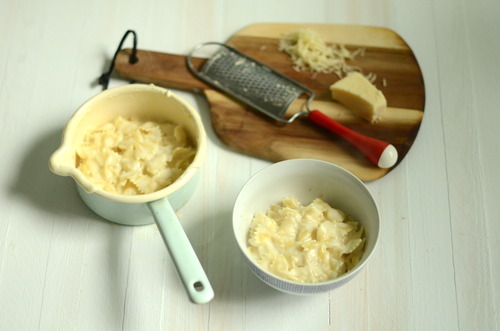
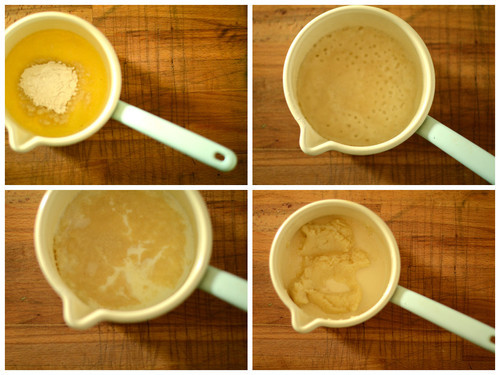
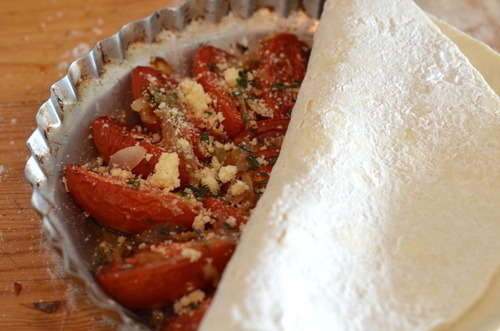
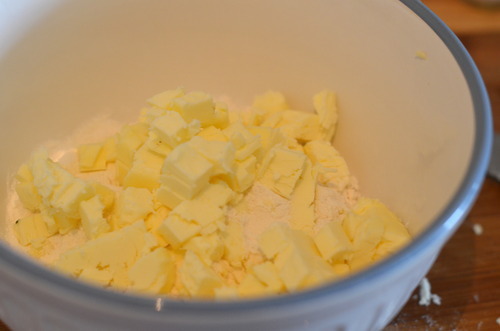
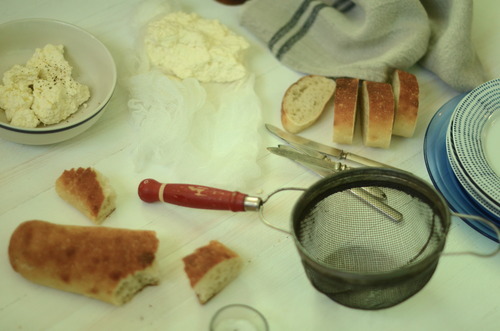
,I live in a very Italian neighbourhood, and my local market makes the most outrageously good ricotta cheese. The thickest, creamiest, most glorious ricotta I’ve ever had. It’s so good.

It’s also $12.00 for 500mL. The deliciously is directly linked to the price tag.

I have made a lot of ricottas in my life. Sometimes for restaurants, sometimes for home, and it’s always good. It is. But it’s never as good as the kind I can buy at the market. So I gave up for a while, I didn’t want to go through the trouble. I forked over the cash when I had a craving.

The trouble, is that to fully appreciate ricotta you have to eat it at room temperature, or slightly warmer. When it has just been made, slathered on good bread, and dipped in olive oil and sprinkled generously with maldon salt- it is the best and simplest snack ever. Put a salad beside it and you’ve got a downright brilliant lunch.

So I started experimenting with recipes, trying to make one as good as the Italian brand down the street, but that I could make at home and then eat while warm. Ricotta isn’t hard to make, you just bring some milk to a boil, add in some lemon, stir it until it occurs, and strain it. It’s a funny thing really, because traditionally ricotta is made by reboiling the whey of other cheeses, the whey of course being nearly completely fat free (the word ricotta literally means twice cooked), but ricotta is ever so much more delicious when you add in fat.

A lot of recipes call for 1 litre of milk and one cup of cream, but I add just a half cup more cream, and it makes a world of difference. Such a difference in fact, that I prefer it to the store bought kind down the street that costs twice as much. Small miracles my friends, small miracles.

Ricotta Cheese

1 litre Whole Milk (or homogenized)

1 1/2 cups Whipping Cream

Juice of 1 Lemon

1 1/2 tsp Salt

Line a large sieve with cheesecloth

Bring the milk and cream to a roaring boil.

Add in the lemon juice and stir, still over the heat, until thick curds have formed.

Pour the liquid into the prepared sieve, put the sieve over a bowl and allow to cool at room temperature for about an hour. You can make it a bit thicker by letting it sit longer if you’d like.

Remove the cheese from the cloth, and serve immediately, or store in an airtight container in the fridge for up to a week.  

Shakshuka

image

When I was about eight, and my sister was twelve, she became a vegetarian. And because I wanted to be just like my older sister, I followed suit. She stopped after a couple years, but to make sure my family didn’t think I was just copying her I ended up staying vegetarian for nine years. I copied a lot of what my sister was doing. She was a trend setter.

I now eat meat, and I love it I do, but I’m pretty sure I could be vegetarian 75% of the time. I love veggie dishes. I’m all about them really, but I live with a man who expects meat with every meal.

This is a totally novel idea to me, and if we’re being honest, it’s a pretty novel idea for mankind.

So I’m always making vegetarian dishes and hoping he doesn’t notice. This pretty much never works, but I try friends. For purposes of money and health, I try.

But then something amazing happened. I made this breakfast and Jordan said it was the best breakfast he had ever had. And this breakfast was essentially a thick tomato sauce, filled with peppers and spiked with cumin and coriander, that you make little hole in and cracked eggs into. It’s rich without being heavy and it’s balances the salty, spicy, tart, sweet thing perfectly. On top of that it’s super healthy, takes half an hour to make from start to finish, and it also only takes one frying pan to make, and as someone without a dishwasher, let me tell you, that is wildly important.

image

Shakshuka

(Not surprisingly this recipe is adapted from Jerusalem, the amazing book by Sami Tamimi and Yotam Ottolenghi. This book is amazing, truly, I can’t recommend it enough.)

2 Red Sweet Peppers, thinly sliced

1 can Plum Tomatoes or Cherry Tomatoes (look for brands that don’t add citric acid)

1 Onion, thinly sliced

2 cloves Garlic, minced

1 1/2 tsp Ground Cumin

1 1/2 tsp Ground Coriander

1 tsp Ground Pepper flakes, or in a pinch some Siracha will do

4 Eggs (the best free-range ones you can find!)

Salt and Pepper

3 tbsp Olive Oil

Toast to serve with.

In a large frying pan (cast iron if you have it) warm the olive oil over medium-low heat.

Add in the peppers and onions and cook until the peppers are very soft and the onions are just starting to brown around the edges, about 7-10 minutes

Add in the garlic, stir for about a minute, then add in the spices.

Stir them in until they are fragrant but not burning at all.

Add in the tomatoes and mix.

Bring heat up to medium-high and let simmer for 10 minutes, stirring regularly, until the sauce has thickened.

Bring heat down to medium, and make 4 divets in the sauce.

Crack the eggs into the holes, and cover with a lid for 3 minutes.

While this is happening you can warm up some naan or toast.

When the yolks are still soft but the whites are firm remove the shakshuka from the heat and serve immediately, with thick toast to sop up all the sauces.

Sunday Salads- Curly Endive Salad with Bacon, Chanterelles, and a Poached Egg

image

Friends. I have no been eating enough salad lately.

I came back from visiting a few months ago on a veggie eating mission. I was so excited about vegetables! And lettuce! I was eating so much lettuce.

I am embarrassed to tell you how much cake I’ve eaten in the last week. How many gross sugary candies that have been put near me that I have scarfed down. How much bread I’ve consumed. It hasn’t been good. I’m not going to give you numbers.

So it’s probably time to get jazzed about salad again. It’s already started a little bit, I walked by my favourite green grocer and they had the most beautiful swiss chard out, and something stirred in me. The part of me that loves healthy foods. The part of me that has been pushed down in favour of sour cherries and fuzzy peaches.

I never eat candy. What is up with me lately?

Anyways. Salad.

This salad is a slight twist on a French bistro classic. Slightly bitter frissee lettuce, tossed with a dijon vinegrette, sprinkled with flecks of bacon, and topped with a poached egg. It is the best salad. And you can eat it for any meal of the day. It’s a brilliant thing.

There are two twists on this staple. The first was just that I couldn’t find frissee. So I used curly endive. It’s fabulous, but use frissee if you can. Butter lettuce would also be appropriate here.

The second twist is the addition of some beautiful chanterelle mushrooms. I just added these on because I couldn’t resist buying them. I love chanterelles, and there season is so fleeting. You have to put them on everything while you can.

Of course, you could omit them, or use another kind of mushroom, I wouldn’t judge you for that. But if you can find chanterelles. Do it.

image

Curly Endive and Bacon Salad with a Poached Egg, and Chanterelles.

3 cups Curly Endive, washed and torn into small pieces.

100 grams Thickly Cut Smoked Bacon, cut into small rectangular pieces.

200 grams Chanterelle Mushrooms

2 Eggs

1/4 cup + 2 tbsp Extra Virgin Olive Oil

1 tsp Grainy Dijon

2 tbsp Lemon Juice

Salt and Pepper

Bring a large pot of water to a boil.

In a frying pan over medium-low heat slowly render out of the bacon, so it get’s nice and crisp but doesn’t dry out.

Scoop bacon pieces out of the fat and put them on a towel lined plate to cool.

Clean the chanterelles- with a pastry brush, carefully brush out all the dirt. With a paring knife cut the very bottom of the mushroom off, just a tiny bit, and then cut the mushrooms into wuaters or sixths, depending on the size.

In a small frying pan warm up the extra 2 tbsp of olive oil.

Add in the mushrooms and cook until the mushrooms are nicely browned. Season generously with salt and pepper and set to the side.

In a small bowl mix together the remaining olive oil, lemon juice and dijon.

Poach your eggs- gently crack your eggs into the pot of gently boiling water.

Let them cook for about 3 minutes, or until, when gently lifted from the water with a slotted spoon, the whites feel hard but the yolk still feels soft.

Mix the endive with the dressing. Divide it into two bowls.

Sprinkle the bacon and chanterelles onto the lettuce, and then place a poached egg onto each bowl.

And done. Get it in you.

Tuesday Tutorial- Bechamel Sauce (and Mac and Cheese)

image

When I was little, and us kids were feeling picky, my mom would make pasta with red sauce and white sauce. Which is to say, she would boil up a big pot of spaghetti, make tomato sauce and cream sauce and let us mix it up as we liked. It was a staple.

And we would pray that there would be leftover cream sauce, because that would mean we would be getting baked potatos with cheesy sauce the next day. Or mac and cheese. Or lasagna.

There are a million uses for cream sauce, or bechamel.

Rich and creamy, it is a simple sauce thickened with flour and made mostly of milk. It’s considered a “mother” sauce in French because it spawns so many others and it is the base for so many dishes.

Once you get the technique down, which won’t take long at all, you’ll find that cooking a bit of flour in butter, and slowly adding in liquid, is the base for stews, soups, and sauces all over the place.

It is one handy trick to have up your sleeve.

image

Bechamel Sauce

2tbsp Butter

2tbsp Flour

2 cups Milk

1 tsp Salt

image

In a medium pot over medium heat melt the butter.

Add in the flour and stir for a couple minutes, until the mixture is very thick.

Add in a quarter cup of milk and don’t stir. Wait until the whole thing is boiling, and then whisk. Waiting before stirring will ensure that you get no lumps.

It will get super thick. That’s good!

Now add another quarter cup of milk, wait until it boils and stir it.

Keep doing this- the pouring, the waiting, the stirring, until all of the milk is mixed in.

And you’ve mastered a French Mother Sauce! Congrats.  

Tomato Tart Tatin

Here’s the thing about tomatoes. They might be my favourite veggie (I know I know, they’re a fruit, but you know what I mean.). They’re sweet, they’re savoury, they’re juicy.

Here’s the other thing about tomatoes. If you put them in the fridge, they suck. They get grainy, they get flavourless, they loose everything special about them.

Here’s the thing about my local green grocer: they put their tomatoes in the fridge at night.

So when I got all excited about fresh tomatoes the other day and they were all warm from sitting in the sun I grabbed myself a big bag full. And then I got home to find grainy sad tomatoes, far from their peak.

image

Here’s the thing about sad grainy tomatoes: they’re still pretty good when you cook them. Usually this means tomato sauce, but the other day it meant this fabulous tart tatin that was on Design*Sponge a couple weeks ago. This is a damn good tart, it’s very savoury (a lot of veggie tatins tend to be a bit sweet for my taste) the pastry is flaky and light, but just buttery enough to have enough flavour to hold it’s own with the tomatoes, and the onions and cheese help bring a depth to it that rounds the whole thing out.

I didn’t use the crust from the original recipe, because I tatins should always be made with puff in my books, and after last Tuesday’s Tutorial on quick puff we’re all pros right? Right.

image

Tomato Tart Tatin

(Adapted from Design*Sponge)

Dough:

1 cup Cold Butter, unsalted, cut into cubes

2 cups AP Flour

1/2 tsp Salt

1/2-3/4 cup Ice Water

For a full tutorial on making this dough with lots of pictures, click here!

On a clean surface toss the butter cubes with the flour and salt.

With a rolling pin roll out the butter so that all of it forms into long thin strips.

Add the water, a couple tablespoons at a time and fold the dough, push it out, add more water, and fold the dough again.

Continue this until it has come together as a cohesive dough.

Wrap with plastic wrap and put in the fridge for at least an hour, or up to two days.

Tart Tatin:

1 recipe of quick puff pastry dough (aboce)

10 Roma Tomatoes

1/4 cup Grated Parmesan Cheese

1 Onion, thinly sliced

2 tbsp Olive Oil

1 tbsp Fresh Thyme Leaves

Preheat oven to 400F

In a medium pot over medium heat warm up 1 tbsp of the olive oil.

Add in the onion and cook, stirring often, for about 10 minutes, until they are soft and just starting to brown on the edges.

Grease a pie pan with the remaining olive oil. Cut a circular piece of parchment and line the bottom of the pan.

Slice the tomatoes in half and put them skin side down in the pan. They will shrink up as they cook so overlap them a bit so that when they are cooked they will still cover the bottom of the pan.

Top them with salt and pepper, the onions, parm and thyme.

On a lightly floured surface roll our the dough into a circle just larger than pie pan.

Cut the edges to clean them up and put it into the pan.

Bake for about 40 minutes, or until the pastry has turned a nice brown and the juices bubbling up the sides are browned as well.

Allow to cool for about 10 minutes before flipping it onto a plate.

Serve while warm or at room temperature.  

image

Sunday Salads- Cucumber and Sprout Salad

I know that I don’t need to tell you how much I love butter and sugar. It’s obvious.

But in my day to day, I’m trying to get healthier. I work out a couple times of week, I eat a lot of veggies, I drink green juice like it’s going out of style, and yet I still feel like all my friends are so much more disciplined than me when it comes to food.

I went out for brunch with a girlfriend recently, and before eating anything, she added a strange green powder to her glass of water and chugged it.

“It has all the good stuff in it” she explained. Is this a thing now? Do I need to start drinking spirulina before every meal?

The answer, of course, is no. And I hate the idea of having to drink powders in order to get your daily nutrition and so I won’t. I can’t. The Italian in me just wanted to shake her and tell her to eat and be happy.

But I’ll give my health nut friends this- I love sprouts. I’ve been putting them in everything these days, and I am loving it. I’ve been growing my own sprouts for ages (remember this post on growing them in vintage tins?) and my local organic shop has started selling sprouted grains and legumes, and they are just the perfect bit of crunch in a salad. Especially when that salad is already a bowlful of crunch in the form of these wonderful little cucumbers. Throw in some lime and cilantro, and this is just about the healthiest salad you could eat!

Cucumber and Sprout Salad

1 lg English Cucumber, or a handful of small cukes- I used organic lemon cucumbers

1/3 cup Sprouted Legumes and Grains

1 1/2 cups Pea Sprouts

Juice of 1 Lime

1/4 cup Cilantro, finely chopped

1/4 cup Extra Virgin Olive Oil

Salt and Pepper to taste

In a medium sized bowl mix together the lime and olive oil. Season with the salt and pepper and stir in the cilantro. Check the seasoning adding more salt, lime, or oil depending. 

Cut the cucumber- if using a long cuke, cut lengthwise in quarters, cut out the seeds and then cut the pieces on a bias. If using small ones just make them look pretty- I cut my in 6ths lengthwise. 

Add the cukes to the salad dressing, and then toss in the sprouts. 

Serve immediately. 

Sunday Salads- Nectarine, Raspberry and Basil Salad with Manchego

I have never thought much of nectarines. I’ve always sort of thought that you could buy them, but why would you when peaches are sitting in the bins next to them? If I could get nectarines in February I’d be all over them, but in peach season? No thanks.

Except, last week Jordan brought some home and I, thinking I should eat them quickly so I could fill up our fruit basket with peaches, brought them on a hike we went on.

I know there was a certain amount of hunger and fatigue in the mix, but hot damn that was a good nectarine.

And you know what nectarines have on peaches? You don’t have to peel them! (I passionately hate peach fuzz)

So this summer, I’ve been buying them like they’re going on of style. I’ve been making ice tea with them, I’ve been sauteeing them with maple syrup and pouring it over French toast, and I’ve been making this salad.

A simple simple fruit salad, but one that, while definitely sweet, has a savoury edge in the way I find sort of satisfying after spending a day making (and admittedly sampling) cakes.

Nectarine, Raspberry, Basil and Manchego Salad

4 very ripe Nectarines

1 cup Raspberries

1 tbsp Honey

1/2 tsp Apple Cider Vinegar

1 tbsp Olive Oil

6 big leaves of Basil

6 big leaves of Mint

25g Manchego, or other mild sheep’s milk cheese

The tiniest pinch of salt

In a medium sized bowl mix together the vinegar, honey and oil.

Cut the nectarines into slices (about 8-10 per fruit) and mix immediately into the vinaigrette so they don’t oxidize.

Add in the raspberries.

Place the herbs on top of each other, roll them lengthwise, and slice them into the thinnest strips. (This is called a chiffonade.)

Mix them gently into the fruit, and then use a vegetable peeler to shave the cheese on top.

This will last a couple hours at room temperature- if you can wait that long!

Sunday Salads- Sesame Soba Salad with Cucumber and Kale

image

Sometimes I make something and I just know I have to tell you about it right away. I need you to know how great it is, I need to tell you now.

Sometimes I make something, and I tinker around with it. I change things up, and months after the first time I decide it’s okay to write about it. It’s deserving.

But sometimes, and this is true often more of cooking than baking, that I make something, and it seems so obvious, so easy it would seem almost insulting to you to give it a recipe and put it up here. It’s something that I make so often that I assume everyone does. That it’s just normal and simple and not worthy of the formality of a recipe and a blog post.

But then I realize that everyone cooks different things at home, and something like this soba noodle salad, which I am making variations on almost weekly, might be worth sharing.

Soba noodles are a staple in my house. I make a big bowl and they last a few days, sometimes serving with steak or some fish, but just as often eating it straight up. It’s a quick lunch or dinner, and it feels good when you eat it. I find myself craving it in the summer months, it’s light and cold and filled with things that my body needs.

So I hope that you look at this not just as a recipe, but as a starting point, mix it up, add in things that you have in your fridge, make it spicier, or lime-ier.

You get to decide.

image

Soba Noodle Salad with Cucumber and Kale

2 bunches of Soba Noodles (they are usually sold in pre-portioned bunches)

1/2 English Cucumber, thinly sliced

1/2 bunch Kale, torn into small pieces off the center stem.

4 Green Onions, thinly sliced on a bias.

1/4 cup Soy Sauce

1 Lime

1 tsp Siracha or other hot pepper- garlic sauce

1/4 cup Sesame Oil

3 tbsp Toasted Sesame Seeds

Bring a large pot of water to a boil.  

Cook the soba to the package instructions. Drain and rinse with cold water, stirring until the noodles cool. If you don’t stir, they won’t cool down properly. 

Meanwhile, mix together the soy, lime, siracha, and sesame oil. Check for seasoning, adding more of whatever you need until it’s perfect. 

Mix sauce with the noodles then mix in the veggies. 

Serve and sprinkle with the sesame seeds. 

Pasta with Wild Leeks, Mushrooms and Arugula

image

A few weeks ago I was back in Toronto visiting my Mom. We visited my best friends cottage, we spent an absorbanant amount of money on Quebec cheese, and we walked around the city. It was a wonderful trip, and a much needed bought of relaxation.

An old friend of mine, Andrew, came over and we made dinner and hung out with my mom and her boyfriend, John. When we left the house to go grab a drink down the street we both turned to each other and said, almost at the exact same time “I hope I’m that when I’m a real grown up”.

Don’t get me wrong, they have their hardships like everyone else, obviously, but there is something wonderful about the way they live. My mom walks to work everyday, John plugs away at his PhD in the study, (as one of her friends put it to me “leave it to your mother to find a 60 year old student!) they live in this beautiful house, and eat gorgeous food. They seem to live really great lives.

My mom is also a fabulous cook, so when I visit most of our time is either spent in her wonderful neighbourhood shopping for ingredients or in the kitchen. We spend a lot of time in the kitchen.

My mom cooks tons of vegetables. Tons. It’s one of the most wonderful things about the way she cooks actually. She is teeny tiny, and eats lots of cheese and pasta and delicious things, but she also eats more veggies that probably anyone else I know. There is always a salad with dinner, but beyond that, she just puts more vegetables in everything. Almost anything cooked gets a bag of arugula, or spinach, or pea shoots wilted into it.

This is a great example of that for me. Just a simple pasta of sauteed ramps, and mushrooms, with a handful of parm and a sprinkling of parsley, thyme and basil. And then a huge bag of arugula wilted into it. Don’t get me wrong, I wilt greens into my pastas all the time, but she just adds so much more than I normally would. And it results in something wonderful, something sharp and bit bitter, but mostly just more flavourful.

image

1 box Pasta

1 bunch Ramps, or Wild Leeks, or Traditional leeks, cleaned and sliced on a bias

2 cloves Garlic, minced

3 cups Cremini Mushrooms, sliced thinly

1/2 cup Freshly Grated Parmesan, or Grano Padano

8 cups Baby Arugula

1/4 cup Parsley, chopped

3 tbsp Basil, chopped

2 tbsp Thyme, chopped.

Olive Oil

Salt and Pepper

Bring a large pot of water to a boil. Salt generously and cook the pasta to the directions on the box. Strain.

Meanwhile, on medium high heat warm up a good glug of olive oil.

Sautee the leaks for about 3 minutes. Add in the mushrooms and cook until starting to caramelize, about another 5 minutes.

Clear a small spot in the middle of the pan and add in another splash of olive oil.

Cook garlic for about a minute until it is fragrant but not browning.

Mix in the leeks and the mushrooms.

Add in the pasta, herbs, and cheese and then toss in the arugula so that it starts to wilt but isn’t soggy. Season liberally with salt and pepper.

Serve immediately.  

Sunday Salads- Roasted Carrots and Beets with Cumin Spiked Yoghurt

I always find this time of year a bit tricky. I always try to eat locally, but I get so sick of cabbage and root veggies. And spring- actually, it’s technically summer now isn’t it!- and I really want to eat green things, but man it’s a slow Spring there is nothing in my local markets. It’s killing me a little bit.

So here is a simple salad of roasted veggies, with some cumin laced yoghurt. My apartment is weirdly cold, so it was actually wonderful to have the oven on to make this, but this would also be terrific with grilled veg- and faster to put together!

1 bunch Heirloom Carrots

1 bunch Baby Beets

1/2 cup Yoghurt

1 tsp Cumin

2 tbsp Lemon Juice.

Salt
Pepper

Extra Virgin Olive Oil

Preheat the oven to 375F

Cut off the bases of all the beets, wrap them in tinfoil and put them in the oven.

Peel the carrots, if they are large, if they are thin, just scrub them

After 30 minutes, toss the carrots with a good glug of olive oil, salt and pepper.

Put the carrots onto a parchment lined cookie sheet, bake for 20 minutes.

Meanwhile mix together the cumin, yoghurt, lemon, and season with salt and pepper.

Remove the beets from the oven, remove them from the tin foil and carefully peel them- the skin should just slide off.

Toss them with the carrots.

Smear the yoghurt on the plate, and arrange the veggies on top.