Soba Noodle Salad with Citrus and Ginger

soba-1.jpg

Well friends, I’ve finally done it. Done that simple thing that nearly all the adults in the world can do, that, well,  most teenagers can do. That thing that I have been avoiding like the plague for over a decade. I learnt to drive.

I spent the money, took the classes, practiced in our manual car, nearly broke up my pending nuptuals, but in some small miracle, I learnt how to drive.  I’m feeling pretty pleased with myself.

soba-7

Jordan however decided to celebrating by getting  a vicious flu. The kind that makes his workaholic self completely stop. He has probably slept for 20 of the last 24 hours.   I on the other hand, am currently spending most of my days mind-over-matter-ing it, in an attempt not to get what he’s getting. And to aid in my attempt to refuse to allow bacteria into my body, I’m also eating kind of insane amounts of vitamin C.

Not just vitamin C though, the internet has led me to believe that I need not only citrus in IV form, but also garlic, ginger, and spicy food. So here is the garlick-iest, ginger-iest, spiciest, and citrus-y salad you’ll ever need. It’s all the immune boosters in one so that we all don’t end up curled up in a ball watching terrible TV.  I for one like to be in fine form when I watch bad TV.

Soba-5

Citrus and Ginger Soba Noodle Salad

2 bundles of Soba Noodles

Juice of 1 Lime

2 Oranges, segmented.

4 Radishes, thinly sliced.

2 stalks Celery, sliced on a bias.

1 clove of Garlic, minced

1.5 inches of Ginger, grated finely

2 tbsp Siracha, or other chili sauce

¼ cup Sesame Oil

3 tbsp Soy Sauce

2 tbsp Sesame Seeds (black or white)

Bring a large pot of water to a boil. Season liberally with salt.

Cook soba noodles according to package instructions, or until al dente.

Strain, and immediately pout cold water over top and woosh it around with your hands or a spoon to cool it all down. Set aside.

Meanwhile, take your minced garlic put it near the edge of your cutting board. Sprinkle a small mount of salt on top. With the side of your knife, crush the garlic until it is pureed. Put it in a large bowl.

Add in the ginger, lime juice, soy sauce, and chili sauce.

Whisk to combine, then slowly add in the sesame oil. Taste, and add more citrus, oil, or soy as needed.

Add in all the remaining ingredients. Toss to fully combine and serve immediately, or cover and keep in the fridge for up to 2 days.

xo

soba-and-kitten

Sunday Salads- Roasted Butternut Squash with Pomegranate and Za'atar

tumblr_inline_n3mtj2AZGf1qfrmur.jpg

The Italian in me just wants to make the simplest food. It doesn’t want to be fussy. It doesn’t want spend hours cutting things just so or mixing 25 ingredients into a salad dressing. My Italian side also pretty much just wants to make gnocchi and tomato sauce all day, which, though delicious, would not make for the most interesting blog. Fortunately, I have fallen deeply in love with Middle Eastern food. The rich flavors, the complex spice mixes, the vegetable forward way of eating.  The more I cook like this, the more I realize that the Italian way of eating simple food, not doing too much to it, that totally unfussy way of cooking seems to fit right in.

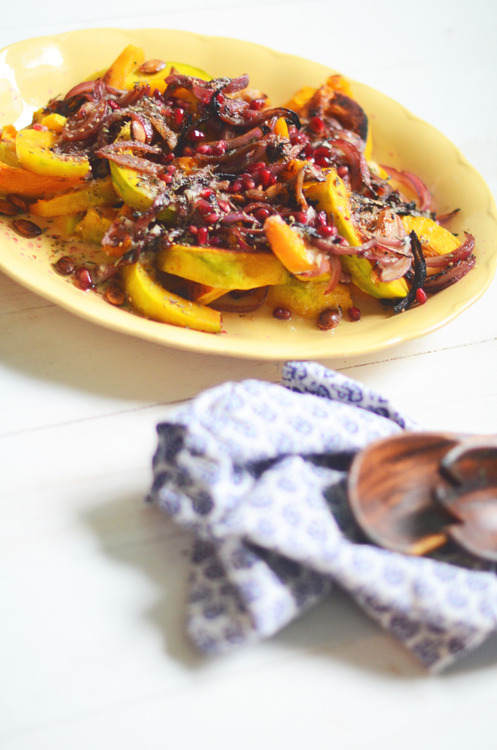
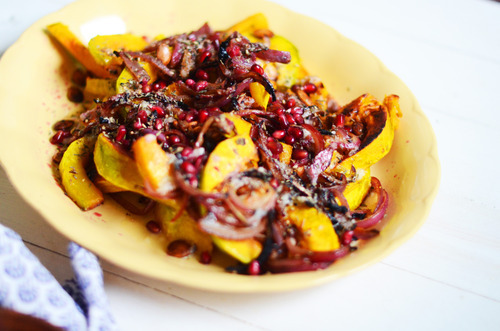
It’s actually been kind of exciting to me, to try new spices and spice blends and treat them to the ways I’ve always cooked food. This salad is a great example. I love squash, and roasting it up with red onions and tossing it with some greens and nuts in a simple vinaigrette is something that I would always do. But in this Middle Eastern update, I toss the onions in pomegranate molasses before roasting them, and add fresh pomegranate on top. I toss everything together with some salt and lemon and za’atar, an amazing spice blend of oregano, cumin and sesame seeds, that you can buy already blended and ready to go. Then I put a bowl of garlicky yoghurt on the side to dip the salad in.

The result is something so much more complex and rich than I would have ever made before, but is still incredibly simple and easy to do.

Small miracles friends. They do happen.

Squash and Pomegranate Salad with Za’atar

  • 2 small Kombucha or Butternut Squash
  • ¼ Pomegranate
  • 1 Red Onion
  • 2 tbsp Pomegranate Molasses*
  • ½ Lemon
  • 1 tbsp Za’atar
  • Olive Oil
  • Salt and Pepper

For Garlicky Yoghurt:

  • ¾ cup Greek Yoghurt
  • 2 large clove Garlic
  • 1 tsp Salt
  • 1 tsp Lemon Juice

Preheat your oven to 425F

Peel the squash- butternut squash can be peeled with a peeler, the kombucha squash will need to be done with a knife and some patience. Be careful!

Cut the squash in half and scoop out the seeds. Wash the seeds and toss them with some salt and a good glug of olive oil. Put them on a tray and bake for about 20 mintues, stirring every 5 mintues.

Cut the squash into ½ inch wedges and lay them out on a baking tray. Toss with a good glug of olive oil and a healthy pinch of salt. Bake for about 45 minutes, or until the squash is fully cooked.

Peel the red onion and cut it in half. Cut into thin strips and toss with salt and the pomegranate molasses. Put them on a baking tray and roast them for about 20 minutes, or until they are soft and a little bit caramelized.

Phew! No more roasting!

Meanwhile make the garlicky yoghurt:

Smash up the garlic as small as you possible can. Mix it with the yoghurt, salt and lemon juice.

When the squash are still warm sqeeze the lemon juice on top and toss to mix. Check your seasoning and add some salt if you need.

Put the squash on a platter. Top with the onions and roasted squash seeds, and break apart the pomegranate and sprinkle the seeds on top.

image

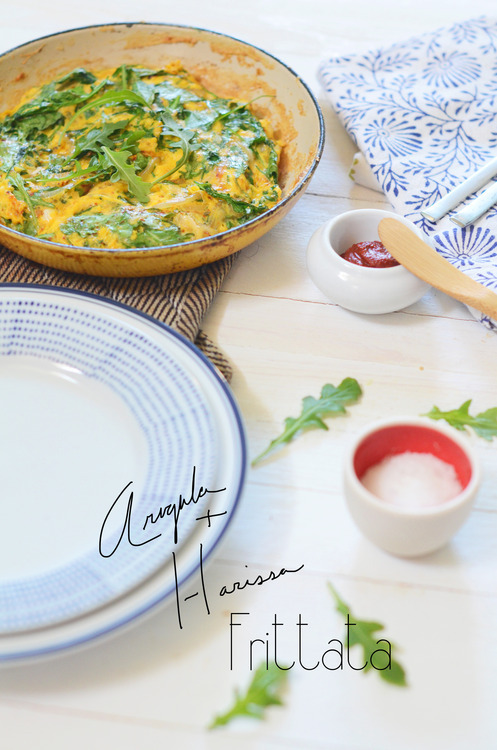
Arugula and Harissa Frittata

Breakfast is not my favorite meal of the day, at least during the week. During the week it’s an apple, maybe some green juice if I was on top of things to buy it (I don’t have a jucier, not do I have space in my tiny kitchen!). On a good day I’ll scramble and egg and throw some salsa on top. Totally premade, store bought crappy salsa. I’m too busy. I’m not organized enough to make overnight oats. Every few months I’ll make a batch of homemade instant oatmeal and think “I should do this more often!” and then I eat them all and don’t make it again for 4 months.

Breakfast is not my place to shine on a weekday.

Weekends though? That’s another story.

I love brunch, in a major way. Soft poached eggs, potatoes, vegetables cooked in interesting ways. Bacon. Sausages.

I have two qualms with most brunches though, the first, is that, unless I got too deep into some bourbon the night before, I want my brunch to be light enough that I still want to move afterwards. I love me some bacon, but maybe I need some salad with it, so shoot me. The second is that, and I am totally tooting my own horn here, but I’m pretty good at cooking brunch. If I go out I want those eggs to be perfect. And if they aren’t I’m going to feel a bit jilted. A good brunch doesn’t come cheap, and I want it flawlessly.

Which means I end up making brunch at home a lot of the time. I’m just a bit finicky about some things, especially in the mornings.

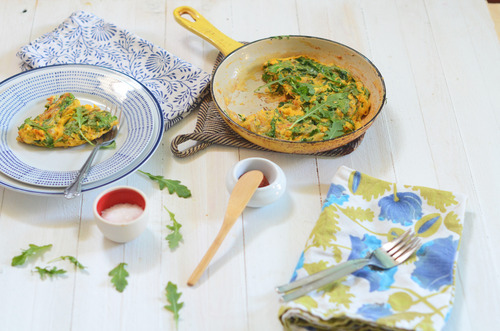
So this is the sort of thing I end up making. It’s incredibly simple, very satisfying, rich without being heavy, and almost foolproof to execute. It’s just the ticket for an no fuss brunch in .


Arugula and Harissa Frittata

Serves 2

1 Shallot, peeled and thinly sliced

4 cups Baby Arugula

1 tbsp Harissa Paste*

2 tbsp Olive Oil

4 Eggs

Salt and Pepper

  • Harissa is a Moroccan spice hot sauce. You can find it at most meditteranean stores, but in a pinch you can mix1 tsp  Sambal (rooster sauce) with 1 tsp ground cumin for this recipe.

Preheat your oven to broil.

Crack the eggs into a small bowl and mix vigorously for 2 minutes.

In a small frying pan over medium heat warm up the olive oil.

Put in the shallots and let cook slowly for about 10-15 mintues until they start to color.

Add in a healthy pinch of salt and stir in the harissa.

Cook the harissa for about a minute and then add in the arugula, a handful at a time so it doesn’t overflow in the pan.

Let it start to wilt and then add in the next handful, You don’t want to cook the arugula entirely, just let it start to wilt.

Add in the eggs with another pinch of salt and stir it up, like your making scrambled eggs. Keep stirring until it’s about half way cooked- but the top still is still smooth.

Take the pan off the heat and put it under the broiler.

Cook until the top gets puffy and the edges are a little bit browned.

Serve immediately. 

Sunday Salads- Potato, Lox, and Boiled Egg Salad

image

Last night was girls night. I kicked Jordan out of the apartment for the evening, and had some quality girlfriend time. 

It’s hard to come by these days I think, we’re all so busy all of the time and it’s so much easier it seems to get together when the guys are with us, but man did I need some girl time. 

We danced around to the Pointer Sisters, we cried, we watched the Brene Brown TedTalk on vulnerability, and we cried some more. We played the Dirty Dancing soundtrack, and watched the scene at the end where they do the lift. 

We talked about the totally unrealistic relationship expectations we have because John Hughes created Jake Ryan. We laughed. We laughed a lot.

And we drank wine. Cleaning up this morning made me realize just how much wine. And sake. And mojitos. I don’t feel terrible this morning, I’m actually not feeling bad at all. But I do feel like I need to eat something substantial. Something that’s going to soak up some booze. Something a bit heartier, not not greasy, not heavy. 

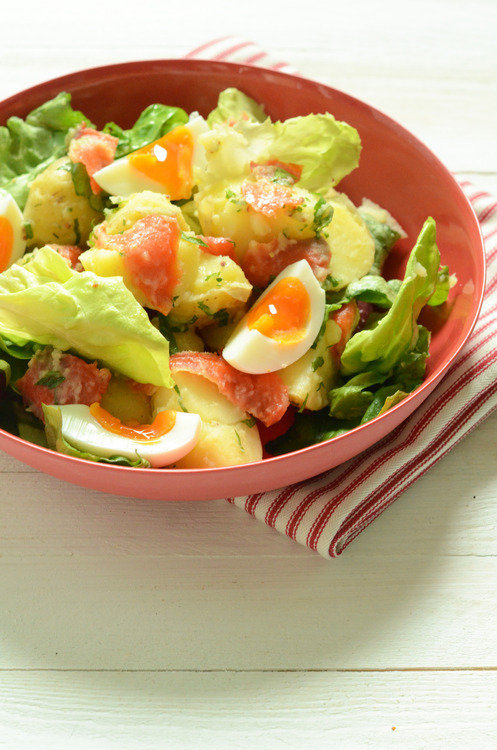
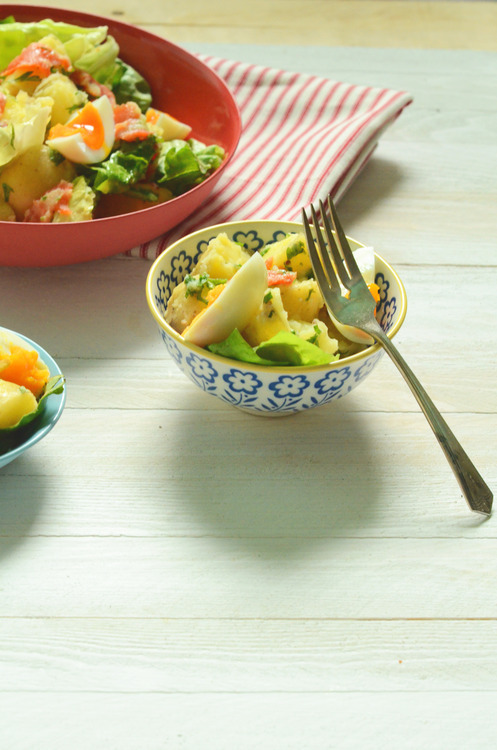
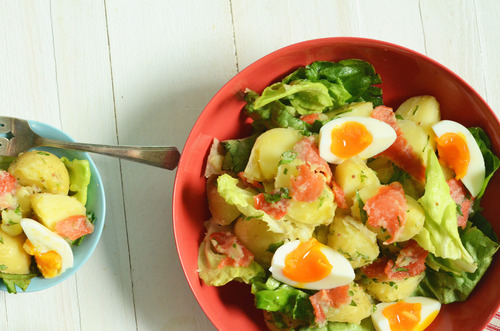
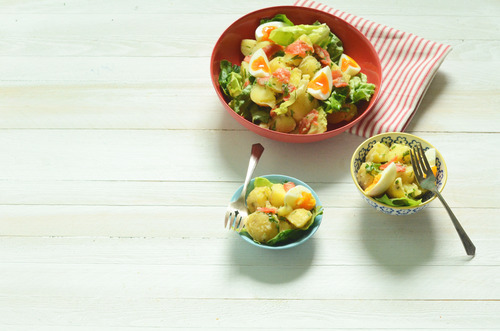
Enter the smoked salmon, potato, boiled egg, salad.

A salad that is filling and rich and just what is required of a hangover salad.

It’s a salad to eat for supper. Or at 10 am after girls night.

Sometimes, that’s just the thing.

 image

Boiled Potato Salad with Lox, Dill and Eggs

4 cups Fingerling Potatoes, or waxy Nugget Potatoes

4 Free Range Eggs

150g Smoked Salmon or Lox (I like lox best)

1 Lemon

½ cup Olive Oil

1 tbsp Dijon Mustard

¼ cup Dill

Salt and Pepper

 image

Scrub the potatoes. Cut them in half and put them in a pot. Cover with cold water and a healthy pinch of salt and put the pot on a burner with medium high heat.

Bring to a boil.

Reduce heat to simmer and cook until the potatoes are fork tender, but still holding their shape- about 15 minutes.

Strain and run cold water on them, stirring often until they are cooled.

Meanwhile bring a small pot filled with water to a boil.

Put the eggs in with a slotted spoon, first dipping them in, and then putting them in entirely- this will help prevent the shells from cracking.

Reduce the heat to medium and set a timer for 7 minutes. When the timer goes off remove the pot from the heat, strain off the hot water and fill with cold running water, stirring often until the eggs are cooled.

Peel and quarter them.

Meanwhile make the dressing- in a large bowl juice the lemon.  Mix in the Dijon with a pinch of salt.  Slowly add in the olive oil whisking vigorously to emulsify it in (it will still be tasty if it splits though so don’t worry too much if it does)

Taste for seasoning and add more lemon, olive oil, or salt as you see fit.

When the potatoes are cooked and cooled toss them into the dressing with the dill. To serve toss in the arugula, portion onto plates and tear pieces of the lox on top.  Place 4 quarters of eggs per plate seasoning each with salt.

Serve immediately. 

image

Coriander Roasted Carrots

My life right now is filled with butter. Like crazy, up to the ears filled with butter.

I’m testing recipes. Recipes for my company. The company that I am setting up, for the cafes I’m working with. It’s very exciting. 

My company.

Eek!

However, at some point rationale has to take over. And my poor little up to the ears with butter body has needed a break from butter. So this week, I went macrobiotic. Nothing too crazy, just no dairy, sugar, wheat, or red meat for a week, a mini cleanse. A sort of cleanse.

Guys, I feel good right now. My skin is better, my stomach isn’t aching.  I didn’t even yell at anyone at the Apple Store yesterday when I went in for the 5th time to get my 3 month old computer fixed. I am feeling good.

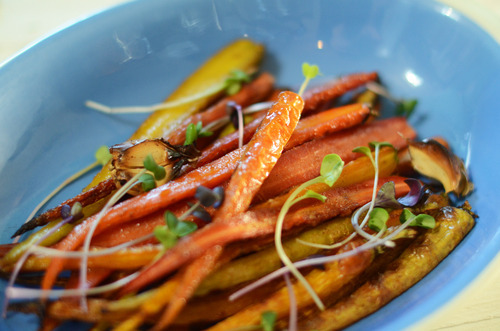
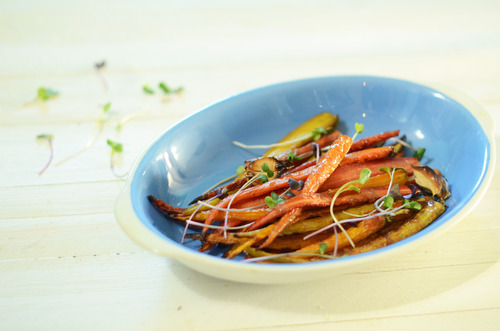
I think this is because I really like vegetables. I like veggies as much as I like cookies. I’m lucky like that. Also, because instead of going on a cleanse where I only eat steamed broccoli I went on a cleanse where I ate a whole lot of roasted carrots. Coriander roasted carrots in fact. Carrots that were so sweet, with just a tiny bit of lemon juice and olive oil, more salt that GOOP would tell me to use I think, and a healthy pinch of ground coriander. Carrots that I am going to continue to make long after this cleanse, because they are devilishly delicious.

That it’s healthy is just a happy coincidence.


Coriander Roasted Carrots

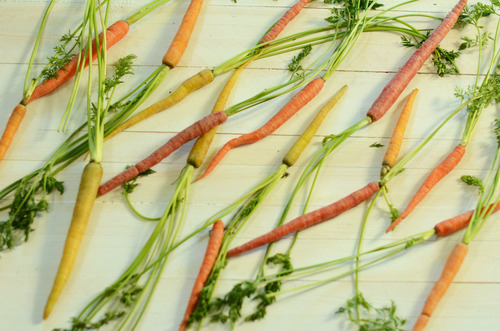
1 bunch of really good Carrots

1 ½ tsp Coriander

2 cloves Garlic

1 tsp Salt

1 tbsp Lemon Juice

1 tbsp Olive Oil

Preheat oven to 450F

Clean the carrots well- I find with good carrots you don’t need to peel them, but you can if you want.  Cut them I half lengthwise.

Squish the cloves of garlic with the side of a knife. Mix the garlic, coriander, salt, lemon and olive oil in a bowl. Toss in the carrots.

Place them in a single layer on a parchment lined tray.

Roast for 15-20 minutes, or until they are wrinkly and slightly browned but still crunchy. Serve immediately. 

Tuesday Tutorials- Polenta!

Let’s talk about polenta.

I love polenta. I love it a lot.

It is, for me, the ultimate comfort food. It’s smooth and creamy and, perhaps most importantly is super cheap. I pretty well lived off of polenta for a couple years. Breakfast? Put an egg on it. Lunch? Some tomato sauce. Dinner? My favourite is with sautéed mushrooms and onions. You can serve it with steak, or Bolognese sauce, or darn near anything.

But when I was young and ever so broke, mostly I ate it with straight up tomato sauce. When I was feeling rich I would buy some parm and add some in, but most days it wasn’t so fancy. I could make a big batch and feed myself for a few meals for under $3.00. Mega cheap.

And, even in my intense poverty, it was a deeply satisfying meal. It takes only a few minutes to make and it is rich and as comforting as any dish could be.

And it is almost ridiculously easy to make. It is a no fuss sort of a dish. You simply bring some liquid to a boil (stock, milk, or a combination of both) whisk in the polenta and let it simmer for half and hour or so.  That’s it.  Unless you’re trying to keep your costing at a minimum, you should add in cheese and a little nub of butter for a bit of flavour.

Once it’s cooked it becomes a creamy porridge, but your left over’s will harden up in the fridge and become something that you can bake or fry and give it some crispy texture. But I like it best hot out of the pot, eaten with a spoon, feeling like a kid again.


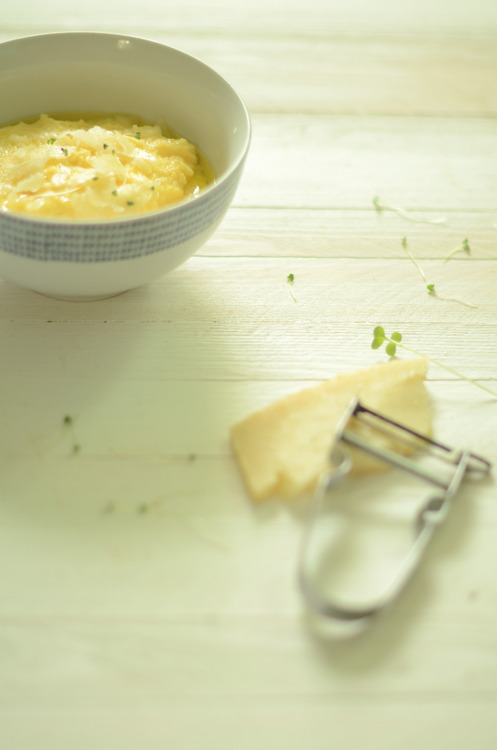
Polenta.

Serves 4

3 cups Chicken Stock, or water

2 cups Milk

1 cup Polenta

½ cup Parmesano Reggiono, or Granda Padana (optional)

2 tbsp Butter (optional)

In a medium pot over medium heat bring a pinch of salt, the stock/water and the milk up to a boil.

Reduce the heat to medium low.

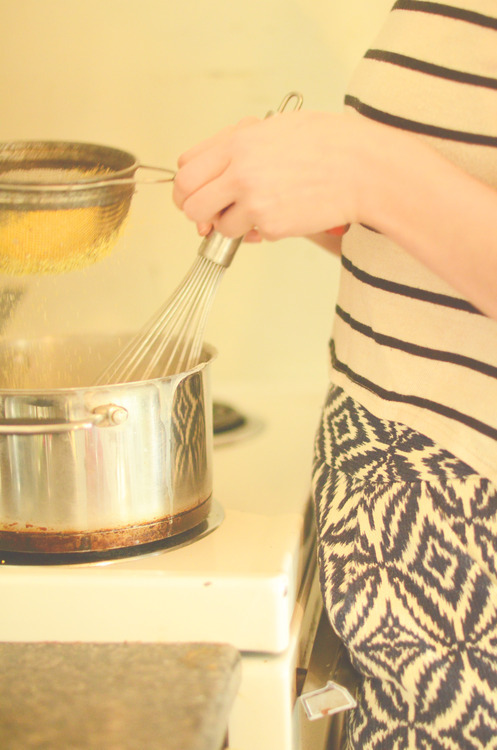
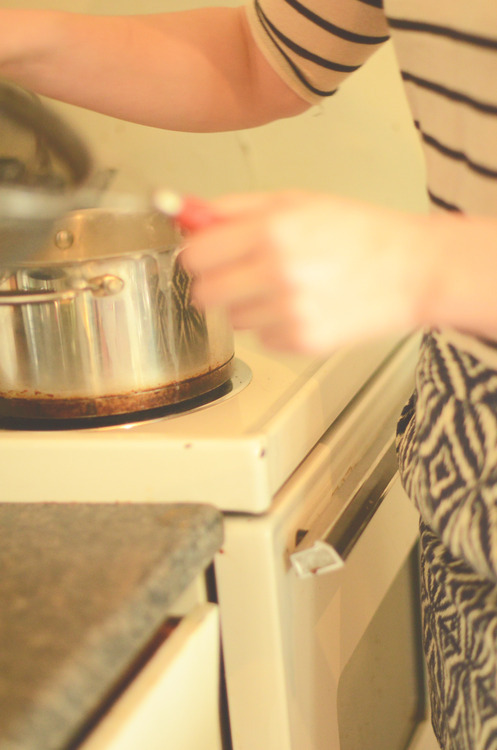
Pour the polenta into a fine sieve and shake it over the pot whisking the whole time- this will prevent lumps from forming.

Keep whisking until the polenta starts to thicken, about 2 minutes.

Switch from a whisk to a spatula or wooden spoon and stir on occasion for 25-35 more minutes, adding a bit of water if it starts to look too thick.

Add in the cheese and butter and stir until it is totally incorporated. Check for seasoning and add more salt if you need it. 

Orecchiette with Yoghurt, Spinach, Hazelnuts and Feta

Sometimes I just get stuck on a recipe. I’ll see it in a book and think, that’s weird/different/crazy/maybe delicious but I’m not sure yet, and I won’t make it for fear that what ever is weird/different/crazy/or maybe delicious will actually be awful and I’ll have wasted time and money on something I’m going to end up pushing to the back of my fridge so I can’t pretend I forgot about it until it’s too old and I have to throw it out.

I do this a fair bit. Because usually when I think something is weird and might not turn out, it doesn’t. And there are few things more frustrating than making something you think might not work, and then having it not work for just the reason you thought before you started. I’m learning to trust my gut on this.

The exception to this rule is Ottolenghi. Because he puts some things together and I think “I’m not sure about this” and then it’s always amazing.

And so with this proven track record of exceeding my expectations, I made pasta with a yoghurt based sauce.

I have been staring at this recipe since I bought the Jerusalem cookbook over a year ago.  My love affar with yoghurt is logn and well documented, but on pasta? I’m a little bit Italian and that seems pretty sacreligious to me.

Guys. I should not use my head, and instead to use Ottolenghis. I shouldn’t pretend I know better.

I don’t.

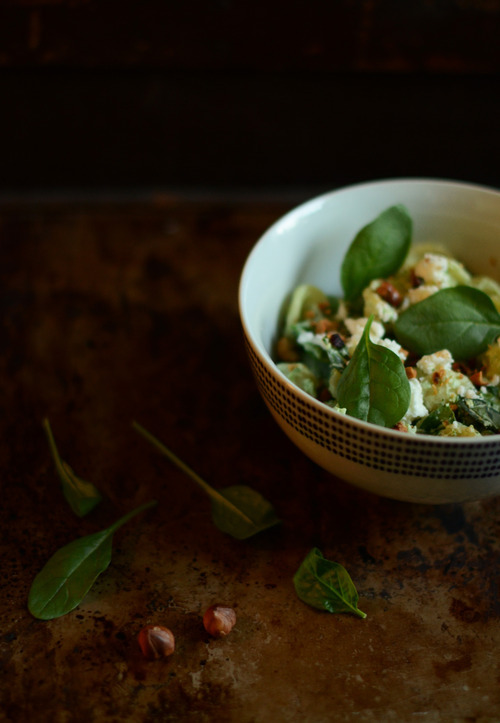
This pasta is wonderful. It’s light and creamy and tangy- the way you would expect from the yoghurt, but it’s also crunchy from the nuts, and super salty in certain bites from the feta.

I had to make a few changes to the recipe- I switched the pine nuts from the original to hazelnuts, because I had them kicking around, and inexplicably my local shop was out of frozen peas (seriously, who runs out of frozen peas?) so I used spinach instead.

The result was a pasta that was totally unexpected, and one that you should probably make right away. Seriously. Do it now.


Orrecciette with Yoghurt, Spinach and Hazelnuts

1lb Orecciette

2 cups Greek Yoghurt

4 cups Baby Spinach

¼ cup Basil, roughly torn

½ cup Toasted Hazelnuts, coarsely chopped

½ cup Feta, crumbled

2 tbsp Olive Oil

Salt and Pepper

Bring a very large pot of water to a boil. Salt generously.

Cook pasta to directions on box.

Meanwhile, in a food processor pulse the yoghurt with 2 cups of spinach, the olive oil and some salt.  Mix until smooth.

Pasta is cooked, strain. Immediately mix together with the yoghurt mixture, and then toss in the basil, hazelnuts and feta.

Eat immediately. 

Green Olive and Orange Tapenade

I’m not sure why, but I’ve been thinking a lot about my trip to New York last year. Maybe it’s because it was this very date, last year, when we were there, or maybe it’s because  I’ve been flipping through the pages of of the Ann St Studio blog lately and she has the most gorgeous pictures of that fabulous city. Or maybe, and mostly likely, it’s because I have felt like I haven’t left Vancouver in too long. I’m feeling wistful and dreaming about hoping on a plane to go somewhere, anywhere maybe. Thinking about it, I’ve realized that I’m often somewhere else in the fall. It might be my favourite time to travel. 

Not that I’m complaining or wining, I’m going to be in Seattle not once, but twice next week for workshops, and I think that will push this feeling out of my system. 

But in the interim, I’m going to sit here and think about New York. 

I’m going to imagine my next trip and plan it in my head and pretend I’m going to visit my sister and that we’ll go to galleries, and drink cocktails, and just hang out and catch up. In this dream she isn’t working full time and doing her MBA but would have time to show me her favourite spots and introduce me to her friends and let me see the life she’s building there. A life I would love to see. 

And I’m imagining going back to this wonderful little restaurant called Left Bank where I ate the most amazing chicken of my life last year. 

The chicken itself was nothing crazy, just roasted simply with some lemon and thyme, but the sauce was revelation. 

And also, possibly the most basic sauce I’ve ever had on a meal at a restaurant. 

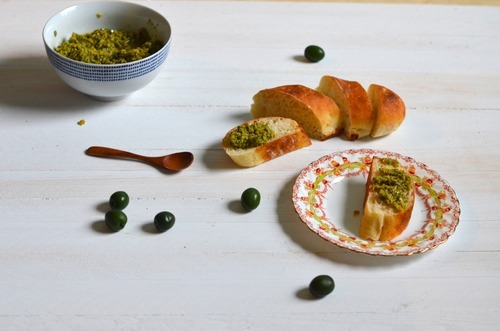
It was simply the most gorgeous bright green olives that were torn into small pieces and mixed with lemon and orange zest and bound in a very loose way with olive oil. 

But these olives. They were the best olives, and the orange was just this hint in the back that brightened the whole thing. 

There was absolutely nothing fussy about any of it, but it was perfect. 

Just perfect.

So I was thinking about this the other day when I was panning on having some friends over, and I made this sauce, only I made a great pile of it and we slathered it on baguettes and ate it with our wine. 

I’ve never had a tapanade with green olives but that’s basically what this was. 

With the left overs, I have dolloped it on top of poached eggs, put spread it on toast and made a chicken sandwich, served it along side pork. 

It’s just the most lovely sauce, that is both deeply savoury and a little bit fruity. 

And it’s wonderful. 

Green Olive and Orange Tapenade

500mL Green Olives*

1 large Orange

1 Lemon

3/4 cup Olive Oil 

*do not bother making this with the canned green olives you get at the store, you will be disappointed. Instead go to an Italian grocer and try a couple different kinds. I like the dark green nocarella olives the best. 

Pit the olives- if you have an olive pitter this will be fast work. If you don’t use the palm of your hand to press the olive down and squish it. Then from the squished olive pull out the pit. If you have bought pitted olives (and I would recommend you don’t, they are often of a worse quality) still go through them and make sure there isn’t a pit to be found. There is nothing worse than turning on your food processor and realizing that there was a pit that you missed and it is now splintered throughout your sauce.)

Put them in a food processor and zest the orange and half of the lemon in. Now cut the orange and squeeze in the juice of half.

Add in half of the olive oil and pulse. You don’t want it to grind into a paste. You want a loose consistency. 

Taste. Does it need a bit more orange or lemon? Add it if you think it does. 

Now stir in the rest of the olive oil, put it in a bowl and serve!

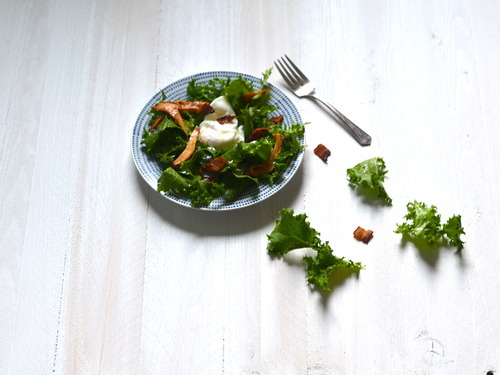
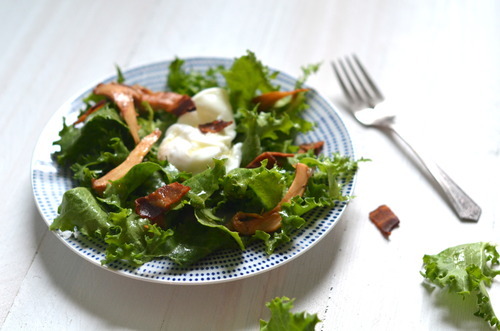
Sunday Salads- Curly Endive Salad with Bacon, Chanterelles, and a Poached Egg

image

Friends. I have no been eating enough salad lately.

I came back from visiting a few months ago on a veggie eating mission. I was so excited about vegetables! And lettuce! I was eating so much lettuce.

I am embarrassed to tell you how much cake I’ve eaten in the last week. How many gross sugary candies that have been put near me that I have scarfed down. How much bread I’ve consumed. It hasn’t been good. I’m not going to give you numbers.

So it’s probably time to get jazzed about salad again. It’s already started a little bit, I walked by my favourite green grocer and they had the most beautiful swiss chard out, and something stirred in me. The part of me that loves healthy foods. The part of me that has been pushed down in favour of sour cherries and fuzzy peaches.

I never eat candy. What is up with me lately?

Anyways. Salad.

This salad is a slight twist on a French bistro classic. Slightly bitter frissee lettuce, tossed with a dijon vinegrette, sprinkled with flecks of bacon, and topped with a poached egg. It is the best salad. And you can eat it for any meal of the day. It’s a brilliant thing.

There are two twists on this staple. The first was just that I couldn’t find frissee. So I used curly endive. It’s fabulous, but use frissee if you can. Butter lettuce would also be appropriate here.

The second twist is the addition of some beautiful chanterelle mushrooms. I just added these on because I couldn’t resist buying them. I love chanterelles, and there season is so fleeting. You have to put them on everything while you can.

Of course, you could omit them, or use another kind of mushroom, I wouldn’t judge you for that. But if you can find chanterelles. Do it.

image

Curly Endive and Bacon Salad with a Poached Egg, and Chanterelles.

3 cups Curly Endive, washed and torn into small pieces.

100 grams Thickly Cut Smoked Bacon, cut into small rectangular pieces.

200 grams Chanterelle Mushrooms

2 Eggs

1/4 cup + 2 tbsp Extra Virgin Olive Oil

1 tsp Grainy Dijon

2 tbsp Lemon Juice

Salt and Pepper

Bring a large pot of water to a boil.

In a frying pan over medium-low heat slowly render out of the bacon, so it get’s nice and crisp but doesn’t dry out.

Scoop bacon pieces out of the fat and put them on a towel lined plate to cool.

Clean the chanterelles- with a pastry brush, carefully brush out all the dirt. With a paring knife cut the very bottom of the mushroom off, just a tiny bit, and then cut the mushrooms into wuaters or sixths, depending on the size.

In a small frying pan warm up the extra 2 tbsp of olive oil.

Add in the mushrooms and cook until the mushrooms are nicely browned. Season generously with salt and pepper and set to the side.

In a small bowl mix together the remaining olive oil, lemon juice and dijon.

Poach your eggs- gently crack your eggs into the pot of gently boiling water.

Let them cook for about 3 minutes, or until, when gently lifted from the water with a slotted spoon, the whites feel hard but the yolk still feels soft.

Mix the endive with the dressing. Divide it into two bowls.

Sprinkle the bacon and chanterelles onto the lettuce, and then place a poached egg onto each bowl.

And done. Get it in you.

Entertaining- Late Summer Provence Menu

image

There is little I like more than having friends over for dinner. There is the prepping, the cooking and the baking, things I love and do every day. But that is followed up with wine, and eating, and laughing. It is the most satisfying thing to me. I love entertaining.

Here’s a secret too- I kind of think I’m awesome at it.

I know that sounds like I’m blowing my own horn, and that’s totally because I am. But I have a cute little apartment, and I can bake a mean cake, and Jordan- the handsome man who lives with me- stirs a great cocktail. We have people over fairly often, and I think we’re good at it.

image

There are reasons for that though, and mostly it’s because I have cooked, and currently bake, professionally, and Jordan used to bartend. After cooking for a hundred people a night for 5 years making dinner for a few friends doesn’t seem so hard. And when you paid your way through school keeping people liquored up, it’s almost second nature in your own home to keep wine glasses filled.

I’m often surprised though when we head over to other peoples houses how stressed out they get. They often make things fussier than they ought to be, or doubt their skills, or find themselves rushing around at the last second.

So I thought that I might start writing about throwing a great party. About planning a menu that is simple and elegant, what you can make in advance, and little ways to make your dinner table pop. And, with the help of Jordan, I think I’ll also give some suggestions for drinks.

And so, without further ado, here is our first Entertaining section!
image

Menu

Warmed Spiced Olives

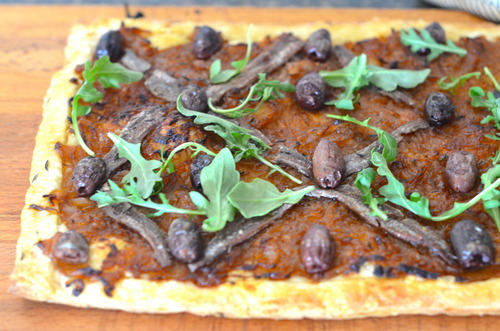
Pissadierre with Arugula Salad

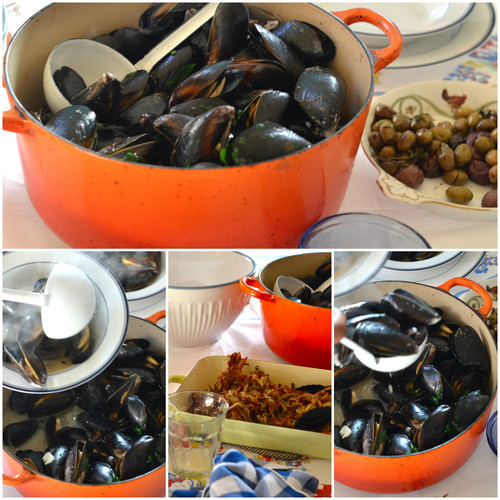
Local Mussels with Bacon, Garlic, and White Wine

Baked Frites with homemade Aoli

Hazelnut and Fig Jewel Cake

To many of you this might seem like the simplest and most basic thing, and it is, but when I’m thinking of a menu I try to stick to one geographical area. No “Around the World” dinners, I keep it simple by staying in one region. For this dinner everything was inspired by the South of France.

I also hate serving food in the kitchen and bringing it to the table. I love family style meals, I don’t want to pretend I’m in a restaurant when I’m at home. Plus, this way you don’t have to ask your host for seconds!

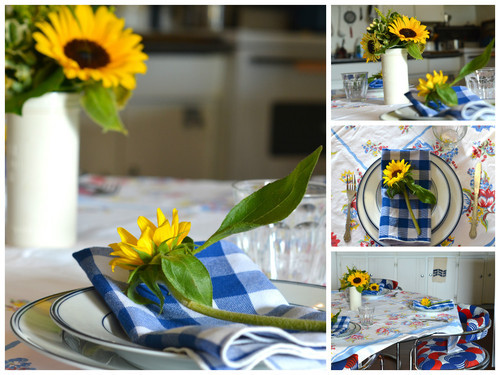
In the theme of the South of France as well I wanted a relaxed table setting, I had a small bouquet of sunflowers in the centre, a floral tablecloth and my blue gingham napkins. I set each setting with appetizer and dinner plates and I marked each spot with an additional sunflower.

I love sunflowers, and while they may not be abundant in Provence, they are aplenty here. And they go beautifully with my “flame” coloured pot that I served the mussels in.
image

To help make sure you know what to do when;

Timeline:

Two Days Before Hand:

  • Get all ingredients

  • Make Puff Pastry

  • Spice Olives

  • Caramelize Onions

The Day Before

  • Clean your house

  • Do small things like iron your tableclothes and make sure you have enough clean napkins. You don’t want to worry about things like that when your guests are arriving.

The Morning Of:

  • Make the puff pastry

  • Make and bake the cake

  • De-beard the mussels

  • Make Aoli

Now go clean yourself up, do another tidy (I sweep my flour about a thousand times before guests arrive, as I am always dropping things!) and pour yourself a glass of wine.

An hour before your guests arrive:

  • Bake your pissaldierre

  • Make your salad dressing

  • Set your table up nicely.

When Guests Arrive

  • Warm up and serve the olives

All the rest can be done as you’re ready- from tossing the salad and serving it up with the tart, to cooking the mussels for the main.

Recipes:

Spiced Olives:

1lb Mixed Olives (I like to get a mix of green and black, but I always try to find nicoise olives, the tiny Italian black olives. Ooh I love nicoise olives!)

1 tsp Edible Lavender Flowers

1 tbsp Fresh Thyme

1 tbsp Olive Oil

1 tsp Fresh Rosemary, finely chopped

Mix all the ingredients together and let sit as long as possible, for at least 1 day.

When you’re ready, warm them in the oven (they are very forgiving, any temperature between 300 and 450) for about 5 minutes.

Serve with an additional bowl for the pits.

Pissaladiere

1 cup Cold Unsalted Butter, cut into cubes

2 cups AP Flour

1/2 tsp Salt

1/2-3/4 cup Ice Water

4 medium Onions

1 tin Good Quality Anchovies in Olive Oil

15 Pitted Nicoise Olives or other good quality black olives.

1 tbsp Olive Oil

Sa;t ad Pepper

(To see my full tutorial for the dough click here.)

On a clean countertop toss the cubes of butter into the flour and salt.

With a rolling pin roll out the butter, flipping it over often with a spatula or pastry scraper.

Continue to do this until all the butter is in long thin strips.

Pour 1/4 cup of the water on top and gently fold the butter mixture on top of it.

Continue doing this, adding more water as needed until a cohesive dough is formed.

Chill the dough for at least an hour, or up to two days.

Slice the onions thinly.

In a medium pot over medium heat warm the olive oil.

Cook the onions, stirring regularly, for about 10 minutes.

Lower the heat and let the onions cook until very soft and a light even brown color. The onions should be soft enough that you squish them in half when you pinch them with your fingers.

These can be kept in the fridge for up to 5 days.

To Assemble:

Preheat the oven to 400F

Roll out the dough on a well floured surface, to a rectancle about 1/4 inch thick (it can be square or circular in a pinch!)

Carefully cut the edges of the dough- you don’t want to drag the knife- that can seal the layers together. Instead cut straight down.

Now do the same thing about 1 inch from the edge of the dough, creating a border. You do not want to cut all the way through.

Put the dough on a parchment lined baking sheet.

Spread the onions on the pastry- keeping clear of the border.

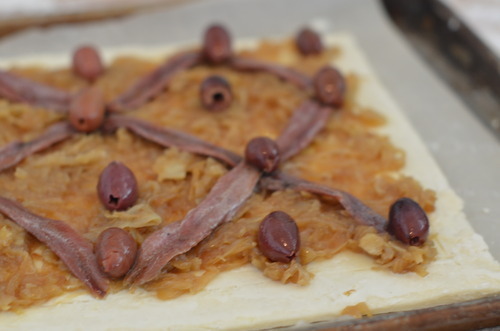
Now put the anchovies in a lattice pattern over the onions, and then place an olive at the point where the anchovies meet.

Bake for about 35 minutes or until the crust is a uniform brown colour.

Allow to cool for at least 30 minutes before serving.
image

Arugula Salad

3 cups Baby Arugula

1 cucumber, thinly sliced.

Juice of 1 Lemon

1 tsp Dijon

3 tbsp Olive Oil

Mic the lemon, dijon, and olive oil. Season to taste with salt and pepper.

Add arugula and cucumber and toss. Serve immediately.

Mussels with Matchstick Frites

8 thick slices of Double Smoked Bacon, cut into 1/2 inch pieces

1 cup White Wine

2 cloves of Garlic, minced.

4 lbs Mussels

1/4 cup Unsalted Butter

Debeard the mussels- each mussel has a hairy bit sticking out of it- this is like it’s arm to attach to rocks etc. Pull it off- this is done easily enough by hand but is extra easy with the help of tweezers.

In a large pot over medium heat cook the bacon until it is very crispy.

Strain off the fat.

Add the garlic and cook until it is fragrant, but not browning.

Add in the mussels and the wine and immediately put a tightly fitting lid on top.

Shake the pot vigorously and cook for about 3 minutes.

Take off the lid. When the mussels are all opened add in the butter and shake again.

When butter is melted you’re ready to serve!

Frites

3 lbs Yukon Gold Potatoes

1/4 cup Olive Oil

1 tbsp Rosemary, finely chopped

1 tbsp Salt

1/2 tsp Pepper

Preheat oven to 450F

With a mandolin (or a lot of patience and practise) cut the potatoes into matchstick sized pieces.

Coat with the olive oil, rosemary, salt, and pepper.

On a parchment lined baking sheet spread out the potatoes

Bake, stirring every 15 minutes or so until the potatoes are evenly cooked, about 45 minutes.

Garlic Aoli

1 Egg Yolk

1/4 Extra Virgin Olive Oil

1/4 Canola Oil

1 tsp Dijon

1 tbsp Lemon Juice

Salt and Pepper

(For my full tutorial click here!)

In a small bowl mix together the yolk and dijon.

Slowly whisk in the olive oil, drip by drip, whisking vigorously to keep it emuslified.

If it starts to get thick add in some lemon juice.

Add in the canola oil the same way.

Season with salt and pepper!

Fig and Hazelnut Jewel Cake

1/2 cup Butter, softened

1/2 cup Brown Sugar

1/2 cup White Sugar

1 tbsp Vanilla Extract

2 Eggs

3/4 cup AP Flour

1/2 cup Ground Hazelnuts

1 tsp Baking Powder

1/2 tsp Salt

about 10 Figs, cut in half

Coarse Sugar for Sprinkling.

Preheat oven to 350F

Butter and flour a 10 inch tart pan, or round cake pan with a removable bottom.

In a large bowl cream together the butter and sugars.

Add in the eggs one at a time. Add the vanilla.

Mix in all the dry ingredients, except the coarse sugar. Stir until just combined.

Spoon the batter into the prepared pan and smooth the top with an offset spatula.

Place the figs in a circular pattern around the pan, like a flower.

Sprinkle with the coarse sugar and bake until an inserted skewer comes out with only a few crumbs, about 35 minutes.

Sunday Salads- Sesame Soba Salad with Cucumber and Kale

image

Sometimes I make something and I just know I have to tell you about it right away. I need you to know how great it is, I need to tell you now.

Sometimes I make something, and I tinker around with it. I change things up, and months after the first time I decide it’s okay to write about it. It’s deserving.

But sometimes, and this is true often more of cooking than baking, that I make something, and it seems so obvious, so easy it would seem almost insulting to you to give it a recipe and put it up here. It’s something that I make so often that I assume everyone does. That it’s just normal and simple and not worthy of the formality of a recipe and a blog post.

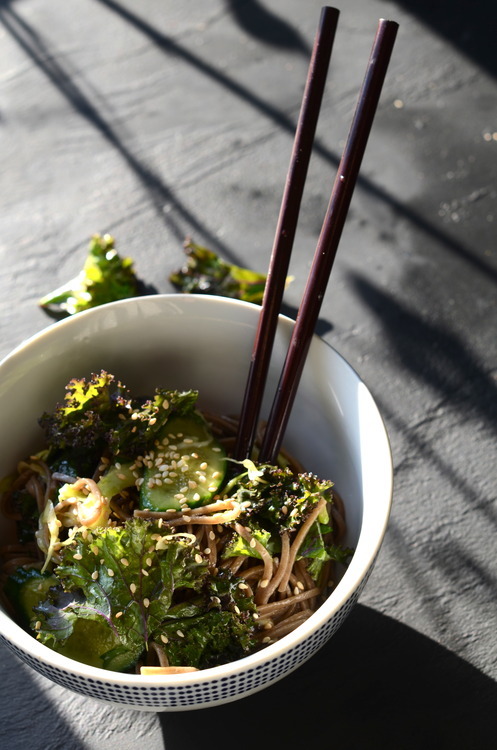
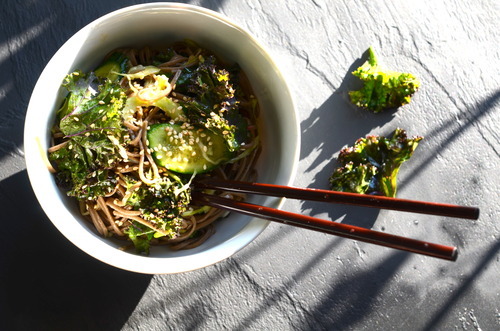
But then I realize that everyone cooks different things at home, and something like this soba noodle salad, which I am making variations on almost weekly, might be worth sharing.

Soba noodles are a staple in my house. I make a big bowl and they last a few days, sometimes serving with steak or some fish, but just as often eating it straight up. It’s a quick lunch or dinner, and it feels good when you eat it. I find myself craving it in the summer months, it’s light and cold and filled with things that my body needs.

So I hope that you look at this not just as a recipe, but as a starting point, mix it up, add in things that you have in your fridge, make it spicier, or lime-ier.

You get to decide.

image

Soba Noodle Salad with Cucumber and Kale

2 bunches of Soba Noodles (they are usually sold in pre-portioned bunches)

1/2 English Cucumber, thinly sliced

1/2 bunch Kale, torn into small pieces off the center stem.

4 Green Onions, thinly sliced on a bias.

1/4 cup Soy Sauce

1 Lime

1 tsp Siracha or other hot pepper- garlic sauce

1/4 cup Sesame Oil

3 tbsp Toasted Sesame Seeds

Bring a large pot of water to a boil.  

Cook the soba to the package instructions. Drain and rinse with cold water, stirring until the noodles cool. If you don’t stir, they won’t cool down properly. 

Meanwhile, mix together the soy, lime, siracha, and sesame oil. Check for seasoning, adding more of whatever you need until it’s perfect. 

Mix sauce with the noodles then mix in the veggies. 

Serve and sprinkle with the sesame seeds. 

Pasta with Wild Leeks, Mushrooms and Arugula

image

A few weeks ago I was back in Toronto visiting my Mom. We visited my best friends cottage, we spent an absorbanant amount of money on Quebec cheese, and we walked around the city. It was a wonderful trip, and a much needed bought of relaxation.

An old friend of mine, Andrew, came over and we made dinner and hung out with my mom and her boyfriend, John. When we left the house to go grab a drink down the street we both turned to each other and said, almost at the exact same time “I hope I’m that when I’m a real grown up”.

Don’t get me wrong, they have their hardships like everyone else, obviously, but there is something wonderful about the way they live. My mom walks to work everyday, John plugs away at his PhD in the study, (as one of her friends put it to me “leave it to your mother to find a 60 year old student!) they live in this beautiful house, and eat gorgeous food. They seem to live really great lives.

My mom is also a fabulous cook, so when I visit most of our time is either spent in her wonderful neighbourhood shopping for ingredients or in the kitchen. We spend a lot of time in the kitchen.

My mom cooks tons of vegetables. Tons. It’s one of the most wonderful things about the way she cooks actually. She is teeny tiny, and eats lots of cheese and pasta and delicious things, but she also eats more veggies that probably anyone else I know. There is always a salad with dinner, but beyond that, she just puts more vegetables in everything. Almost anything cooked gets a bag of arugula, or spinach, or pea shoots wilted into it.

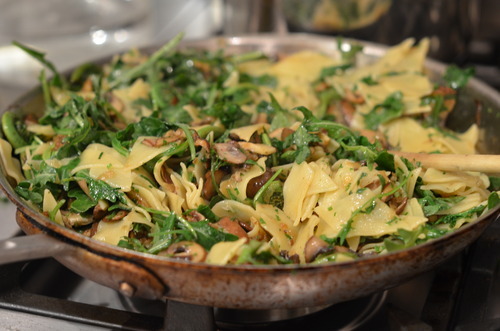
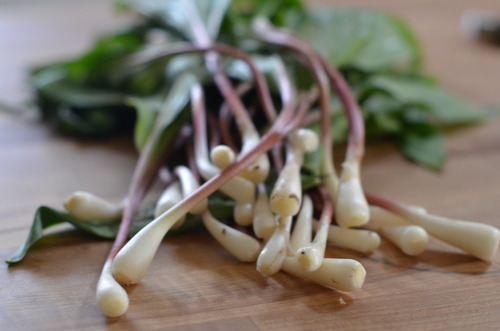
This is a great example of that for me. Just a simple pasta of sauteed ramps, and mushrooms, with a handful of parm and a sprinkling of parsley, thyme and basil. And then a huge bag of arugula wilted into it. Don’t get me wrong, I wilt greens into my pastas all the time, but she just adds so much more than I normally would. And it results in something wonderful, something sharp and bit bitter, but mostly just more flavourful.

image

1 box Pasta

1 bunch Ramps, or Wild Leeks, or Traditional leeks, cleaned and sliced on a bias

2 cloves Garlic, minced

3 cups Cremini Mushrooms, sliced thinly

1/2 cup Freshly Grated Parmesan, or Grano Padano

8 cups Baby Arugula

1/4 cup Parsley, chopped

3 tbsp Basil, chopped

2 tbsp Thyme, chopped.

Olive Oil

Salt and Pepper

Bring a large pot of water to a boil. Salt generously and cook the pasta to the directions on the box. Strain.

Meanwhile, on medium high heat warm up a good glug of olive oil.

Sautee the leaks for about 3 minutes. Add in the mushrooms and cook until starting to caramelize, about another 5 minutes.
Clear a small spot in the middle of the pan and add in another splash of olive oil.

Cook garlic for about a minute until it is fragrant but not browning.

Mix in the leeks and the mushrooms.

Add in the pasta, herbs, and cheese and then toss in the arugula so that it starts to wilt but isn’t soggy. Season liberally with salt and pepper.

Serve immediately.  

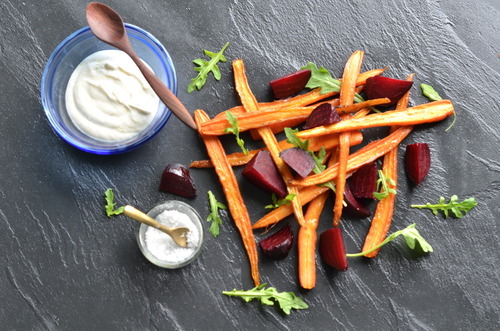
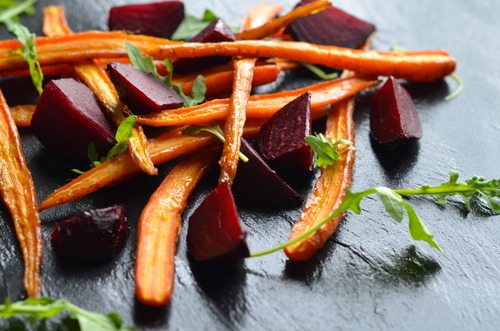
Sunday Salads- Roasted Carrots and Beets with Cumin Spiked Yoghurt

I always find this time of year a bit tricky. I always try to eat locally, but I get so sick of cabbage and root veggies. And spring- actually, it’s technically summer now isn’t it!- and I really want to eat green things, but man it’s a slow Spring there is nothing in my local markets. It’s killing me a little bit.

So here is a simple salad of roasted veggies, with some cumin laced yoghurt. My apartment is weirdly cold, so it was actually wonderful to have the oven on to make this, but this would also be terrific with grilled veg- and faster to put together!

1 bunch Heirloom Carrots

1 bunch Baby Beets

1/2 cup Yoghurt

1 tsp Cumin

2 tbsp Lemon Juice.

Salt
Pepper

Extra Virgin Olive Oil

Preheat the oven to 375F

Cut off the bases of all the beets, wrap them in tinfoil and put them in the oven.

Peel the carrots, if they are large, if they are thin, just scrub them

After 30 minutes, toss the carrots with a good glug of olive oil, salt and pepper.

Put the carrots onto a parchment lined cookie sheet, bake for 20 minutes.
Meanwhile mix together the cumin, yoghurt, lemon, and season with salt and pepper.

Remove the beets from the oven, remove them from the tin foil and carefully peel them- the skin should just slide off.

Toss them with the carrots.

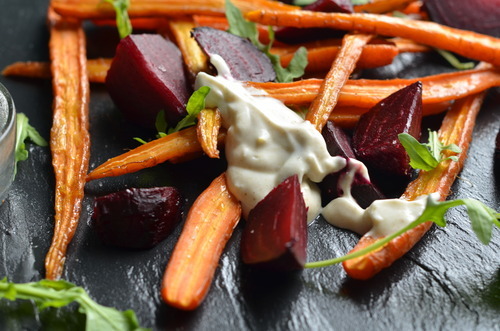
Smear the yoghurt on the plate, and arrange the veggies on top.

Tuesday Tutorials- Gnocchi

I wish that I had a cuter story about gnocchi. I wish my Nona had taught me to rice the potatoes, that she had shown me just how much flour you need to bring the dough together. I wish, to be honest, I could even remember her gnocchi, but I don’t. Although I’ve heard my mom and cousin talking about how incredible they were, the only time I remember her serving us gnocchi I also remember her apologizing for not making them from scratch.

But such is memory I guess, flawed.

So instead I learnt how to make gnocchi from reading the French Laundry Cookbook, where Thomas Keller goes to great length to explain how to make them. There are many ways to make gnocchi, and many debates on how to do it best, should you use starchy russets potatoes, or waxier Yukon golds? Should there be cheese added, or just on the top? If you use another starch, a squash, or a sweet potato, is it still gnocchi?

Over the years since I first forayed into the world of homemade pastas I have tried just about every possible method and every possible ingredient, and this is the recipe I always come back to. I use Yukon golds- waxier, so that you get more control over the starch content, no cheese in the gnocchi, it’s an unnescessary flavour, and it detracts from what is darn close to perfection to begin with. And you can call it a squash gnocchi, or a sweet potatoe gnocchi, but again- if it ain’t broke, don’t fix it.

Gnocchi are surprisingly simple to make, you roast the potatoes, push them through a potato ricer or through a seive, to get very fluffy potatoes, and then you add in a few eggs and a touch of flour and knead it together until it barely forms, and then roll it, cut it, and boil it. It’s also wonderful because it freezes brilliantly, so if you make a bigger batch you can keep some for later.

While it is simple, and just about anyone can do it, I should note that it takes a quick hand, and the first time you do it you should stick to a small batch and just practise the technique. Gluten, the protein in wheat, forms at 55C and you want the dough to come together before it cools down past that temperature, so you must work quickly and keep a cloth over your dough as you go. And always have a pot of water boiling so you can test the little pastas, and make sure the consistently is just right.

,

Gnocchi

Adapted from Thomas Kellers The French Laundry Cookbook

2lbs Yukon Gold Potatoes

1- 13/4cups AP Flour plus lots more for rolling 

3 Egg Yolks

2 tbsp Salt

Preheat the oven to 450F

Poke some small holes in the potatoes with a fork on every side, and then lay them on a baking sheet and bake until an inserted knife goes in and out without any resistance, about 45 minutes to an hour.

Bring a small pot of water to a boil.

As soon as the potatoes have cooled just enough to touch, put a towel over the rest of the potatoes, take one and cut it in half. Without peeling it, put it flesh side down in the ricer and press it in until no more potato comes out. Repeat with the rest. If you don’t have a potato ricer you can take a sieve and press it the potatoes through with the back of a large spoon, this is a bit more time consuming, but totally effective- I have done it many times.

When the potatoes are all riced make a well in the middle of the bowl.

Add in the eggs and a bit of the flour, and the salt. Mix until it has barely come together. If the dough is sticking to your hangs you need some more flour.

Again add in a bit more and check again, making sure your hands are clean.

One the dough is supple, but not sticky your in business.

Take about a cup of the dough out. Put a tea towel over the rest.

Flour the surface of your counter generously and roll out the reserved dough. I roll mine with both hands, and when it starts to feel a bit too long, I just cut it in half and do each hald seperately, the dough will break if you are too rough with it.

With a pastry cutter or a knife cut the dough ito small logs. You can at this point roll them to get ridges on a gnocchi board or the back of a fork but I find this to be not too important. Now put them on a ery well floured tray and shake the tray a bit so that each piece is totally covered in flour. They will stick together if you are not diligent about thi.

Now put a couple in your boiling water to test. If you haven’t added enough flour they may break apart. If they do just mix in another small handful. If they don’t keep going!

Repeat with the rest of the dough until you have lots of lovely little gnocchis all ready to go.

If you are planning on freezing some/all your gnocchi put them in the freezer as they are on the tray covered in flour. After a couple hours take them apart and put them in a freezer bag and put them back.

Bring a very large pot of water to a boil. If you are using frozen gnocchi use the biggest pot you have and do it in batches, otherwise they will bring down the water temperature too much and won’t cook properly.

Salt the water generously and put your gnocchi in!

When they rise to the top they are ready to be put in your favourite sauce and eaten with abandon.

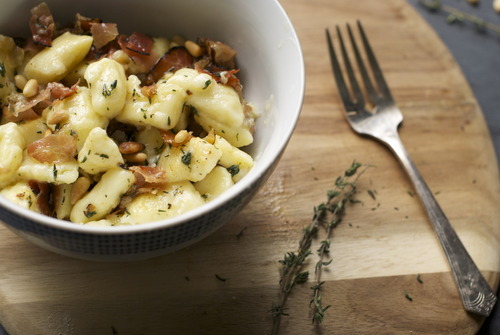
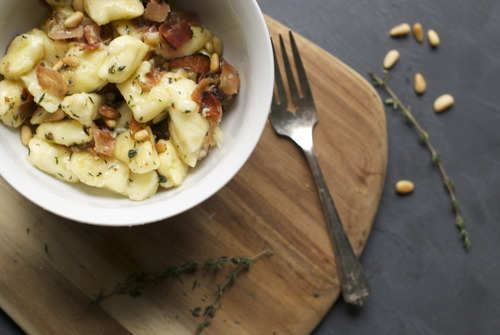
Here I have sauteed some garlic and shallots in some olive oil, added in some pancetta, and topped it off with toasted pine nuts. The simplest and most delicious dinner!

Sunday Salads- Semolina Crusted Cauliflower with Arugula and Capers

image

Phew.

The last month has just about taken it out of me. Valentines was very near the death of me. For serious.

The thing about doing the pastries for 4 different restaurants is that, when one is busy usually all of them are busy. And then it gets crazy.

Post Valentines there will be lots of deep breathing, lots of yoga, and lots of writing. I know I’ve been bad to you you all lately. I just haven’t had a chance to breath lately.

But now is the prime time to start again, to write again, and to eat salads again.

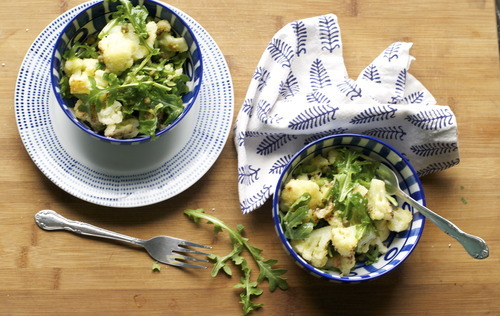
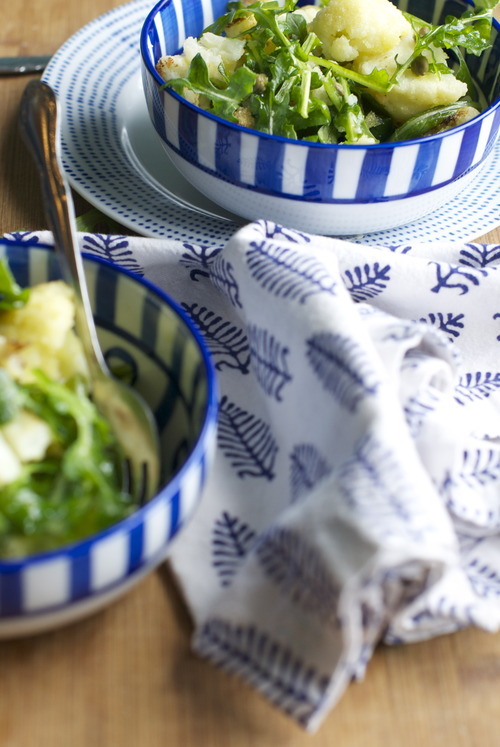
This one is one of my all time favourites, one I make pretty regularly and one that gets lots of praise every time I do. It’s full of super crispy cauliflower, peppery arugula and the sharp acid of capers. It’s admittedly, not one of the healthiest salads I make, I know it, and you could bake the cauliflower if you wanted to, I have and it’s still good, but there is just something about it when it’s pan fried in bubbling olive oil that just makes it better. It might make everything better.

image

Semolina Crusted Cauliflower with Arugula and Capers.

1 head of Cauliflower

1 cup Semolina Flour

1 cup Olive Oil

Half a Lemon

1 tsp Dijon Mustard

1 tbsp Capers- I like the really little ones if you can find them

2 cups Arugula

Bring a large pot of water to a boil

Mix a tsp of salt with the semolina flour in a medium bowl.

In another medium bowl mix together the lemon and mustard and slowly mix in a couple tablespoons of olive oil. Taste and add salt to your liking.

Meanwhile cut the cauliflower into small-ish florets.

Generously salt the water and blanch the cauliflower for about 1 minute.

Drain it well and immediately mix it into the semolina flour and toss to coat.

In a large saucepan over medium- high heat warm about a quarter of a cup of olive oil.

Put in half the cauliflower and fry until it’s nicely browned.

Drain off the oil, and put the cauliflower into the bowl with the dressing.

Repeat this process with the rest of the cauliflower, adding more olive oil as needed.

Mix in the capers and arugula and serve immediately.

Valentines Breakfast for Dinner- Pancakes with Raspberry Rose Syrup

Here’s the thing of it, guys just don’t like Valentines Day. I have never heard a man sound excited about buying flowers that are suddenly double the price two weeks into February. I have never been told that a male friend is really excited to take their girl out for dinner, or to a show, and I think that’s mostly because men really don’t like being told what to do. So they don’t like being told they have to be romantic. They’re stubborn like that.

Here’s the other thing, all girls like Valentines. Even the tomboy-est of ladies wants a day of the year where the door is opened for her, and roses are sitting out on the table when she gets home. It’s a silly day, but it’s also wonderful. It’s a day of romance, and it’s a day for pink. And I will make no claims pretending to be above it.

It’s just fun.

But what isn’t fun is how expensive it is to go out on Valentines, how much more restaurants charge for things, and how busy it is. Which is why, when I’m not working, Jordan and I make dinner in on Valentines. And this year, I’m proposing pancakes.

I love breakfast for dinner. It is my absolute favourite. It is simple, and not fussy, but it feels special. It feels indulgent, and it feels a little bad for you, and if you have pancakes for dinner, you’ve already had your sweets and you don’t need dessert!

It’s extra festive if you cut out some hearts from pretty paper and sew them onto string, and tie that string onto a couple of skewers so that you have heart bundting on your pancakes. But you don’t have to.

These pancakes are incredibly good, they are the lightest fluffiest pancakes I have ever encountered, and they are best when they are smothered with this raspberry-rose sauce. Just please don’t go and buy the raspberries that are imported from Argentina (unless you live in Argentina, in which I’m super jealous) I used some lovely frozen local ones and they are all kinds of delicious.

Super Fluffy Pancakes with Raspberry Rose Syrup

Syrup:

1 1/2cups Sugar

1/3 cup Water

1cup Raspberries

1 tsp Rosewater- or to taste

Pancakes:

(adapted from Oh So Sinfully Delicious)

2cups AP Flour

1 tbsp Baking Powder

1/2 tsp Salt

1/4 cup Sugar

1 cup Buttermilk, or regular milk with a tsp of lemon juice mixed in.

1/4 cup Melted Butter

2 Eggs

In a small saucepan mix the water and sugar, and over low heat allow all the sugar to dissolve. Add in the raspberries and bring to a boil. Add in the rosewater, adding more depending on your preference and how strong your rosewater is- just don’t add so much it gets perfumey.

In a medium sized bowl mix together all the dry ingredients.

In another bowl mix together the milk, butter and eggs.

Quickly pour the wet ingredients into the dry ingredients and mix until barely combined and still lumpy.

Warm a frying pan to a low heat and add in the oil. Add in big spoonfuls of the batter into the pan. When bubbles start to appear in the top fly the pancakes over.

Cook over low heat- the batter is very thick and they will take a little longer to cook then you may be used to, but don’t rush it by raising the temperature or they will burn.

Just put them on a plate and smother then with syrup and eat up!

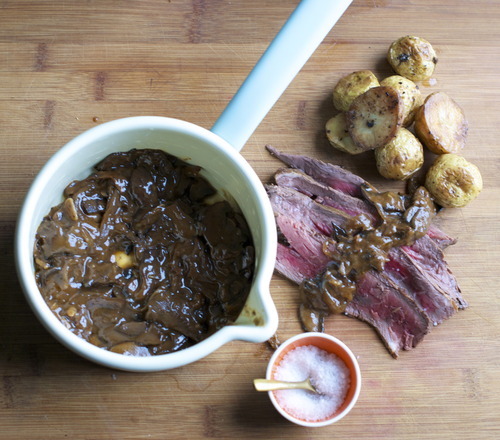
Tuesday Tutorials- Better Than a Restaurant Steak with Wild Mushroom Sauce

image

About a year ago I wrote an article for a local online magazine on finding the best steak in the city. I ate some great steaks, and had an extremely happy boyfriend who came along with me. But while I was eating my way through the city, I realized something; there is no reason to order steak at a restaurant.

I’m going to tell you something else; I don’t buy expensive steaks.

I’ve never been a big tenderloin fan, I find sometimes the tenderness verges on mushy and that totally freaks my mouth out. I like something with a bit more chew, although not too much. Mostly though, what I like in the cheaper cuts of meat is the flavour.

The rich beefy flavour comes from muscles that have moved and been worked, which means cuts like the flank, the flatiron, the sirloin are all great cuts of meat, if you give them a little love.

And to back up this argument, I encourage you to think of steak frites in France, where the steak is always a bit tough.

The easy way to get the sinue out is to marinade it. It takes nothing but planning your meal 12 hours in advance, which, well, I know that doesn’t always happen. In that case, buy a ribeye.

But if your feeling prepared, and thought about dinner the night before, marinade your steak.

The other thing that is easy to do at home is make a super fantastic sauce. It requires not much money, and about 15 minutes of your time. And the rest, as they say, is gravy. Sorry, I couldn’t help it.

image

Seared Steak with Wild Mushroom Red Wine Sauce

1 Steak, Flat Iron, Flank, or some Sirloin

2 tbsp Balsamic Vinegar

2 tbsp Soy Sauce

1 tbsp Salt

1tsp Black Pepper

Sauce:

1 pckg Dried Wild Mushrooms (I found dried chanterelles!)

1 lb Cremini Mushrooms, thinly sliced

1 Large Onion, thinly sliced

2 cloves Garlic, minced

1c Red Wine

1 tbsp Flour

3 cups Chicken Stock

2 tbsp Tomato Paste

Olive Oil

Salt and Pepper

Mix all the ingredients in a medium sized bowl. Cover with seran wrap and put in the fridge overnight.

Put the dried mushrooms in a small bowl and cover with 1 cup of water.

In a large saucepan over medium high heat, warm a big glug of olive oil and start sauteeing the cremini mushrooms. You want to get them nice and browned.

When they’re brown push them to the edges to the pot and in the middle, put in the onions and brown them. Add the garlic and the tomato paste and and stir them until the middle as well.

Push that to the outside of the pot and put in another glug of olive oil and the flour. Stir that for a minute.

Now mix it all up and add the red wine and stir to make sure there are no lumps.

Add in the chicken stock.

Season with salt and pepper and simmer for 10 minutes.

Once your sauce is simmering, start getting ready to cook your steak.

Bring a large saute pan on a medium-high heat and let it get hot for about 3-4 minutes.

Pour in a glug of canola oil, and tilt the pan to spread the oil all over the whole pan. Carefully put the steaks into the pan, making sure you face it away from you so no oil will splash at you.

Cook until it is deep brown and then flip it and do the same.

Here is a trick for telling how done your meat it: Relax your hand, and then bring your index finger to your thumb. With your other hand press the meaty bit of your hand at the base of your thumb. That is what your steak should feel like when it’s rare.

When you do the same with your middle finger your steak is medium rare.

When you do the same with your ring finger your steak is medium.

When your do the same with your pinky finger your steak is medium-well

Anything past that is well done.

BUT If your not sure pull it off and let it rest for a minute and then cut into a corner of it.

If your steak is cooked let it sit for at least 5 minutes before you cut.

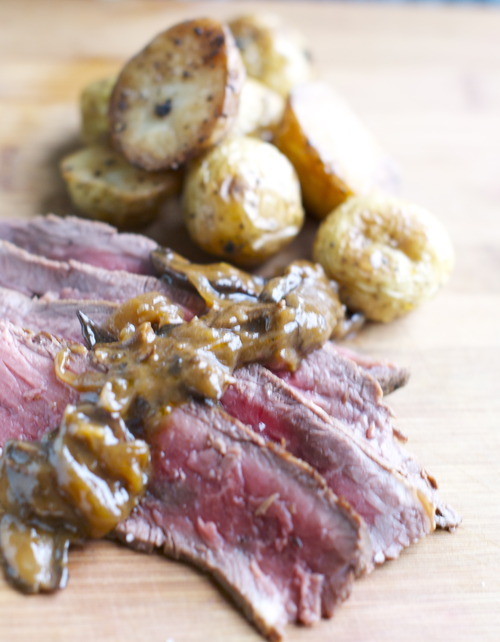
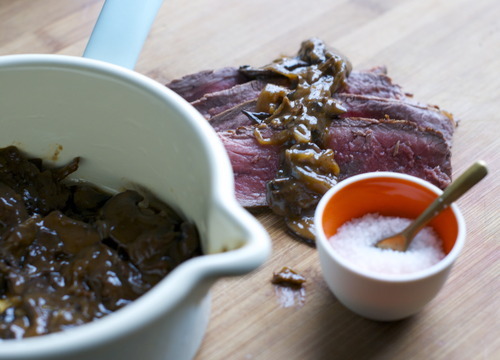
Then, slice it into thin strips, and serve with your perfect sauce!image

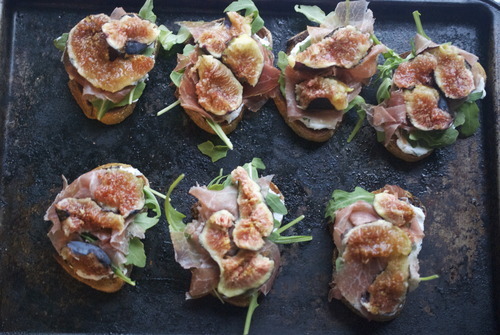
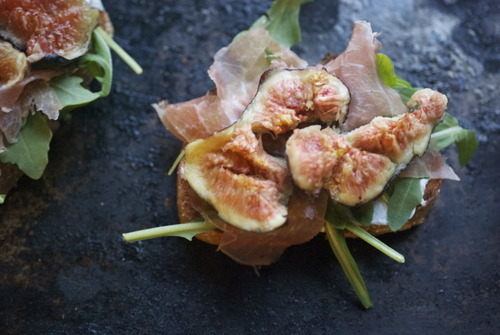
Fig and Prosciutto Toasts with Minted Ricotta

Anyone who knows me knows that I love meat. I have worked at butcher shops, I have an inordinate love of game meats, and God knows I love bacon. But a lesser known fact is that I was a vegetarian for 8 years growing up. I gave up a proscuitto-free life a long long time ago, with some serious pushing and prodding by a chef I worked for, but on the condition that I would only eat meat I could feel ethical about. Free-range, organic whenever possible, and way less meat then the American dream.

The lovely man that I live with is a very accomodating sort, he puts up with me, which does say quite a bit, but he puts his foot down on a few matters, that the floor gets swept every night, that windows should be open while we sleep, and there should always be meat with dinner. Now, I’m all for keeping the floor clean, and I have an extra quilt at the foot of my bed to stay warm but we definitely disagree on the meat issue.

So we’ve started compromising by using a little bit of meat. It’s unusual for us to eat a whole chicken breast, or 8oz of steak each, but it’s common to find some bacon in a pasta, or some local prawns in curries, or in this case, a few slices of proscuitto.

It’s not much, it isn’t. But it is enough to make him feel like he’s getting some meat in a meal, and it’s small enough to make me feel ethical about the whole thing.

And that doesn’t touch on taste, which is big and important here. There are few things better in life than figs and prosciutto. But on top of crispy bread with ricotta? We is very close to perfection.

4 slices of good crusty bread

1/2 cup Ricotta Cheese

6 slices of Prosciutto, very thinly sliced.

8 large Mint Leaves, finely sliced

Zest of 1 lemon

6 Figs

Handful of Arugula

Olive Oil

Salt and Pepper

In a small bowl mix the ricotta with the mint, lemon zest, salt and pepper.

Cut the bread in half and toast until just getting warm.

Spread the ricotta mixture on the toasts.

Put a few leaves of arugula on top.

Tear apart the prosciutto and figs and layer them atop of the arugula.

Drizzle with olive oil and eat eat eat!

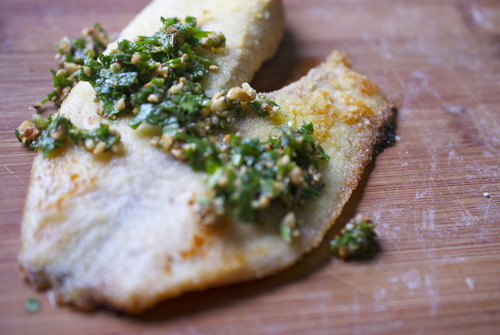
Semolina Crusted Tillapia with Dukkah

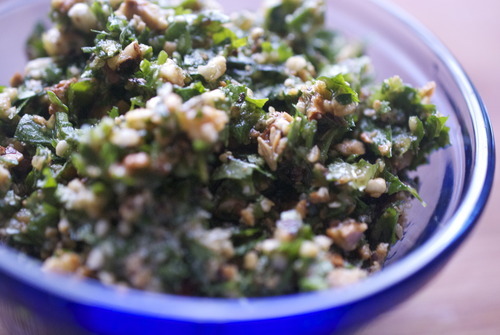
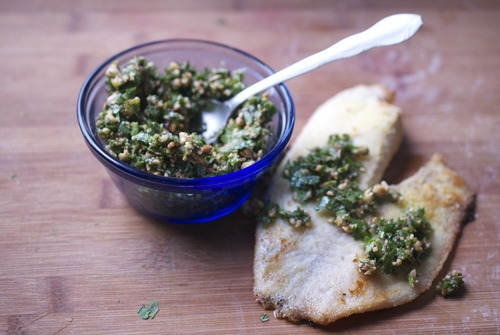
I was introduced to dukkah by a woman I worked for at Little Nest, and instantly fell in love with it. It’s a beautiful thing dukkah, rich with fennel seeds and cumin drenched in olive oil, and in this version with loads of parsley and cilantro chopped in too. People will tell you that it isn’t dukkah, and they’re sort of right, this is a totally bastardised version, but also the version that I was introduced to, and so now the one I prefer. Traditionally it doesn’t have fresh herbs in it, but it turns what is essentially a spice blend into something to dip bread in, pour over poached eggs, and in this case spoon on top of fish.

Semolina Crusted Tilapia with Dukkah

2 fillets Tilapia

1/4 cup Semolina Flour

Salt and Pepper

Dukkah

1/2 cup Hazelnuts

1/4 cup Toasted Sesame seeds

1 tsp Fennel Seeds

1 tsp Cumin Seeds

1 tsp Corriander Seeds

1 cup Flat Leaf Parsley Leaves

1 cup Cilantro Leaves

1/2 cup Olive Oil

Salt Pepper

Preheat the oven to 350F.

Put the hazelnuts in the oven and cook for about 15 minutes, tossing them every few minutes until they are toasted all the way through.

In a small pan over low heat toast the fennel, cumin and coriander seeds until they are fragrant but not smoking.

Put them into a food processor, a spice grinder, or a mortar and pestle and grind until fine.

Add in the hazelnuts and the sesame seeds and crack them but you want them still coarse.

If your using a food processor add in the leaves and the olive oil and blitz until the leaves are broken up but not pureed. Or you can cut them by hand.

Add in the salt and pepper and check your seasoning.

Turn your broiler on high and let it warm up a bit.

Mix the salt, pepper and semolina together on a plate and dip the fillets in making sure they’re well coated. Put them on a lightly oiled pan and then on the top shelf of the oven.

Keep them in until the tops are slightly browned and they are cooked all the way through.  

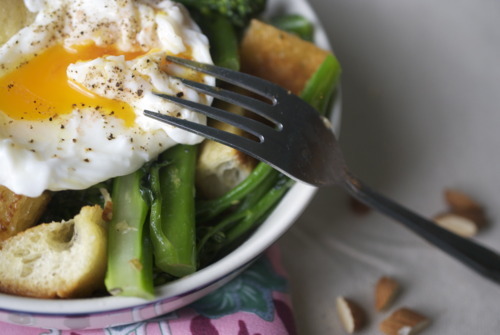
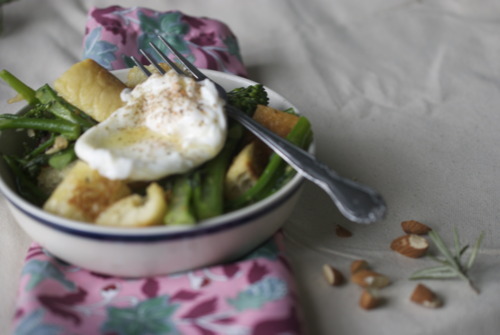
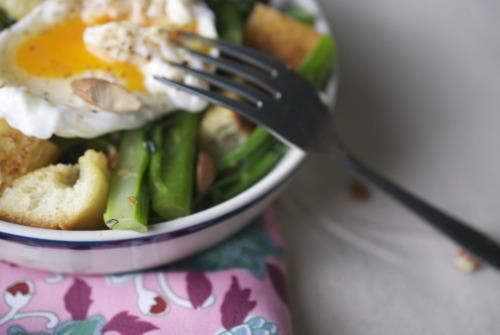
Panzanella Salad with Broccolini, Almonds, and Poached Eggs


I was reading a piece a while back in the New York Times opinion section about a former restaurant critic. He had a line about trendy restaurants that went something like “Yes, now everyone does hanger steaks with poached eggs, who cares? 10 years ago it was salmon and lentils” And to that article I say, I will totally be putting poached eggs on everything in 10 years. I love poached eggs. 

I think most people associate eggs with breakfast. Maybe it’s because my Mom’s back up dinner was always frittata, or maybe it’s because I used to run a small breakfast restaurant, so I was always thinking about what my specials would be the night before, but either way I eat eggs for dinner all the time.

Mostly I make a big salad and plop a poached egg on top. It’s a simple, protein filled, very cheap way to make a salad feel like dinner, and it’s a wonderful thing. This one is full of day old bread that is ripped apart and fried in olive oil. I’ve also added broccolini but what makes this really special are the slow cooked onions that are fried up with almonds and rosemary. It just makes it feel less like a throw together meal, like your not just making because all of those things happen to be in your fridge, and you had stale bread from last nights dinner and your too lazy to go out and buy some fish. Oh no. This is intentional. And it’s very very good. 

Panzanella Salad with Broccolini, Almonds and Poached Eggs

2 Free Range Organic Eggs

2 cups of Day old (or fresh!) baguette, cut into cubes or torn into pieces.

1 bunch Broccolini

1 Large yellow Onion, thinly sliced.

1/2 cup Whole Almonds, coarsely chopped.

1 sprig of Rosemary, finely chopped

Juice of half a lemon

Olive oil, Salt and Pepper

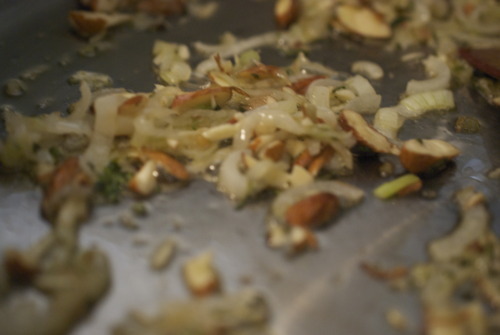
In a large saucepan over medium-low heat warm up a big glug of olive oil. Add in the onions and a pinch of salt. Cook until the onions are very soft, stirring often and not letting them brown.

Meanwhile get a deep pot of water on the stove on high heat and bring it up to a boil. 

Once the onions are starting to want to brown add in the rosemary and the almonds and let the almonds get nicely toasted and the rosemary make your whole house smell amazing. Now scoop all that goodness into a bowl and get the pan up to a medium heat.

Warm up another big glug of oil and put in broccolini. It will spit a bit when you put it in  don’t be alarmed! Just cook them until they turn bright great and the tips get a little bit browned and they are just a little tender to the bite if you eat one. Salt generously and squeeze a little lemon juice on top. Then put them on the bowl with the onions. 

Once again heat up some olive oil in the pan and add bread this time. Let the bread get nicely brown and salt it too. Once it’s crispy and delicious add it into the bowl and mix it all together and adjust the seasoning.

Now poach the eggs. Drop them in one by one and cook them until the whites are hard but the yolks are soft, about 3 minutes.

Fill up salad bowls with the panzanella and add one egg on each. And there is a simple cheap delicious meal in under 20 minutes!