Soba Noodle Salad with Citrus and Ginger

soba-1.jpg

Well friends, I’ve finally done it. Done that simple thing that nearly all the adults in the world can do, that, well,  most teenagers can do. That thing that I have been avoiding like the plague for over a decade. I learnt to drive.

I spent the money, took the classes, practiced in our manual car, nearly broke up my pending nuptuals, but in some small miracle, I learnt how to drive.  I’m feeling pretty pleased with myself.

soba-7

Jordan however decided to celebrating by getting  a vicious flu. The kind that makes his workaholic self completely stop. He has probably slept for 20 of the last 24 hours.   I on the other hand, am currently spending most of my days mind-over-matter-ing it, in an attempt not to get what he’s getting. And to aid in my attempt to refuse to allow bacteria into my body, I’m also eating kind of insane amounts of vitamin C.

Not just vitamin C though, the internet has led me to believe that I need not only citrus in IV form, but also garlic, ginger, and spicy food. So here is the garlick-iest, ginger-iest, spiciest, and citrus-y salad you’ll ever need. It’s all the immune boosters in one so that we all don’t end up curled up in a ball watching terrible TV.  I for one like to be in fine form when I watch bad TV.

Soba-5

Citrus and Ginger Soba Noodle Salad

2 bundles of Soba Noodles

Juice of 1 Lime

2 Oranges, segmented.

4 Radishes, thinly sliced.

2 stalks Celery, sliced on a bias.

1 clove of Garlic, minced

1.5 inches of Ginger, grated finely

2 tbsp Siracha, or other chili sauce

¼ cup Sesame Oil

3 tbsp Soy Sauce

2 tbsp Sesame Seeds (black or white)

Bring a large pot of water to a boil. Season liberally with salt.

Cook soba noodles according to package instructions, or until al dente.

Strain, and immediately pout cold water over top and woosh it around with your hands or a spoon to cool it all down. Set aside.

Meanwhile, take your minced garlic put it near the edge of your cutting board. Sprinkle a small mount of salt on top. With the side of your knife, crush the garlic until it is pureed. Put it in a large bowl.

Add in the ginger, lime juice, soy sauce, and chili sauce.

Whisk to combine, then slowly add in the sesame oil. Taste, and add more citrus, oil, or soy as needed.

Add in all the remaining ingredients. Toss to fully combine and serve immediately, or cover and keep in the fridge for up to 2 days.

xo

soba-and-kitten

Spaghetti Carbonara with Poached Eggs

breakfast-carbonara-4.jpg

I mentioned this in my last post, and I feel a bit weird about announcing it over the internet, but here goes: Over the holidays Jordan proposed, and I said yes. It has been a magnificent couple of weeks, full of celebrating with friends and family. Jordan told me that the wedding is off if I go on a “wedding diet” and I assured him that it wouldn’t happen, because it can’t happen. Because everywhere I turn these days someone is pouring me a glass of bubbly, and then refilling it, and then refilling it again. Let me tell you friends, it is hard to stay sober when you’re recently engaged.

So this post is against all the new years resolutions, and against the very principle of a wedding diet, because it is hang-over food.

Spaghetti Carbonara, or “bacon and egg bascetti” as I used to call it when I was wee, it basically just that- bacon, eggs, parmesan, and loads of black pepper. You don’t need to cook the sauce, it cooks as the it’s tossed with the hot pasta. You can easily make this without the poached egg of course, but there is something about adding that makes the pasta feel like breakfast. Which is sometimes just the ticket.

breakfast-carbonara-2


Spaghetti Carbonara with Poached Eggs


1 lb Spaghetti

7 Eggs (use good quality free range organic ones, it really will make a difference)

400g Bacon (good smoky stuff please!)

200g Parmesano Reggiano, or Grana Padano

Salt and Pepper


Cut the bacon into ½ inch pieces and cook them in a small frying pan over medium heat for about 15 minutes, or until they are crunchy, but not burning.

Strain the fat off into a jar of can. Put the bacon aside.

Fill a large and a medium sized pot with water and bring to a boil.

Meanwhile grate the parmesan and mix it in a large bowl with 3 of the eggs and healthy cracking of black pepper.

When the large pot of water comes to a boil, season it liberally with salt and cook the pasta to the directions on the package.

Just as the pasta is done and you’re about to strain it, crack the eggs into the remaining medium sized pot.

Strain the pasta and add it, and the bacon to the egg and parm mixture. Stir vigorously until it has completely combined, making sure it doesn’t curdle.

Divide among 4 bowls.

Using a slotted spoon remove the eggs from the water- testing to make sure they are done by gently poking at the yolk and white with your finger, ensuring that the white is hard but the yolk is soft.

Put the eggs on top of the pasta and enjoy immediately!

breakast-carbonara-1

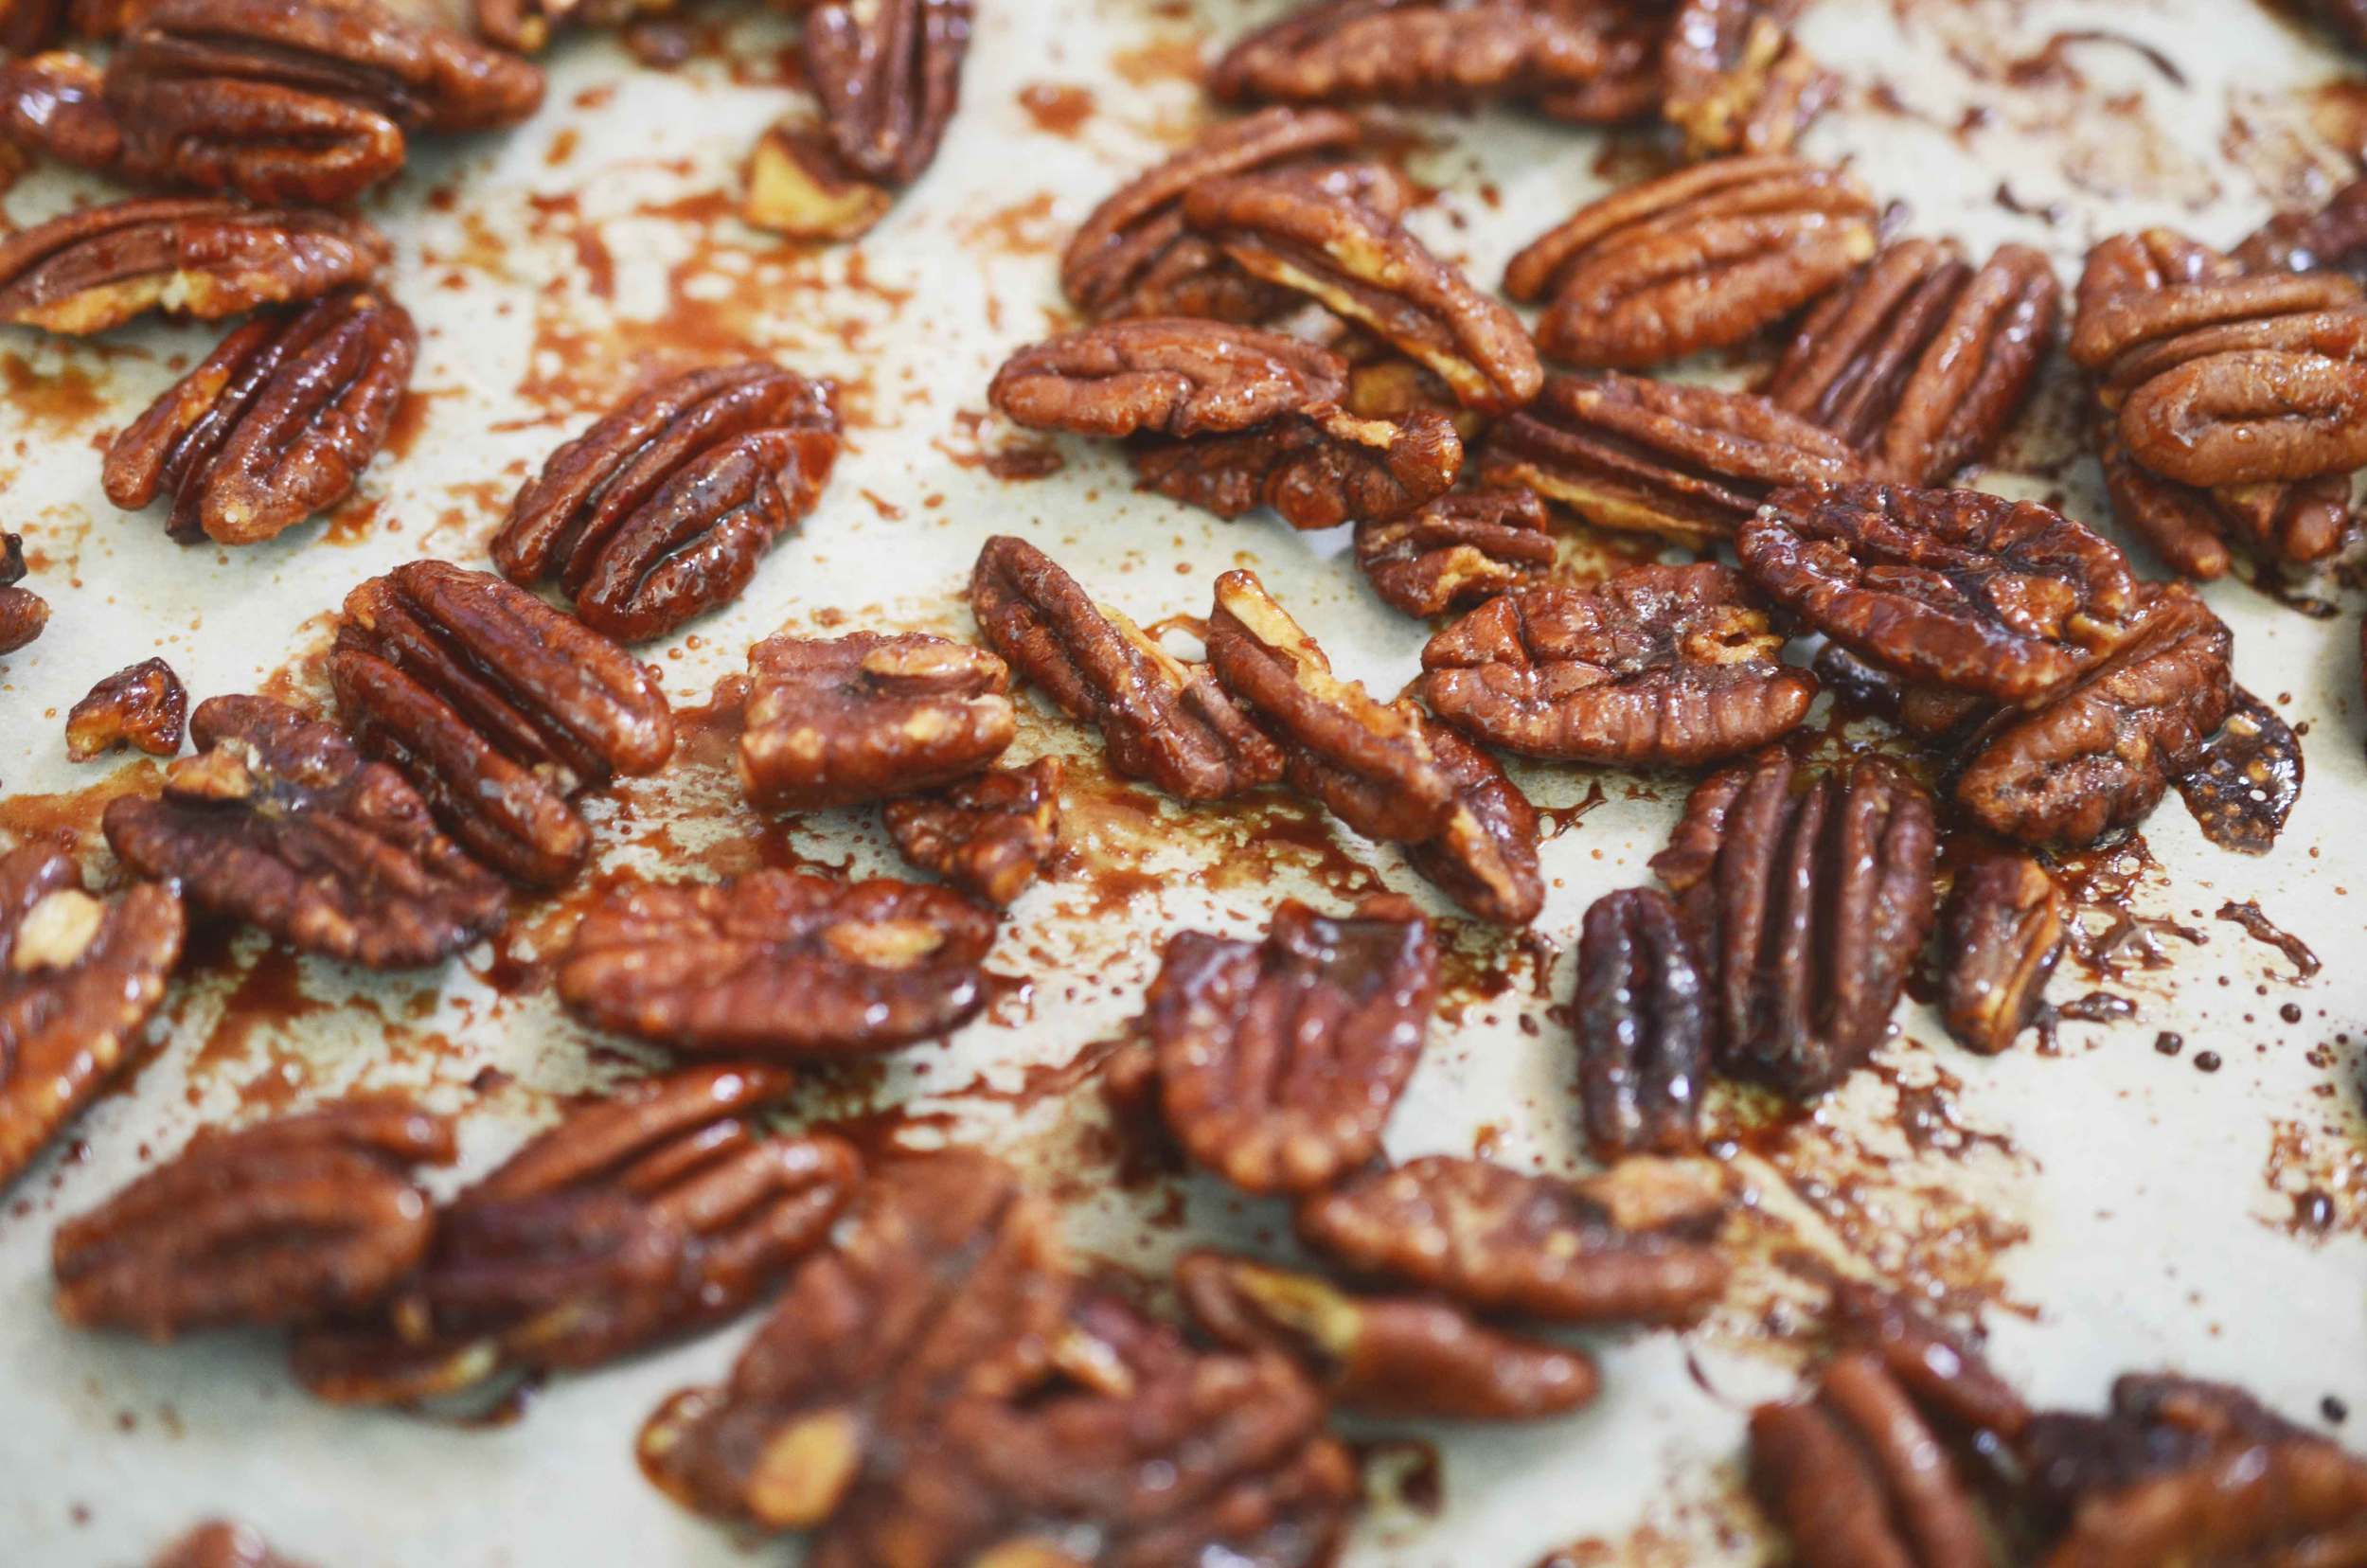
Sriracha +Maple Roasted Pecans

pecans-1.jpg

Here’s the thing: I have not been blogging enough lately. This little part of the internet has been in my thoughts so much these days, but I haven’t actually been writing and photographing and putting up here. It’s gotten a bit lost. I’ve been writing and photographing for other people. People like Edible Vancouver and the Vancouver Observer and HelloGiggles. But not here.

And I’ve been baking a lot too, for Merchants Oyster Bar, which just got a great review in the Globe and Mail, and even if the woman reviewing it made it sound like the chef was making the pastries, it was me, and she said nice things.

But mostly I’ve been baking for Livia Sweets the company. The super-exciting-can’t-contain-my-smile-when-I talk-about-it company that I own. That I make pastries for and sell. That people buy, and say nice things about on the internet. That fills me with so much joy I can barely handle it.

I’ve also been working hard with a design team to get this website spick and span with a new look, updated pages, lots more pictures of myself (which I’m a bit self conscious of truthfully) and that’s much more user friendly. You can leave comments again now! I can update the recipe index! I can add pages about my exciting new projects! It’s a lot of big improvements.

It’s been a very busy couple of months, the kind that knock you over sideways a bit and make you so exhausted that you end up getting strep throat that makes you cough so hard you have to take all sorts of herbs, and watch an entire season of Nashville in one week just get better.

But now I’m feeling pretty good. I’m feeling pretty on top of things. And I’m going to ease you into a recipe with this one because it’s so painfully easy it feels like a cheat to give it to you, except you would all hate me if I didn’t because it’s so darn good. It’s crunchy and salty and spicy, but also earthy and sweet and exactly what I want in a bowl of pecans on my table. And also on my friends table because I’ve already been enlisted to bring her some after she saw my instagram picture of them only a few minutes ago. They are wonderful. And so are all of you, thank you for your patience these last few weeks.

pecans-2

Sriracha and Maple Roasted Pecans


2 cups Pecans

½ cup Maple Syrup*

1 tbsp Sriracha

2 tsp  Coarse Salt

*If you think maple syrup is a bit indulgent, or you just don’t have any kicking around, you can easily substitute honey or brown rice syrup, and it was be nearly as delicious.


Preheat your oven to 325F

Line a baking tray with parchment paper.

Mix together all the ingredients with your hands in a medium sized bowl and then sprinkle them out on the parchment lined tray and spread them out.

Bake for about 20 minutes, stirring every 5 minutes.

You’ll know they’re done when the sugar around them has stopped bubbling but instead looks crystallized onto the nuts.

Cool, and try not to eat them all in 5 minutes.


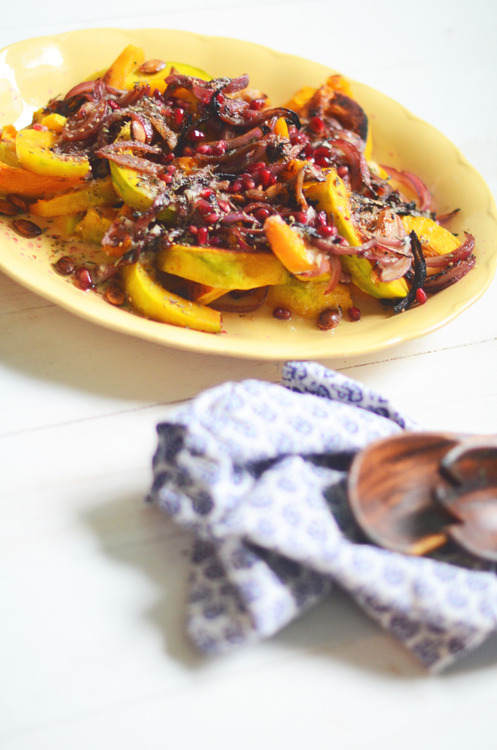
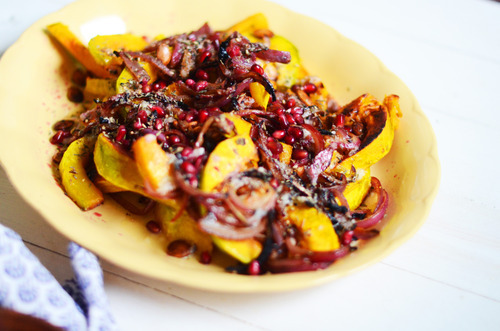
Sunday Salads- Roasted Butternut Squash with Pomegranate and Za'atar

tumblr_inline_n3mtj2AZGf1qfrmur.jpg

The Italian in me just wants to make the simplest food. It doesn’t want to be fussy. It doesn’t want spend hours cutting things just so or mixing 25 ingredients into a salad dressing. My Italian side also pretty much just wants to make gnocchi and tomato sauce all day, which, though delicious, would not make for the most interesting blog. Fortunately, I have fallen deeply in love with Middle Eastern food. The rich flavors, the complex spice mixes, the vegetable forward way of eating.  The more I cook like this, the more I realize that the Italian way of eating simple food, not doing too much to it, that totally unfussy way of cooking seems to fit right in.

It’s actually been kind of exciting to me, to try new spices and spice blends and treat them to the ways I’ve always cooked food. This salad is a great example. I love squash, and roasting it up with red onions and tossing it with some greens and nuts in a simple vinaigrette is something that I would always do. But in this Middle Eastern update, I toss the onions in pomegranate molasses before roasting them, and add fresh pomegranate on top. I toss everything together with some salt and lemon and za’atar, an amazing spice blend of oregano, cumin and sesame seeds, that you can buy already blended and ready to go. Then I put a bowl of garlicky yoghurt on the side to dip the salad in.

The result is something so much more complex and rich than I would have ever made before, but is still incredibly simple and easy to do.

Small miracles friends. They do happen.

Squash and Pomegranate Salad with Za’atar

  • 2 small Kombucha or Butternut Squash
  • ¼ Pomegranate
  • 1 Red Onion
  • 2 tbsp Pomegranate Molasses*
  • ½ Lemon
  • 1 tbsp Za’atar
  • Olive Oil
  • Salt and Pepper

For Garlicky Yoghurt:

  • ¾ cup Greek Yoghurt
  • 2 large clove Garlic
  • 1 tsp Salt
  • 1 tsp Lemon Juice

Preheat your oven to 425F

Peel the squash- butternut squash can be peeled with a peeler, the kombucha squash will need to be done with a knife and some patience. Be careful!

Cut the squash in half and scoop out the seeds. Wash the seeds and toss them with some salt and a good glug of olive oil. Put them on a tray and bake for about 20 mintues, stirring every 5 mintues.

Cut the squash into ½ inch wedges and lay them out on a baking tray. Toss with a good glug of olive oil and a healthy pinch of salt. Bake for about 45 minutes, or until the squash is fully cooked.

Peel the red onion and cut it in half. Cut into thin strips and toss with salt and the pomegranate molasses. Put them on a baking tray and roast them for about 20 minutes, or until they are soft and a little bit caramelized.

Phew! No more roasting!

Meanwhile make the garlicky yoghurt:

Smash up the garlic as small as you possible can. Mix it with the yoghurt, salt and lemon juice.

When the squash are still warm sqeeze the lemon juice on top and toss to mix. Check your seasoning and add some salt if you need.

Put the squash on a platter. Top with the onions and roasted squash seeds, and break apart the pomegranate and sprinkle the seeds on top.

image

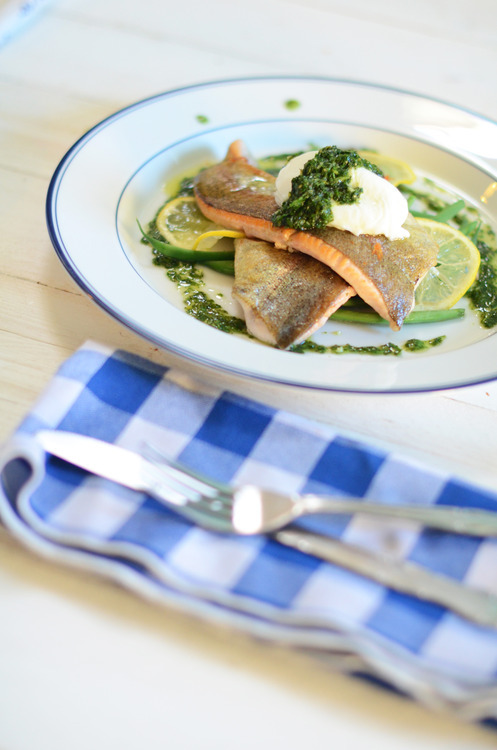
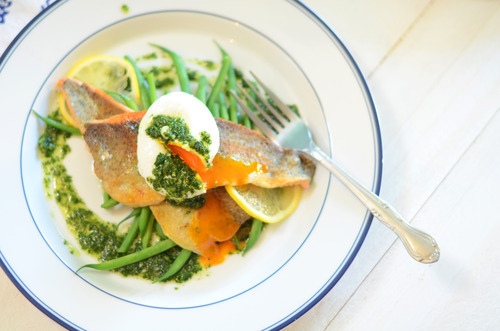
Poached Eggs with Seared Trout and Minty Pesto

tumblr_inline_n2szi49T9a1qfrmur.jpg

My Mom grew up with what she calls “Depression Era” food. The sort of get-as-much-fat-in-you-while-you-can-because-you-don’t-know-when-food-will-be-around-next. The sort of food inspired by the hardships her parents faced when they were young. She had never had a green bean not cooked in cream sauce until her twenties. It wasn’t food that was based around quality ingredients, or fresh ingredients, or local produce, except incidentally. In fact I’ve only really heard her talk about a handful of things she ate as a kid. Mostly we talk about her moms “cloud” biscuits, which are legendary in my family. They are outrageously good. As are Grammy’s gingerbread cookies and her pies. The other food-things that my mom talks about from when she was wee, is corn and trout, which are things her dad made.

For corn, my Grampy would have a pot of water boiling on the stove, and then, and only then, would he go outside and cut the corn, shuck it, and bring it inside to boil. The pot had to be boiling. It’s the only way to eat corn.

The other thing my Grampy did was go trout fishing. He’d wake up at the crack of dawn and escape the kids and watch the sunrise. And then he’d fry up trout for breakfast for the family. My mom starts smiling when she talks about those trout.

I’ve been thinking an awful lot about Grampy lately. I cleaned out my desk the other day and found a slew of cards I’ve written him and never sent. Which is ridiculous. I’ve got stamps, I’ve got envelopes. I’ve got cute little cards. They have thoughtful notes written out. Why haven’t I sent them? They do no good here.

The other thing I found was all these letters that he’s sent me. His is so witty, and smart, and funny and charming. There is so much of his personality in those letters, a personality I don’t know very well because we live so far apart.

So the other day I was thinking about him, still kicking it at 94, when I walked by my local fishmonger and there were the most beautiful little trout in the window. And I knew I had to get some for breakfast.

I’m sure this is not how my Grampy made trout. I can’t imagine him making a pesto or poaching an egg, although it’s possible that those are two skills he has that I don’t know about. But it’s a very me breakfast, poached eggs and beans and pesto, with a bit of him thrown in, in the form of little river fish.

And it was wonderful.

Poached Eggs with Seared Trout and Minto Pesto and Green Beans

Serves 2

  • 1/2lb Green Beans, cleaned with the woody ends picked off
  • 2 small Trout, or one larger one. Gutted and filleted.
  • 2 good quality Free Range Eggs
  • 1 small Handful of Mint
  • 1 large Handful of Parsley
  • 1 small clove of Garlic, peeled and coarsely chopped.
  • 1 Lemon
  • 1/3 cup Olive Oil
  • Salt and Pepper

In a food processor blitz together the parlsey, mint, garlic and ¼ cup of the olive oil. Zest half of the lemon in and add in a healthy pinch of salt. Pulse a couple times. Check for seasoning. Put aside.

Fill a medium pot with water and bring to a boil. Add a pinch of salt.

Meanwhile bring a small frying full of water to a boil. Add the beans and cook for 2 minutes. Strain and set aside.

Rinse out the frying pan and put it back on the stove over medium heat.

Let it warm up and then add the remaining olive oil.

Season the trout liberally with salt.

When the pan is quite hot (but not smoking) put the fish fillets in skin side down. Immediately shake the pan a bit to move the fish around. That will make sure they don’t stick.

Cook the trout on the skin side until it’s about ½ way cooked. Flip them over, and cook for 30 more seconds.

Put the fish on a plate.

Once you’ve flipped the fish crack your eggs into your boiling water. Turn the water down to a simmer. And cook for about 3 mintues for nice runny eggs.

Put them on top of the fish with the beans and spoon the sauce on top. Serve Immediately.

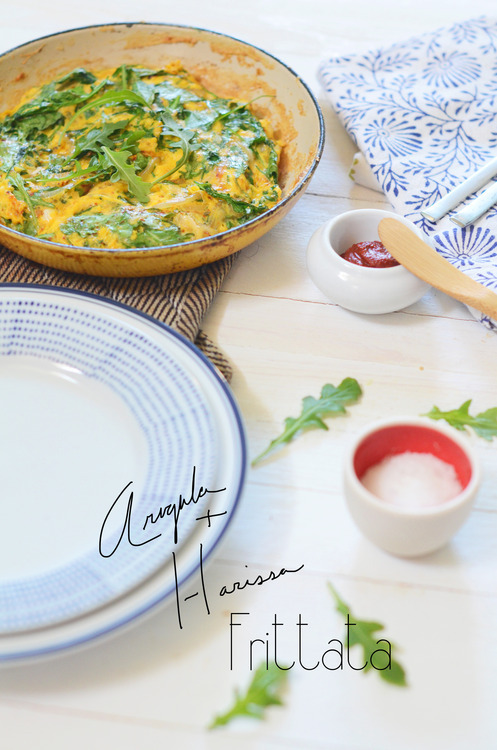
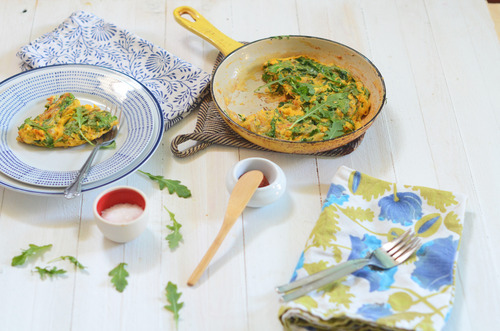
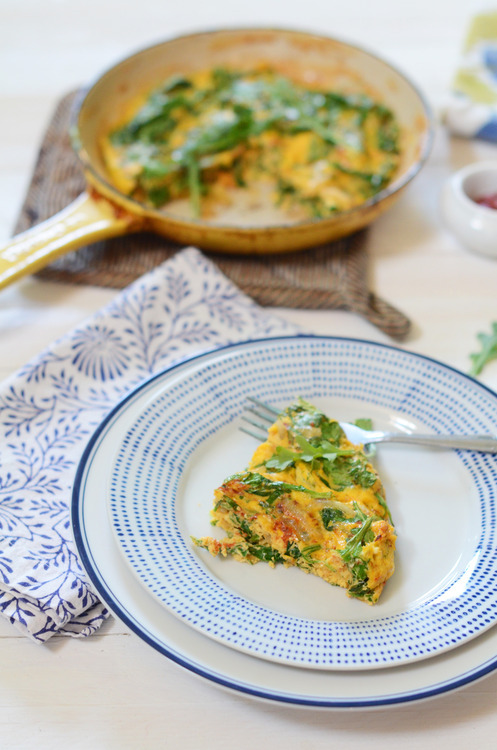
Arugula and Harissa Frittata

Breakfast is not my favorite meal of the day, at least during the week. During the week it’s an apple, maybe some green juice if I was on top of things to buy it (I don’t have a jucier, not do I have space in my tiny kitchen!). On a good day I’ll scramble and egg and throw some salsa on top. Totally premade, store bought crappy salsa. I’m too busy. I’m not organized enough to make overnight oats. Every few months I’ll make a batch of homemade instant oatmeal and think “I should do this more often!” and then I eat them all and don’t make it again for 4 months.

Breakfast is not my place to shine on a weekday.

Weekends though? That’s another story.

I love brunch, in a major way. Soft poached eggs, potatoes, vegetables cooked in interesting ways. Bacon. Sausages.

I have two qualms with most brunches though, the first, is that, unless I got too deep into some bourbon the night before, I want my brunch to be light enough that I still want to move afterwards. I love me some bacon, but maybe I need some salad with it, so shoot me. The second is that, and I am totally tooting my own horn here, but I’m pretty good at cooking brunch. If I go out I want those eggs to be perfect. And if they aren’t I’m going to feel a bit jilted. A good brunch doesn’t come cheap, and I want it flawlessly.

Which means I end up making brunch at home a lot of the time. I’m just a bit finicky about some things, especially in the mornings.

So this is the sort of thing I end up making. It’s incredibly simple, very satisfying, rich without being heavy, and almost foolproof to execute. It’s just the ticket for an no fuss brunch in .


Arugula and Harissa Frittata

Serves 2

1 Shallot, peeled and thinly sliced

4 cups Baby Arugula

1 tbsp Harissa Paste*

2 tbsp Olive Oil

4 Eggs

Salt and Pepper

  • Harissa is a Moroccan spice hot sauce. You can find it at most meditteranean stores, but in a pinch you can mix1 tsp  Sambal (rooster sauce) with 1 tsp ground cumin for this recipe.

Preheat your oven to broil.

Crack the eggs into a small bowl and mix vigorously for 2 minutes.

In a small frying pan over medium heat warm up the olive oil.

Put in the shallots and let cook slowly for about 10-15 mintues until they start to color.

Add in a healthy pinch of salt and stir in the harissa.

Cook the harissa for about a minute and then add in the arugula, a handful at a time so it doesn’t overflow in the pan.

Let it start to wilt and then add in the next handful, You don’t want to cook the arugula entirely, just let it start to wilt.

Add in the eggs with another pinch of salt and stir it up, like your making scrambled eggs. Keep stirring until it’s about half way cooked- but the top still is still smooth.

Take the pan off the heat and put it under the broiler.

Cook until the top gets puffy and the edges are a little bit browned.

Serve immediately. 

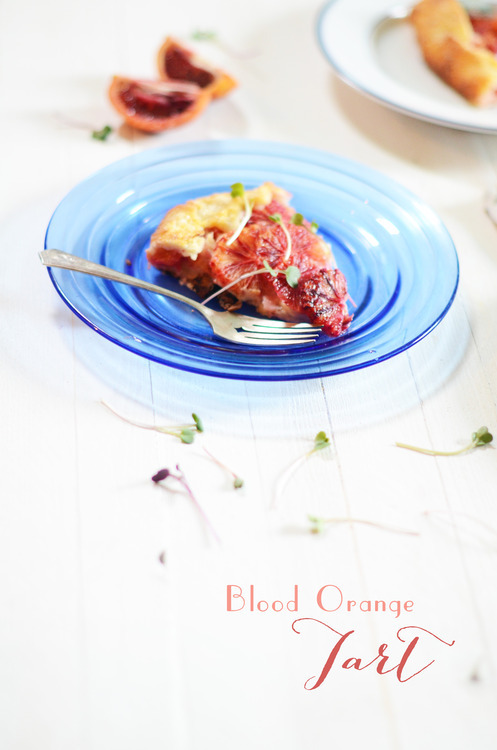
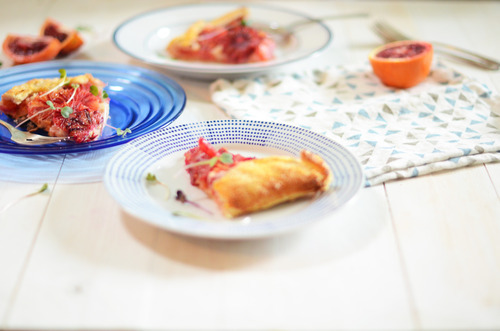
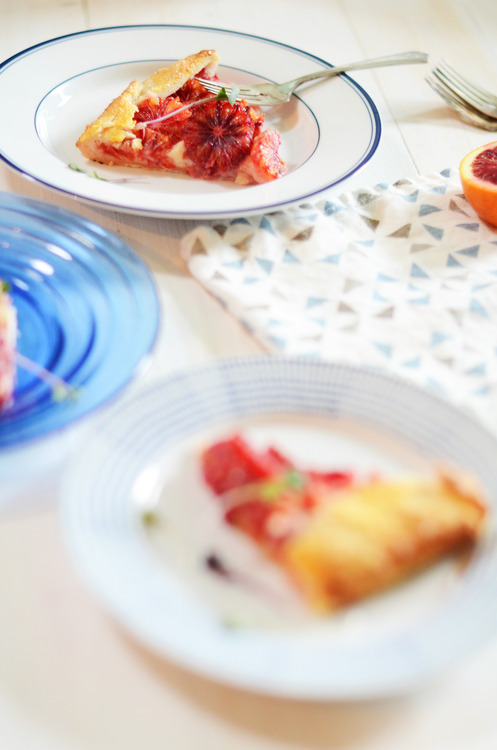
Blood Orange Tart!

image

You know when you see foods that’s too pretty. Like it can’t possible taste good?

I kept seeing pictures of blood orange tarts, and thinking “oh my gosh they are so beautiful, but I bet they aren’t super delicious”. I’m rarely a big fan of cooked oranges. I felt like baking them, even in a buttery crust, might not be the best idea. I mean, blood oranges are perfect as is, why do anything to them?

Well, I’m here to tell you that you should.

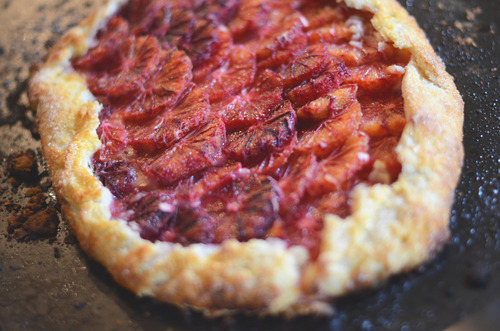
You should make a pastry cream, you should make some super flakey dough, and you should layer a whole bunch of blood oranges on top.

image

Because suddenly the butter and vanilla bring something extraordinary to the blood oranges, and the oranges themselves stay almost exactly the same. They are still juicy, and bright and crisp, they just happen to have married themselves with some sweeter things.

It’s a simple tart, but one that’s rather showy, and one that perfectly uses up the remarkable produce available right now.

 image

Blood Orange Tart

For Flakey Pastry

1 cup Butter, cut into small cubes

2 cups AP Flour

1 tsp Salt

Cold Water

For Pastry Cream

1 cup Milk

½ Vanilla Bean, or 1 tbsp Vanilla Extract

2 tbsp Cornstarch or AP Flour

¼ cup Brown Sugar

1 Egg

8 Blood Oranges

1 Egg Yolk

1 tbsp Milk

¼ cup Coarse Sugar

Bring the milk and vanilla bean up to a simmer in a small pot.

Meanwhile mix together the sugar and egg in a medium sized bowl. Add in the cornstarch or flour, depending on what you use.

Slowly add in the hot milk, whisking the whole time.  Pour the mixture back into the pot, and turn the heat down to low.

Stir constantly until the mixture thickens consistently.

Immediately strain into a bowl, cover with plastic wrap and chill.

Cut Oranges:

Cut the tops and bottoms off the oranges. Cut the skins off too, leaving no white pith.

Cut the oranges widthwise, into rounds.

Make dough:

On a large clean surface mix together the butter, flour and salt.

With a rolling pin roll the butter into the flour, scraping the strips of butter off the rolling pin, and the counter. Keep rolling and scraping until all of the butter is stretchd into long thin strips.

Tablespoon by tablespoon add in the cold water, with the help of a pastry scraper gently mix the flour and butter with the water. You want to keep the butter in strips as much as possible.

Once the dough has begun to come together flatten it with your palms, and fold the dough in half. Do this again and again until the dough has lots of layers, but before the dough begins to get tough. It’s best to stay on the side of too soft, and only fold the dough a could times.

Line a baking tray with parchment paper.

Roll the dough into a large rectangle and fold it gently into quarters. Lift the rectangle and place it onto the lined tray.

Scrape out the pastry cream into the middle of the dough. Spread it out, and cover the whole thing except for an inch and half border around the edges.

Layer the slices of oranges on top.

Fold the edges of pastry up around  the fruit, pleating as necessary.

Put the tray in your freezer for at least 25 minutes.

Preheat the oven to 375 degrees.

Take the tart out of the freezer.

Mix together the yolk and milk in a small bowl.

Brush the edges of the pastry with egg wash and sprinkle liberally with the sugar, both on the fruit and on the edges.

Bake for 35-45 minutes, until the pastry is nicely browned.

Let the tart cool for at least 30 minutes before cutting and eating!

image

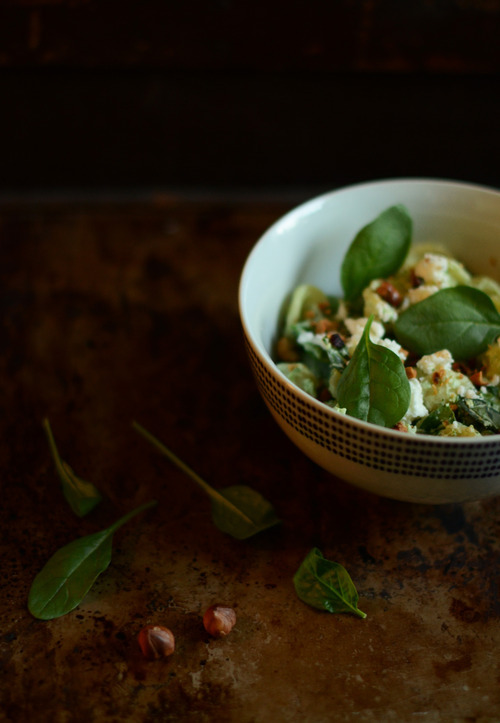
Orecchiette with Yoghurt, Spinach, Hazelnuts and Feta

Sometimes I just get stuck on a recipe. I’ll see it in a book and think, that’s weird/different/crazy/maybe delicious but I’m not sure yet, and I won’t make it for fear that what ever is weird/different/crazy/or maybe delicious will actually be awful and I’ll have wasted time and money on something I’m going to end up pushing to the back of my fridge so I can’t pretend I forgot about it until it’s too old and I have to throw it out.

I do this a fair bit. Because usually when I think something is weird and might not turn out, it doesn’t. And there are few things more frustrating than making something you think might not work, and then having it not work for just the reason you thought before you started. I’m learning to trust my gut on this.

The exception to this rule is Ottolenghi. Because he puts some things together and I think “I’m not sure about this” and then it’s always amazing.

And so with this proven track record of exceeding my expectations, I made pasta with a yoghurt based sauce.

I have been staring at this recipe since I bought the Jerusalem cookbook over a year ago.  My love affar with yoghurt is logn and well documented, but on pasta? I’m a little bit Italian and that seems pretty sacreligious to me.

Guys. I should not use my head, and instead to use Ottolenghis. I shouldn’t pretend I know better.

I don’t.

This pasta is wonderful. It’s light and creamy and tangy- the way you would expect from the yoghurt, but it’s also crunchy from the nuts, and super salty in certain bites from the feta.

I had to make a few changes to the recipe- I switched the pine nuts from the original to hazelnuts, because I had them kicking around, and inexplicably my local shop was out of frozen peas (seriously, who runs out of frozen peas?) so I used spinach instead.

The result was a pasta that was totally unexpected, and one that you should probably make right away. Seriously. Do it now.


Orrecciette with Yoghurt, Spinach and Hazelnuts

1lb Orecciette

2 cups Greek Yoghurt

4 cups Baby Spinach

¼ cup Basil, roughly torn

½ cup Toasted Hazelnuts, coarsely chopped

½ cup Feta, crumbled

2 tbsp Olive Oil

Salt and Pepper

Bring a very large pot of water to a boil. Salt generously.

Cook pasta to directions on box.

Meanwhile, in a food processor pulse the yoghurt with 2 cups of spinach, the olive oil and some salt.  Mix until smooth.

Pasta is cooked, strain. Immediately mix together with the yoghurt mixture, and then toss in the basil, hazelnuts and feta.

Eat immediately. 

Stocking Stuffer Sundays- Homemade Irish Cream with FREE downloadable labels

image

Oh I’m so excited for Stocking Stuffer Sundays! They were easily one of my favourite series I’ve ever done on the blog and, perhaps because I am such a huge lover of all things Christmas, I’m so jazzed to be starting it up again!

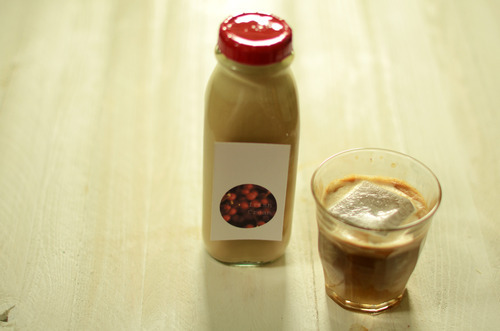
Just like last year every Sunday I’ll post a fun edible gift that you can make and give. And just like last year there will be a cute fun free downloadable gift tag option! Only this year, with my mad new photoshop skills that I learnt at Blogshop a couple weeks back, I was able to design the tags myself.

On a side not, how fun is photoshop? I was so intimidated for so long, but no longer!

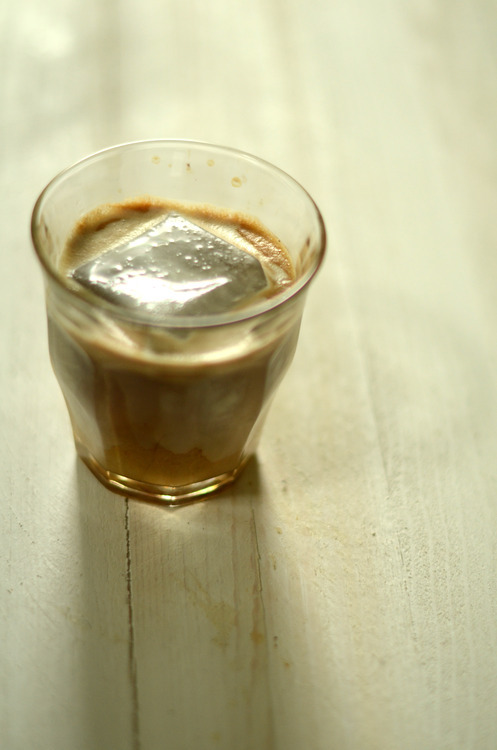
So without further ado here is one of the easiest recipes you’ll ever find on this site- Irish Cream. Sometimes known as Bailey’s, it literally takes 5 minutes to make, but instead of being full os preservatives this stuff is just cream, condensed milk, whiskey, vanilla and coffee.

But I hope you look at this as a jumping point- add in more coffee if you want a darker flavour, stir in some melted chocolate, or caramel for a more dessert flavour. Basically, mix it up as you like, this is just the beginning!

image

Click here to get the FREE downloadable labels!

image 

Irish Cream

1 cup Cream

1 cup Whiskey

1 can Sweetened Condensed Cream

1 tbsp Vanilla Extract

1 oz. Very strong coffee, or a shot of espresso

pinch of salt

Mix all your ingredients into a blender and mix for 30 seconds. Don’t over mix of it 

image

Green Olive and Orange Tapenade

I’m not sure why, but I’ve been thinking a lot about my trip to New York last year. Maybe it’s because it was this very date, last year, when we were there, or maybe it’s because  I’ve been flipping through the pages of of the Ann St Studio blog lately and she has the most gorgeous pictures of that fabulous city. Or maybe, and mostly likely, it’s because I have felt like I haven’t left Vancouver in too long. I’m feeling wistful and dreaming about hoping on a plane to go somewhere, anywhere maybe. Thinking about it, I’ve realized that I’m often somewhere else in the fall. It might be my favourite time to travel. 

Not that I’m complaining or wining, I’m going to be in Seattle not once, but twice next week for workshops, and I think that will push this feeling out of my system. 

But in the interim, I’m going to sit here and think about New York. 

I’m going to imagine my next trip and plan it in my head and pretend I’m going to visit my sister and that we’ll go to galleries, and drink cocktails, and just hang out and catch up. In this dream she isn’t working full time and doing her MBA but would have time to show me her favourite spots and introduce me to her friends and let me see the life she’s building there. A life I would love to see. 

And I’m imagining going back to this wonderful little restaurant called Left Bank where I ate the most amazing chicken of my life last year. 

The chicken itself was nothing crazy, just roasted simply with some lemon and thyme, but the sauce was revelation. 

And also, possibly the most basic sauce I’ve ever had on a meal at a restaurant. 

It was simply the most gorgeous bright green olives that were torn into small pieces and mixed with lemon and orange zest and bound in a very loose way with olive oil. 

But these olives. They were the best olives, and the orange was just this hint in the back that brightened the whole thing. 

There was absolutely nothing fussy about any of it, but it was perfect. 

Just perfect.

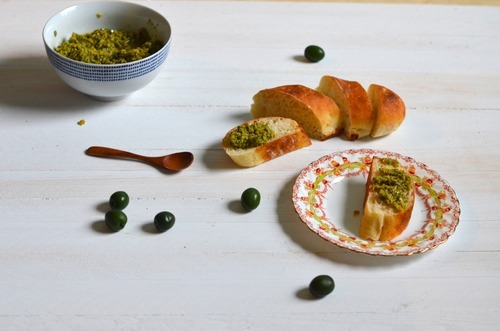
So I was thinking about this the other day when I was panning on having some friends over, and I made this sauce, only I made a great pile of it and we slathered it on baguettes and ate it with our wine. 

I’ve never had a tapanade with green olives but that’s basically what this was. 

With the left overs, I have dolloped it on top of poached eggs, put spread it on toast and made a chicken sandwich, served it along side pork. 

It’s just the most lovely sauce, that is both deeply savoury and a little bit fruity. 

And it’s wonderful. 

Green Olive and Orange Tapenade

500mL Green Olives*

1 large Orange

1 Lemon

3/4 cup Olive Oil 

*do not bother making this with the canned green olives you get at the store, you will be disappointed. Instead go to an Italian grocer and try a couple different kinds. I like the dark green nocarella olives the best. 

Pit the olives- if you have an olive pitter this will be fast work. If you don’t use the palm of your hand to press the olive down and squish it. Then from the squished olive pull out the pit. If you have bought pitted olives (and I would recommend you don’t, they are often of a worse quality) still go through them and make sure there isn’t a pit to be found. There is nothing worse than turning on your food processor and realizing that there was a pit that you missed and it is now splintered throughout your sauce.)

Put them in a food processor and zest the orange and half of the lemon in. Now cut the orange and squeeze in the juice of half.

Add in half of the olive oil and pulse. You don’t want it to grind into a paste. You want a loose consistency. 

Taste. Does it need a bit more orange or lemon? Add it if you think it does. 

Now stir in the rest of the olive oil, put it in a bowl and serve!