Tuesday Tutorial- Homemade Ricotta Cheese

,I live in a very Italian neighbourhood, and my local market makes the most outrageously good ricotta cheese. The thickest, creamiest, most glorious ricotta I’ve ever had. It’s so good.

It’s also $12.00 for 500mL. The deliciously is directly linked to the price tag.

I have made a lot of ricottas in my life. Sometimes for restaurants, sometimes for home, and it’s always good. It is. But it’s never as good as the kind I can buy at the market. So I gave up for a while, I didn’t want to go through the trouble. I forked over the cash when I had a craving.

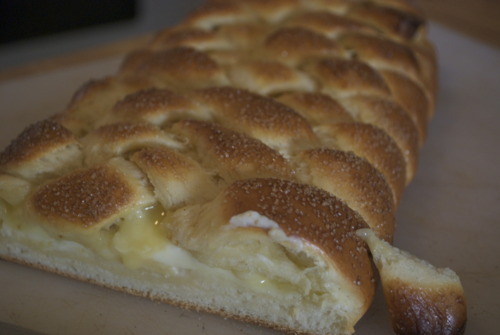
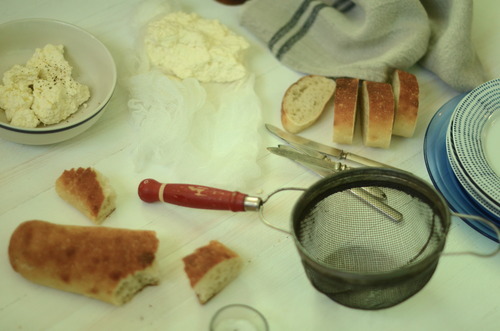
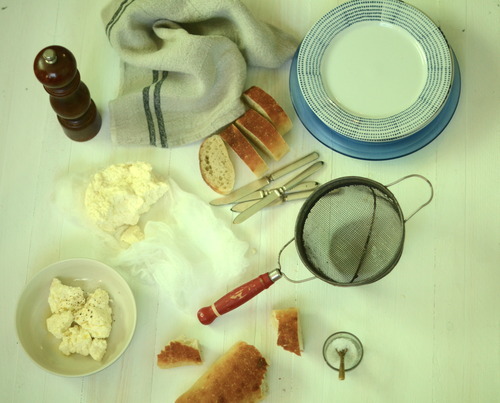
The trouble, is that to fully appreciate ricotta you have to eat it at room temperature, or slightly warmer. When it has just been made, slathered on good bread, and dipped in olive oil and sprinkled generously with maldon salt- it is the best and simplest snack ever. Put a salad beside it and you’ve got a downright brilliant lunch.

So I started experimenting with recipes, trying to make one as good as the Italian brand down the street, but that I could make at home and then eat while warm. Ricotta isn’t hard to make, you just bring some milk to a boil, add in some lemon, stir it until it occurs, and strain it. It’s a funny thing really, because traditionally ricotta is made by reboiling the whey of other cheeses, the whey of course being nearly completely fat free (the word ricotta literally means twice cooked), but ricotta is ever so much more delicious when you add in fat.

A lot of recipes call for 1 litre of milk and one cup of cream, but I add just a half cup more cream, and it makes a world of difference. Such a difference in fact, that I prefer it to the store bought kind down the street that costs twice as much. Small miracles my friends, small miracles.

Ricotta Cheese

1 litre Whole Milk (or homogenized)

1 1/2 cups Whipping Cream

Juice of 1 Lemon

1 1/2 tsp Salt

Line a large sieve with cheesecloth

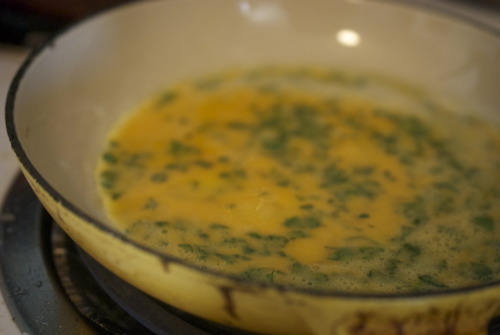
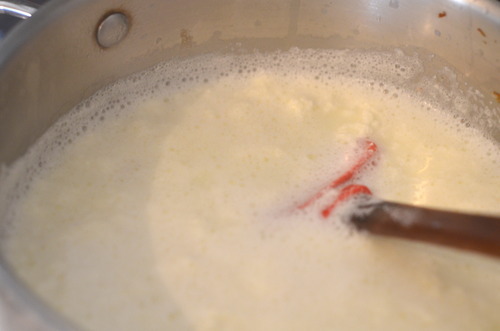
Bring the milk and cream to a roaring boil.

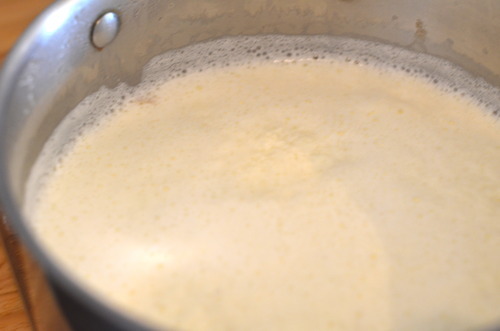
Add in the lemon juice and stir, still over the heat, until thick curds have formed.

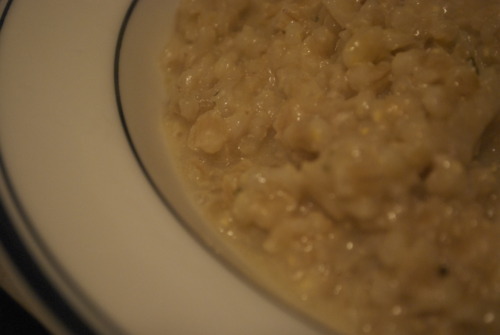
Pour the liquid into the prepared sieve, put the sieve over a bowl and allow to cool at room temperature for about an hour. You can make it a bit thicker by letting it sit longer if you’d like.

Remove the cheese from the cloth, and serve immediately, or store in an airtight container in the fridge for up to a week.  

Sunday Salads- Nectarine, Raspberry and Basil Salad with Manchego

I have never thought much of nectarines. I’ve always sort of thought that you could buy them, but why would you when peaches are sitting in the bins next to them? If I could get nectarines in February I’d be all over them, but in peach season? No thanks.

Except, last week Jordan brought some home and I, thinking I should eat them quickly so I could fill up our fruit basket with peaches, brought them on a hike we went on.

I know there was a certain amount of hunger and fatigue in the mix, but hot damn that was a good nectarine.

And you know what nectarines have on peaches? You don’t have to peel them! (I passionately hate peach fuzz)

So this summer, I’ve been buying them like they’re going on of style. I’ve been making ice tea with them, I’ve been sauteeing them with maple syrup and pouring it over French toast, and I’ve been making this salad.

A simple simple fruit salad, but one that, while definitely sweet, has a savoury edge in the way I find sort of satisfying after spending a day making (and admittedly sampling) cakes.

Nectarine, Raspberry, Basil and Manchego Salad

4 very ripe Nectarines

1 cup Raspberries

1 tbsp Honey

1/2 tsp Apple Cider Vinegar

1 tbsp Olive Oil

6 big leaves of Basil

6 big leaves of Mint

25g Manchego, or other mild sheep’s milk cheese

The tiniest pinch of salt

In a medium sized bowl mix together the vinegar, honey and oil.

Cut the nectarines into slices (about 8-10 per fruit) and mix immediately into the vinaigrette so they don’t oxidize.

Add in the raspberries.

Place the herbs on top of each other, roll them lengthwise, and slice them into the thinnest strips. (This is called a chiffonade.)

Mix them gently into the fruit, and then use a vegetable peeler to shave the cheese on top.

This will last a couple hours at room temperature- if you can wait that long!

Pasta with Wild Leeks, Mushrooms and Arugula

image

A few weeks ago I was back in Toronto visiting my Mom. We visited my best friends cottage, we spent an absorbanant amount of money on Quebec cheese, and we walked around the city. It was a wonderful trip, and a much needed bought of relaxation.

An old friend of mine, Andrew, came over and we made dinner and hung out with my mom and her boyfriend, John. When we left the house to go grab a drink down the street we both turned to each other and said, almost at the exact same time “I hope I’m that when I’m a real grown up”.

Don’t get me wrong, they have their hardships like everyone else, obviously, but there is something wonderful about the way they live. My mom walks to work everyday, John plugs away at his PhD in the study, (as one of her friends put it to me “leave it to your mother to find a 60 year old student!) they live in this beautiful house, and eat gorgeous food. They seem to live really great lives.

My mom is also a fabulous cook, so when I visit most of our time is either spent in her wonderful neighbourhood shopping for ingredients or in the kitchen. We spend a lot of time in the kitchen.

My mom cooks tons of vegetables. Tons. It’s one of the most wonderful things about the way she cooks actually. She is teeny tiny, and eats lots of cheese and pasta and delicious things, but she also eats more veggies that probably anyone else I know. There is always a salad with dinner, but beyond that, she just puts more vegetables in everything. Almost anything cooked gets a bag of arugula, or spinach, or pea shoots wilted into it.

This is a great example of that for me. Just a simple pasta of sauteed ramps, and mushrooms, with a handful of parm and a sprinkling of parsley, thyme and basil. And then a huge bag of arugula wilted into it. Don’t get me wrong, I wilt greens into my pastas all the time, but she just adds so much more than I normally would. And it results in something wonderful, something sharp and bit bitter, but mostly just more flavourful.

image

1 box Pasta

1 bunch Ramps, or Wild Leeks, or Traditional leeks, cleaned and sliced on a bias

2 cloves Garlic, minced

3 cups Cremini Mushrooms, sliced thinly

1/2 cup Freshly Grated Parmesan, or Grano Padano

8 cups Baby Arugula

1/4 cup Parsley, chopped

3 tbsp Basil, chopped

2 tbsp Thyme, chopped.

Olive Oil

Salt and Pepper

Bring a large pot of water to a boil. Salt generously and cook the pasta to the directions on the box. Strain.

Meanwhile, on medium high heat warm up a good glug of olive oil.

Sautee the leaks for about 3 minutes. Add in the mushrooms and cook until starting to caramelize, about another 5 minutes.

Clear a small spot in the middle of the pan and add in another splash of olive oil.

Cook garlic for about a minute until it is fragrant but not browning.

Mix in the leeks and the mushrooms.

Add in the pasta, herbs, and cheese and then toss in the arugula so that it starts to wilt but isn’t soggy. Season liberally with salt and pepper.

Serve immediately.  

Tuesday Tutorials- No Knead Margherita Pizza

I live in what was traditionally Little Italy, an area called Commercial Drive. There are two big pizza places, a divorced couple who hate each other and own two competing, but equally horrible overpriced restaurants across the street from each other. There were a couple cheap slice joints, you those weird ones that put sesame seeds on the crust? Those kinds of cheap slice joints.

Then a couple years ago there was a bit of an outcry that there was no good proper pizza in Vancouver. And then two years ago was the year pizza came to the city. In droves. There is pizza everywhere.

Here’s the thing of it. I love pizza. Good proper Neopolitan pizza is hard to beat. And I eat it all the time.

The best pizza joint in the city is now 3 blocks away from my house. And a totally reasonably good place is 1 block from my house. And it has this lunch special, and I am there all the time. All the time!

And while pizza isn’t expensive, I have decided that this year is the year to not go out for cheapy lunches and to make dinner at home more.

So I’m going to start making pizza at home. Partly to save money, yes, I’ll admit to that, but largely because I can make proper pizza at home. And it’s unbelievably easy.

Heres the thing of it, you don’t knead the dough. And you don’t cook the sauce.

Are you ready to make wonderful pizza at home without kneading the dough or cooking the sauce?

I thought so.

No Knead Margherita Pizza

Adapted from the Sullivan St. Bakery

Dough

31/2 cups AP Flour

1tsp Dry Active Yeast

2tsp Kosher Salt

1 1/2 cups lukewarm Water

Sauce

1cup Strained Tomatoes

A good glug of Olive Oil

Sea Salt

4 balls of Fresh Mozzarella

A Handful of Fresh Basil

1/4 cup Grated Parmesan or Grana Padano

With a wooden spoon mix all the dough ingredients in a large bowl. When it’s all combined cover it with plastic wrap and leave it. Forget about it for 18 hours! This is sort of a loose measure of time, I make mine before I go to bed and it works out beautiful when I make dinner, but I have also been impatient and used the dough and made pizza for lunch and it worked really well too. I’d say 13-20 hours is the range really.

When your ready the dough will make 2 big pizzas.

Preheat your oven as hot as it will go. Mine is 500F. If you have a pizza stone, use it. If not, just take an old baking sheet and put that in your oven and let it get toasty hot. Once the oven is hot enough let it sit at that temperature for at least 15 minutes before you start working on the dough.

The dough will be very soft and sticky so use lots of flour. The first rule of dough is not to roll it. Carefully with your fingers streth the dough out, I find it easiest to hold the dough in the air put your clenched fists under it and gently pull them apart. The dough will get thin, then put it on a well floured surface and use your fingertips to stretch out the edges.

Generously flour a rimless baking sheet or the bottom of a rimmed baking sheet.

Put the dough on top of that.

Use half the strained tomatoes and spread over the dough leaving a half inch of space around the edges for the crust.

Drizzle the olive oil on top and sprinkle with salt (you could mix all the these things ahead of time, but then you’d have to clean another bowl, which is something I avoid like the plague.)

Cut the cheese thinly and put 2 balls worth on each pizza.

Take out your pizza stone or baking sheet. With quick jerking motions slide the pizza off your cold tray and onto the hot one. Immediately put it in the oven.

I have what might possibly be the worst oven of all time. If your oven cooks as unevenly as mine you’ll have to rotate your halfway through cooking, although if you can keep the oven shut that’s the best thing.

After 2 minutes of baking turn the broiler on for 2 minutes. This should help the dough get a bit charred. After 4 minutes your pizza should be done.

Get it out of the oven, sprinkle with parm and torn basil and eat while it is still piping hot!

Tuesday Tutorials- The Best Biscuits

The second instalment in my new weekly column, where I talk about food basics, and give you the step by step know-how to do it at home.

The restaurant where I work recently started to do brunch, and before we opened I was chatting with the chef about what kinds of pastries he might want. The original idea was croissants which, despite obviously being delicious, are also so tedious to make, especially in a kitchen with as little counter space as ours, so I threw out the idea of making biscuits.

This did not go over.

Biscuits are dry, biscuits are bland, biscuitsare over done, and never delicious.

So I, being the super competitive person that I am, decided to make him some. I made savoury biscuits, ones with chunks of cheddar and dots of scallions, and let the restaurant fill up with the smell of cooking butter and melting cheese. And then I dared him not to like them.

He is not the first person I have converted to a biscuit lover, but if we’re being real here, most of this credit can go to my Grammy.

Grammy made “Cloud Biscuits”, light, airy, full of layers and always moist. Growing up they were always made with fish chowder, or if we were lucky, for breakfast. Hers was a different recipe than this, because hers was a different time. In the Great Depression butter was a serious luxury, so the cloud biscuits were always made with shortening, and just a tablespoon or so of the good stuff to give it flavour. But it was the texture that got me hooked.

Which is funny, because most people complain about the texture, they think dry, over cooked, bland. So here is THE way to make the perfect biscuit.

Let’s start out with a couple basics first

  • The way you get layers is by using big chunks of really cold butter. When that cold butter goes into the hot oven it produces steam, and if you have the right formations of butter you get perfect light fluffy biscuits.

  • You need to knead, but not too much. Flour has gluten in it, and gluten will make your biscuits tough. But you need to knead your dough in order to get in the layers. This means really feeling the dough, as you knead it when it starts to get tough, it’s time to stop.

  • Use good ingredients. If your going to add cheese to your biscuit, make it good aged cheese. There are only a few things in your biscuits, make sure they’re adding something.

  • Be creative! There are a million things you can do to a biscuit, don’t limit yourself and have fun with the possibilities!

Biscuits

(Adapted from the Tartine Bakery Cookbook)

4 1/2 cups All Purpose Flour

1tbsp Baking Powder

1tsp Baking Soda

11/2 tsp Salt

1/4 cup Sugar

1cup Unsalted Butter, very cold, cut into cubes

1 3/4 cup Buttermilk

Eggwash

1 Egg Yolk

1tbsp Cream, milk, or buttermilk

Option

1 1/2 cup Aged Cheddar, chopped

1 bunch Scallions

In a large bowl mix together all the dry ingredients.

Add in the butter and with your hands, or a pastry scraper, break the butter up into lima bean sized pieces, or about the size of your pinky finger nail.

Add in any flavourings, in these ones I used cheddar and scallions, but the world is your oyster on this one.

Carefully pour the buttermilk in and mix it with a spatula or spoon until it just begins to come together.

Push the dough down with the palms of your hands and then fold the dough in half. Continue doing this 4-6 times or until you just start to feel resistance.

Put the dough onto a lightly floured surface and roll out to about 3/4 inch thick.

Cut the dough out into whatever shapes you like, traditionally savoury are round and sweet ones are cut into triangles.

Put them on a baking sheet lined with a silpat or parchment paper and put them in the freezer for 15 minutes.

While the biscuits are chilling preheat your oven to 400F

Take the biscuits out of the freezer and brush the tops with your egg wash.

Put them in the oven and immediately turn the temperature down to 350F

Don’t open the door for the first 12 minutes, afterwards you can open it and turn the pan so that it cooks evenly.

After about 20 minutes the tops should be nicely browned and you should be able to see a significant rise. Allow to cool before eating.

Arugula Omelette with Bread Crumbs

Heres the thing of it; I only buy really good bread. Out of principle. Heres the other thing of it; good bread is only good for a day. Heres the other thing of it; there are only 2 people in my household so it’s hard to go through a whole baguette, or a full of sourdough loaf. (note, if Nutella is involved it is not hard to go through a whole baguette.)

So I’m always looking for excuses to use stale bread. Someone told me recently that in Italy breadcrumbs are poor mans cheese, which got me thinking. The friend who told me this had just made braised leeks and sprinkled breadcrumbs that she had sauteed in olive oil with garlic and rosemary and it was a killer dish. The sort of elegant dish Italian peasants have made for the last 300 years. So when I got home that night I busted out my food processor and made great use of the day old bread that always seems to be sitting in my bread box. And then I went to bed because it was late and I had already eaten dinner.

The next morning though I woke Jordan up with omelettes, just simple ham and arugula omelettes but I sprinkled breadcrumbs on the top and they were suddenly these elevated into something much more interesting. The crispness, the toasted flavour, the spike of rosemary, it was a glorious combination that, because I had already made the breadcrumbs, it was a no brainer painfully easy addition. Which is exactly what I want in my breakfasts.

Breadcrumbs

At least 2 cups of stale bread diced into cubes

1 tsp chopped Rosemary

1 tbsp chopped Parsley

2 clove Garlic

Zest of 1 lemon

A glug of Olive Oil

Salt and Pepper

Omelettes

4 Eggs

1 tbsp chopped Parsley

a Handful of Arugula

50g Ham or Porketta, thinly sliced.

2 tbsp Grated Parm, Romano, or Fruitlano.

2 tsp Butter

Salt and Pepper

In a food processor pulse breadcrumbs until they are crushed but not powdery. You want to be able to bite into them still.

In a frying pan over medium-low heat warm up the olive oil.

Add in the breadcrumbs and stir until they start to get toasty.

Add in the garlic and rosemary and keep stirring until the garlic gets fragrant and the breadcrumbs have become a nice toasty brown.

Add in the salt the zest and the parsley and set aside.

Mix 2 eggs in a bowl until thoroughly combined. Add the salt, pepper and parsley and mix again.

In a small frying pan over medium heat (your life will be easier if this is a non stick pan. If you don’t use non stick- I don’t- just make sure the pan is sparkling clean) warm up a teaspoon of the butter.

Pour the eggs in and using a wooden spoon or a spatula mix the eggs as the cook until there are some scrambled pieces but they are all connected by the uncooked eggs.

Using your spatula spread the eggs out into a thin layer and let them firm up.

Once the top is beginning to set flip the omelette- use a rubber spatula to lift the edges and then with a quick flick of the wrist flip it.*

Let it cook for another 30 seconds. Sprinkle with the grated cheese, and then layer on the ham and arugula. Fold the omelette onto itself and slide it onto a plate.

Dust the top generously with the bread crumbs.

*If your not comfortable flipping the omelette you can just let it cook all the way on the one side and then fold the whole thing in half at the end. ALTHOUGH Julia Child recommends practising the flipping motion with a pan with a handful of dried beans, and who am I to argue with Julia Child.

Barley Risotto

After much too long without a kitchen I can cook again. I can make tea in the morning, make soup for lunch and cook a proper dinner (I don’t, for the record, do this every day but now my kitchen is there, if I feel compelled to)

Which is especially nice right now because we’re getting that first bout of bone chilling weather here in Van, and I do not want to be leaving my house for food. I want to hibernate. I want to drink hot chocolate, and apple cider, and read books and swaddle myself in knitted blankets. That’s what I want. What I also want it barley risotto.

Risotto that warms you up form the inside out on a cold night but is healthy enough that I don’t feel to guilty about eating a cookie for breakfast the next day. Risotto that’s rich and soothing and is delicious with both grilled sausages and with sauteed salmon. Risotto that is good heated up the next day because it’s not made of rice that gets soggy. Risotto that has that nuttiness and bit of chew that characterized whole grains. Risotto that is just plain really good.

2 cups pearled barley

1/2 head of fennel, diced

1 small onion, diced

2 cloves of garlic, minced

a sprig of rosemary, finely chopped

3 sprigs of thyme, finely chopped

2 cups of chicken or vegetable stock

1/3 cup grated parm

Bring the stock up to a boil with 2 cups of water.

Add a pinch of salt and then add in the barley and cook them to their package instructions, about 25 minutes.

Meanwhile in a medium pan on medium-low heat warm up a good glug of olive oil. Add in your onions and fennel and saute until they become translucent and very fragrant.

Add in your garlic and the herbs and cook just until you can start to smell the garlic but not so that it gets any colour.

Add in the barley, the cheese and the knob of butter and stir to combine it all and check your seasoning.

And then eat this wonderful mix by itself, or serve it as a side!

Carbonara

They say that scent is the sense most linked to memory and I think, despite not knowing who they are, that they’re right. I think about it occasionally, if a man walks by wearing Jordan’s old cologne and I get a flash in my head of his old apartment, or the way freshly cut rhubarb makes me think of my mom making pie, but never is it more obvious to me then when I smell bacon.

Bacon, which I have eaten literally hundreds of times in at least dozens of ways.

But every time I smell bacon cooking all I can think of is a pale pale yellow bowl with thin red and blue stripes around the top of the inside. I can see it vividly, sitting on top of the glass tabletop from my childhood backyard, with our neighbours overgrown shrubs turning into trees in the background. I can feel the warmth of the hot Toronto summers, but mostly what I see is the Spaghetti carbonara inside that striped bowl, and what I smell is bacon.

It was the ultimate summer meal, it took minutes to throw together, cook bacon, cook pasta, toss with eggs and pepper and parmesan, put on table. The speed of it was important not only because my Mom was a busy woman, but also so the burners wouldn’t be on and heat up the house.

For me, this pasta is the epitome of simple Italian food, and I am a snob about it. I adamantly don’t believe that there should be anything in it besides pasta, eggs, parm, pepper, bacon and salt. I don’t like cream in mine, i think it should be creamy enough as is. The crucial thing is that everything be of great quality. Using DeMecca pasta will not give you good carbonara. Using a brand, made in Italy, that has 100%duram semolina flour is important. (I have found, although I’m sure there are lots of exceptions to this rule, that the pasta in boxes is often of a lesser quality then the kind in a bag with the label stapled to the top.)

Good eggs are also crucial, and maybe most important is the parm. Try to get grana padano, or real parmesanno reggiano.

And also, don’t skip on the pepper. The name Carbonara means black, like coals, and though I don’t like quite that much pepper in mine it should have a fair bit.

Spaghetti Carbonara

10 thick slices of the best bacon you can get. Pancetta is a lovely subsistute as well.

2 Free Range Organic Eggs

3/4 cup Grated Parmesano Reggiono, or Grana Padano

1 package Very good Quality Spaghetti, or Spaghettini

Salt and Pepper

Cut the bacon into thick pieces.

Fry them on medium heat until wonderful and crispy, but with a little chew to them still.

Strain and set aside.

Get a big pot of water on high heat.

Meanwhile mix your eggs, parm and a healthy cracking of pepper.

I was a little crazy this time and added a bit of parsley. You could do that too if you wanted.

Now put that strange eggy sauce in the bottom of a large bowl.

Now, perhaps you have a good stove and your water is boiling already. In that case, throw your pasta in, give it a good stir and cook it depending on the package instructions, but basically if until it is cooked throw with a bit of bite to it yet. If you don’t have a good stove, throw on some Aretha and dance around a bit, and then add your pasta, stir it a bit and cook it by the package instructions. Whatever works for you.

Once it’s cooked strain it and then quickly put it into that big bowl with the sauce in the bottom and give it a good toss. You want to move quickly now.  If you take to long the eggs with curdle, but if you move just fast enough you’ll have a wonderful silky sauce that wraps around each noodle. And it will be glorious.

Lemon Braided Bread

It’s probably fair to say that I’m a little obsessive with baking. There are so many baked goods that I make that don’t get up on this blog because they weren’t quite fluffy enough, or moist enough or pretty enough. I’m constantly tinkering with recipes here, a little more of this, a little more of that. Or sometimes I just have to spend a little more time on the presentation, I don’t like putting things up here that don’t look great.

Which is why it’s so surprising to make a recipe and go, goodness, I don’t need to change a thing. It is rare and unusual and wonderful, and it happened this week.

The amazing Smitten Kitchen had a recipe for lemon braided bread and hot damn was it good. The bread is very moist and very butter, and the cheesy layer is the perfect amount of sweetness without really being all that sweet and the lemon sets the whole thing over the edge. And it’s shockingly easy for something that turns out as beautiful as this bread.

A girlfriend of mine was coming over for lunch and, despite us both being pretty small girls, we ate two thirds of it in one sitting. Oh just one more slice, maybe a little bit thicker, oh come on thicker still, yes there we go

.

Sponge

6 tablespoons (3 ounces) warm water
1 teaspoon sugar
1 1/2 teaspoons instant yeast

1/4 cup (1 ounce) unbleached all-purpose flour

Dough

Sponge (above)
6 tablespoons (3 ounces) sour cream or yogurt
1/4 cup (4 tablespoons or 2 ounces) unsalted butter, softened
2 large eggs, 1 beaten for dough, 1 beaten with 1 teaspoon water for brushing bread
1/4 cup (1 3/4 ounces) sugar
1 teaspoon salt
1 teaspoon vanilla extract
2 1/2 cups (10 5/8 ounces) unbleached all-purpose flour

Egg Wash

1egg yolk

1 tbsp Water

Lemon Cream Cheese Filling

1/3 cup (2 1/2 ounces) cream cheese, softened
2 tablespoons (5/8 ounces) sugar
2 tablespoons (1 ounce) sour cream
1 teaspoon fresh lemon juice
2 tablespoons (1/2 ounce) unbleached all-purpose flour
1/4 cup (2 ounces) Lemon Curd

Mix all the sponge ingredients together and let sit until bubbly, about 15 minutes

In a standing mixer fitted with the dough hook attachment, or with some strong arms add in the dough ingredients except the salt and the butter and need until it becomes a shaggy mass. (Yes that actually is the technical term) and then add the salt.

Work it until a nice dough has formed and it pulls away from the side of the bowl.

With the motor still running add in the butter piece by piece until it’s all combined and the dough is smooth and elastic.

Cover it with a tea towel and let it rise in a warm place for about an hour or maybe a little longer until it’s doubled in size.

On a lightly floured surface roll out the dough into a long rectangle, roughly the size of the baking sheet your going to bake it on. Lightly press in two lines that divide it in thirds lengthwise.

Carefully transfer it to your lined baking sheet.

Mix together all the ingredients for your filling except the lemon curd.

Spread the sour cream layer onto the middle section of the dough, then spoon on the lemon curd.

Cut dough on either side of the lemon layer into strips, trying to get as many on both sides.

And you can either fold them over, or weave them through.

And let it proof, again, in a warm place covered with a tea towel, until it has doubled again in size.

Preheat your oven to 350F

Mix an egg yolk with a couple tablespoons of water and brush them onto of your bread.

Sprinkle with your coarse sugar and get it in the oven!

You want to, because when it comes out, it comes out like this:

And it smells like heaven and no matter what else you might serve, if you make this for brunch no one will eat anything else.