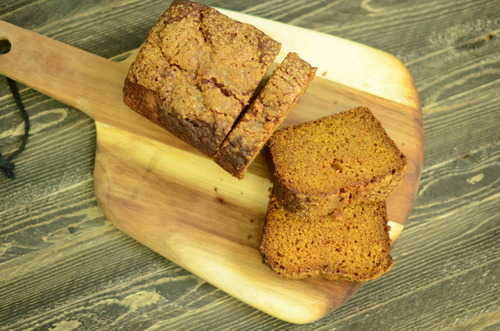
Red Wine Salt

You know that moment the morning after a couple too many drinks when you first wake up, and realize that you forgot to put the cork in the bottle of red, that you opened much too late and drank only half a glass out of?

And it’s sort of heart breaking that that lovely bottle that so many grapes died for is now just going to be thrown down the drain?

And you think, well, maybe I opened it late enough and you put the cork back in it and hope for the best, but by the time you open it up the next day (lord knows you’re not trying anything boozy that night) it’s absolutely tragically off.

I can’t be the only one who does that right?

So recently a friend of mine suggested red wine salt as a solution, and my brain nearly exploded.

There is a use for corked and terrible left over wine?

How am I only just figuring this out?

It’s a day full of questions.

Here’s what you need to know.

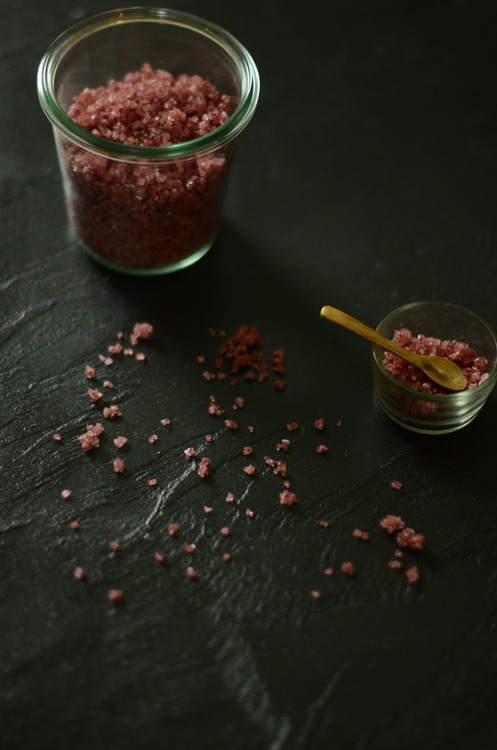
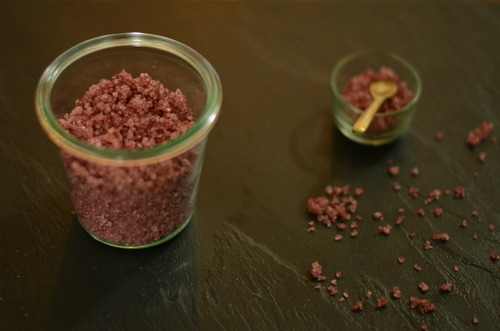
You take that wine, you reduce it down like crazy, and when it’s a thick syrup you stir in a whole bunch of coarse salt, and then you spread it on a tray and let it sit out overnight.

And the next day, unlike the last when you woke up knowing that you’d ruined a bottle of wine, you wake up to something wonderful. Something that will instead add a bit of depth to your steak dishes, and gussy up a piece of duck, and look tres chic on your dinner table when you’re entertaining.  Or bottle it up and give it as a hostess gift!

Just don’t tell them that really, it’s just the cheapest salt around with an old bottle of wine.

Red Wine Salt

1 bottle of Red Wine (give or take a glass)

2+ cups of Rock Salt

In a medium pot over medium heat reduce wine until it becomes a thick syrup. This will take about 30 minutes.

For every tablespoon of liquid that you have add in 1 ½ cups of salt

Mix together well and spread on a baking sheet lined with parchment paper.

Allow to sit out overnight, or until very dry.

Bottle up and give as gifts, or save for you

Orecchiette with Yoghurt, Spinach, Hazelnuts and Feta

Sometimes I just get stuck on a recipe. I’ll see it in a book and think, that’s weird/different/crazy/maybe delicious but I’m not sure yet, and I won’t make it for fear that what ever is weird/different/crazy/or maybe delicious will actually be awful and I’ll have wasted time and money on something I’m going to end up pushing to the back of my fridge so I can’t pretend I forgot about it until it’s too old and I have to throw it out.

I do this a fair bit. Because usually when I think something is weird and might not turn out, it doesn’t. And there are few things more frustrating than making something you think might not work, and then having it not work for just the reason you thought before you started. I’m learning to trust my gut on this.

The exception to this rule is Ottolenghi. Because he puts some things together and I think “I’m not sure about this” and then it’s always amazing.

And so with this proven track record of exceeding my expectations, I made pasta with a yoghurt based sauce.

I have been staring at this recipe since I bought the Jerusalem cookbook over a year ago.  My love affar with yoghurt is logn and well documented, but on pasta? I’m a little bit Italian and that seems pretty sacreligious to me.

Guys. I should not use my head, and instead to use Ottolenghis. I shouldn’t pretend I know better.

I don’t.

This pasta is wonderful. It’s light and creamy and tangy- the way you would expect from the yoghurt, but it’s also crunchy from the nuts, and super salty in certain bites from the feta.

I had to make a few changes to the recipe- I switched the pine nuts from the original to hazelnuts, because I had them kicking around, and inexplicably my local shop was out of frozen peas (seriously, who runs out of frozen peas?) so I used spinach instead.

The result was a pasta that was totally unexpected, and one that you should probably make right away. Seriously. Do it now.


Orrecciette with Yoghurt, Spinach and Hazelnuts

1lb Orecciette

2 cups Greek Yoghurt

4 cups Baby Spinach

¼ cup Basil, roughly torn

½ cup Toasted Hazelnuts, coarsely chopped

½ cup Feta, crumbled

2 tbsp Olive Oil

Salt and Pepper

Bring a very large pot of water to a boil. Salt generously.

Cook pasta to directions on box.

Meanwhile, in a food processor pulse the yoghurt with 2 cups of spinach, the olive oil and some salt.  Mix until smooth.

Pasta is cooked, strain. Immediately mix together with the yoghurt mixture, and then toss in the basil, hazelnuts and feta.

Eat immediately. 

Stocking Stuffer Sundays- Homemade Irish Cream with FREE downloadable labels

image

Oh I’m so excited for Stocking Stuffer Sundays! They were easily one of my favourite series I’ve ever done on the blog and, perhaps because I am such a huge lover of all things Christmas, I’m so jazzed to be starting it up again!

Just like last year every Sunday I’ll post a fun edible gift that you can make and give. And just like last year there will be a cute fun free downloadable gift tag option! Only this year, with my mad new photoshop skills that I learnt at Blogshop a couple weeks back, I was able to design the tags myself.

On a side not, how fun is photoshop? I was so intimidated for so long, but no longer!

So without further ado here is one of the easiest recipes you’ll ever find on this site- Irish Cream. Sometimes known as Bailey’s, it literally takes 5 minutes to make, but instead of being full os preservatives this stuff is just cream, condensed milk, whiskey, vanilla and coffee.

But I hope you look at this as a jumping point- add in more coffee if you want a darker flavour, stir in some melted chocolate, or caramel for a more dessert flavour. Basically, mix it up as you like, this is just the beginning!

image

Click here to get the FREE downloadable labels!

image 

Irish Cream

1 cup Cream

1 cup Whiskey

1 can Sweetened Condensed Cream

1 tbsp Vanilla Extract

1 oz. Very strong coffee, or a shot of espresso

pinch of salt

Mix all your ingredients into a blender and mix for 30 seconds. Don’t over mix of it 

image

Pumpkin Loaf, and Fun New Jobs.

image

I think it’s safe to say that I always have a project on the go. I’m adding new things to roster all the time, and currently I juggle 6 jobs. Some of them pay, some of them don’t, some of them are things I love, and one of them, serving at a restaurant, is something I do just to make ends meet. It’s a hectic life. But it’s a fun one.

One of the best parts about it, is that I am always meeting new people, doing new things, trying new recipes. And one of my favourite projects right now is with my friend Brett Holland. He is an exceptionally handy guy, who built a solar powered coffee food cart on wheels, that he bikes throughout the city, selling great coffee, and some darn good pastries, if I do say so myself. It’s called On the Grind Cafe

As he’s working out the kinks of the cart, he’s parking at the corner of Union and Jackson (right on the Strathcona bike path!), and if you’re passing by the area, you should probably pop by, drink some coffee, and perhaps get a pastry that I’ve baked.

Right?

And if you don’t live close by, and can’t get a slice of my pumpkin loaf, you should definitely make some yourself.

It is so moist, and so simple to make, and it just feels like fall. It makes a great breakfast with a coffee in the morning, but it’s also darn good slightly warmed before bed, with a cup of tea.

image

Pumpkin Loaf

Loosely adapted from Smitten Kitchen

1 1/2 cups AP Flour (or whole wheat pastry flour)

1 tsp Baking Powder

1/2 tsp Baking Soda

1 tsp Cinnamon

1/2 tsp Nutmeg

1 cup Pureed Pumpkin

1/2 cup Olive Oil

1 1/4 cup Brown Sugar

2 Eggs

Coarse Sugar to sprinkle on top.

Preheat oven to 350F

Line loaf pan with parchment paper.

In a large bowl mix together to the oil and sugar.

Add in the eggs.

Mix in the pumpkin.

Gently stir the dry ingredients in until just combined.

Pour the batter into the prepared pan and level with a spatula.

Sprinkle the coarse sugar on top and cook until an inserted skewer comes back with only a few moist crumbs- about 30 minutes.

Allow to cool before removing from pan.

Tuesday Tutorial- Homemade Mayo!

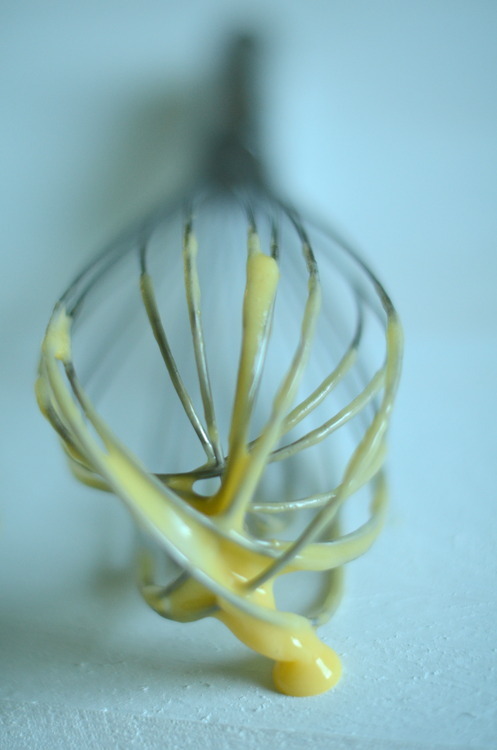
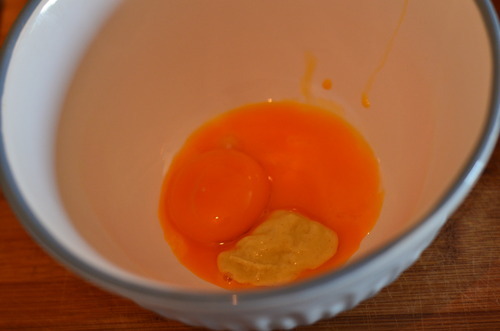
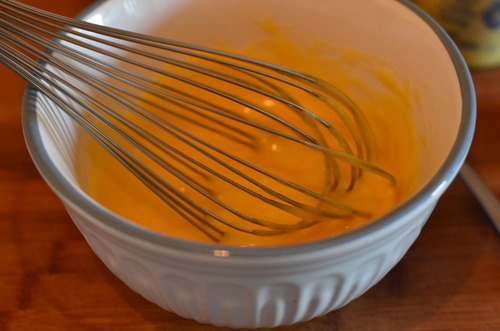
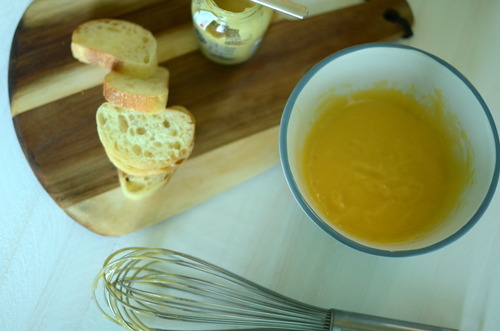
The very first thing I learnt at the very first restaurant I ever worked at, was how to make mayo. Specifically this herb laden, lemon spiked, garlicky mayo that we served with the frites. The sous chef at the time swears to this day that when he tried mine, and I had made it taste just like he showed me, he decided to take a chance on me and mentor me.

So when I say my life was changed by mayo, I am not even kidding a little bit.

Career altering mayo. Fact.

I still make mayo pretty regularly- the idea of keeping egg yolks and oil at room temperature for months at time creeps me out, so I try to do it myself as much as possible. It takes only minutes, is preservative free, and tastes just a world better than the jarred variety.

And once it’s made the fun comes in. Adding roasted garlic? Squeezing in some more lemon? Flecking in some parsley and thyme? Maybe mixing in chipotle spice, or smoked paprika, or Old Bay seasoning.The options are limitless, and nearly all of them are delicious.

Homemade Mayo

1 Egg Yolk

1 tbsp Dijon Mustard

2 tbsp Lemon Juice

1/2 tsp Salt

1 cup Vegetable Oil

Mix together the yolk, dijon, salt, and lemon juice.

Very slowly drip in the oil and whisk vigorously.  

When it starts to get very shiny, add in a few drops of the lemon juice. 

Repeat this- adding oil, and then lemon juice, until all the oil is mixed in. 

Taste it and check for seasoning. I like mine pretty lemony but you can play around with it and add less if you’d like. 

And you’re done! Easy isn’t it?

Cinco De Mayo Dessert! No Churn Dolce de Leche Ice Cream with Coconut Ganache

Dolce de leche has got to be one of the greatest things of all time. It’s a very simple idea- take sweetened condensed milk and caramelize it- whoever thought of it was a very, very clever person.

BUT whoever realized that instead of painstakingly stirring a pot of sweetened milk without burning it, you could just put a whole can in a pot of boiling water and leave it for 3 hours, and when you return the insides will have turned from white to auburn, and the taste will have changed from sweet milk to the richest caramel you could ever hope to know? Well that person was straight up genius.

Periodically, if I know I’m going to be home for 3 hours, and I’m feeling uncharacteristically organized, I pull out a big pot and make some dolce. It’s the sort of thing that makes everything feel a touch nicer- basic chocolate cookies? Sandwich some dolce in the middle. An end of the evening coffee? Stir in a spoonful of the good stuff. A bowl of vanilla ice cream? Drizzle some of this on top for a totally decadent dessert.

Or better yet- put it in your ice cream.

The blogosphere has been going crazy for a couple months now with this revelation that you can make fabulous ice cream without an ice cream churner- all you do is whip up some cream and condensed milk and throw the whole thing in the freezer. But, if you happen to have some dolce kicking around in your cupboard, you might as well use that instead.

This is truly one of the simplest things I think I’ve ever made. And the texture of this ice cream is unreal. Unreal.

Most ice creams that don’t use a machine tend to get icy quickly, to get so hard it’s difficult to scoop them, and to lack that smoothness of really good ice cream.

I’m not even kidding you- this has the texture of soft serve. A week later, it still had the texture of soft serve. It is soo smooth.

The only possible thing that might make this better, is if you made a ganache with coconut milk and poured that, while it was still warm, over top of your ice cream. It is the perfect way to celebrate Cinco de Mayo, and also most nights of the week.

So here is how you make this, and you should probably make this right away.

Dolce de Leche No Churn Ice Cream with Coconut Milk Ganache

Makes about 1.5 liters

Ice Cream

1 175mL can Dolce de Leche*

600mL Heavy Cream

1 tbsp Vanilla Extract

Ganache

1 cup Coconut Milk

1 cup Dark Chocolate

Coconut shavings for garnish

*To make dolce de leche take the whole can, unopened, and put it in a pot of water with at least 1 inch of water above it. Bring it to a boil. Boil it for 3 hours topping up the water periodically- if the water gets too low the pressure in the can can change, and apparently it can explode, so be mindful. After 3 hours take it out and let it cool completely before opening.

In the bowl of standing mixer fitted with a whisk attachment whip the dolce de leche, heavy cream, and vanilla until it is very thick- about 10 minutes.

Put into an air tight container and freeze for at least 4 hours, or preferably overnight.

Put the chocolate into a medium sized bowl.

In a saucepan bring the coconut milk up to a boil.

Pour over the chocolate, let it sit for 30 seconds and then whisk until it is smooth.

Scoop your ice cream, pour your ganache, and eat to your hearts content!