Tuesday Tutorials- Gnocchi

I wish that I had a cuter story about gnocchi. I wish my Nona had taught me to rice the potatoes, that she had shown me just how much flour you need to bring the dough together. I wish, to be honest, I could even remember her gnocchi, but I don’t. Although I’ve heard my mom and cousin talking about how incredible they were, the only time I remember her serving us gnocchi I also remember her apologizing for not making them from scratch.

But such is memory I guess, flawed.

So instead I learnt how to make gnocchi from reading the French Laundry Cookbook, where Thomas Keller goes to great length to explain how to make them. There are many ways to make gnocchi, and many debates on how to do it best, should you use starchy russets potatoes, or waxier Yukon golds? Should there be cheese added, or just on the top? If you use another starch, a squash, or a sweet potato, is it still gnocchi?

Over the years since I first forayed into the world of homemade pastas I have tried just about every possible method and every possible ingredient, and this is the recipe I always come back to. I use Yukon golds- waxier, so that you get more control over the starch content, no cheese in the gnocchi, it’s an unnescessary flavour, and it detracts from what is darn close to perfection to begin with. And you can call it a squash gnocchi, or a sweet potatoe gnocchi, but again- if it ain’t broke, don’t fix it.

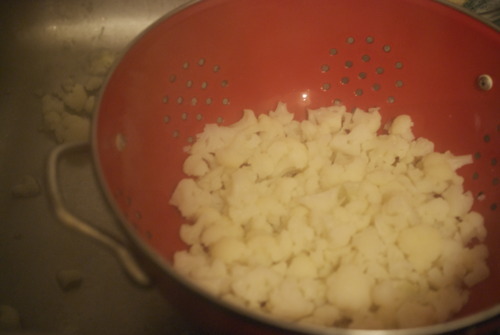
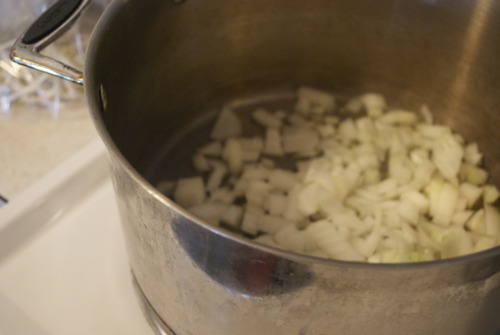
Gnocchi are surprisingly simple to make, you roast the potatoes, push them through a potato ricer or through a seive, to get very fluffy potatoes, and then you add in a few eggs and a touch of flour and knead it together until it barely forms, and then roll it, cut it, and boil it. It’s also wonderful because it freezes brilliantly, so if you make a bigger batch you can keep some for later.

While it is simple, and just about anyone can do it, I should note that it takes a quick hand, and the first time you do it you should stick to a small batch and just practise the technique. Gluten, the protein in wheat, forms at 55C and you want the dough to come together before it cools down past that temperature, so you must work quickly and keep a cloth over your dough as you go. And always have a pot of water boiling so you can test the little pastas, and make sure the consistently is just right.

,

Gnocchi

Adapted from Thomas Kellers The French Laundry Cookbook

2lbs Yukon Gold Potatoes

1- 13/4cups AP Flour plus lots more for rolling 

3 Egg Yolks

2 tbsp Salt

Preheat the oven to 450F

Poke some small holes in the potatoes with a fork on every side, and then lay them on a baking sheet and bake until an inserted knife goes in and out without any resistance, about 45 minutes to an hour.

Bring a small pot of water to a boil.

As soon as the potatoes have cooled just enough to touch, put a towel over the rest of the potatoes, take one and cut it in half. Without peeling it, put it flesh side down in the ricer and press it in until no more potato comes out. Repeat with the rest. If you don’t have a potato ricer you can take a sieve and press it the potatoes through with the back of a large spoon, this is a bit more time consuming, but totally effective- I have done it many times.

When the potatoes are all riced make a well in the middle of the bowl.

Add in the eggs and a bit of the flour, and the salt. Mix until it has barely come together. If the dough is sticking to your hangs you need some more flour.

Again add in a bit more and check again, making sure your hands are clean.

One the dough is supple, but not sticky your in business.

Take about a cup of the dough out. Put a tea towel over the rest.

Flour the surface of your counter generously and roll out the reserved dough. I roll mine with both hands, and when it starts to feel a bit too long, I just cut it in half and do each hald seperately, the dough will break if you are too rough with it.

With a pastry cutter or a knife cut the dough ito small logs. You can at this point roll them to get ridges on a gnocchi board or the back of a fork but I find this to be not too important. Now put them on a ery well floured tray and shake the tray a bit so that each piece is totally covered in flour. They will stick together if you are not diligent about thi.

Now put a couple in your boiling water to test. If you haven’t added enough flour they may break apart. If they do just mix in another small handful. If they don’t keep going!

Repeat with the rest of the dough until you have lots of lovely little gnocchis all ready to go.

If you are planning on freezing some/all your gnocchi put them in the freezer as they are on the tray covered in flour. After a couple hours take them apart and put them in a freezer bag and put them back.

Bring a very large pot of water to a boil. If you are using frozen gnocchi use the biggest pot you have and do it in batches, otherwise they will bring down the water temperature too much and won’t cook properly.

Salt the water generously and put your gnocchi in!

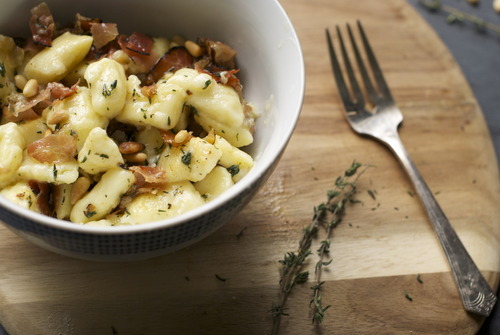
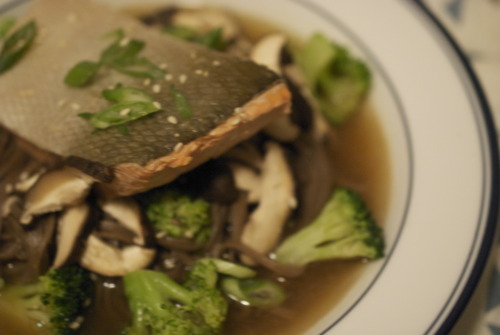
When they rise to the top they are ready to be put in your favourite sauce and eaten with abandon.

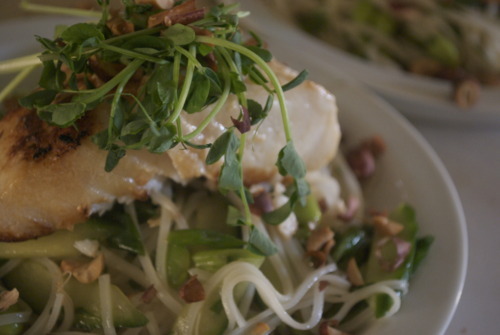
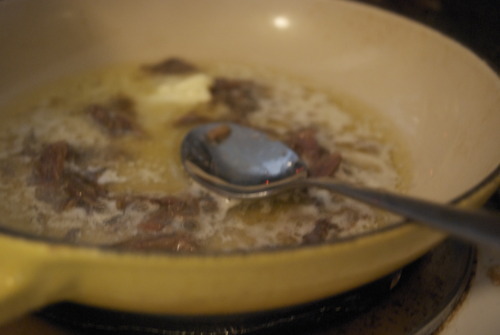
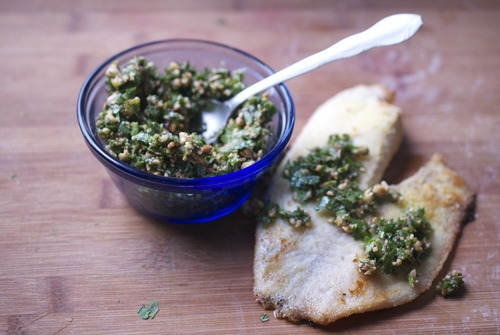
Here I have sauteed some garlic and shallots in some olive oil, added in some pancetta, and topped it off with toasted pine nuts. The simplest and most delicious dinner!

Sunday Salads- Semolina Crusted Cauliflower with Arugula and Capers

image

Phew.

The last month has just about taken it out of me. Valentines was very near the death of me. For serious.

The thing about doing the pastries for 4 different restaurants is that, when one is busy usually all of them are busy. And then it gets crazy.

Post Valentines there will be lots of deep breathing, lots of yoga, and lots of writing. I know I’ve been bad to you you all lately. I just haven’t had a chance to breath lately.

But now is the prime time to start again, to write again, and to eat salads again.

This one is one of my all time favourites, one I make pretty regularly and one that gets lots of praise every time I do. It’s full of super crispy cauliflower, peppery arugula and the sharp acid of capers. It’s admittedly, not one of the healthiest salads I make, I know it, and you could bake the cauliflower if you wanted to, I have and it’s still good, but there is just something about it when it’s pan fried in bubbling olive oil that just makes it better. It might make everything better.

image

Semolina Crusted Cauliflower with Arugula and Capers.

1 head of Cauliflower

1 cup Semolina Flour

1 cup Olive Oil

Half a Lemon

1 tsp Dijon Mustard

1 tbsp Capers- I like the really little ones if you can find them

2 cups Arugula

Bring a large pot of water to a boil

Mix a tsp of salt with the semolina flour in a medium bowl.

In another medium bowl mix together the lemon and mustard and slowly mix in a couple tablespoons of olive oil. Taste and add salt to your liking.

Meanwhile cut the cauliflower into small-ish florets.

Generously salt the water and blanch the cauliflower for about 1 minute.

Drain it well and immediately mix it into the semolina flour and toss to coat.

In a large saucepan over medium- high heat warm about a quarter of a cup of olive oil.

Put in half the cauliflower and fry until it’s nicely browned.

Drain off the oil, and put the cauliflower into the bowl with the dressing.

Repeat this process with the rest of the cauliflower, adding more olive oil as needed.

Mix in the capers and arugula and serve immediately.

Tuesday Tutorials- Better Than a Restaurant Steak with Wild Mushroom Sauce

image

About a year ago I wrote an article for a local online magazine on finding the best steak in the city. I ate some great steaks, and had an extremely happy boyfriend who came along with me. But while I was eating my way through the city, I realized something; there is no reason to order steak at a restaurant.

I’m going to tell you something else; I don’t buy expensive steaks.

I’ve never been a big tenderloin fan, I find sometimes the tenderness verges on mushy and that totally freaks my mouth out. I like something with a bit more chew, although not too much. Mostly though, what I like in the cheaper cuts of meat is the flavour.

The rich beefy flavour comes from muscles that have moved and been worked, which means cuts like the flank, the flatiron, the sirloin are all great cuts of meat, if you give them a little love.

And to back up this argument, I encourage you to think of steak frites in France, where the steak is always a bit tough.

The easy way to get the sinue out is to marinade it. It takes nothing but planning your meal 12 hours in advance, which, well, I know that doesn’t always happen. In that case, buy a ribeye.

But if your feeling prepared, and thought about dinner the night before, marinade your steak.

The other thing that is easy to do at home is make a super fantastic sauce. It requires not much money, and about 15 minutes of your time. And the rest, as they say, is gravy. Sorry, I couldn’t help it.

image

Seared Steak with Wild Mushroom Red Wine Sauce

1 Steak, Flat Iron, Flank, or some Sirloin

2 tbsp Balsamic Vinegar

2 tbsp Soy Sauce

1 tbsp Salt

1tsp Black Pepper

Sauce:

1 pckg Dried Wild Mushrooms (I found dried chanterelles!)

1 lb Cremini Mushrooms, thinly sliced

1 Large Onion, thinly sliced

2 cloves Garlic, minced

1c Red Wine

1 tbsp Flour

3 cups Chicken Stock

2 tbsp Tomato Paste

Olive Oil

Salt and Pepper

Mix all the ingredients in a medium sized bowl. Cover with seran wrap and put in the fridge overnight.

Put the dried mushrooms in a small bowl and cover with 1 cup of water.

In a large saucepan over medium high heat, warm a big glug of olive oil and start sauteeing the cremini mushrooms. You want to get them nice and browned.

When they’re brown push them to the edges to the pot and in the middle, put in the onions and brown them. Add the garlic and the tomato paste and and stir them until the middle as well.

Push that to the outside of the pot and put in another glug of olive oil and the flour. Stir that for a minute.

Now mix it all up and add the red wine and stir to make sure there are no lumps.

Add in the chicken stock.

Season with salt and pepper and simmer for 10 minutes.

Once your sauce is simmering, start getting ready to cook your steak.

Bring a large saute pan on a medium-high heat and let it get hot for about 3-4 minutes.

Pour in a glug of canola oil, and tilt the pan to spread the oil all over the whole pan. Carefully put the steaks into the pan, making sure you face it away from you so no oil will splash at you.

Cook until it is deep brown and then flip it and do the same.

Here is a trick for telling how done your meat it: Relax your hand, and then bring your index finger to your thumb. With your other hand press the meaty bit of your hand at the base of your thumb. That is what your steak should feel like when it’s rare.

When you do the same with your middle finger your steak is medium rare.

When you do the same with your ring finger your steak is medium.

When your do the same with your pinky finger your steak is medium-well

Anything past that is well done.

BUT If your not sure pull it off and let it rest for a minute and then cut into a corner of it.

If your steak is cooked let it sit for at least 5 minutes before you cut.

Then, slice it into thin strips, and serve with your perfect sauce!image

Fig and Prosciutto Toasts with Minted Ricotta

Anyone who knows me knows that I love meat. I have worked at butcher shops, I have an inordinate love of game meats, and God knows I love bacon. But a lesser known fact is that I was a vegetarian for 8 years growing up. I gave up a proscuitto-free life a long long time ago, with some serious pushing and prodding by a chef I worked for, but on the condition that I would only eat meat I could feel ethical about. Free-range, organic whenever possible, and way less meat then the American dream.

The lovely man that I live with is a very accomodating sort, he puts up with me, which does say quite a bit, but he puts his foot down on a few matters, that the floor gets swept every night, that windows should be open while we sleep, and there should always be meat with dinner. Now, I’m all for keeping the floor clean, and I have an extra quilt at the foot of my bed to stay warm but we definitely disagree on the meat issue.

So we’ve started compromising by using a little bit of meat. It’s unusual for us to eat a whole chicken breast, or 8oz of steak each, but it’s common to find some bacon in a pasta, or some local prawns in curries, or in this case, a few slices of proscuitto.

It’s not much, it isn’t. But it is enough to make him feel like he’s getting some meat in a meal, and it’s small enough to make me feel ethical about the whole thing.

And that doesn’t touch on taste, which is big and important here. There are few things better in life than figs and prosciutto. But on top of crispy bread with ricotta? We is very close to perfection.

4 slices of good crusty bread

1/2 cup Ricotta Cheese

6 slices of Prosciutto, very thinly sliced.

8 large Mint Leaves, finely sliced

Zest of 1 lemon

6 Figs

Handful of Arugula

Olive Oil

Salt and Pepper

In a small bowl mix the ricotta with the mint, lemon zest, salt and pepper.

Cut the bread in half and toast until just getting warm.

Spread the ricotta mixture on the toasts.

Put a few leaves of arugula on top.

Tear apart the prosciutto and figs and layer them atop of the arugula.

Drizzle with olive oil and eat eat eat!

Semolina Crusted Tillapia with Dukkah

I was introduced to dukkah by a woman I worked for at Little Nest, and instantly fell in love with it. It’s a beautiful thing dukkah, rich with fennel seeds and cumin drenched in olive oil, and in this version with loads of parsley and cilantro chopped in too. People will tell you that it isn’t dukkah, and they’re sort of right, this is a totally bastardised version, but also the version that I was introduced to, and so now the one I prefer. Traditionally it doesn’t have fresh herbs in it, but it turns what is essentially a spice blend into something to dip bread in, pour over poached eggs, and in this case spoon on top of fish.

Semolina Crusted Tilapia with Dukkah

2 fillets Tilapia

1/4 cup Semolina Flour

Salt and Pepper

Dukkah

1/2 cup Hazelnuts

1/4 cup Toasted Sesame seeds

1 tsp Fennel Seeds

1 tsp Cumin Seeds

1 tsp Corriander Seeds

1 cup Flat Leaf Parsley Leaves

1 cup Cilantro Leaves

1/2 cup Olive Oil

Salt Pepper

Preheat the oven to 350F.

Put the hazelnuts in the oven and cook for about 15 minutes, tossing them every few minutes until they are toasted all the way through.

In a small pan over low heat toast the fennel, cumin and coriander seeds until they are fragrant but not smoking.

Put them into a food processor, a spice grinder, or a mortar and pestle and grind until fine.

Add in the hazelnuts and the sesame seeds and crack them but you want them still coarse.

If your using a food processor add in the leaves and the olive oil and blitz until the leaves are broken up but not pureed. Or you can cut them by hand.

Add in the salt and pepper and check your seasoning.

Turn your broiler on high and let it warm up a bit.

Mix the salt, pepper and semolina together on a plate and dip the fillets in making sure they’re well coated. Put them on a lightly oiled pan and then on the top shelf of the oven.

Keep them in until the tops are slightly browned and they are cooked all the way through.  

Pancetta and Leek Quiche

It was Jazz Festival in Vancouver last week, a weekend where every venue puts on shows ranging from Mexican folk music to old proper quartets and everyone in between shows up, and while admittedly most of the more senior people in this play at expensive sold out shows, slews of people play at the outdoor stages. Every year a couple friends of ours who live near one of these outdoor venues throw a big party and we eat too much breakfast and then spend the day in the beer garden and listen to great music. It is one of my favourite days of the year.

And this year was no exception, the only difference was that after several drinks I decided that everyone should come over to brunch the next day which was, shall we say, a questionable decision.

I love having people over for brunch, as one friend put it “it’s breakfast you don’t have to wake up early for” and I would like to add it’s breakfast you can drink champagne with and not feel guilty. So I hauled my butt out of bed and made quiche.

I think people get scared of quiche, the pastry the baking, but really, you eat it at room temperature, so while you have to get up a little earlier to put it together, it means you don’t have to cook at all when people arrive, which is a trade off I’m more than happy to give. This is also a very special quiche recipe, one that is smoother than smooth and not overwhelmingly eggy.

I served this with heaps of roasted potatoes and a big salad, and I think everyone was very happy, even me, once I had a glass of bubbly in my hands!

Leek and Pancetta Quiche.

This recipe is adapted from the Tartine Bakery cookbook, and is special for 2 reasons- it has a tiny amount of flour in it which helps it from cracking, and it uses creme fraiche, which gives it a bit of a tang. Because I made several of these this weekend and my grocery store only had one small container of it, I substituted half yoghurt in, and this worked beautifully)

Pastry

This pastry works very simply. You keep big pieces of butter in the dough and chill it. When the cold butter goes into the hot oven it produces steam, and thats what gives you the flakey layers. So, it’s very important not to cut the butter too small or to overwork the dough.

2 cups AP Flour

1 cup Butter, very cold, cubed

1 tsp Salt

A small cup of ice water

Filling

5 Eggs

3 tbsp Flour

1 cup Creme Fraiche

1 cup Whole Milk

1 tbsp finely chopped thyme

1 tsp Salt

3 Large Leeks, sliced

200g Pancetta

Put the butter into a bowl with the flour and the salt, and with your hands break apart the butter into lima bean sized pieces.

Add the a couple tablespoons of butter and stir, then add a couple more until it just follows a fork around the bowl as you stir.

Now push it flat and fold it in half, and repeat until the dough starts to come together but it is still soft. If it starts to feel firm stop right away. Wrap it up and put in the freezer for 15 minutes.

Preheat the oven to 375F

Roll out the dough and fit it into a 12 inch tart pan, a 10 inch pie pan, or even a 10 inch cake pan.

Take a piece of parchment paper and cut it into a circle an inch wider than your tart. Press it into the top of your pastry and pour some beans or rice into it. This will prevent your beautiful pastry from rising too much.

Bake it for about 20 minutes, and then take out the beans and parchment paper and bake it for another 10, until the whole thing is a nice light brown color.

Turn the oven down to 325F

Filling.

While all this is going on slice up your leeks and pancetta and start cooking them over medium low heat. They will get soft, loose their liquid and then start to caramelize. This will take about 20 minutes.

In a large bowl mix together one of the eggs with the flour. Stir until there are no bumps, a couple of minutes. Add in the other eggs one by one, scraping the sides to make sure no flour is sticking.

Mix the milk and the creme fraiche together with a whisk until smooth and add that to the egg mix. Season with the salt, pepper and thyme.

Once the tart shell is out, fill it with the leeks and pancetta mixture. Pour the egg mix on top until the tart is very full.

Bake until the center has just firmed up, about 30 minutes.

Allow to cool before eating.

Panzanella Salad with Broccolini, Almonds, and Poached Eggs


I was reading a piece a while back in the New York Times opinion section about a former restaurant critic. He had a line about trendy restaurants that went something like “Yes, now everyone does hanger steaks with poached eggs, who cares? 10 years ago it was salmon and lentils” And to that article I say, I will totally be putting poached eggs on everything in 10 years. I love poached eggs. 

I think most people associate eggs with breakfast. Maybe it’s because my Mom’s back up dinner was always frittata, or maybe it’s because I used to run a small breakfast restaurant, so I was always thinking about what my specials would be the night before, but either way I eat eggs for dinner all the time.

Mostly I make a big salad and plop a poached egg on top. It’s a simple, protein filled, very cheap way to make a salad feel like dinner, and it’s a wonderful thing. This one is full of day old bread that is ripped apart and fried in olive oil. I’ve also added broccolini but what makes this really special are the slow cooked onions that are fried up with almonds and rosemary. It just makes it feel less like a throw together meal, like your not just making because all of those things happen to be in your fridge, and you had stale bread from last nights dinner and your too lazy to go out and buy some fish. Oh no. This is intentional. And it’s very very good. 

Panzanella Salad with Broccolini, Almonds and Poached Eggs

2 Free Range Organic Eggs

2 cups of Day old (or fresh!) baguette, cut into cubes or torn into pieces.

1 bunch Broccolini

1 Large yellow Onion, thinly sliced.

1/2 cup Whole Almonds, coarsely chopped.

1 sprig of Rosemary, finely chopped

Juice of half a lemon

Olive oil, Salt and Pepper

In a large saucepan over medium-low heat warm up a big glug of olive oil. Add in the onions and a pinch of salt. Cook until the onions are very soft, stirring often and not letting them brown.

Meanwhile get a deep pot of water on the stove on high heat and bring it up to a boil. 

Once the onions are starting to want to brown add in the rosemary and the almonds and let the almonds get nicely toasted and the rosemary make your whole house smell amazing. Now scoop all that goodness into a bowl and get the pan up to a medium heat.

Warm up another big glug of oil and put in broccolini. It will spit a bit when you put it in  don’t be alarmed! Just cook them until they turn bright great and the tips get a little bit browned and they are just a little tender to the bite if you eat one. Salt generously and squeeze a little lemon juice on top. Then put them on the bowl with the onions. 

Once again heat up some olive oil in the pan and add bread this time. Let the bread get nicely brown and salt it too. Once it’s crispy and delicious add it into the bowl and mix it all together and adjust the seasoning.

Now poach the eggs. Drop them in one by one and cook them until the whites are hard but the yolks are soft, about 3 minutes.

Fill up salad bowls with the panzanella and add one egg on each. And there is a simple cheap delicious meal in under 20 minutes!

Grilled Spot Prawns with a Thai Mango Salad

In Italy they celebrate the first asparagus with festivals all over the country (though I’m told especially in Veneto), ringing in the first of the local produce after a long winter of root vegetables and grains. I remember being told that in cooking school and feeling a little left out, a little cast to the side that we didn’t have these traditions, that my deep and very self important 19 year old self had missed something important. That some deep rooted cultural practise that I believed in had just passed me by because I lived in Canada.

And while that was many things, self indulgent definitely among them, it’s also not true. We may not have the long standing history of it, but Vancouver has spot prawns. And with them the Spot Prawn Festival.

I didn’t really realize before I moved to Vancouver that seafood is just as seasonal as produce, but it makes sense once you think about it. If you want the best salmon in BC you wait until mid-late summer, you’ll catch the fattiest trout in the fall, but of all seafood nothing is as seasonal as the spot prawn.

They are the first things out of the water in the Spring, big prawns that are bright coral and marked with two namesake white dots on their tails. They are tender beyond any shrimp or prawn I’ve ever had and they have an unmistakably sweet flavour. You have probably seen them in Asian supermarkets swimming around, or on Japanese menus as “ama-ebi” or sweet shrimp, but the taste of them fresh from the water is a completely different experience.

They are also one of the only sustainable shrimp/prawn fisheries in the world, and we are incredibly lucky not only to have these glorious little guys swimming around our local waters but also to have a sustainable fish shop 2 blocks away from our apartment.

Now, spot prawns are not cheap, they cost a pretty penny, so these are not for everyday, at least not on my budget (they average around $15 a pound!) but they are worth buying a few every Spring to celebrate.

I made a light dinner of them the other day, with a simple Thai inspired mango salad and grilled the prawns until just they are just barely cooked. With a cold beer, you’d be hard pressed to find a better summer meal!

Grilled Spot Prawns with Thai Mango Salad

*If you can’t get spot prawns you can make this with any shrimp, but fresh and local will make a difference in the taste if you can get them. 

Thai Mango Salad

1 philipine Mango (you can use Chinese mangos too, but the Phillipine ones are less fibrous, and often cheaper!)

1/2 a Cucumber

1/4 Red Onion

1/2 inch piece of fresh ginger

1 clove garlic

Juice of 1 lime

1 tbsp Fish Sauce

1 tsp Sambal Olek or other Asian chili garlic oil

2 tbsp Peanut or Canola Oil

Handful of cilantro and mint.

Spot Prawns

10 Prawns, head off

Zest of 1 Lime

1 tbsp Sambal Olek or other Asian chili garlic oil

1 tbsp Peanut or Canola Oil

Throw all the ingredients into a bowl and marinade for at least half an hour.

Meanwhile make the salad.

Mix the lime juice, fish sauce, sambal and oil in a bowl. On a rasp grate the ginger and garlic and mix it in. Check for seasoning, it should be quite strong- the lime, sambal and fish sauce should jump out at you!

Thinly slice the onion and add to the dressing.

Peel the mango with a peeler. Throw out the peel, then continue to use the peeler to get nice thin strips of the fruit. Add to the bowl.

Cut the cucumber in half and use the peeler to make thin strips of it. You could use a mandoline here if you wanted to, but then you’d have to wash it after, so I just use the peeler.

Mix this all together- this can sit for about an hour like this, but don’t add the herbs until your just about to serve it.

For the prawns- Heat your BBQ, grill pan, or saute pan until it’s blazing hot. Your only going to cook the prawns for about a minute each side, and your going to be taking the shells off, so you want to impart as much flavour into the meat as possible. If the edges get a little black it’s a good thing.

Once your surface is scorching hot put the prawns out in a single layer and let them cook for 1 minute each side and then flip. Once they’re starting to curl up, the edges are getting colored and they have turned bright coral your in business, take them off right away.

Mix your herbs into the salad, place half of it on each plate and put 5 prawns per plate. Poor yourself a beer and dig in!

Thai Chicken Noodle Salad

If theres one thing I find myself making over and over it’s noodle salads. They take wonderfully to nearly anything in your fridge, making them very simple and super cheap, a winning combination for this unemployed girl. I think it’s because I make them so often, and I throw in nearly anything that I worry that they’re not good enough for the blog space and I pass over them again and again when I’m making them. 

That changes with this chicken. It’s a simple enough start, mix a few ingredients and marinate some chicken for an hour or two before frying it up, but it makes this throw together lunch into a legitimate dinner, and a damn good one at that. 

The marinade comes from Martha Stewart, but the rest of the ingredients I think are up to you. I’m putting a guideline for what I use, but it varies greatly depending on the season and if I’m willing to get up and go to the store, or if I have enough in the vegetable drawer of my fridge to make do. Fresh herbs are crucial though, don’t skimp out on those. The cilantro and mint are vital and if you can find thai basil, it really elevates this, although depending on your local shops it can be hard to find. 

Marinade

2 Cloves of Garlic, minced

1/2 cup Soy Sauce

1/2 cup Rice Wine Vinegar

2 tbsp Brown Sugar

2 tbsp Lime Juice

1/2 tsp anchovie fillets, minced

1/2 tsp Sambal Olek, or another garlic chili sauce

1 1/2 lbs boneless skinless chicken thighs, cut into thin strips

3 1/2 oz Rice Noods

2tbsp Sesame oil

Half a Cucumber. Cut in half and then sliced thinly

2 carrots, Julienned

1/2 cup Bean Sprouts

1/2 bunch green onions, sliced thinly

1/2 cup toasted peanuts

a handful of cilantro

a handful of mint

To make marinade, mix all ingredients together in a bowl

Put half of the marinade into a plastic zip-loc bag and add the chicken. Mix together and let marinade at least an hour or up to overnight.

Meanwhile, bring a large pot of water up to a boil. Cook your noodles to the package instructions. Strain and run under cold water, stirring occasionally until the noodles are totally cold to the touch. Toss with 1 tbsp of sesame oil. 

In a frying pan over medium heat, heat up the remaining sesame oil. Add in the chicken and cook, stirring regularly until it’s all cooked and the pan is almost dry.


Put the noodles in a large bowl, Mix the remaining marinade with the veggies and put that on top, top that with the chicken and then sprinkle the peanuts on top. And your in business. 

Cauliflower and Cumin Fritters with Lime Yoghurt

I find myself over and over again seasoning everything with fennel seeds, dried chilis and lemon zest. A little rosemary if I’m feeling crazy. It’s a fantastic combination, for pasta sauces, a big plate of sauted veggies, roasted meats, it works on nearly everything. But I’ve been finding lately that I’ve been a little bit on auto-pilot with them. It’s easy, it’s comforting but I’m finding it a little tired lately.

And whenever I’m in a food rut, I turn to Ottolenghi.
His food is simple, easy, and elegant, but it’s also heavily influenced from his Isreali background, and his use of spices is immaculate.

It’s never heavy or laden with them but there is always a waft or coriander, or a hint of rosewater in his food that makes you curious about your food. I like to be curious about my food.

These fritters are no exception. The cauliflower and cumin are a brilliant marriage and the lime yoghurt cuts through any heaviness, making it a perfect appy on it’s own or a great light supper with a salad. Although, with a poached egg on top, this could also be an epic breakfast.

Cauliflower and Cumin Fritters with Lime Yoghurt

(almost exactly how it appears in “Ottolenghi”

Fritters

1 small Cauliflower, cut into florets

1 cup AP Flour

3 tbsp Chopped Flat leaf Parsley

1 clove, Garlic- minced

2 Shallots- minced

4 Eggs

2 tsp Cumin, ground

1 tsp Cinnamon

1/2 tsp Tumeric

1 1/2 tsp Salt

1 tsp Black Pepper

Oil to fry

Lime Yoghurt

300g Greek Yoghurt

2 tbsp Finely chopped Cilantro

Zest of 1 Lime

2 tbsp Lime juice

2 tbsp Olive Oil

Salt and Pepper

Mix all the yoghurt ingredients together in a bowl, set aside.

Bring a large pot of water to a boil. Add in a healthy pinch of salt and cook the cauliflower until it’s soft, about 15 minutes. Drain.

While the cauliflower is cooking mix together all the other ingredients (except oil) and beat until smooth. Add in the cauliflower and mix that in too.

In a frying pan on medium heat add in a good glug of oil and heat until it’s hot- put a tiny dollop of the batter in, when it starts bubbling your ready to go.

Carefully spoon in the batter and let fry until a bubble or two appears on the top and the edges and the bottoms get a nice brown color. With a spatula flip them over and repeat on the other side. Continue cooking until they are all done, then serve them with a generous helping of the lime yoghurt.

Poached Eggs with Moroccan Spiced Root Veggies.

I know, it’s been a long time. I could say I’ve been busy, and that would be true, but I am suddenly, unexpectedly un-busy now. And while that is terrifying, and it is, it also means that I can spend a little (or a lot) more time focussing on this. This little space in the internet where I write and post and give recipes and get a huge amount of satisfaction. So even though I’m pretty scared about my current employment situation, (I was working for a very small company that was very slow, and I lost my job because of that last week) I’m also excited about writing every day again, and baking every day.

When I came home unemployed on the weekend, it was still morning and I didn’t really want to talk about it yet, so I made breakfast. Not a fussy breakfast, but one that takes a bit of time and a bit of love and a bit of focus. Which is what I have an abundance of right now.

Poached Eggs with Moroccan Spiced Root Veggies and Garlicky Yoghurt.

*I have a great Moroccan spice mix that I bought at a farmers market, but you can make your own easily. This is a good one here.

1 1/2 cups nugget potatoes cut in half

1 small bunch of Carrots

1 tbsp Olive Oil

1 tbsp Moroccan Spice Mix

2 Eggs

Handful of Cilantro, roughly chopped

Salt and Pepper

1/2 cup Yoghurt

1/2 tsp Salt

1 small clove garlic

Put the potatoes in a small pot covered in cold water. Bring to a boil. Strain.

Cut the carrots into 1inch pieces.

In a large saucepan over medium heat warm the olive oil. Add in the potatoes and carrots and fry until they turn a nice auburn colour.

Meanwhile bring a medium sized pot of water to a boil.

While all this is happening peel and mince the garlic. Use a garlic press or the flat side of your knife to squish it into the smallest pieces possible.

Add the garlic and salt to the yoghurt.

Once the potatoes and carrots are a nice brown turn off the heat and add in the spice mix and cilantro.

Now you can poach the eggs. Drop them in one by one to the water. You want a solid simmer, but not a boil. Let them simmer until the whites feel firm but the yolk is still soft when you push on it.

But a shmear of yoghurt on the plate, pile on some veggies and put the egg on top. And there you have a simple, beautiful breakfast.

Sunday Staples- Poached Salmon and Soba Noodles in Miso Broth


This is one of those amazing meals that takes under half an hour to make but is absolutely nice enough to serve company. It is also deeply satisfying without being heavy at all, it’s downright healthy actually.

Soba noodles are my favourite thing right now. Don’t get me wrong I’ve been eating and cooking with them for years but for some reason they’re all I want lately. In salads, in stir fries, and now in a soup of sorts. This is also a recipe that is very forgiving and can take nearly any substitution. Not the right time of year for salmon? A white fish would be delicious. Can’t get fresh fish? Chicken it is!- although that will need longer to cook. The vegetables are also loose, bok choy, broccolini, gai laing would all great alternatives. 

Poached Salmon with Soba Noodles in Miso Broth

Broth

5 cups Water

1 bunch Green Onions

Handful of Cilantro

1 stick Lemongrass

1 1inch knob of Ginger

2 tbsp Soy Sauce

1tsp Sambal Olek

1 tbsp Sesame Oil

1 tbsp Miso Paste.

Fillings

2 Fillets of Salmon

1 Head Broccoli (Bok choy would also be great!)

2 sticks Celery

2 Bundles of Soba Noodles

6 Shiitake Mushrooms

Using the back of your knife bruise and cut your lemongrass until it will fit in your pot and is very aromatic.

Cut your green onions- use the white parts for some pretty little slices and then roughly chop the tops.

Add the tops of the green onions, the lemongrass, and all the other ingredients for your broth into a medium pot. Bring to a simmer. Let it simmer for about 10 minutes, then strain it into another pot. Bring it up to a simmer again.

Meanwhile bring a large pot of water up to a boil and season with salt.

While thats all happening cut your broccoli into little florets and slice your mushrooms and celery.

Once your water is boiling add your soba noodles, broccoli, celery and mushrooms and boil for about 6 minutes.

Add your salmon to your broth and turn the heat very low.

Once your noodles are cooked strain them and then place some of the soba and the vegetables into your bowls.

Add the salmon and ladel some of the broth on top. Add your slices of green onions and your done!

Barley Risotto

After much too long without a kitchen I can cook again. I can make tea in the morning, make soup for lunch and cook a proper dinner (I don’t, for the record, do this every day but now my kitchen is there, if I feel compelled to)

Which is especially nice right now because we’re getting that first bout of bone chilling weather here in Van, and I do not want to be leaving my house for food. I want to hibernate. I want to drink hot chocolate, and apple cider, and read books and swaddle myself in knitted blankets. That’s what I want. What I also want it barley risotto.

Risotto that warms you up form the inside out on a cold night but is healthy enough that I don’t feel to guilty about eating a cookie for breakfast the next day. Risotto that’s rich and soothing and is delicious with both grilled sausages and with sauteed salmon. Risotto that is good heated up the next day because it’s not made of rice that gets soggy. Risotto that has that nuttiness and bit of chew that characterized whole grains. Risotto that is just plain really good.

2 cups pearled barley

1/2 head of fennel, diced

1 small onion, diced

2 cloves of garlic, minced

a sprig of rosemary, finely chopped

3 sprigs of thyme, finely chopped

2 cups of chicken or vegetable stock

1/3 cup grated parm

Bring the stock up to a boil with 2 cups of water.

Add a pinch of salt and then add in the barley and cook them to their package instructions, about 25 minutes.

Meanwhile in a medium pan on medium-low heat warm up a good glug of olive oil. Add in your onions and fennel and saute until they become translucent and very fragrant.

Add in your garlic and the herbs and cook just until you can start to smell the garlic but not so that it gets any colour.

Add in the barley, the cheese and the knob of butter and stir to combine it all and check your seasoning.

And then eat this wonderful mix by itself, or serve it as a side!

Coconut Corn Soup.


I live in a pretty funny little part of East Van. It was the Italian area and then at some point it became the hippie hang out and now it’s the part of town that has the best cheese shop, a shockingly good vegan Mexican joint, and home to the coffee shop that wakes me up at 7am from crowds of Europeans shouting over soccer goals. It’s a wonderful place, most of the time.

It’s also very food oriented. It has more greengrocers then probably anywhere else in the city and my new favourite fish shop.

And on my way to my new favourite fish shop a couple days ago I noticed a very sweet little man outside with a small truck and a sign that said “Chilliwack Corn”. Now, who am I to refuse fate?

So instead of getting tuna I got sidestriped shrimp (the best shrimp ever doncha know?) and made a big batch of coconut corn soup.

This is good soup.

It’s rich and satisfying, it freezes well because of all of the starch in the corn, and it’s very flavourful. It’s loaded with lemongrass and ginger and lime and it is wonderful. Best takes less then 20 minutes on the stove and it is also terrific chilled, so you can make it the day before company comes by and be totally prepped up!

Coconut Corn Soup

A healthy glug of Olive Oil

1 large Onion, diced

2 cloves Garlic, sliced,

1 stalk Lemon Grass, sliced or chopped,

1 inch piece of Fresh Ginger, sliced,

2 cans of Coconut Milk

4 Pieces of good fresh sweet Corn

1 Lime

Fish Sauce to taste.

8 Shrimp

A small handful of cilantro, mint and/or thai basil.

* because your going to be pureeing the soup don’t worry about how nicely anything is cut!

In a medium sized pot on medium heat warm your olive oil and add in your lemongrass, ginger and onions.

Once the onions are soft and everything is very fragrant add in the garlic and cook until you just start to smell it. Then add in the coconut milk and 1 cup of water.

Cook this mixture for about 10 minutes, and then add in the corn. Cook the corn out for 5 minutes and then take it off the heat and puree it. You can use an emersion blender or a standing blender but either way I recommend pushing it throw a sieve. With the ginger and the lemongrass being so fibrous you just won’t get as nice a texture without that extra step! It doesn’t take long but it does make a big difference.

Now you can either bring it back up to a simmer and serve or chill it to serve. Either way check your seasoning. Add in lots of lime and lots of fish sauce and make sure theres enough salt.

For the prawns, just bring 1 cup of the soup of to a boil in a small pot, and add in the shrimp for 1 minute and then serve them right away!

Garnish with the herbs, and you have a perfect summer meal.

Spring Pea Frittata with Roasted New Potatoes

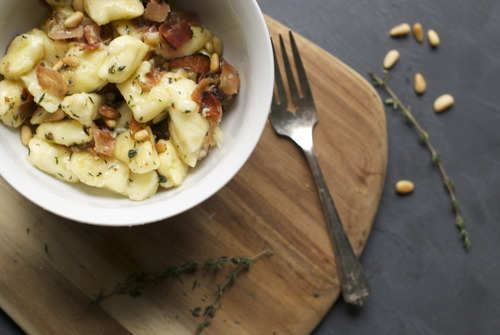
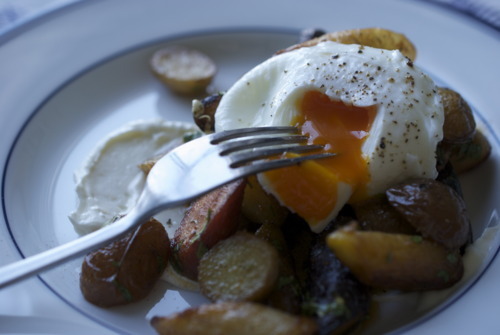
I don`t know how my parents pulled this off, but from the age of about 4 (so my sister was around 8) we fended for ourselves for breakfast. On weekends they slept in, and and we cooked for ourselves. When we were really young this meant cereal, but as we got older it included pancakes, and sometimes bagels and cream cheese and lox. Either way it was a minute in time when I got to hang out with my sister and feel a little bit grown up. At least until I spilt the milk on the floor and started crying. I always cried over spilt milk.

I think because of this I love to make breakfast. I love the quiet of being up first and stretching out across the kitchen. I love the just drinking my tea and making what I want to make.

On the odd occasion that Jordan and I have a morning off together, (or more likely when I work in the morning and speed home and he`s still curled up in bed sleeping when I return at 9am) I make breakfast. I like to make it especially if he`s still sleeping and I feel like I have full control over the kitchen. I like the silence of it.

So this weekend as I was coming home from work I picked up a few things, made myself some tea , and a frittata and enjoyed the peace and quiet. And then of course I woke up Jordan and we had a perfect lazy Sunday morning.

Spring Pea Frittata with Roasted New Potatoes.

Serves 2

1 cup Shelled Peas

2 Shallots

1 tbsp Butter

1 small Clove of Garlic

4 Eggs, the better quality the better

3 tbsp Goats Cheese

A few leaves of mint, or basil or parsley if you have them!

1lb New Potatoes

a good glug of olive oil

Cut the potatoes into wedges and put in a medium sized pot. Cover with cold water and bring them to a boil.

Cook for 2 more minutes and then strain them.

Then in a medium sized frying pan warm the pan on medium heat and pour in your olive oil. When it’s warm add in your par cooked potatoes and let them get nice and brown in there.

Meanwhile

On medium heat melt the butter in a small frying pan. Slice the shallots into thin strips and add them in with a little salt.

Once they are nice and translucent add in your garlic and simmer until it just starts to become fragrant. Then add in the peas with a 1/4 cup of water. Let the water reduce and the peas get perfectly cooked.

While that’s reducing crack your eggs into a bowl and give them a bit of a whisk. Add in a pinch of salt and a crack of pepper too. Now pour them into the pan. The key to a light and fluffy frittata is that you stir it, scrape up the pieces from the bottom. When you have some big pieces and it almost looks like it might be scrambled eggs take it off the heat,  smooth out the top with your spatula and crumble your goats cheese on top. Now get it into the oven!

In about 5 minutes the top will be set and it will feel firm if you touch the middle. There shouldn’t be any browning on it though. Take it out of the oven,

Now using a rubber spatula scrape the outsides of the pan and carefully life the frittata out of the pan.

Sprinkle the frittata with any herbs you have around and slide it onto a plate or wooden cutting board along with the potatos.

Vietnamese Noodle Salad with Halibut

Jordan has a lot of Italian friends. I`m not sure why or how he, being half Portuguese and half British, got in with this group of guys but any way he did. And while they may all be upstanding citizens with no mob connections they, without fail, always know a guy who knows a guy.

We know a guy who knows a guy who can fix our plugged drain, another who can build us a bookshelf, someone who give us fresh tomatoes in the summertime, and someone who makes their own prosciutto in their backyard shed, and yet another who sometimes give us fish.

Which is how several beautiful black cod and an alarmingly large piece of halibut appeared in my appeared in my fridge last week. They had never been frozen. They were unbelievably fresh. I was unbelievably happy.

So, while I wrecked my eyebrow tweezers plucking out pin bones, I thought about summer. About the sun pouring through the window, about fresh veggies, and all things green. I thought about hiking, which made me think about canoeing, which made me think about bikinis which made me think that perhaps we should eat a salad with this piece of fish.

But here,s the problem with salads: I always think their great until an hour later when I’m super hungry again.

So instead of just veggies, I made a Vietnamese noodle salad, with edamame, and peanuts, and cucumbers, and sprouts. And of course, on top in it`s place of honor, the most incredible buttery, soft piece of halibut imaginable.

Vietnamese Noodle Salad with Halibut

Don’t worry if halibut is out of your price range, it’s out of mine nine times out of ten. Just use any kind of white fish, cod, talapia, snapper, whatever looks good and fresh at your market will be delicious here.

For Halibut

2 fillets of halibut

Juice of 1 lime

1 tbsp Soy Sauce

1 tsp Fish Sauce

Oil for frying

Salad

Half a package of rice noodles, or rice stick noodles

1 cup Edamame, shelled

5 green onions, slices thinly on a bias

1 cup Bean Sprouts

1 cup Pea Shoots

Half a Cucumber, cut into quarters lengthwise and then cut on a bias.

Half a Cup Peanuts

A big handful of Cilantro

A handful of Thai Basil

For Dressing

1tbsp Lime Juice

2 tsp Soy Sauce

1 tsp Fish Sauce

2 tbsp Peanut Oil, Canola Oil, or Olive Oil

Preheat your oven to 400F

Get a big kettle on the stove and bring to a boil.

Prepare your Fish

Put the lime, soy, fish sauce and halibut into a ziploc bag and shake it up a little to disperse everything. Set aside. This can be done up to 2 hours in advance.

Make Salad

Cut up your veggies, pull apart your herbs, peel your beans.

Roast your peanuts at a 400F oven for about 10 minutes or until they start to get yummy and brown inside. The skins might smoke a bit, but that doesn’t mean that their done yet, cut one open or bit one in half and see. Peanuts need to be nicely roasted to be tasty.

Roughly chop them up.

Mix all the ingredients for your dressing and taste it. Is it seasoned properly? Is it lime-y enough for you?

That kettle should be boiling by now. Put all your rice noodles into a big bowl and then pour the water over top. Give it a little shake and let it sit there until they cook through but there is still a bit of bite to them.

Strain it into a colander and rinse with cold water, stirring sometimes to make sure it all cools down evenly.

Mix all your salad ingredients together except the peanuts.

Put the halibut onto a baking sheet lined with parchment and bake until it’s nice and browned inside but still very moist in the middle, about 10 minutes. (sorry, no picture here!)

Put the halibut on top of the salad, sprinkle with the peanuts and your in business!

Roman Crostini-nini

My “Aunt” Silvia is an endlessly chic Roman woman who fell in love with a brilliant Canadian man, my “Uncle” Frank. The best job for him was at McMaster University in Hamilton Ontario and thats where they lived throughout my childhood.  Aunt Silvia was not like anyone else I knew.

She has an immaculate salt and pepper bob, wears nothing but black, and is looks endlessly chic smoking like a chimney, the way only French and Italian woman can.She had a beautiful husky voice, and a fiery temper.

When my Dad was doing his PhD Uncle Frank was his Professor and my Mom ended up becoming very good friends with his wife. I picture them in the late 70’s, both beautifully dressed, making wonderful meals and talking about literature.

We didn’t visit all that often, they lived about an hour or so away from us, and while I remember eating well when we went to visit, mostly I remember so many of the staple things my Mom used to make that were recipes from Aunt Silvia. Those really simple Italian meals that just take four or five ingredients but turn into something magical.

The one I remember most is Roman Crostini. It’s one of my all times favourite things, in fact, if you look in my grade 2 yearbook you’ll see that “crostini-nini” is listed as my favorite food. The best par of crostini (nini) is that it literally takes 5 minutes. It’s a perfect h’or deurve and it’s always a crowd pleaser. It’s super cheap and, once again, it literally takes 5 minutes.

It doesn’t take much, just good bread, good mozzarella, and fresh parsley. The secret ingredient is anchovies, which are so prevelent in Roman food and so absent in ours. I have served this to people who swear they hate anchovies, (after making sure there are no allergies) and they’ve loved it. The anchovies just disintegrate into the olive oil leaving this rich deep flavour without any fishiness. And then the cheese oozes in and the bread crusts up and the parsley just makes it all snap together. It’s amazing, and it takes 5 minutes to make.

Roman Crostini

1 good quality Baguette, it can be stale!

3 Anchovy Fillets, get the good ones, packed in olive oil.

1/4 cup Olive Oil

3-5 Balls of Boconccini, depending on the size

A Small Handful of Flat Leaf Italian Parsley

Preheat the oven to 400F

Line a baking tray with parchment paper.

Cut the baguette into slices, leaving the bread just barely attached at the base so that the loaf still looks like a loaf afterwards. If you cut through the bottom a couple times, don’t worry about it, just keep going.

Slice the boconccini into slices and then stick them in between the bread slices like so:

Cut up the anchovies in the smallest little strips and then cook them in butter or olive oil on medium low heat, squishing them with the back of a spoon periodically to help them fall apart.

Then take it off the heat, chop up that parsley and add that in too.

Then pour it on top of the bread. You can let it sit like this for a while too, if your making dinner, and then pop it in the oven just as friends are arriving. Or you can make it right away and eat it right away.

Then pop it in the oven until the cheese is oozing, the bread has browned, and your house smells amazing.

Throw it on a plate and eat promptly.