Stocking Stuffer Sundays- Caramel Bourbon Marshmallows with Free Downloadable Labels!

Have you ever made marshmallows? And then given them away? I mean you eat a few for yourself first, but then you put some in a cute little box and give them to a friend who’s sick, or stash some into a stocking. And then that person becomes your best friend.

Because homemade marshmallows are amazing.

They are the best ever.

They are soft, squishy, melt-y and most of, flavorful!

These aren’t those strange hardened pieces of sugar from the supermarket. They are filled with whatever your heart desires.

These days,  my heart desires bourbon. Which changes hot chocolate from this super sweet thing into something much more adult, and much more compelling.

CLICK HERE for the labels.

Caramel Bourbon Marshmallows

2 tbsp + ½ tsp Powdered Gelatin

2 cups Sugar

½ cup Corn Syrup

2 Egg Whites

1 tbsp Vanilla Extract

1 tsp Salt

2 oz Bourbon

In a small bowl mix together the gelatin and ½ cup cold water.

Mix ½ cup of water with the corn syrup.

In the bowl of a standing mixer fitted with the whisk attachment put the egg whites.

In a medium pot stir together the sugar and another ½ cup of cold water.

Put over medium heat with a lid on.

When the sugar is totally dissolved take the lid off and let the sugar bubble away until a auburn caramel color is achieved. Immediately add in half of the corn syrup mixture. It will bubble and spit like crazy so be careful! Stir for a moment, then put in the rest of the corn syrup.

Put your candy thermometer in and, stirring occasionally, bring it up to 240F.

As the sugar heats up scrape the gelatin mixture in with the egg whites and turn the whisk on medium high.

When the sugar is 240F slowly pour it down the edge of the bowl with the whisk running.

Turn it up to high and keep it running for about 10 minutes, until the mixture is very thick and pillow-y. Stir in the vanilla and bourbon.

While it’s running line an 8 inch square pan with parchment and grease liberally with canola oil.

Pour the marshmallows into the prepared pan and let set for at least 6 hours.

Cut and bag!


Nutella Marshmallows, and some very fun times

image

I am a very lucky person. I am lucky for a whole lot of reasons, for my family, for my friends, for my job. But everyday I wake up and think, how did I get so lucky not only to find such a tremendous person to spent my days with, but also for him to have come from such a terrific family.

The horror stories about mothers-in-law do not apply. Mean sisters are not a concern, and grumpy fathers do not exist. Jordan’s family is a small miracle to me, because not only are they such great people, but they also have welcomed me in with reckless abandon, which is so appreciated when my own family is so far away. (which is my fault, I know.)

So when it was decided that we would throw Jordan’s parents a surprise party for their 40th wedding anniversary, I got excited.

image

(They were very very surprised!)

Here is something you should know about me- I love throwing parties. Like, a lot.

image

(Jordan’s Dad, Steve, looking very pleased with a stiff drink and a cigar)

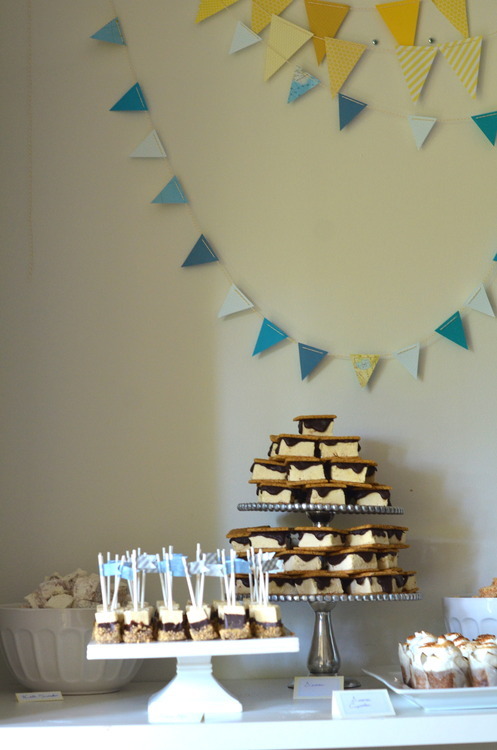
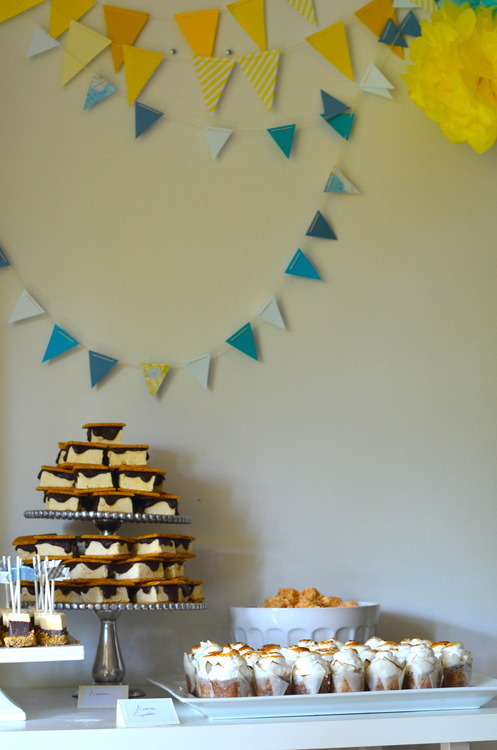
It was held at his older sisters house, because she has an incredible back yard, and as a group we made some pretty fabulous food (halibut sliders on brioche buns anyone?) made some great drinks (last weeks post on cherry bourbon for starters!) and I spent several weeks cutting out triangles of yards and yards of bunting, and spent hours deliberating what to do for dessert.

There was a lot of pressure on this.

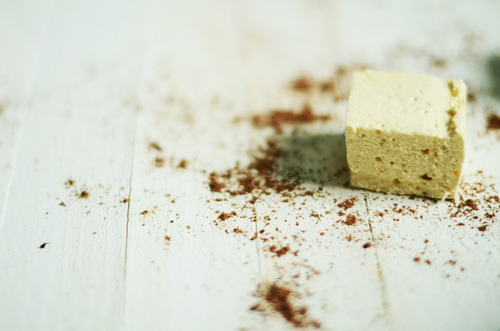
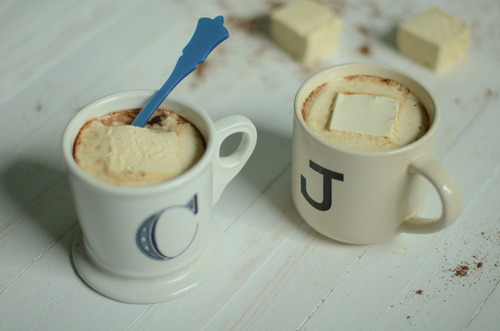
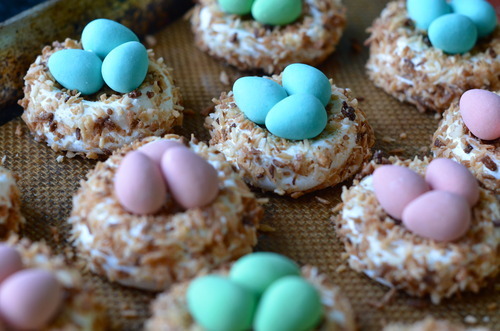
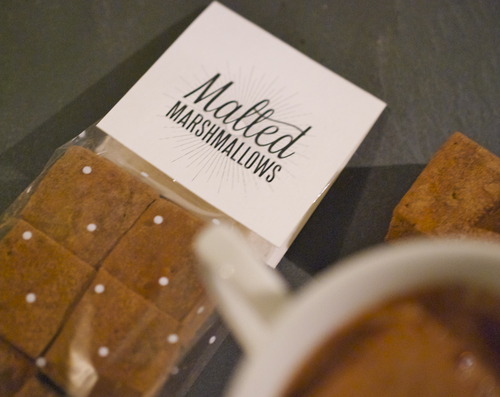
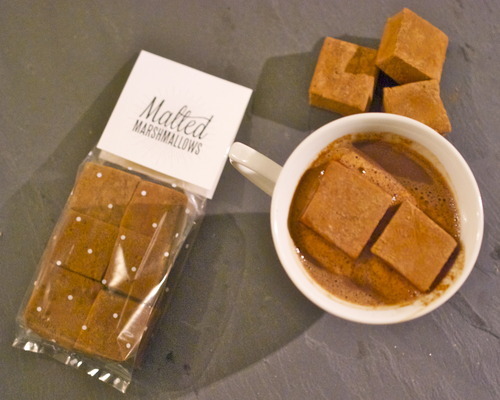
In the end, I went with a s’mores theme. It was a backyard party after all. I made s’mores pops, s’mores cupcakes, straight up s’mores (with my caramel marshmallows to get that burnt sugar taste, and smothered in ganache) and laid out bowls of coconut marshmallows and Nutella marshmallows.

Guys, I’m not going to lie, I thought it looked pretty spectacular.

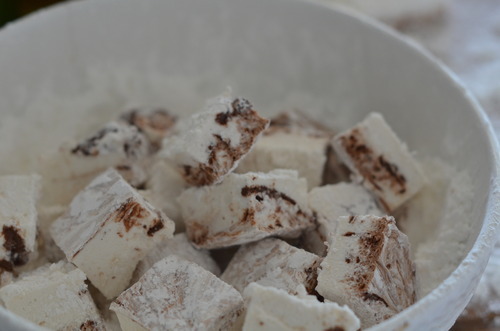
And while there wasn’t a lot left over, the biggest hit might have been the Nutella marshmallows. They were killer.

image

Actually, everthing was killer, it was a terrific party. His parents were so surprised (and as they’re anniversary is actually in a couple weeks they took several minutes just to figure out what we were yelling “Surprise!” about.) His dad was ecstatic, and his mom was thrilled, we drank, we danced, we played bocci, and we had a really really great time. With a really great family.

Nutella Marshmallows

2 tbsp + 1/2 tsp Unflavoured Powdered Gelatin

2 cups Sugar

1/2 cup Corn Syrup

2 Egg Whites

1 tbsp Vanilla

1 tsp Salt

1 1/2 cups Nutella

Icing sugar for coating.

Line an 8 inch square pan with parchment paper and oil it generously.

Sprinkle gelatin over 1/2 cup of cold water.

Put your egg whites in a standing mixer fitted with the whisk attachment.

In a medium pot mix together the sugar, corn syrup, and just enough water to give it the texture of wet sand (about 1/2 cup)

Put a lid on it, and put it on a burner with medium heat.

In a couple minutes give it a quick stir and then put the lid back on- this build up of steam in the pot will prevent crystals from forming.

Once the sugar has COMPLETELY dissolved, remove the lid.

Bring the heat up to high and put in your candy thermometer.

When the thermometer reads 230F start your mixer.

When the thermometer reads 240F mix the gelatin into the sugar mixture, and start carefully pouring the sugar into the mixer with the whisk running. It is important not to pour into the middle of the bowl- or all the sugar will splash to the edges. Instead pour the mixture down the side of the bowl, it’s okay if it sticks to one spot, as the marshmallows whip up in size they will pull any left over sugar in.

Keep the motor running for about 10 minutes or until the marshmallows have become big, white, fluffy, and marshmallow-y looking. The bowl should be nearly cool by now.

While you’re waiting for that to happen, warm up the Nutella either in a microwave or in a double boiler, until it is fairly thin.

When your marshmallows are ready, pour them into your prepared mold- move quickly! They will firm up quickly now!- and spread them out with an offset spatula.

Now pour the nutella on top and swirl in with toothpick, or chopstick. It’s important to mix them in really well.

Allow for them to firm up completely, about 4 hours, or overnight.

When they are ready to cut use ample icing sugar on every surface! Cut into the desired shape, roll in icing sugar, and eat!

image

Marshmallow Birds Nests, and Other Cute Things

 tend to have an issue with food that values being cute over being delicious. It’s just not my cup of tea. It’s not that I have a problem with food that looks sweet, but like cake pops, or cakes covered in fondant, I just don’t totally get it.

And yet… Easter. It just wants you to make overly cute things. And it wants you to give those overly cute things to the insane cuteness that is your niece and nephew.

Friends, I am obsessed with my niece and nephew. They are the kids I want one day, they are the kids you dream your boyfriends sister will have, and they are the kids you dream of babysitting. They are that cute, that well behaved, and that affectionate.

And so my thoughts on overly cute foods has been over ridden, by my love of overly cute kids.

I’m sorry.

Except I’m not really, because these are also super tasty. They are basically just toasted coconut marshmallows (delicious) with Cadbury Mini Eggs on top, and I’m not going to pretend that I’m above a Cadbury Mini Egg at Easter time. I’m totally not above it.

*PS don’t forget to enter the giveaway from earlier in the week! The winner will be decided on Wednesday!

3 pkgs Unflavoured Gelatin

1 1/2 cups Sugar

1 cup Corn Syrup, Brown Rice Syrup or Cane Syrup

1 tbsp Vanilla Extract

1 tsp Coconut Extract

2 cups Shredded Coconut, toasted*

2 tbsp Icing Sugar

3-6 drops Lemon Juice,

Cadbury Mini Eggs

*Toast the coconut by putting it on a tray in a thin layer in an oven preheated to 325F.

When it get’s nice and brown you’re in business.

Line two baking sheets with a silpat or parchment paper. Spray them with cooking spray or put a bit of a neutral oil, like canola, on a cloth and wipe it on the parchment/silpat. Marshmallows can be very sticky.

In the bowl of an electric mixer fitted with the whisk attachment, stir the gelatin with 1/2 cup of cold water. Let sit.

Meanwhile in a medium pot mic together the sugar and syrup with 1 cup of cold water. Put the lid on and over medium heat bring to a boil, stirring occasionally to make sure all the sugar has dissolved.

Once the sugar is completely dissolved take the pot lid off and turn the heat to high. Put in your candy thermometer and cook until the syrup comes to 240F

Pour the syrup into the mixing bowl and quickly turn the mixer on to medium, and then once it starts to thicken, to high.

Keep it on, after about 10 minutes your mixture will be thick and white, and starting to pull away from the edges as it turns.

It will thicken quickly so this part has got to be quick!

In a piping bag fitted with a medium plain piping tip, pipe the nest. Pipe a small circle and then go around the edges to create the sides. They will slump down a bit as they cool.

Allow to cool and harden for at least 6 hours, or overnight.

Put the toasted coconut into a bowl and put your marshmallows in, one at a time. Depending on how long you let them dry you may need to press the coconut in to make them stick. That’s okay.

Now mix together the icing sugar and lemon juice.

Dip one side of each egg into the frosting and use it as glue to stick the eggs into the nests.

AND now give them to cute small children and be merry.  

Stocking Stuffer Sundays- Malted Chocolate Marshmallows

I am very very lucky to have such a wide network of incredibly creative people. And I am even more lucky to have a wide network of creative people with whom I barter. I make cakes for my friend who cuts my hair and I baked for a friends gallery opening in exchange for a photo shoot. In high school I traded my (admittedly limited) seamstress-ing skills for clothes at a vintage shop, but recently I’ve noticed that if I just ask, people will just help out.

Which is what I did with my graphic designer when I started thinking about doing “Stocking Stuffer Sundays” and that is what the super talented Jen Cook did. She helped out.

Jen made my beautiful website, and now she’s made some beautiful labels for you.

Every year I make marshmallows for stocking stuffers. Every year there a fan favourite. There is something that is all kinds of wonderful about homemade marshmallows. For starters they are completely unlike the store bought variety, they are softer, denser, and you can flavour them with just about anything. Anything, that is, that you want to put in hot chocolate.

I like marshmallows plain, I do, but the real home of a marshmallow is in hot chocolate. Let’s be clear on that.

These are chocolate marshmallows, with lots of cocoa powder in them, but they also have a bit of malt, which for me is very nostalgic. Partly because I drank ovaltine as a kid, and partly because I used to listen to the song “Malted Milk” by Eric Clapton all the time. So it’s twice the memories plopped into a steaming mug of hot chocolate.

So basically what I’m saying here, it tastes like happiness. 

For Labels Click Here

Chocolate Malted Marshmallows

Adapted from Shauna Server

2 tbsp unflavored powdered gelatin
1/3 c cold water
1 cup granulated sugar
1/2 cup corn syrup, divided
Pinch of salt
1/4 c unsweetened cocoa powder
1/2 c malted milk powder
6tbsp boiling water
1tbsp vanilla extract

For Rolling

2/3 c Icing Sugar

1/3 c Cocoa Powder


Mix the gelatin and the cold water in a small bowl. Let sit for at least 5 minutes. 

In the bowl of a standing mixer, fitted with the whisk attachment, dissolve the cocoa and malted powders in the boiling water. Add in the vanilla. Mix in the gelatin mix. 

In a small pot mix the corn syrup with the corn syrup, the sugar, and 1/4 cup water. put the lid on it and on medium heat bring to a boil. When all of the sugar has dissolved take off the lid, turn it up to high heat and put in a candy thermometer. Bring the sugar mix to 242F. 

When the sugar is at 253F turn the mixer on medium. When the sugar mixture has come to 242F slowly pour into the mixer, creating a slow and stead stream down the side, being careful not to let it splash around the sides. 

Turn the mixer to high and let it run for 10-15 minutes or until it is thick and pale. 

While this is happening line a 10 inch square baking pan with cling wrap and grease it liberally. You can do with this with Pam or another spray or with some canola oil and a paper towel. 

When the marshmallows are ready pour the mixture into the prepared baking pan and  smooth with an offset spatula. Allow to sit for at least 8 hours. 

Cut up into whatever size you like, squares are most effective but I’ve seen really cute snowflakes and all sorts of shapes. Roll them in the sugar and cocoa mixture and package them up as you please!