http://www.youtube.com/watch?v=0MWRcWuL7Qw
Tuesday Tutorial! Here is a quick stop motion video showing you how to ice a tiered wedding cake with buttercream! Hope you like it! xo
(Source: http://www.youtube.com/)
http://www.youtube.com/watch?v=0MWRcWuL7Qw
Tuesday Tutorial! Here is a quick stop motion video showing you how to ice a tiered wedding cake with buttercream! Hope you like it! xo
Oh. Finally.
You know that feeling when everything might just be going a little too well? Something has to mess up and stress you out just to restore the balance of the world?
I have a had a great few weeks. Really, truly, great few weeks. My boss at the restaurant I serve at said he would like me to start doing the pastries at both his restaurants! Yes! My editor at Edible Vancouver promoted me to associate editor! Yes! It was Jordan’s birthday, we had a super fun party! Yes!
So of course my site had to go down. It had to go down when my graphic designer was hiking the volcanos of Iceland, largely out of internet range.
If you could see the emails I was writing to the tech support at all the different places that might be able to help, you would be amazed, and also surprised at how polite I was given how completely pushed around I was. I am Canadian I suppose.
So thanks friends, who came and checked even though there was nothing to look at for weeks, and thanks for your patience. I am so very very grateful for it.
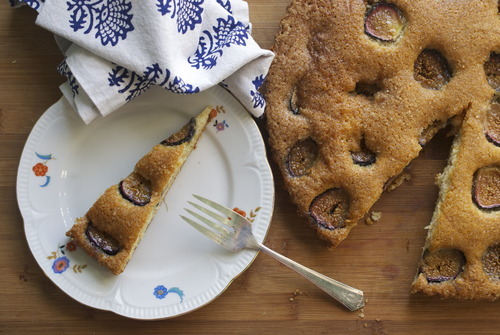
I am also grateful for this fig cake. Because when one is mostly happy, but also deeply frusterated, the only thing I know that works, is cake.
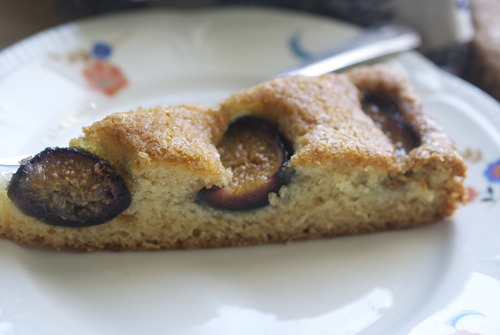
Fresh Fig Honeyed Jewel Cake.
1 3/4 cup AP Flour
3/4 tsp Baking Powder
1/2 tsp Baking Soda
1/2 tsp Ground Cinnamon
1/2 tsp Ground Ginger
2 Eggs
1/2 cup Sugar
1/4 cup Brown Sugar
1/2 cup Honey
1/2 cup Milk
1/2 cup Vegetable Oil
1/4 cup Coarse Sugar, for sprinkling on top.
10-13 Plump Fresh Figs, cut in half
Preheat oven to 350F
Butter and flour a 9 inch Cake or tart pan.
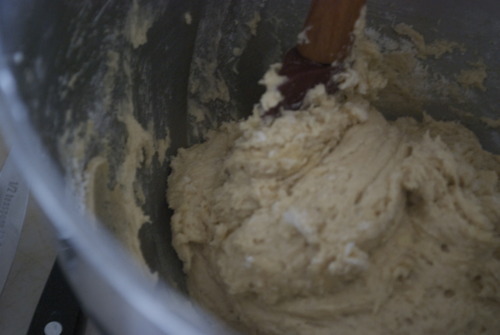
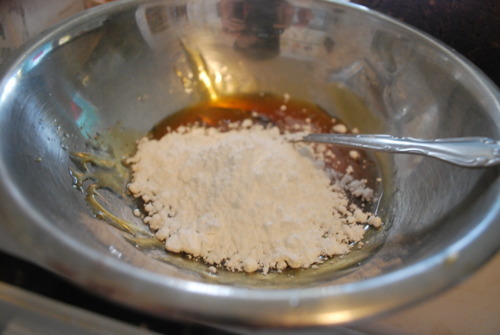
In a standing mixer fitted with the paddle attachment cream together the oil, sugars, and honey
Add in the eggs one at a time beating well between each addition and wiping down the sides of the bowls with a spatula to make sure it is all evenly combined.
In a separate bowl sift together the dry ingredients.
Add in one third of the dry ingredients and mix until barely combined. Add in half the milk. Keep repeating until all the ingredients are incorporated being careful not to mix too much as that will make your cake tough.
Pour cake evenly into pan and smooth out with an inverted spatula.
Place figs in a concentric circle starting from the outside and moving in.
Sprinkle with coarse sugar and bake until an inserted skewer comes out with only a few moist crumbs, about 25-30 minutes.
At the very first restaurant I worked at I was incredibly lucky to have been taken under the wing of the chef, who was unbareably talented. I’m fairly certain it had nothing to do with any talent I might have had and more to do with my bubbly 17 year old personality and my eagerness, my excitement, my glee to work 15 hours a day for well below minimum wage, but whatever the reasoning I will always be grateful.
I worked at the “garde manger” section, the cold side, the appetizers station, chopping vegetables, making aoilis and, joyfully once a week, I worked with the only other women in the kitchen in pastries.
But most days I was generally doing bitch work, except when this kind chef would come over and ask me questions and make me think deep and hard about what I was doing, how it all tasted, and why things worked that did. It was during one of these conversations I learnt about the amazing combination of apricots with cardamon.
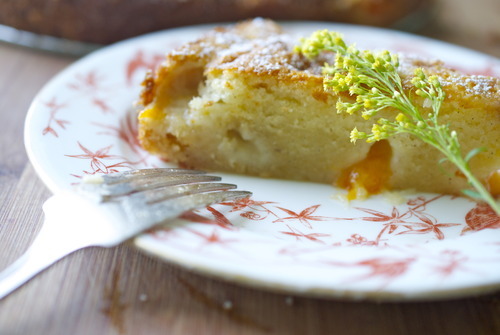
In fact, I had actually brought up the two together on a whim, and then he drilled me on my choice and made me very insecure, but when we made the cooked down the apricots, pushed them through a seive, sweetened them with honey and added some crushed cardamon pods I knew I was onto something. At that restaurant we smeared some of this jam on a plate and toped it with foie gras, but these days, simpler days, I just bake it all in a cake.
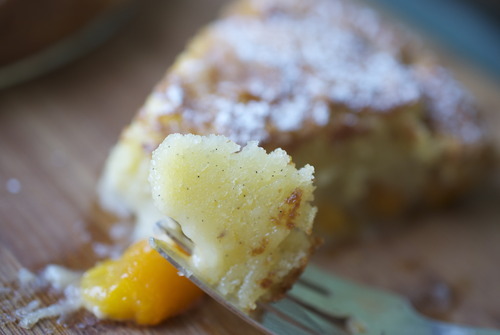
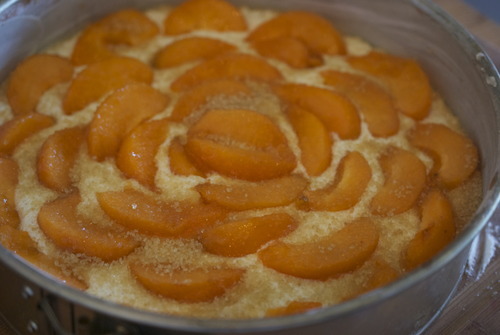
Cardamon Spiced Apricot Cake
1/2 cup Butter
2/3 cup Sugar
1/3 cup Honey
2 Eggs
1 1/2 cup AP Flour
1 tsp Cardamon
1/4 tsp Cinnamon
1/2 tsp Baking Powder
1/4 tsp Baking Soda
2/3 cup Milk
10 Apricots, cut in half lengthwise and then each half cut into 3rds lengthwise
Preheat the oven to 325F
Butter and flour an 8 inch round baking pan.
In a medium bowl sift together the dry ingredients
In a standing mixer fitted with the paddle attachment cream the butter, sugar and honey together until light and fluffy.
Add in the eggs one at a time beating well between each addition. Scrape down the sides of the bowl and beat for another minute.
Turn the mixer to the lowest setting and mix in one third of the dry ingredients. Stir until just combined then add half the milk. Continue like this until all ingredients are incorporated.
Pour the batter into the prepared pan and smooth out with a spatula. Put the apricots on the top of the cake in a flower pattern- starting from the outside and working in.
Bake the cake until an inserted skewer comes out with only a few moist crumbs, about 35 minutes.
Allow to cool in the pan, carefully remove it, sprinkle with icing sugar and enjoy!
My love of flour is very well documented here, I am not, nor will I ever be, the sort of person who sneaks in a bunch of whole wheat flours and pretends that the dense slighly soggy texture that nearly always happens when you substitute whole wheat for all purpose, doesn’t exsist. I’m just not that girl. I hope you all know that by now.
The glorious exception to this rule, is almond flour. Chalk full of nutrients, and proteins, even some iron! And while it can definitely not be substituted for good old AP, it can produce the sort of rich, thick tasting baking that I covet. But this sneaky little recipe does both- it uses almond flour to help out with the meltingly tender crumb, but it also throws buckwheat flour into the mix. Buckwheat flour, if you’ve never used it is a gluten free flour with a soft nutty flavour, that is common in both France (galettes!) and Japan (soba noodles!) and isn’t the sort of flour you could ever accuse of trying to be something it’s not (I’m looking at you quinoa).
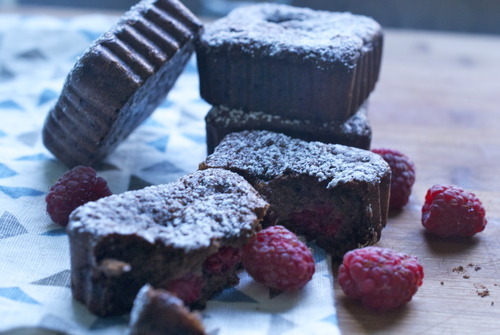
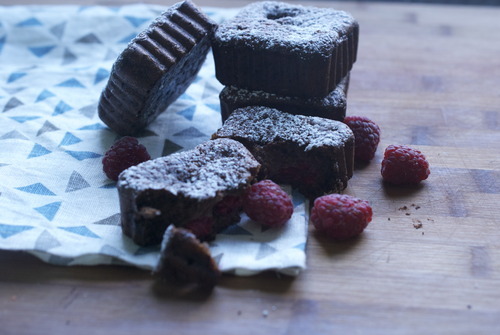
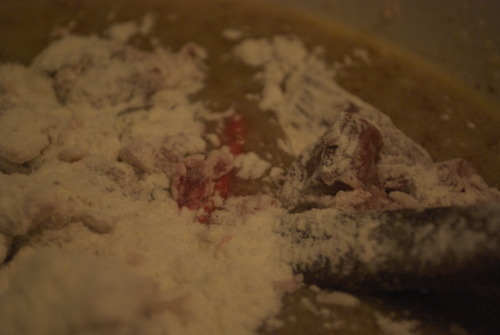
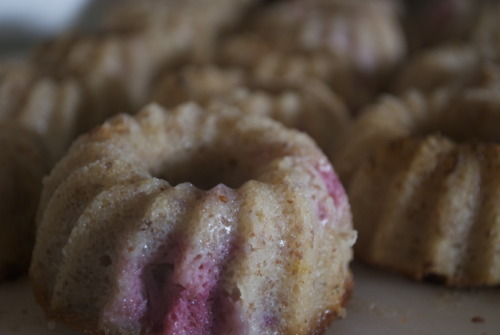
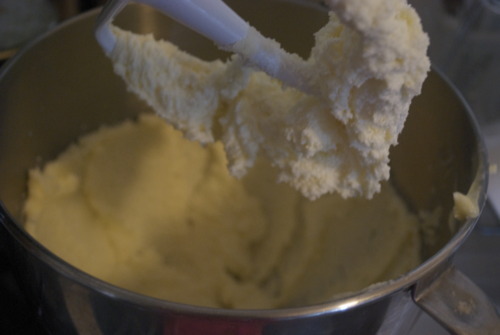
All of which is a very long way of saying that these chocolatey morsels are basically health food compared to what I normally post up here. They are also creamy and slighly gooey, and all that is cut by the raspberries that have baked just enough to start to soften inside the batter. And the hint of nuttiness from the buckwheat turns out to be just what you never knew you needed.
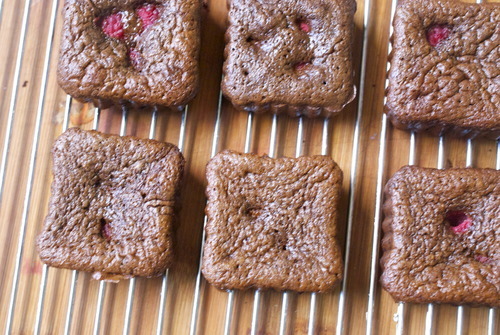
Chocolate Raspberry Buckwheat Cakes
(Adapted from Smitten Kitchen)
7 tablespoons unsalted butter, plus extra for buttering pan
3 1/2 ounce Bittersweet dark chocolate
4 large eggs
1/2 cup Granulated or blond cane sugar
A good pinch Salt
1 tbsp pure vanilla extract
1/4 cup Buckwheat Flour
1/4 cup Almond meal
1/2 pint Raspberries
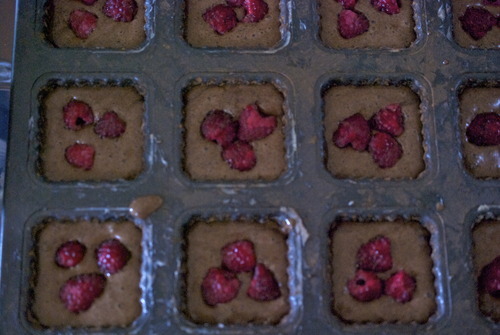
Preheat the oven to 300F
Grease your pans, I used these little 2 inch square pans but you can easily bake this in an 8 inch round pan.
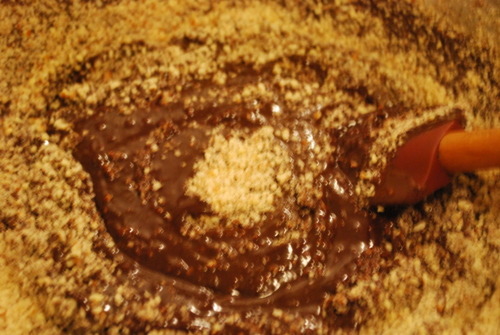
In a medium sized bowl set over a pot with an inch or two of simmering water, melt the chocolate and the butter.
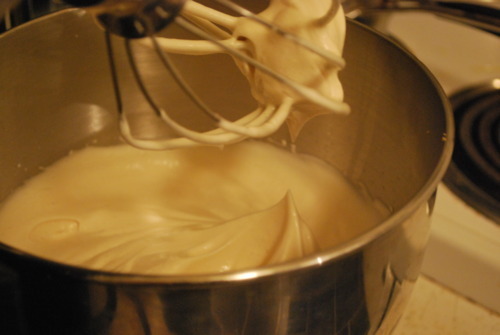
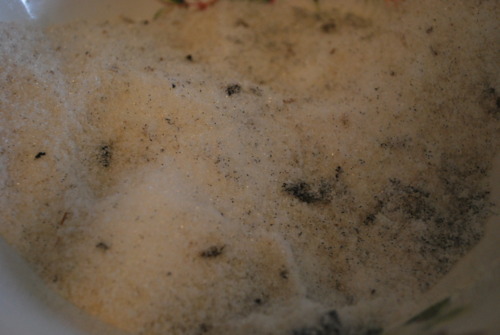
In the bowl of a standing mixer fitted with the whisk attachment beat the eggs until frothy. With the mixer still on high slowly add in the sugar tablespoon by tablespoon and let the motor run until the eggs are pale and thick and take a moment to smooth out into the bowl if you pick some up.
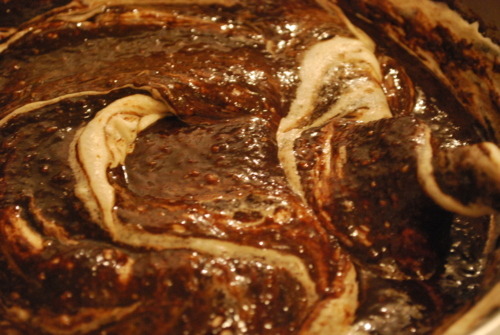
Fold in the chocolate and butter.
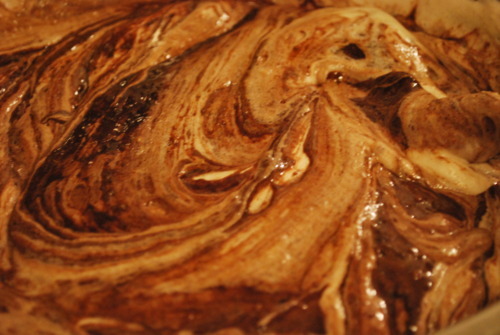
Add in the vanilla, then the almond meal and the buckwheat flour. Pour batter into your pan and smooth with a spatula. Place berries on top and bake for 20-30 minutes, or until the top has barely set but is still a little soft to the touch. Allow to cool, sprinkle with icing sugar and enjoy!
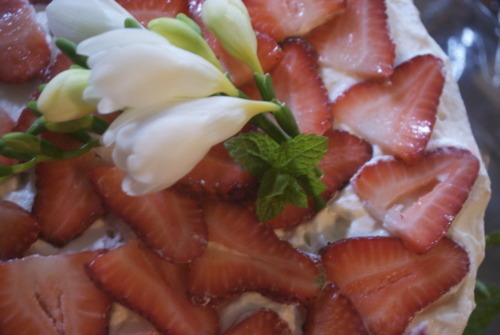
Hello lovely people! I did a little blogging for Edible Vancouver this week, so if you feel like making a cake with fresh strawberries you should check out my post here. I’ll have more things here up by the end of the day but until then…
I have alway thought, and some people are going to hate me for this, but that the best thing about Vancouver is getting out of it. Thats not to say that I don’t love my neighbourhood, or that I haven’t had many a great night at great restaurants and bars downtown, but it is to say that when you look around Vancouver the most amazing things aren’t the buildings or the culture, but the mountains and ocean that surround it. And the best part of the mountains and the ocean is just how easy it is to get there.
And while lots of people make the most of the mountains in the winter time, skiing and snowboarding, I hate the cold and tend to shine in the summer. Which is how I found myself on Savary Island last weekend.
I have never seen so many eagles, or starfish, and I’ve never seen such long strips of white sand beaches in Canada. It was exactly what I needed. A quick refresh before all the excitement of my new website took over. Life is feeling pretty good right now friends.
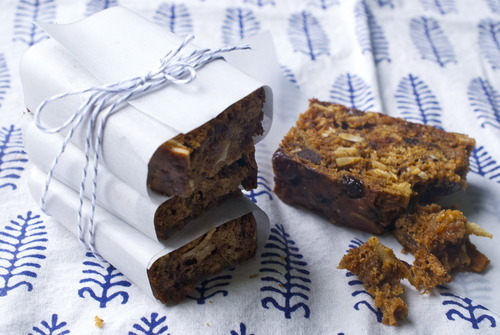
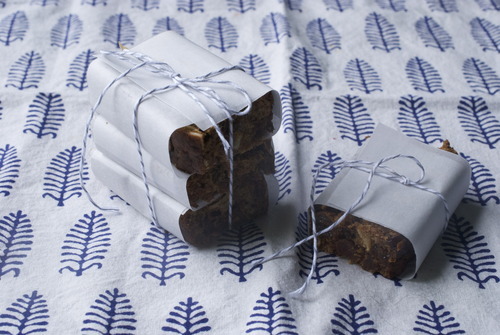
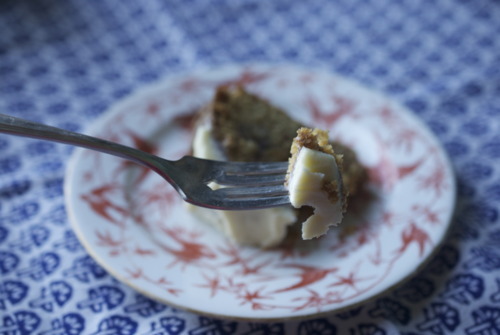
On this getaway I took a brought a cake. Something I found in a Maida Heatter book called the Survivor Cake, it’s not too sweet, very dense and moise and this weekend help up to 2 ferry rides and a water taxi each way, and paired beautifully with both coffee in the morning and a glass of red mid afternoon.
Survivor Cake
(Very loosely adapted from Maida Heatter)
1/2 cup Butter
1/3 cup Brown Sugar
1/2 cup Fancy Molasses
1/2 cup Coffee or water
2 Bananas, mashed
3 Eggs
1 cup Raisins
1/2 cup dried Cranberries
1/2 cup Walnuts
1/2 cup Shredded Coconut
1/2 cup Dark Chocolate Chips
2 cups AP Flour
1 tsp Baking Soda
1 tsp Baking Powder
1/2 tsp Salt
2 tsp Cinnamon
1/2 tsp Nutmeg
In a small pot over medium heat bring the sugar, molasses, bananas, coffee (or water) raisins, cranberries and butter to a boil. Making sure the bottom doesn’t melt keep it on the heat until the butter is completely melted.
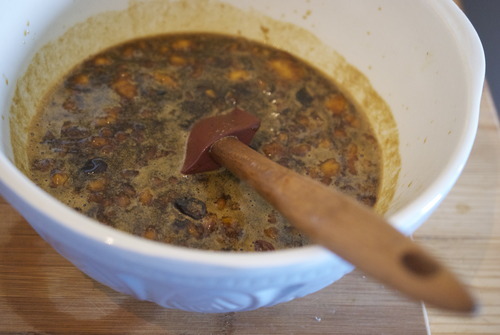
Take it off the heat, pour it into a bowl and let it cool to room temperature.
Preheat the oven to 350F
Line a 9 inch square pan with parchment paper.
Into the bowl with the butter mixture add in the eggs mixing with a wooden spoon. Slowly sift in the dry ingredients and stir until almost combined.
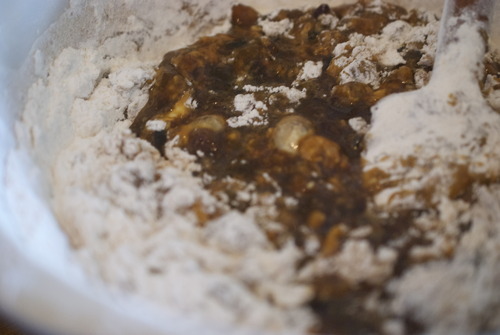
Add in the coconut, chocolate and the walnuts. Mix until their are no more streaks of flour but not any more and pour into the prepared pan.

Bake until an inserted skewer comes out with only a few moist crumbs, about 45 minutes.
Allow to cool and then wrap tightly, it will keep moist for nearly a week!
I am about to write the most pretentious thing I can think of. Are you ready? Are you sure? I just happened to have some white chocolate yoghurt ganache in my fridge. I know. Who am I?
In my defence it was there because I had failed miserably at making some macarons that I had been planning on filling with said ganache, but none the less. I happened to have some white chocolate yoghurt ganache in my fridge. Oy.
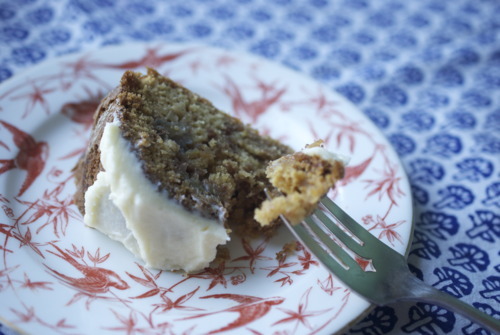
I have never been a huge white chocolate fan, unless your buying the really pricey stuff that is way out of my league, it’s just very sweet. Too sweet I think, but the yoghurt really mellows it out and brings in enough acid that makes you want to lick the spoon. It’s sort of like grown-up cream cheese icing.
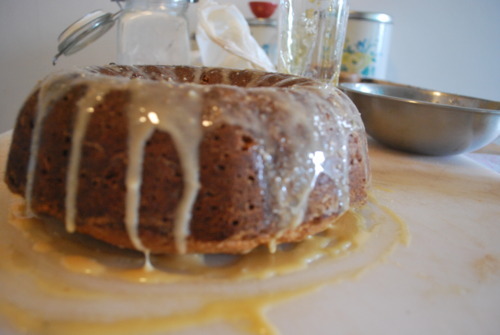
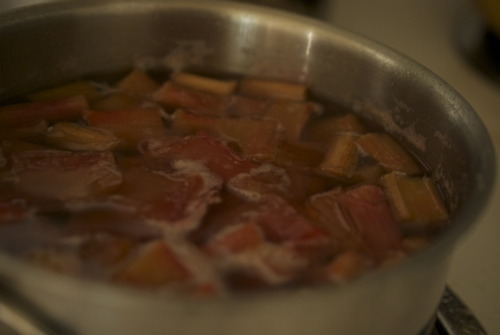
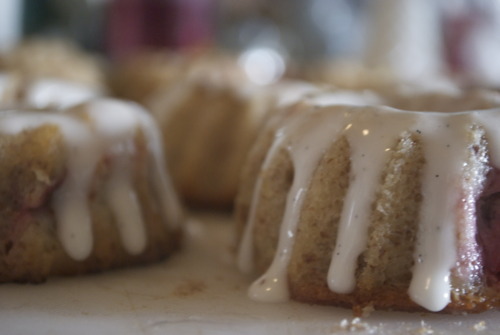
So with this glorious stuff in my fridge, I made a very simple rhubarb cake, a buttermilk breakfast cake not to sweet with a wonderful crumb and slathered this ganache on top. Just enough to make you want to eat the top first and be a little spiteful of the bites that didn’t get any.
Rhubarb Breakfast Cake with White Chocolate Yoghurt Ganache
1/2 cup Butter
11/2 cup Sugar
1 egg
1 tbsp Vanilla Extract
Zest of 1 lemon
2 cup AP Flour
2 tsp Baking Soda
1 tsp Salt
1/2 cup Buttermilk
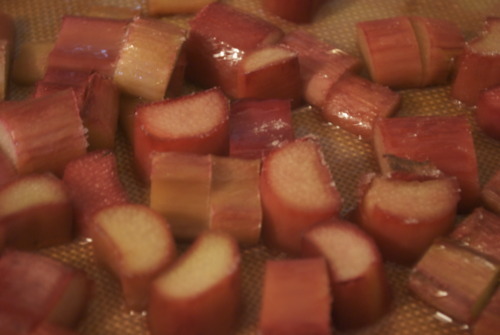
3 cup Rhubarb cut into 1 inch pieces
1/2 cup Yoghurt
4 oz White Chocolate
Preheat oven to 350F
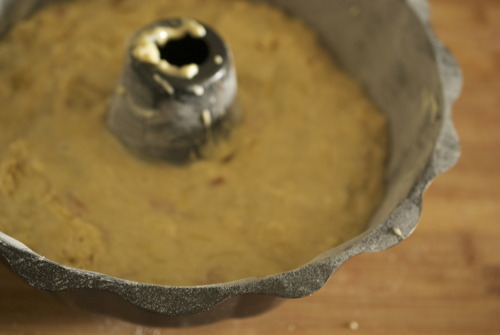
Butter and flour a bundt pan or a 9 inch square pan.
Put the rhubarb half a cup of sugar and 1 cup of water into a small pot and simmer it until it is soft, about 10 minutes. Strain out rhubarb. The syrup will make fabulous drinks if you wish.
Meanwhile in a standing mixer fitted with the paddle attachment cream butter and sugar until light and fluffy.
Add in the egg slowly and mix until totally combined. Scrape down the edges of the bowl.
Sift the dry ingredients into a bowl.
Alternate adding the dry and wet ingredients starting and finishing with the dry. When the last batch of dry ingredients has almost been combined add in the rhubarb and gently mix by hand. Do not overmix it or it will get tough.
Pour the batter into prepared pan and bake until an inserted skewer comes out clean, about 30 minutes.
While the cake is in the oven you can make the ganache:
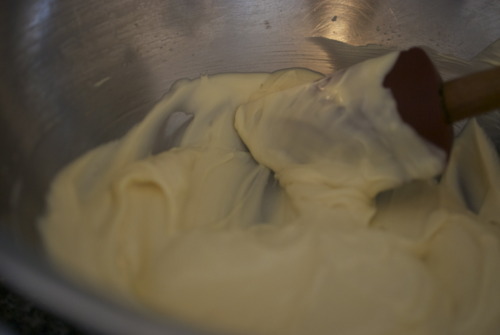
Place the chocolate in a heatproof bowl. Place the bowl over a pot filled with about an inch of simmering water. Melt the chocolate, stir it regularly because white chocolate has a tendancy of burning.
Once the chocolate is fully incorporated add in the yoghurt and stir to combine.
Once the cake is cooled you can pour the ganache on top or spread it on with a spatula. And c’est finis.
 Most people who have ever talked to me for more then 5 minutes has probably heard be complain about my landlord. He is a glorified slumlord, who fixes nothing and does nothing and is exceedingly cranky more often then not. He doesn’t do a good job when problems arise and so they keep happening over and over again and he blames you for his shotty work.
I am not a fan.
However, since Jordan has moved in, my gay landlord has been much more open about fixing a few things up. Apparently my charm is useless on him, but my handsome man is getting things done.
It has been a crazy couple of weeks, but my apartment is now the proud owner of new dark laminate flouring, a glorious step up from the heinous 70’s grey industrial carpeting I’ve been living with for years. But heres the thing about putting in new flouring, you basically move. Everything you own has to be put into boxes and moved somewhere else and it is a hassel my friends.
Now we’re starting to paint and put things together and, thankfully, my kitchen is back and working, and Jordan is so good looking we even got a new fridge! Miracles do happen friends.
So a couple days ago when everything was covered in dust and it reeked of paint fumes and all my books we’re in boxes and I was starting to go crazy, I did what I always do when I’m stressed, and I baked a cake.
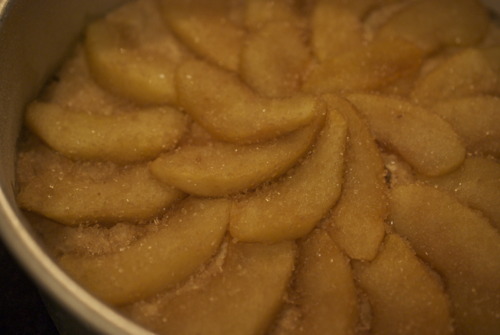
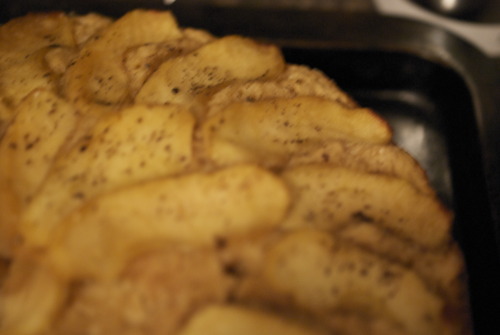
A wonderful cake too, rich from brown butter and brown sugar sauteed apples on the top. Most cakes get their moist crumb from lots of butter and sugar but this cake gets it form the buttermilk so it’s not to sweet ot two heavy. It also uses whole wheat pastry flour, which is very uncommon for me, but it adds a pleasant nuttiness without feeling too healthy. The top has some coarse sugar and salt so it gets a bit of a crunch when you bite in.
The best part though; it doesn’t need a mixer, you put it together like a muffin base, just mix wet with dry, so it doesn’t dirty up the kitchen too much.
And then, with cake in hand I cleaned, and dusted, and gathered bags and bags to give to charity and felt like things would be okay.
Brown Butter Apple Cake
Adapted from 101cookbooks.
2 1/2 cups whole wheat pastry flour
1 tablespoon baking powder
3/4 cup brown sugar
1/2 teaspoon salt
2 eggs
1 cup buttermilk
1/4 cup butter, melted and cooled a bit
zest of 1 lemon
1 tbsp Vanilla Extract
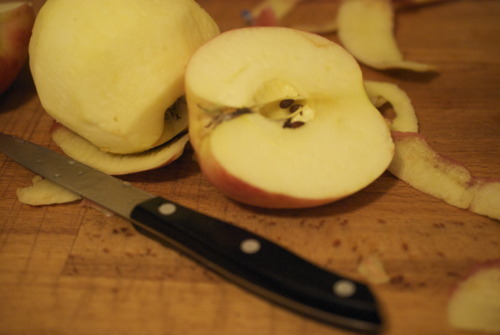
1 large apple, or 2 small guys, peeled and sliced.
3 tablespoons large grain raw sugar
1 teaspoon large grain salt
Preheat oven to 325F
Butter and flour an 8 inch cake pan.
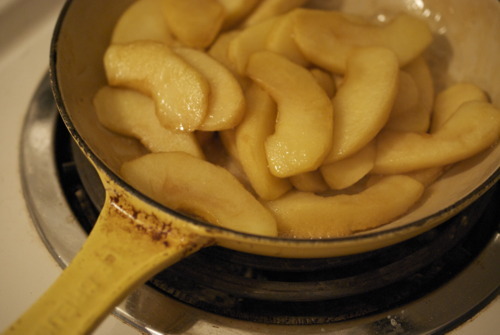
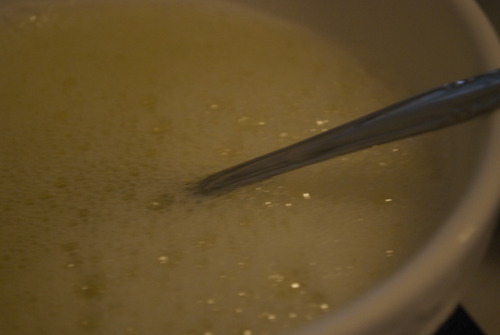
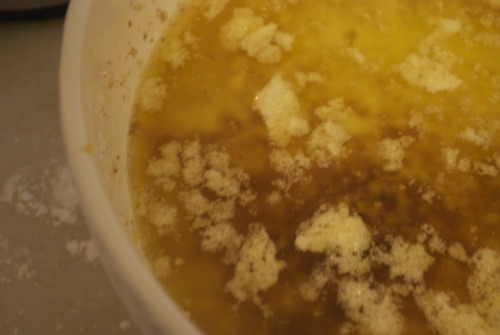
In a small sauce pan on medium heat melt the butter. Keep it on the heat after it melts until it bubbles and gets frothy and starts to get a sweet nutty smell, and you can see little brown bits at the bottom. Set aside.
In the same pan add the apples and 1/4 cup of the brown sugar and sautee until the apples are translucent and soft- about 10 minutes.
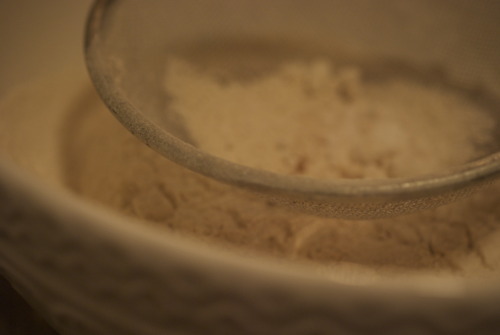
In a large bowl mix together the flour, sugar, baking powder and salt making sure there are no lumps of brown sugar.
Mix together the butter, buttermilk, eggs, zest and vanilla and then add it to the dry ingredients being careful not to over mix.
Pour the batter into the pan and use a spatula to level it. Carefully place the apple slices in a nice pattern on top. Sprinkle the coarse sugar and salt on top.
Bake for about 30 minutes or until an inserted skewer comes out with only a few moist crumbs.
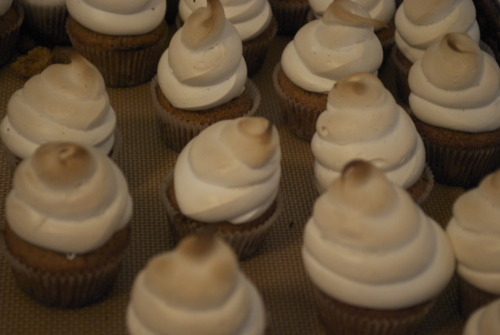
A few years ago, after working at a very good restaurant for an extremely talented chef who made me cry every day for 8 months, I took a hiatus from cooking. To pay the bills I took a job as a hostess for a summer. The catch was that they promised me full time work and only gave me two shifts a week, which would have been way more manageable except that then I got dumped. And that would have been easier if I had lived in the city for longer and had more friends but I didn`t. And so I spent my days applying for jobs and not getting the jobs I`d applied for and crying, and feeling rejected and just generally having a really rough go. And so everyday I woke up and made cupcakes. Everyday. Compusively. I made blueberry cupcakes, raspberry caramel cupcakes, dolce de leche cupcakes, maple pecan cupcakes. I made an insane amount of cupcakes. I gave them to people at work (which might be why they ended up giving me more shifts) and I gave them to my one good friend (who obliging took them everyday, even though shes very food concious) occasionally I gave them to boys I went on dates on, but they were rarely worth it. Fortunately that phase is through and my life has sorted itself out and I have since decided I am over cupcakes. I am cupcaked out. But today I had to go to a beach party and bring dessert, and I realized why people started making cupcakes in the first place. It`s cake, that doesn`t involve cutlery, or plates. And then I realized there was one kind of cupcake I`d never made before. S`mores cupcakes. I`m telling you, you really ought to make these. Yes there are multiple steps and yes it`s a little time consuming, but really. It`s S`mores cupcakes. You know you`re going to.
Graham Cracker Cupcakes:
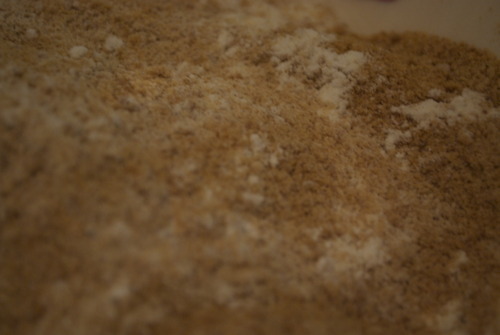
1 1/2 cups graham cracker crumbs (about 15 crackers)
1/2 cup all purpose flour
1 tbsp Baking Powder
3/4 cup Brown Sugar
2 Large Eggs
1/2 cup Butter, softened
3/4 cup Milk or Buttermilk
Ganache:
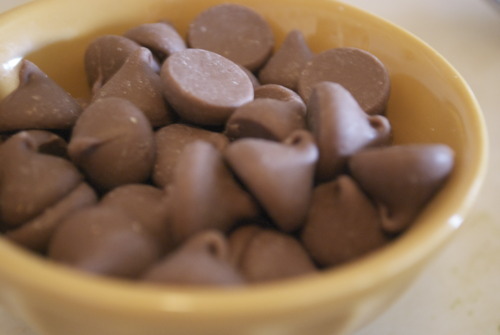
3/4 cup Milk Chocolate
2/3 cup Heavy Cream
Marshmallow Topping:
3 Large Egg Whites
2 tbsp Sugar
1/2 cup Water
1/2 cup Corn Syrup
3/4 cup Sugar
1 tsp Vanilla Extract
To make Ganache
Bring the cream to a boil
Pour on top of chocolate
Stir until smooth (sorry! i forgot to take a picture of this step!)
To Bake Cupcakes
Preheat oven to 350F
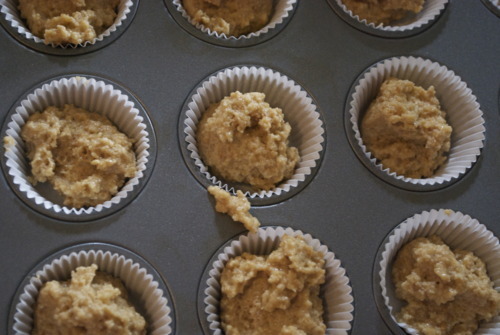
Line with cupcake liners or butter and flour 1 dozen cupcake tins, or 3 dozen mini cupcake tins.
Whisk together your dry ingredients
Cream together butter and sugar until light and fluffy. Add in the eggs one at a time beating well between each addition.
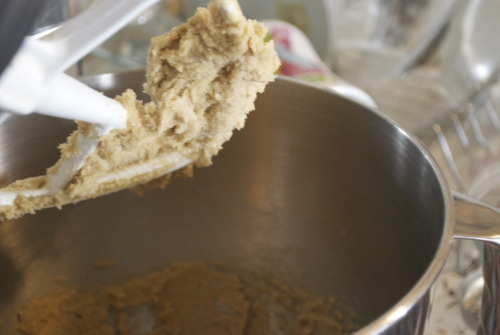
Alternate in the dry ingredients and wet ingredients beginning and ending with the dry.
Spoon the batter 3/4 of the way up the cupcake liners.
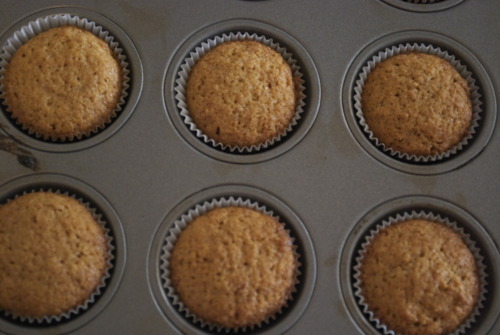
And bake them until they’re beautiful and slighly browned and an inserted skewer comes out with only a few moist crumbs, about 15 minutes for mini cupcakes.
To Make Marshmallo Topping
Put 3/4 cup sugar, corn syrup, and water in a pot over medium heat and stir until the sugar is dissolved. Remove spoon and bring to a boil and with a candy thermometer let it comet ot he firm ball stage, 246Degrees F.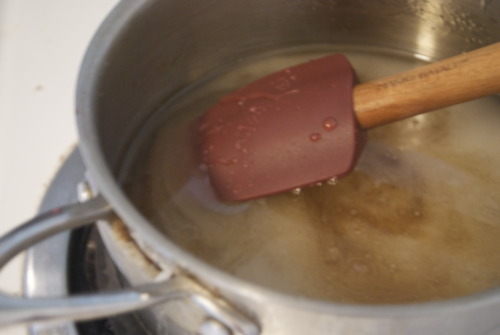
While it’s boiling put the egg whites and the vanilla in the bowl of a standing mixer with the whisk attachment. Whisk on high speed until soft peaks form. Add in the 2 tablespoons of sugar slowly until stiff peaks form.
When the sugar is up to temperature slowly pour it into the whites while whisking on high speed. Keep whisking until the bowl is cool and the meringue looks very marshmallowy! Put into a piping bag right away.
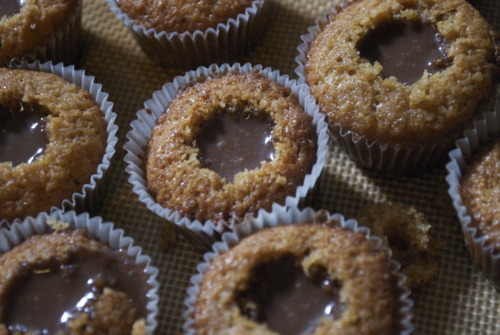
To Assemble:
Crank up the oven to 425F
With a pairing knife cut a little hole out of the middle of the cupcakes.

Put the ganache into a piping bag and pipe it into the holes in the cupcakes (the consensus was that there wasn’t enough chocolate in the ones I made so don’t hesitate to load em up!)
Pipe the marshmallow topping on top of the whole thing!
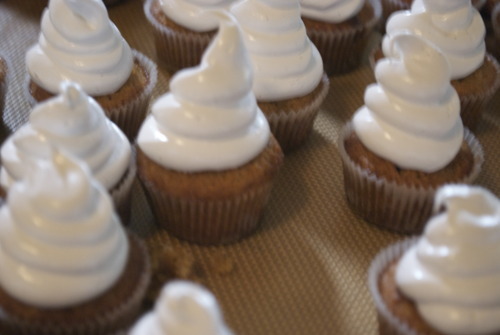
Now throw the whole things in the oven for a couple minutes until the tops just get golden. If you leave them to long they will not only burn but shrivel up a bit as the night goes on, so don’t worry about leaving them fair.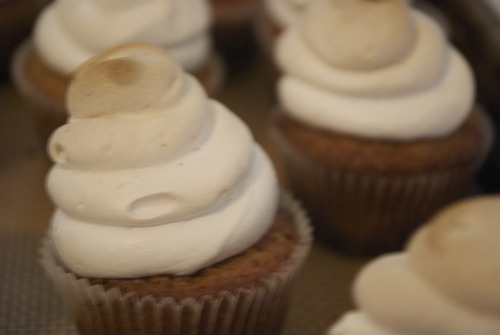
Cherries are the only reason I know that is is summer. Truly.
The rain and the 15 degree weather are not convincing me that it is July. I am hesitant to believe it, but cherries do not lie.
They are only here for a few short months, and they are here now.
So, because it`s normally too hot to bake in my tiny apartment in July, I am experimenting baking with cherries this year. I am doing this because it`s very cold in Vancouver right now, and it`s actually nice to turn on my oven and have it heat the place up.
And it`s nice to have a warm piece of cake on a cold rainy day. And this cake is especially nice. I made it last night and brought it to a girls night potluck, and I was running terribly behind schedule so as soon as it was out of the oven I put it on a cloth bag and ran out the door, so it was still warm when we ate it. And we were fighting over the last piece, literally. It`s not to sweet, and has the perfect crumb, and of course, the most wonderful sweet cherries just bursting inside. It`s almost good enough to make me want to clouds to stay, so I can make it again today. Almost.
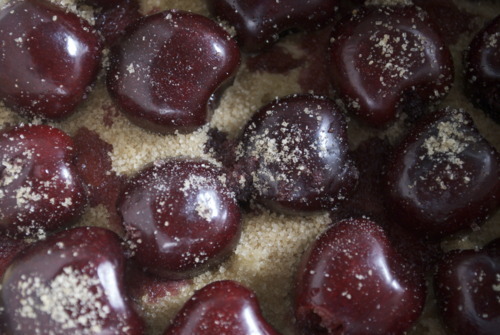
Cherry Jewel Cake
1/2 cup Butter, soft
1/2 cup Brown Sugar
1/2 cup White Sugar
2 Large Eggs
1 tbsp Vanilla, or seeds from 1 vanilla bean
Zest of 1 lemon
1 cup All Purpose Flour
1 tsp Baking Powder
2 tbsp Raw Course Sugar, or brown sugar
2lbs Cherries, pitted (you can either use an olive pitter for this, if you have one, or cut them in half and push out the pit!
Preheat your oven to 325F
Line an 8 inch pan, preferably with a removable bottom with parchment paper, or butter and flour it.
Cream the butter and the sugar together until light and fluffy.
Add in the eggs one at a time beating well between each addition. Scrape down the sides and beat on medium high speed for about a minute.
Fold in your dry ingredients, it’s quite a dry dough but don’t worry.
Spoon the batter into your prepared pan and smooth it out, then carefully layer in your cherries in a circle pattern.
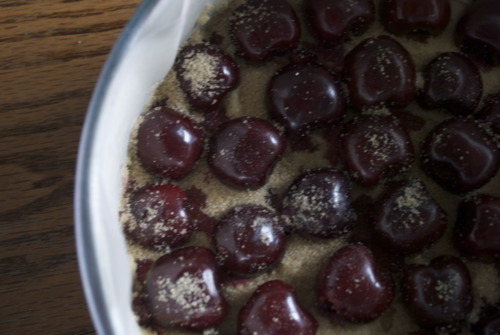
Bake for about an hour, or until an inserted skewer comes out with only a few moist crumbs,
x

Scenario Number One:
You got stuck working late/in traffic and now you need to leave the house in 2 hours to get to a birthday celebration and you promised to bring a cake, you should bring a present, and you deffinately should shower, straighten your hair and look nicer.
Scenario Number Two:
You forgot it’s your friends birthday and only remembered after you’d phoned her to bitch about your day. You told her your running a little behind but of course you didn’t forget, you have a cake waiting for her in your fridge! Only to realize that the bakery across the street is closed for renovations.
Scenario Number Three:
Your dog has an alliance with your cats, who pushed the cake off the counter so he could eat it. I actually watched my pets do this once, so I know it happens. Now you’ve got one hour to reproduce a cake nice enough to serve for the birthday your throwing your friend, who used to date your husband and you want to show up, just a little bit.
I have an answer to all your problems! Well, not world peace, or a million dollars, but cake problems I have you sorted on.
The answer is, cake mix.
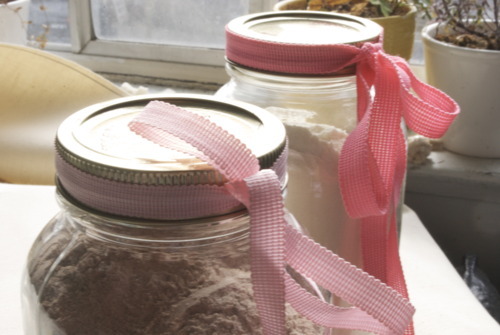
No no, not Betty Crocker just add water cake mix. Home made cake mix. Mix that you just throw together in a bowl with things you already have in your pantry. Your going to use half of it in the cake that your going to produce in seconds flat and the other half you’ll put in that mason jar that you got pickles or over priced jam in, tie a ribbon around it and then you have a present too.
Preheat your oven to 350F
flour and butter 3 8 inch cake pans.
Make this lovely cake mix,
Cake Mix:
5 cups sugar
7 cups Flour
3 tbsp Baking Powder
*optional, you can add in 1 cup of cocoa powder to make it a chocolate cake mix.
Save out 3 1/2 cups of the mix and package the rest up however you like.
Add to the reserved mix
4 eggs
1 cup milk
1 cup veg oil
*if you’ve added the cocoa powder to the mix make it 1 1/2 cups milk.
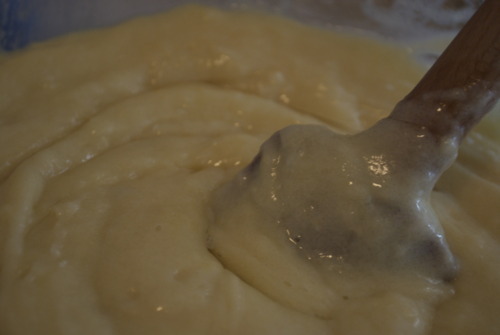
Mix that together and there’s your batter.
Pour it into the pans and bake for about 25 minutes or until an inserted skewer comes out with only a few moist crumbs.
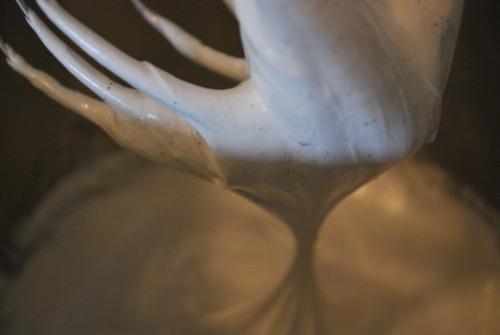
While your cake is in the oven your going to take a quick shower, wash your face, and moisturize. Then, you take the cake out of the oven and while its cooling you’ll pick and outfit, dry your hair, and whip together this until it holds stiff peaks:
2 cups of whipping cream
2 tbsp Icing sugar
1 tsp Vanilla extract
*optional, if you have a cup of creme fraiche, mascarpone, cream cheese or even sour cream you can add that in too. Lemon zest is also a nice addition if you have a lemon kicking around.
Now you’ll slice up
2 cups of fruit,
maybe it’s berries, maybe it’s pears, maybe it’s grapefuit segments. Canned peaches would be excellent. What ever you have on hand will be delicious.
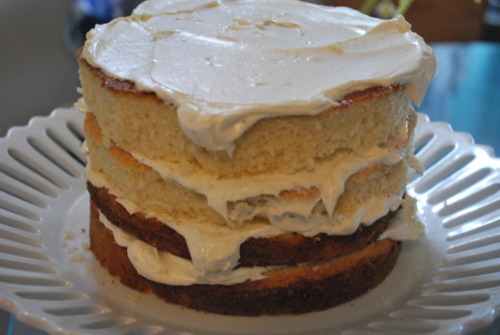
Now for the cake.
Unmold it and put the bottom layer on the plate or cake stand.
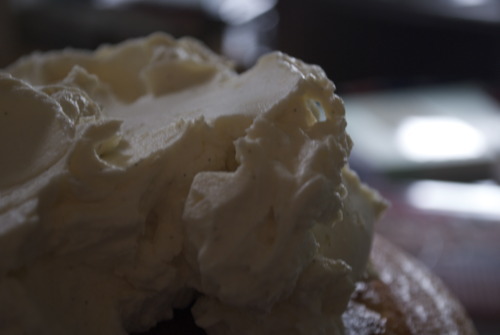
Then you can blob some of the cream on it and push it to the edges without having it drip over.
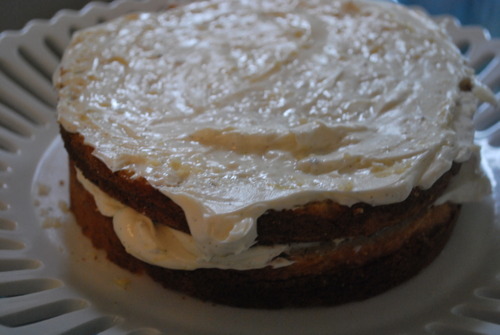
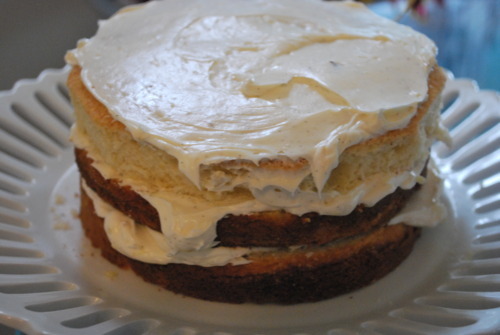
Now add some fruit placing it in a single layer. Put the next layer of cake on top and repeat. Don’t fuss to much, this is a rustic cake, don’t break hairs over it.
Instead, pop it in the fridge and go make your hair look nice, throw some make up on, and then take your cake in one hand, and use your other to wave down a cab while all the cute guys within a ten block radius come to check out the cute girl with the awesome looking cake who looks so effortless about it all.
I reguarly am told by friends that I am an intimidating person to cook for. That I’m picky, (only true when I’m making it, if someone else cooks for me I’m over the moon happy!) that my food is always pretty (well I’m flattered really, but honest my non blog food is pretty non pretty) and that I don’t screw things up. Well the last one is a terribly terribly misconception.
Let the records show that I, Claire Lassam, have made some terrible meals. Terrible!
A great/tragic example of this was on Valentines Day. I came home to an amazing meal. Jordan had braised lamb, and made a wild mushroom risotto, and sauteed brocollini (my favourite!) and had put an excessive amount of love into the meal.
For my part I had found fresh passionfruit at a local market that deffinately does not usually sell fresh passionfruit and thought, perfect! Passionfruit curd on a pavlova. Simple, light, perfect.
Only my pavlova was hard as a rock, and with my terrible oven starting to brown, and the curd was overwhelmingly sweet. It was, absolutely, inedible.
So last weekend, when I was at Jordan’s parents place to make them an early Father’s Day dinner, (which is to say that I was in the presence of a properly working oven) and I couldn’t find the flour (of course it was there but I found it too late) and I had loads of rhubarb (pleasantly acidic) I decided to try a round two.
This time, I had a couple tricks up my sleeve. Mostly, instead of getting it off Martha, which does normally have good recipes, I got it off Smitten Kitchen, because she said she had tried two recipes and had made a master recipe that was perfect. And also because I love Smitten Kitchen and nearly everything she makes is brilliant. Also, an Australian friend told me that, when in doubt, keep whipping, and I did and it turned out very well.
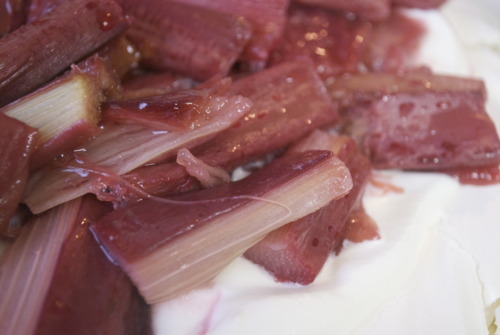
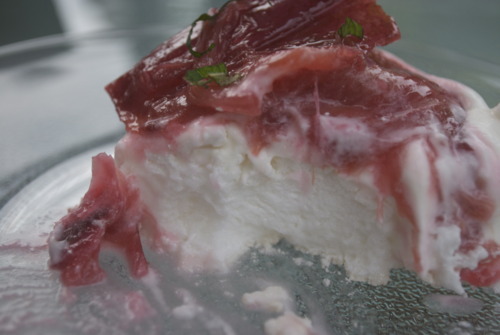
And it is brilliant. It’s a light crisp exterior that leads the way to a marshmallowy centre. Marshmallowy. I don’t think I need to say any thing else except that with whipped cream and rhoasted rhubarb, this is not only a showy and incredibly good dessert, but also a very simple dessert, and those are the best kind in my books.
Meringue:
4 large (120 grams) egg whites
Pinch of salt
1 cup (200 grams) superfine (castor) or regular sugar
1 teaspoon white vinegar
1/2 tablespoon cornstarch, potato starch or arrowroot powder
Rhubarb:
6 stalks of rhubarb
1/2 cup Sugar
1 cup whipping cream, whipped with one teaspoon of vanilla extract.
Preheat oven to 225F
Whisk together your egg whites and your salt until soft peaks, using an electric mixer, unless you have incredibly strong arms and a great amount of determination, in which case, do it by hand.
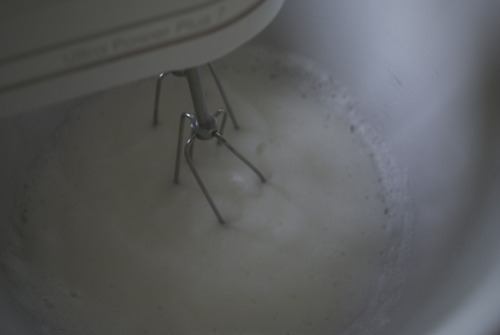
Slowly add in the sugar and cornstarch, tablespoon by tablespoon until all of it is incorporated. Then keep whipping. Aren’t sure if it’s glossy enough? Keep whipping. Does is hold stiff enough peaks? Keep whipping. Basically keep whipping and whipping for a long time, until it is very glossy, and very stiff.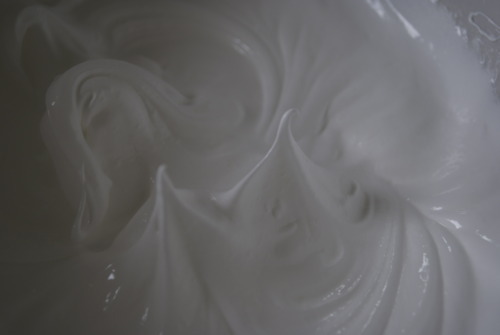
On a parchment lined pan spread the meringue out into a circle with an inverted spatula, i made mine about 10 inches wide. 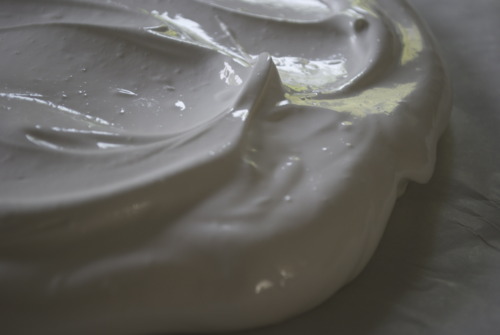
Put it in the oven for about 45 minutes. If it starts to get brown turn the oven down, if it starts to crack turn the oven off. Once it feels firm to the touch but still has some give inside of it crack the oven open, turn the oven off and let it cool completely inside.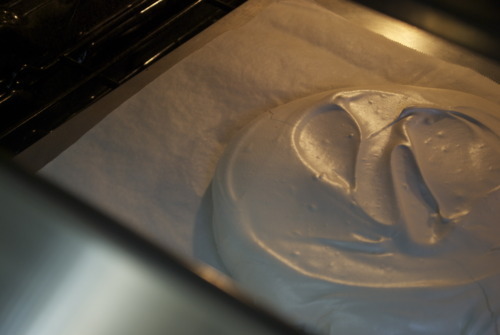
In the meantime, take your rhubarb and cut it into one inch pieces. Lay it on a parchment lined baking sheet and pour sugar over top. Once your pavlova has cooled, crank the oven up to 400F and put the rhubarb in until it is soft but still holds it’s shape, about 15-20 minutes. 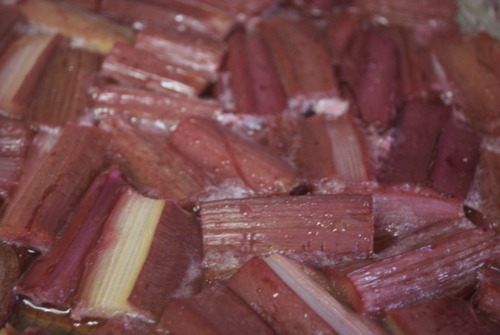
To Assemble:
Transfer the meringue onto your serving tray.
Blob heaps of the whipped cream on top, and then dollop the rhubarb on top of that. Don’t be shy with the rhubarb, you need lots to balance it out.
And if you’ve done everything right you get marshmallowy goodness.And you get happiness.
I love going to cafes and little breakfast and lunch restaurants.
I love sweet little spots with great coffee, wonderful little baked goods, and maybe a sandwich or a salad that tastes fresh and like it was made with love.
I love the places that you don’t feel strange having a bite to eat alone, and that you can sit for an hour with a book and be very content just like that.
Which is to say that when I was in London last fall I fell madly, deeply, overwhelmingly in love with Ottolenghi.
Oh it’s just… just perfect.
It’s clean and crisp, it’s mostly white with some bright read details. It has a large counter filled with the most perfect salads. Ones like Brocolini with Chilis and Almonds, or Braised Globe Artichokes, with Broad Beans, Pink Peppercorns and Preserved Lemons. And then just past the heavenly salads are the baked goods.
The most beautiful Pistachio Cakes, dripping with rosewater icing, and Blackberry Friands, and dense and wonderful Chocolate cake you’ve ever had.
It’s the sort of place you could go everyday for a month and not try the same thing twice.
It’s the sort of place that’s hard not to fall in love with.
And fortunately for those of us not living in London there are cookbooks and a weekly column in The |Guardian for us to steal his recipes and try to replicate it at home.
Which is what I did the other day when I was in dire need of some sweets.
The recipe for these came from the Guardian and it called for blackberries but it’s to early for them here so I went with rhubarb, and then because I love rose so much I put some of that in the icing which really was wonderful.
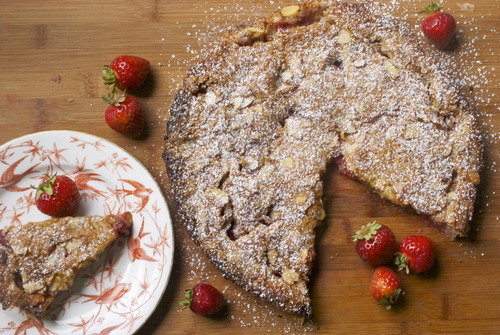
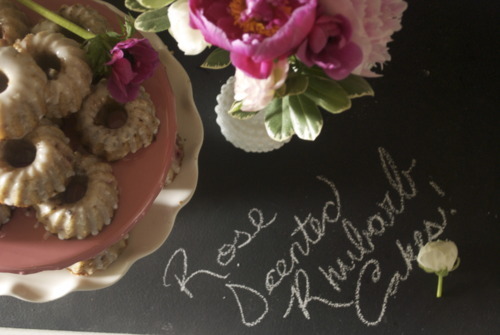
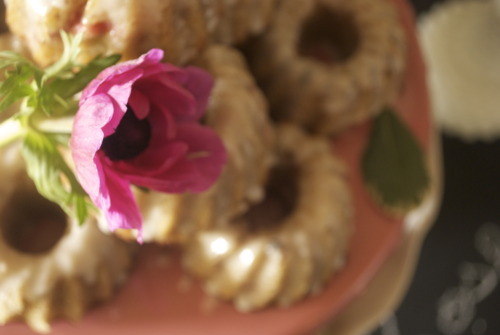
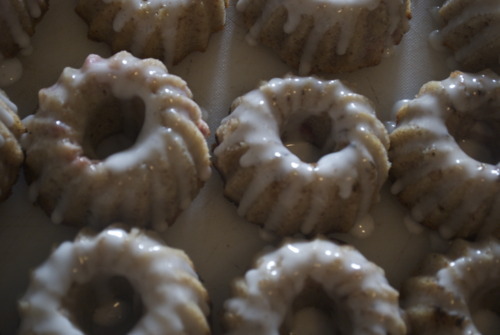
These cakes are very moist and very rich, thanks largely to the addition of ground almonds in them. Because of that they will stay very moist for several days, so it’s a great cake to make in advance of something, or just to keep in a jar for a week and eat one a day. But they are so pretty, they would also be perfect for an afternoon tea.
Rose Scented Rhubarb Almond Cakes
4 big stalks of Rhubarb, washed and cut into 1centimeter (about 1/2 inch) pieces.
1/2 cup sugar
Cakes:
10 egg whites
100g plain flour
300g icing sugar
180g ground almonds
1tbsp Vanilla extract
⅓ tsp salt
Grated zest of ½ lemon
1 cup unsalted butter, melted and left to cool, plus extra for greasing
Icing:
1 cup Icing sugar
1 tbsp Rose water
1 tsp Lemon Juice
Preheat oven to 400F
On a parchment lined baking sheet spread cut rhubarb out in a single layer and then sprinkle sugar on top. Bake for about 20 minutes or until rhubarb is just beginning to get soft. Take out of the oven and let cool.
Turn heat down to 350F.
Butter mini bundt pans, mini loaf pans, or mini cupcake pans.
Whisk up the egg whites until they’re frothy, but not full whipped.
Add in the lemon zest, melted butter and vanilla.
Sift in all the dry ingredients and fold gently together.
Then fold in the roasted rhubarb and spoon into the prepared trays and bake until an inserted skewer comes outs with only a few moist crumbs, about 15-25 minutes. Allow to cool completely.
To make the icing mix all the ingredients together until smooth. If it looks a little thick, add in some water or more lemon, if it looks thin add in some more icing sugar.
And then drizzle them on the very tops of each, the icing will run down and leave lovely little drips around each of them.
Lately I don`t get out much. I work a whole lot, I bake a whole lot, and I read quite a bit, but mostly when I read I fall asleep, in awkward places in awkward positions that make my neck hurt later.
I haven`t been seeing my friends as much as I should, but I have time to call them sometimes if I walk home instead of running home, which is usually a good enough of an excuse for me.
But sometimes I worry that my friends will all abandon me for being so boring.
So last weekend, for my dear dear friend Arlene`s birthday, I went out.
I wore a short skirt.
I baked a cake.
I drank to much sangria.
I watched some amazing flamenco dancing and cheered on a man named Jose, a 60 year old ladies man who sang Spanish love songs while beautiful women danced in front of him.
I pretended that I didn`t work at 5am the next morning.
I felt like the 23 year old that I am.
It was wonderful.
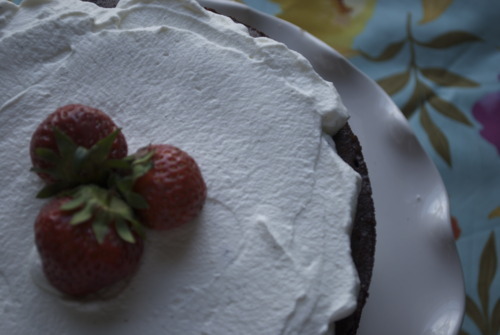
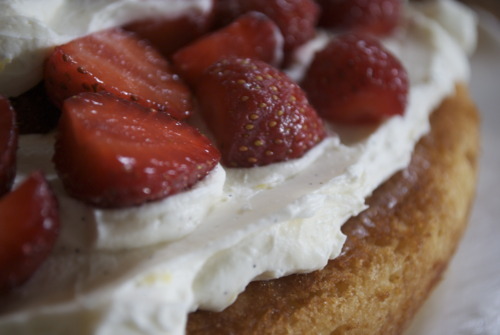
And on the theme of playful, fun, youthfulness and all those good things that go along with them, I made strawberry shortcake. It was light and fruity, it was summery and it was darn good if I say so myself.
Stawberry Shortcake
Adapted from a recipe from Epicurious
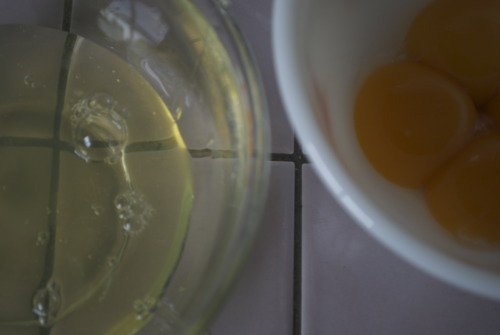
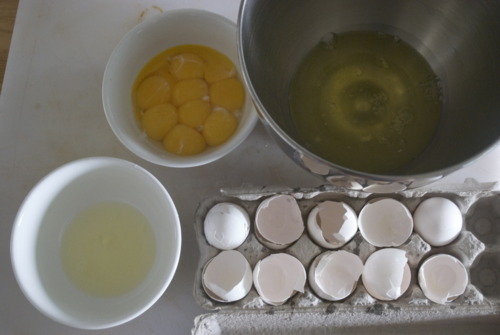
8 Large Egg Yolks
1 1/2 cups Sugar
1/4 cup Milk
1 tbsp Vanilla Extract
Zest of 1 Lemon
1 cup All Purpose Flour
1 tsp Salt
4 Egg Whites
Cream Frosting
2 cups Whipping Cream, very cold
1/4 cup Sour Cream
4 tbsp Icing Sugar
Zest of 1 Lemon
1 tbsp Rosewater
Rose Syrup
1/2 cup Sugar
1/2 cup Water
1 tsp Rosewater
1 lb Fresh Strawberries, cut into slices
Make Rose Syrup
Combine all ingredients in a pot and simmer until the sugar is disolved. Cool. (sorry, I forgot to take a picture of that!)
Make Cake
Preheat oven to 350F
Line 2 8 inch round pans with parchment, do not grease pans! Worst case scenerio don’t use anything. They will come out with some patience.
Sift all the dry ingredients, reserving 1/2 cup sugar, into a bowl
Mix the yolks, vanilla, zest and milk into a small bowl
Add the yolk mixture to the flour mixture and mix until just smooth.

In the bowl of a standing mixer fitted with the whisk attachment whisk egg whites until frothy.
With the mixer still running slowly add in the remaining half cup of sugar, tablespoon by tablespoon, until the meringue is very shiny and holds stiff peaks.
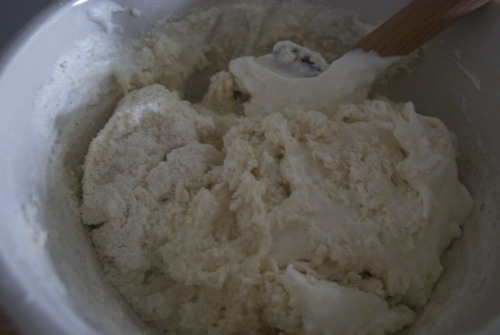
Gently fold the whites into the cake batter being careful not to over mix.
Pour the batter into your prepared pans.
Bake until an inserted skewer comes out with only a few moist crumbs, about 25-35 minutes.
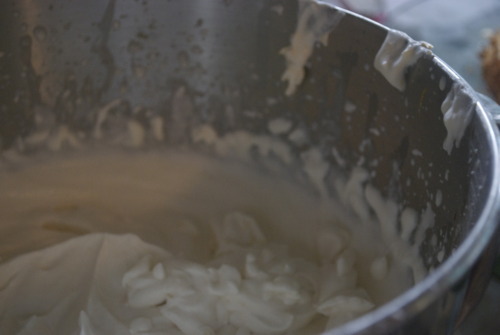
Make Frosting:
Mix all ingredients in a standing mixer fitted with the whisk attachment.
Whisk together until soft peaks form, about 5 minutes.
Assemble Cake:
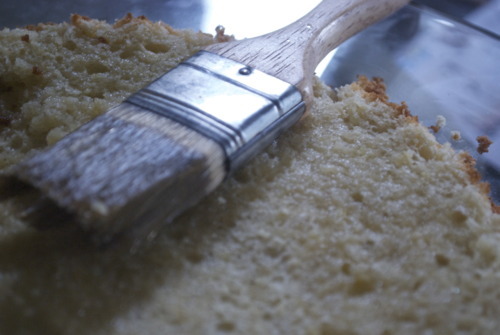
Slice Layers of cooled cake in half lengthwise.
Put the first layer of cake on your cake plate and brush with the rose syrup.
Dollop with a heafty spoon of cream and gently spread out to the corners.
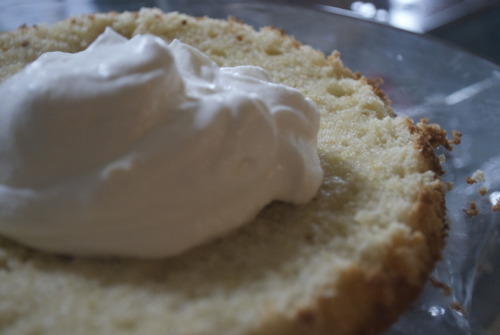
Spread some slices of strawberries on top.
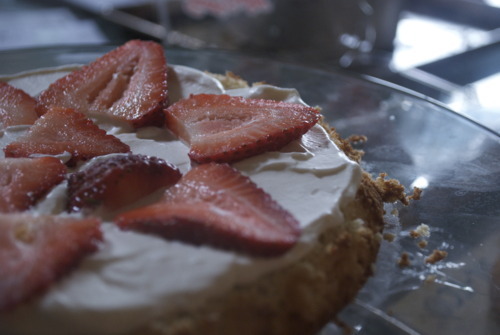
Continue until you’ve done all the layers
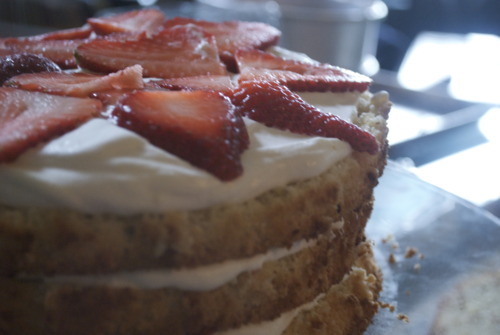
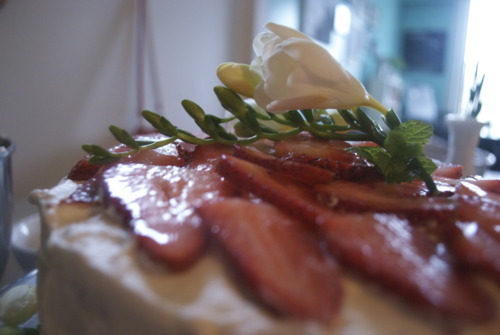
Then ice the outside and put strawberries on the top!
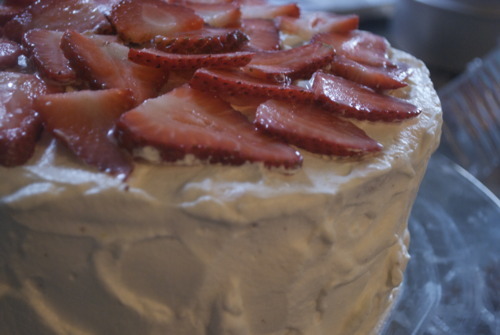
I put some flowers on top, because I’m just like that.
When I was about 7 or 8 and at the height of my Fimo Clay stage (before the water colour phase but after the decoupage stage, and concurrent with the make your own hair clips phase) my sister was at the height of her Martha Stewart phase.
Oh Martha.
I’m not sure an 11 year old has ever loved Martha like my sister.
So, when the Easter edition of the magazine came out that year with Peter Rabbits Garden cake on the cover, a simple carrot cake, with Oreo crumbs on top and carefully placed vegetables made out of marzipan in artful rows, we knew we had met our match.
Nina baked the cake and made the fondant white picket fence while I painstakingly dyed all the veggies (we couldn’t find paste food colouring so I would mix the colours really brightly and then let them dry out for a few hours and then go back to making them so the consistency would be better.) I painted the bottoms of cabbages a deep purple and let the edges stay a crisp green, I laboured for weeks on that cake.
When it was done we brought it over to our Aunt and Uncles house, and when it arrived to the table, my sister told them that she had done it all.
So I did what I always did in such occasions, I ran and locked myself in the bathroom crying hysterically and promising never to come out.
Which is all a long way of saying that every Easter after that my mom made a basic white cake in a cake mold shaped like a lamb and covered the whole thing with shredded coconut and called it a day.
So when I volunteered to bring desert for Easter dinner last week I had no idea what to bring. Was coconut cake traditional? There’s nothing fresh to make pies with, no fruits to fill layers of angel food cakes, no anything really. Until I realized of course that I have lemon curd in my fridge.
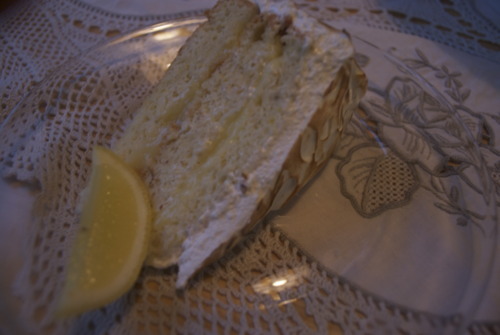
So it may not be overly festive but hot damn this cake was good.
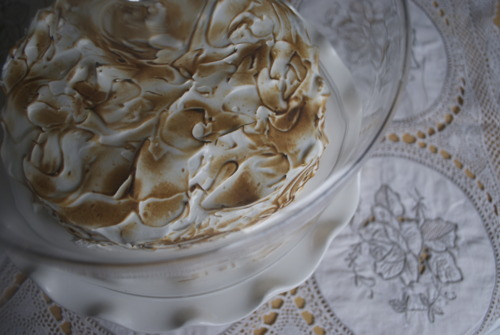
It will last a day or two in the fridge so you can make it the day before and relax about it. It’s quite showy with the burnt edges but it’s really beautiful without, if you don’t have a blow torch, or the patience to do it all with a BBQ lighter. But most importantly, it’s fresh, and light, and not to sweet and not to heavy, so it makes a wonderful end to a big meal.
Lemon Meringue Layer Cake
Angel Food Cake- recipe follows
1 cup Lemon Curd- you can half this recipe for it.
Italian Meringue- Recipe follows
Angel Food cake
10 Egg whites
1 1/2 cups Sugar
1 cup Pastry Flour
1/2 tsp Salt
1/2 tsp Cream of tartar
1 1/2 tsp Vanilla
Zest of 1 Lemon
Tip: when your seperating this many eggs at once, have 2 bowls for your whites and one for your yolks. As you separate them, put the yolks in the bowl and then transfer the whites over individually. That way if one of the yolks breaks and it gets in the white, you only lose one egg instead of the whole batch.
Preheat oven to 350F
Sift 1 cup of sugar with the pastry flour and the salt.
In the bowl of a standing mixer fitted with the whisk attachment whisk the egg whites, cream of tartar, vanilla, and lemon zest until soft peaks.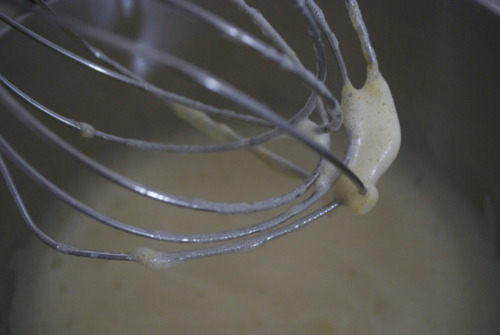
Slowly add in the sugar teaspoon by teaspoon until all the sugar is incorporated and the when you bring the whisk up the egg stands at stiff peaks.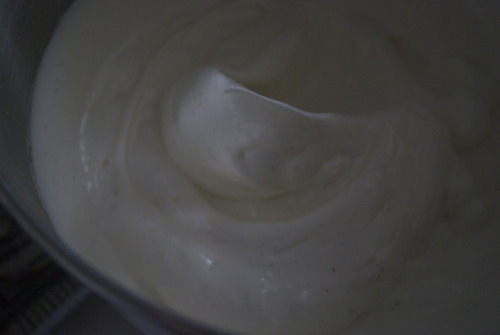
Carefully fold the flour into the meringue.
And pour it into an unlined ungreased 9 inch round pan without a detachable bottom. 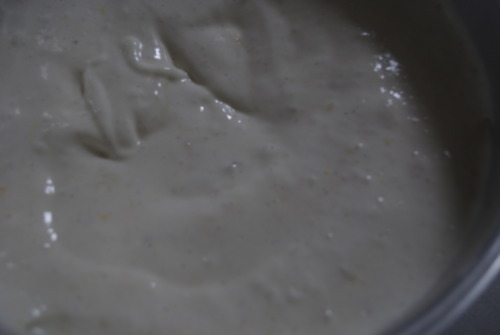
Bake for about 30 minutes or until it has risen nicely and an inserted skewer comes out with only a few moist crumbs. Immediately turn the cake upside down and let it cool completely inside the the cake pan, upside down. When cooled remove.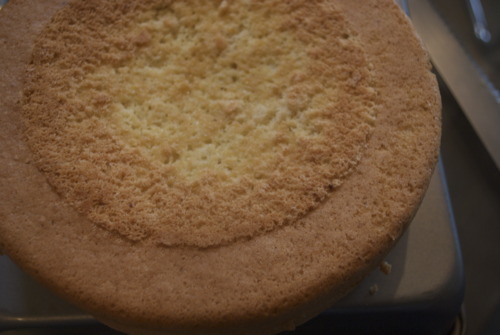
Cut the cake into 3 layers.
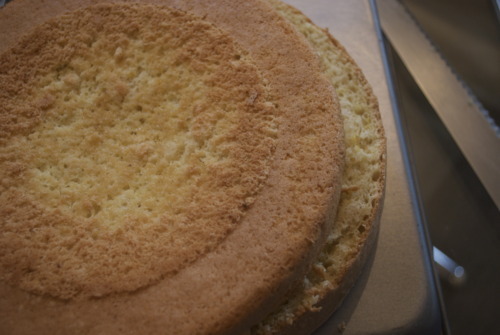
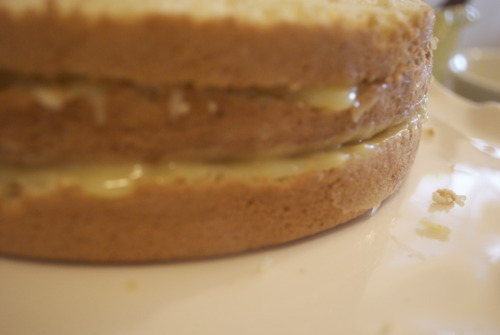
Spread a thick layer of curd in between each layer.
Italian Meringue
3 Egg Whites
1/2 cup Sugar
Over a small pot filled with an inch of simmering water whisk the egg whites and the sugar until it is quite hot to the touch. (Sorry, I forgot to take a picture of this stage.)
Pour the mixture into the bowl of your standing mixer fitted with the whisk attachment and whisk until nearly cooled and very light and glossy.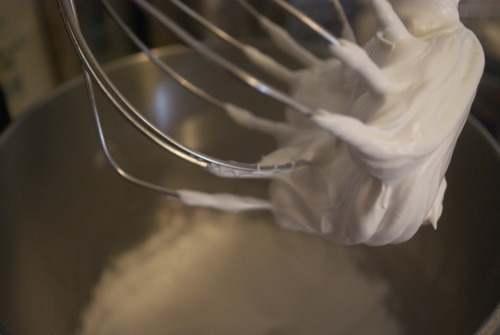
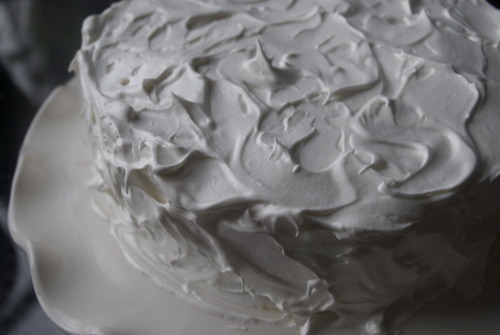
Immediately smooth over cake.
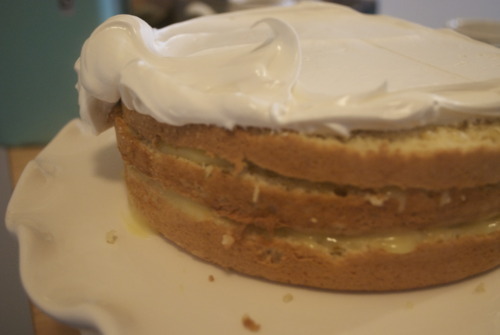
Be generous in your icing and allow for lots of artful swoops.
Then carefully with a blow torch on medium or a BBQ lighter burn the edges of the cake.
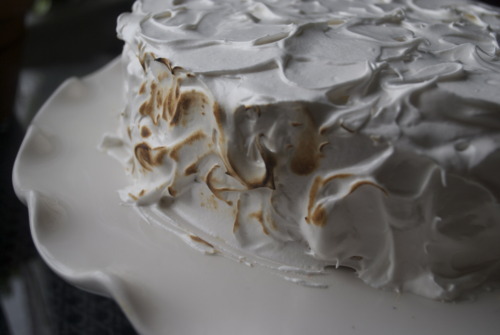
And then eat!
The inimitable MFK Fisher who revolutionized food writing from the 1930’s all the way to 1990’s wrote a wonderful essay about leftovers. Of course now that I am looking for it to quote it, it is lost somewhere in a book shelf and I can’t give you anything concrete but the basic idea of it was, that anyone can go to the store, buy ingredients, follow a good recipe and make a good meal. And this is true. But, she argues, it takes a good creative cook to look into her fridge and say, “Well, I’ve got a little bacon, some leftover squash, a tomato, and half a bottle of wine” and turn it into something delicious. And then, in her wonderful honest, not at all pretentious way, tells us that its a better way to cook, a more exciting way to cook, and a more satisfying way to cook.
Ever since reading that I think about it all the time. It’s so nice to make a meal out of things you thought you might throw away!
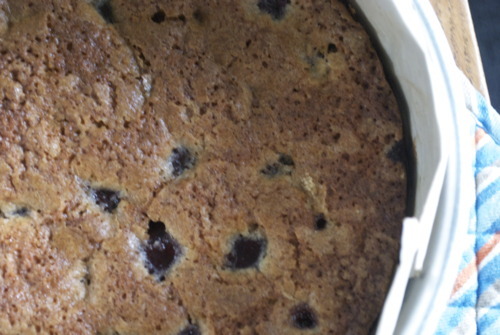
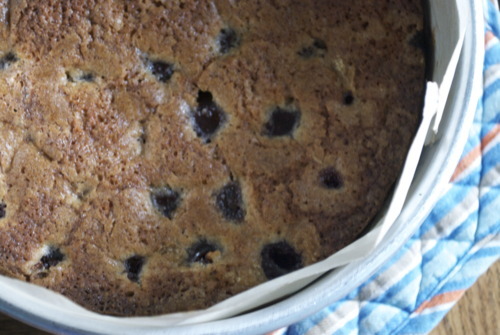
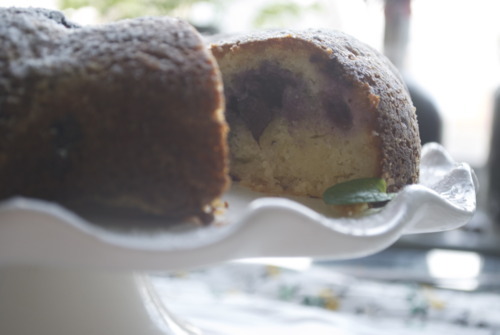
So yesterday when I looked in my fridge and saw half a bag of frozen blueberries, three quarters of a tub of ricotta that expires in 2 days, a lemon past it’s prime and 4 things of butter with a few tablespoons in each, I knew I could make it into something. In fact, I might just start keeping these things around to make this cake again but it was seriously good.
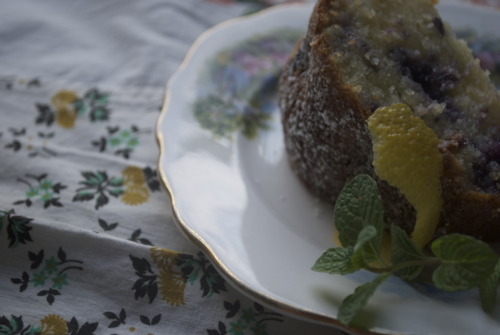
It is very very moist, not to sweet from the lemons, and the blueberries add a little something that makes it taste like summer.
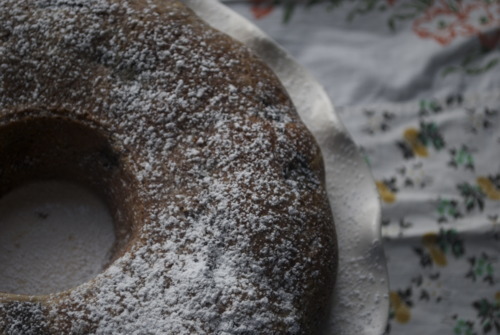
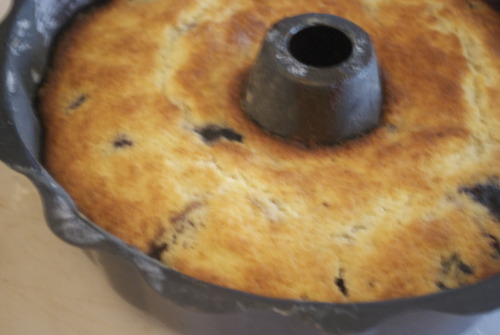
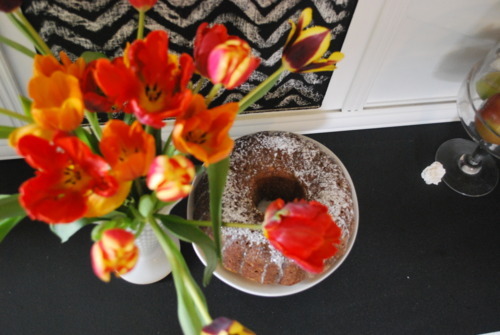
So here it is, Blueberry Ricotta Bundt Cake.
3/4 cup Butter, Softened
1 1/2 cup Sugar
3 Eggs
1 cup Ricotta
1 1/2 cup AP Flour
1 tbsp Baking Powder
1 tsp Baking Soda
Juice of 2 Lemons
Zest of 1 Lemon
Cream butter and sugar until light and fluffy
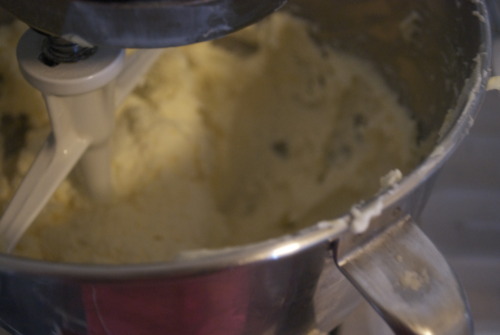
Add in ricotta and lemon zest.
Add in the eggs one at a time, scraping down the sides of the bowl in between each addition.
Add in the ricotta and the lemon zest.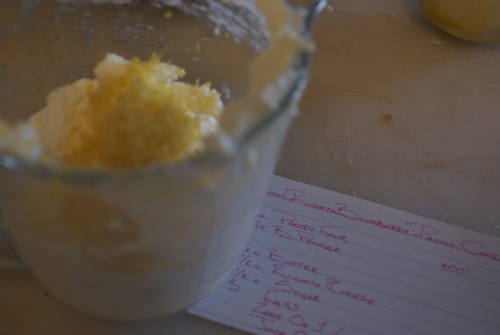
Add in the lemon juice, and then the dry ingredients. Do not over mix.
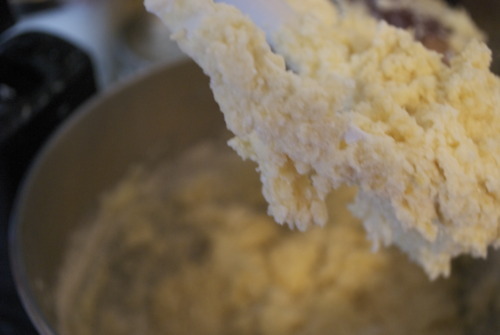
Mix in the blueberries and spoon into the prepared pan.
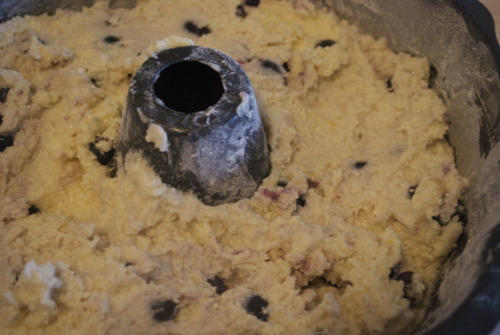
Bake until an inserted skewer comes our with only a few moist crumbs, about 45 minutes.
Flip it out onto a a plate and let cool, slice it and eat it up!

Gluten free has a bad name. And maybe rightly. There are so many terrible wheat free alternatives out there. Bread made with rice flour just isn’t good, I’m sorry celiacs it just isn’t. Foods that shouldn’t be gluten free but try almost always fall flat. However, there are lots of traditional french baked goods that aren’t supposed to have wheat, that use things like ground almonds that are amazing. They don’t try to be something that they aren’t, and they’re better for it. Such is the case for this sensational flourless chocolate hazelnut cake.
I have long debated putting this recipe up here because it isn’t my recipe, it is an extremely talented woman named Mary McIntyre who owns a wonderful cafe called Little Nest. But then I realized that she in fact has already published it in a a book which makes me feel that it’s okay.
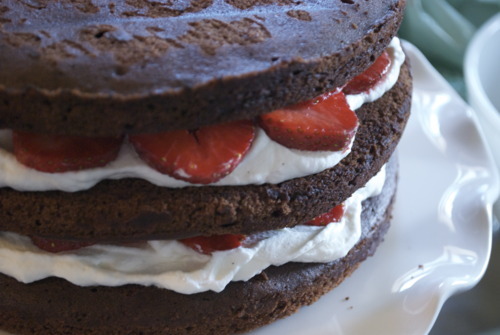
I have made a couple changes, I use hazelnuts instead of almonds, and I use more vanilla extract. But this is a a very forgiving recipe, it’s super dark and intense without being fudgy, it’s still light somehow, its just generally wonderful. Seriously, make this cake.
Chocolate Hazelnut Cake
6 eggs, seperated
2 cups Brown Sugar
225g Butter
225g Good Dark Chocolate
1/2 cup Cocoa Powder
1/2 cup Hot Water
1 1/2 cup Ground Hazelnuts
Preheat oven to 350F
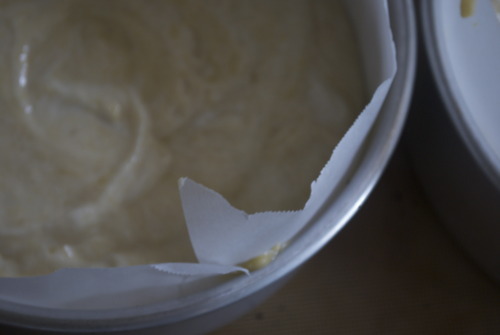
Line an eight inch round spring form pan with parchment paper
Melt butter and chocolate in a double boiler. 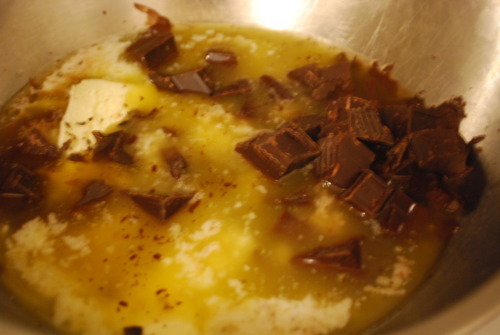
Add in the egg yolks.
Add in one cup of sugar, the ground hazelnuts, and cocoa powder.
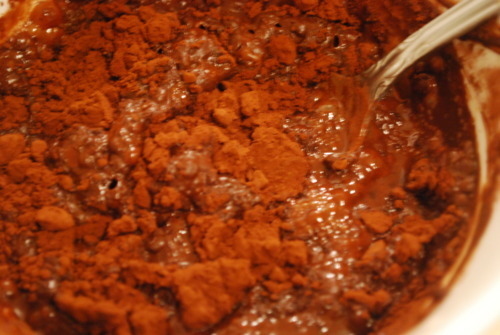
Add sugar and hazelnuts.
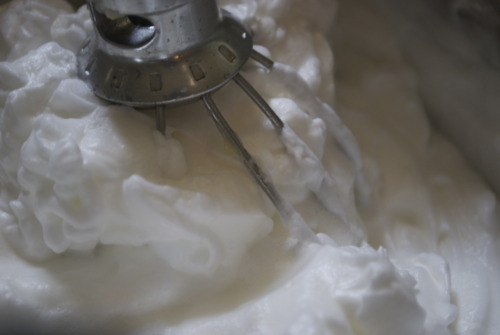
In an electric mixer with the whisk attachment whip egg whites until soft peaks form. With the mixer still on slowly add in the brown sugar until it’s shiny and stiff peaks form.
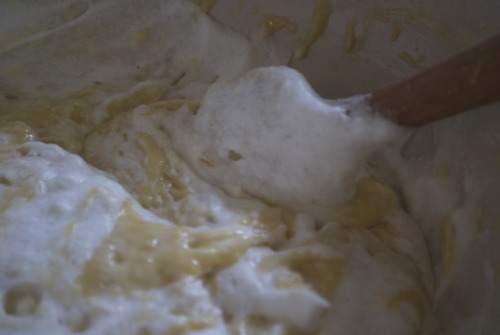
Scoop one third of meringue into chocolate batter and fold in.
Add in the rest of the meringue and fold until barely combined.
Pour batter into prepared pan,
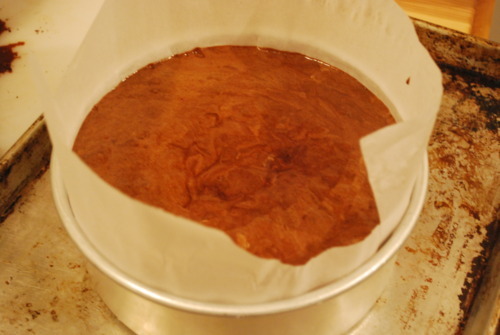
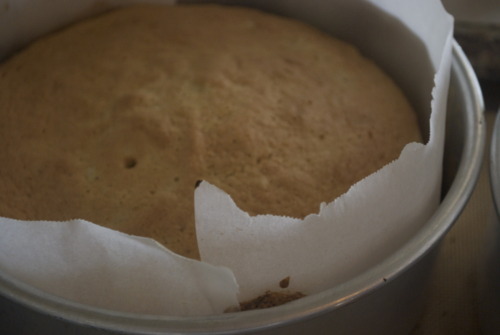
Cook until an inserted skewer comes out with only a couple moist crumbs about an hour.
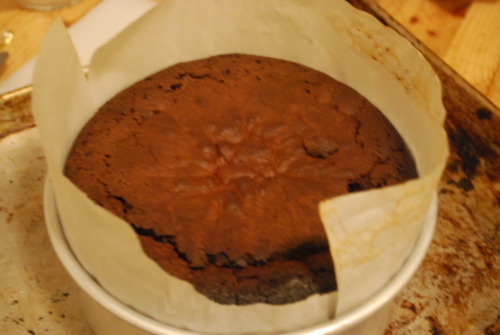
Allow to cool in the pan. It will sink, do not panic!
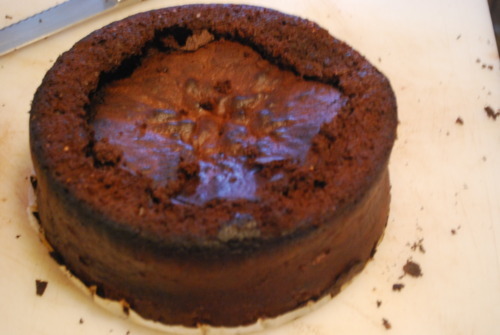
Turn it upside down and your in business!

I have lived in Vancouver for 4 years now but I’d be lying if I said I didn’t miss Toronto sometimes. I miss the hot hot summers, the bustling streets and the art galleries and museums. But not even a tiny part of me misses Toronto in March. It is a hideous time in Toronto, all sludge and grey sky’s and, while we may have clouds in Van, we also have cherry blossoms. It is overwhelming how beautiful the streets of East Van are these days. Whole streets are pink with petals. East Vancouver may have a bad reputation but my goodness there is no nicer place on earth in early spring than the side streets of Commercial Drive.
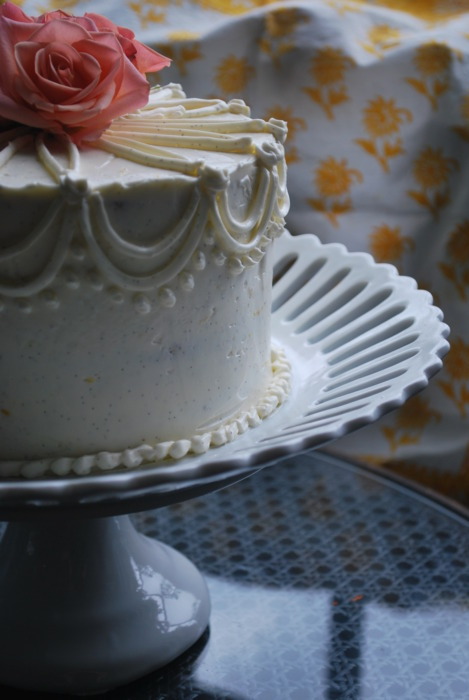
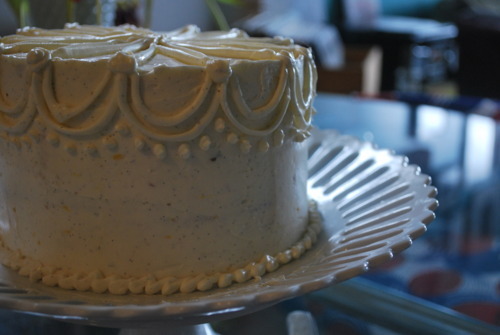
So when I was asked to make a birthday cake this weekend I knew it would be have to be girly and floral, because all I can smell is flowers and all I can think of is summer. So here is a pound cake with vanilla rose buttercream. It’s unbelievably moist with lots of vanilla and just a hint of lemon. And a hint of rose too. Because it’s spring, and there’s something very romantic about spring.
Vanilla Pound Cake
1c Butter
2 1/4 cup Sugar
3 3/4 cup Pastry Flour
1 tsp Salt
2 tbsp Vanilla
Zest of 1 Lemon
3 Eggs
1 cup Buttermilk
Preheat oven to 350F
Butter and flour 2 7 inch cake pans
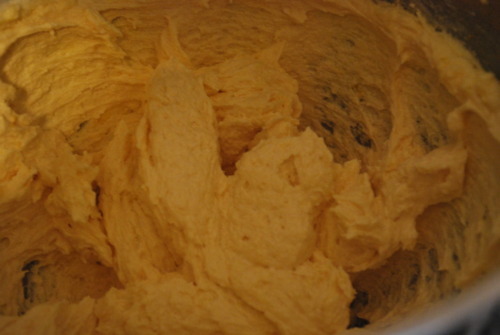
In a mixer with the paddle attachment cream Together butter and sugar until light and fluffy, about 5 minutes
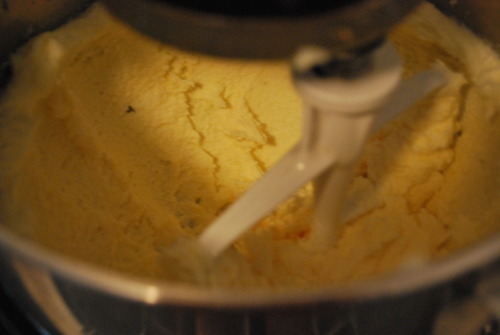
Add in the eggs one at a time beating well between each addition.
Add in the zest and the vanilla extract beating again for another minute.
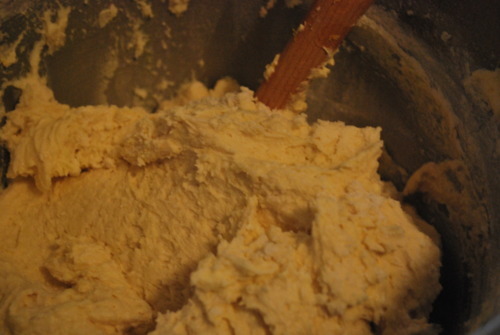
Add in one third of the dry ingredients, then half the buttermilk.
Repeat again until all the ingredients have been just combined, do not overmix.
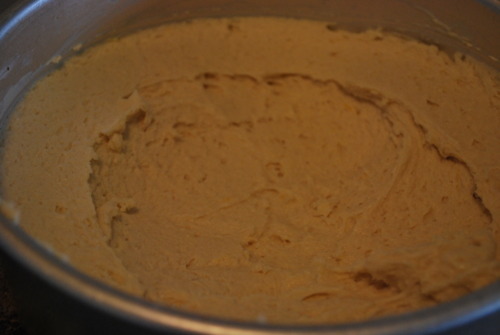
Spoon into prepared pans
Vanilla-Rose Buttercream
1lb Butter, room temperature
8ox Sugar
4oz Egg Whites
2 Vanilla Beans
2 tsp Rose Water
Zest of one Lemon
Split the vanilla beans in half and scrape our the seeds out.
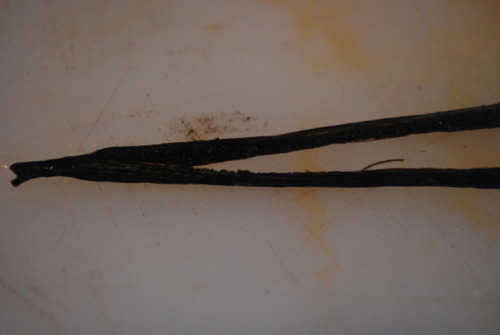
Break up the beans in a metal bowl with the sugar. Just squish them together, the abrasiveness of the sugar will do this easily.
Mix the egg whites into the sugar and set over a small pot of water on medium high heat on the stove. Whisk.
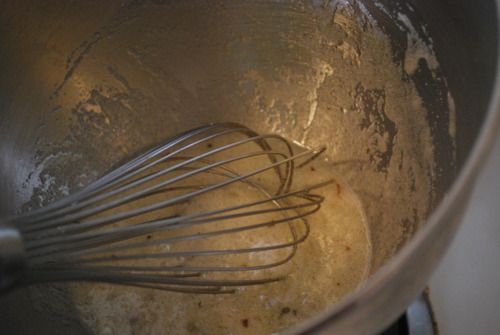
Keep whisking until it is frothy and is hot to the touch.
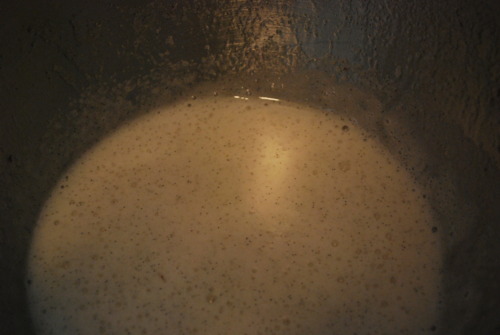
Remove from heat and pour mixture into the bowl of an electric mixer. Whisk on high for about 5 minutes or until stiff peaks appear and the mixture is very glossy.
On medium speed whisk in butter knob by knob. If it starts to look split don’t panic, just add in a big chunk of butter and it should come back. Add in the lemon zest, the rose and a bit of vanilla if you think you need more. Taste and make sure the rose is strong enough for you (sorry I forgot to take a picture at this point)
Now cut the cakes in half lengthwise.
Put a dob of icing down on your cake stand and put your first layer of cake down. put a thick layer of icing on top and spread it out with a spatula.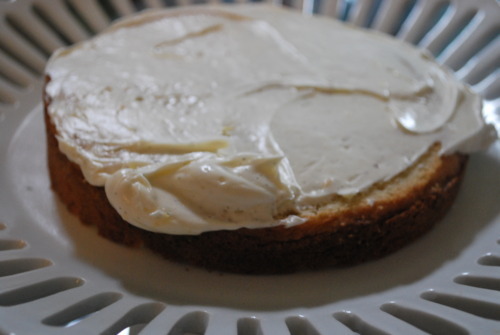
Then coat the outside with a thin layer of icing and refridgerate until cool and solid.
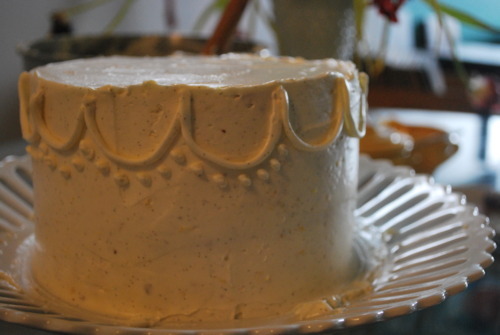
Now ice it however you’d like!
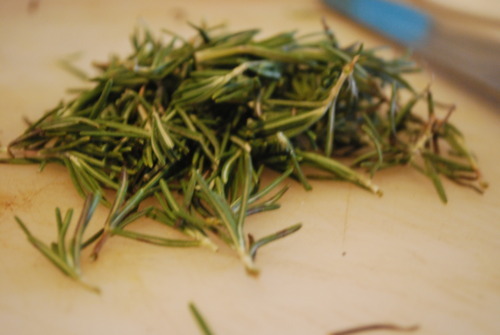
This past week, after realizing how much money we spend on fresh basil, parsley and rosemary, we planted an herb garden. Our window in the living room is now ful lof cute pots and mason jars turned into holders for the basics like rosemary and mint but also hard to find herbs like chervil, lemon thyme, and lavender. I am thrilled.
So imagine my joy when I open my Martha Stewart and there’s a whole article on cooking with fresh herbs! Oh Martha, you always know whats best for me.
There were some good looking recipes, like the Vietnamese pork with mint, but the one I was dying to try was the rosemary pound cake. Simple and not over complicated it’s the perfect cake with tea or maybe a spoon of creme fraiche if your the sort to keep that around.
I did make some changes, I didn’t add the egg white in, mostly because I forgot but I think it turned out beautifully without, I added in some lemon zest and more vanilla, and then changed the glaze around a bit. But it was delicious.
I made it yesterday morning and brought in half of it to work and then came home and pondered what to do with the rest (for the sake of my arteries keeping it at home seems like a bad option) and then our amazing friends called us up last minute for dinner and I felt like a 50’s housewife “Oh perfect! We can bring this cake I just happened to bake this morning” And that friends, is ridiculous.
Rosemary Pound Cake
1cup Butter
2 1/4cup Sugar
2tbsp Chopped Rosemary
Zest of one lemon
1tbsp Vanilla
3 Eggs
3 3/4 cup Pastry Flour
1tbsp Baking Powder
1 cup Milk
Rosemary Honey Glaze
1/2 cup Honey
2 Springs Rosemary
1/2 Lemon
1 cup Icing Sugar
To bake cake:
Preheat oven to 325F
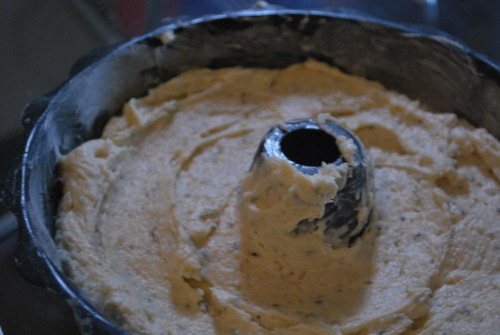
Butter and flour a bundt pan or 2 leaf pans
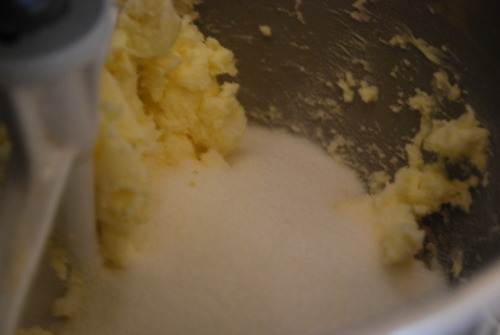
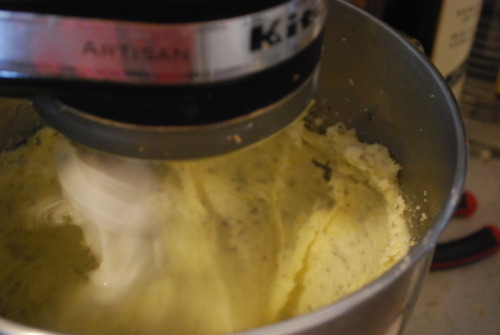
Cream butter and sugar together until light and fluffy.
Add in rosemary and zest until completey combined.
With your mixer on medium high speed add in the eggs one at a time beating well between each addition.
Bring the mixer down to low speed and pour in 1 third of the dry ingredients. Then add half the milk and vanilla. Continue alternating until all the ingredients are mixed ending with the dry. Do not overmix.
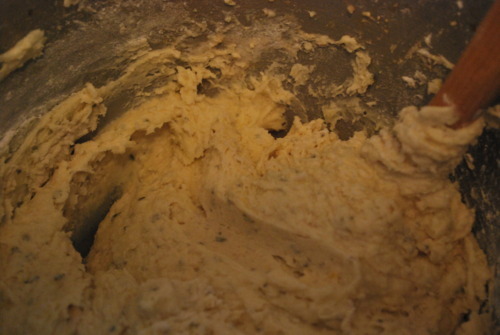
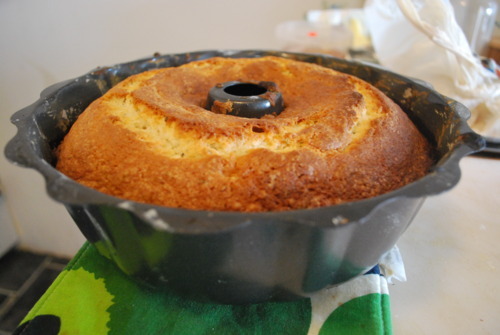
Spoon into pan and bake until an inserted skewer comes out with only a few moist crumbs, about 45 minutes.
Turn out of the pan and cool
Meanwhile For the Glaze:
Put rosemary and honey in a pot and let simmer for about 10 minutes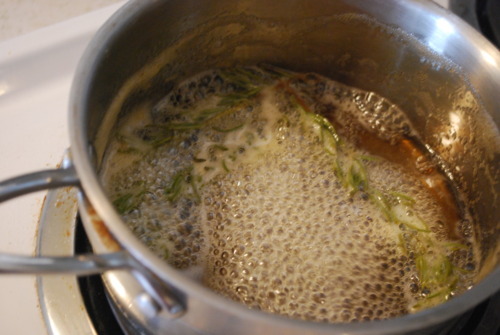
Allow to cool.
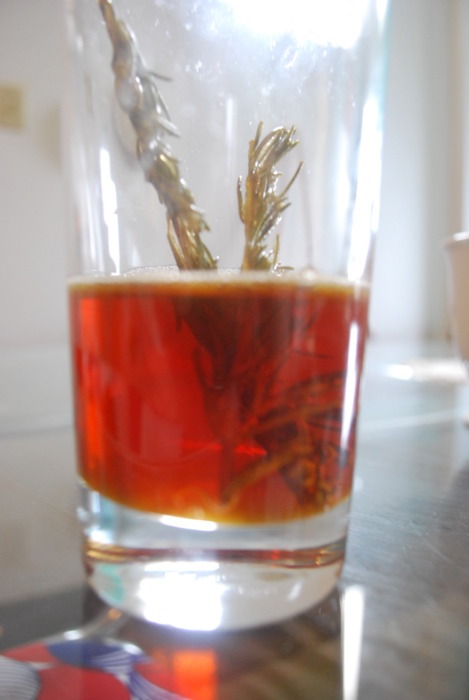
Take out rosemary and add in lemon. Sift in icing sugar and stir.
Add more lemon or milk if nescassary until a good runny consistency happens.
Pour over cooled cake and eat right away.