Chocolate Chip Peanut Butter Cookies

peanut-butter-cookie-3.jpg


If you are lucky enough to actually like the family you were born into, I highly recommend not leaving the city they live in. Because if you do, the chances of you falling in love are very high. With a person, or with a city, or with a job and then you will be stuck. Stuck in a city, with a person and a job that you are in love with, which is, by most measures, is a pretty fabulous situation to be in. But if you are lucky enough to actually like the family you were born into, there will always be a part that is missing.


That’s how it is for me at least. I absolutely love Vancouver, and I can’t put into words how wonderful Jordan is, and I get giddy every time I think about how I work for myself. But it is tough sometimes, and never more so than right after I’ve visited home.  I’ve been super lucky lately, my Mom came out to visit this summer for a whole week, and then I got to visit my whole extended family in Boston a month ago, and last weekend I was back in Toronto for a family wedding. By all accounts, I’ve seen more of my family than I usually do, but somehow that just makes it harder. It’s always so perfect when we’re all together, and now I’m here thinking about how I’m not sure when I’ll see them again, Which is a miserable situation.


And whenever I’m this hopeless and lonely, the only thing that does any good is to make cookies. Not fussy cookies, not fancy cookies, and not anything wild or crazy cookies. The kind of cookies I can imagine my Mom baking, the kind that you just drop on a pan and they turn into soft and caramel-y and glorious sweet bits of comfort that make everything a little bit better.


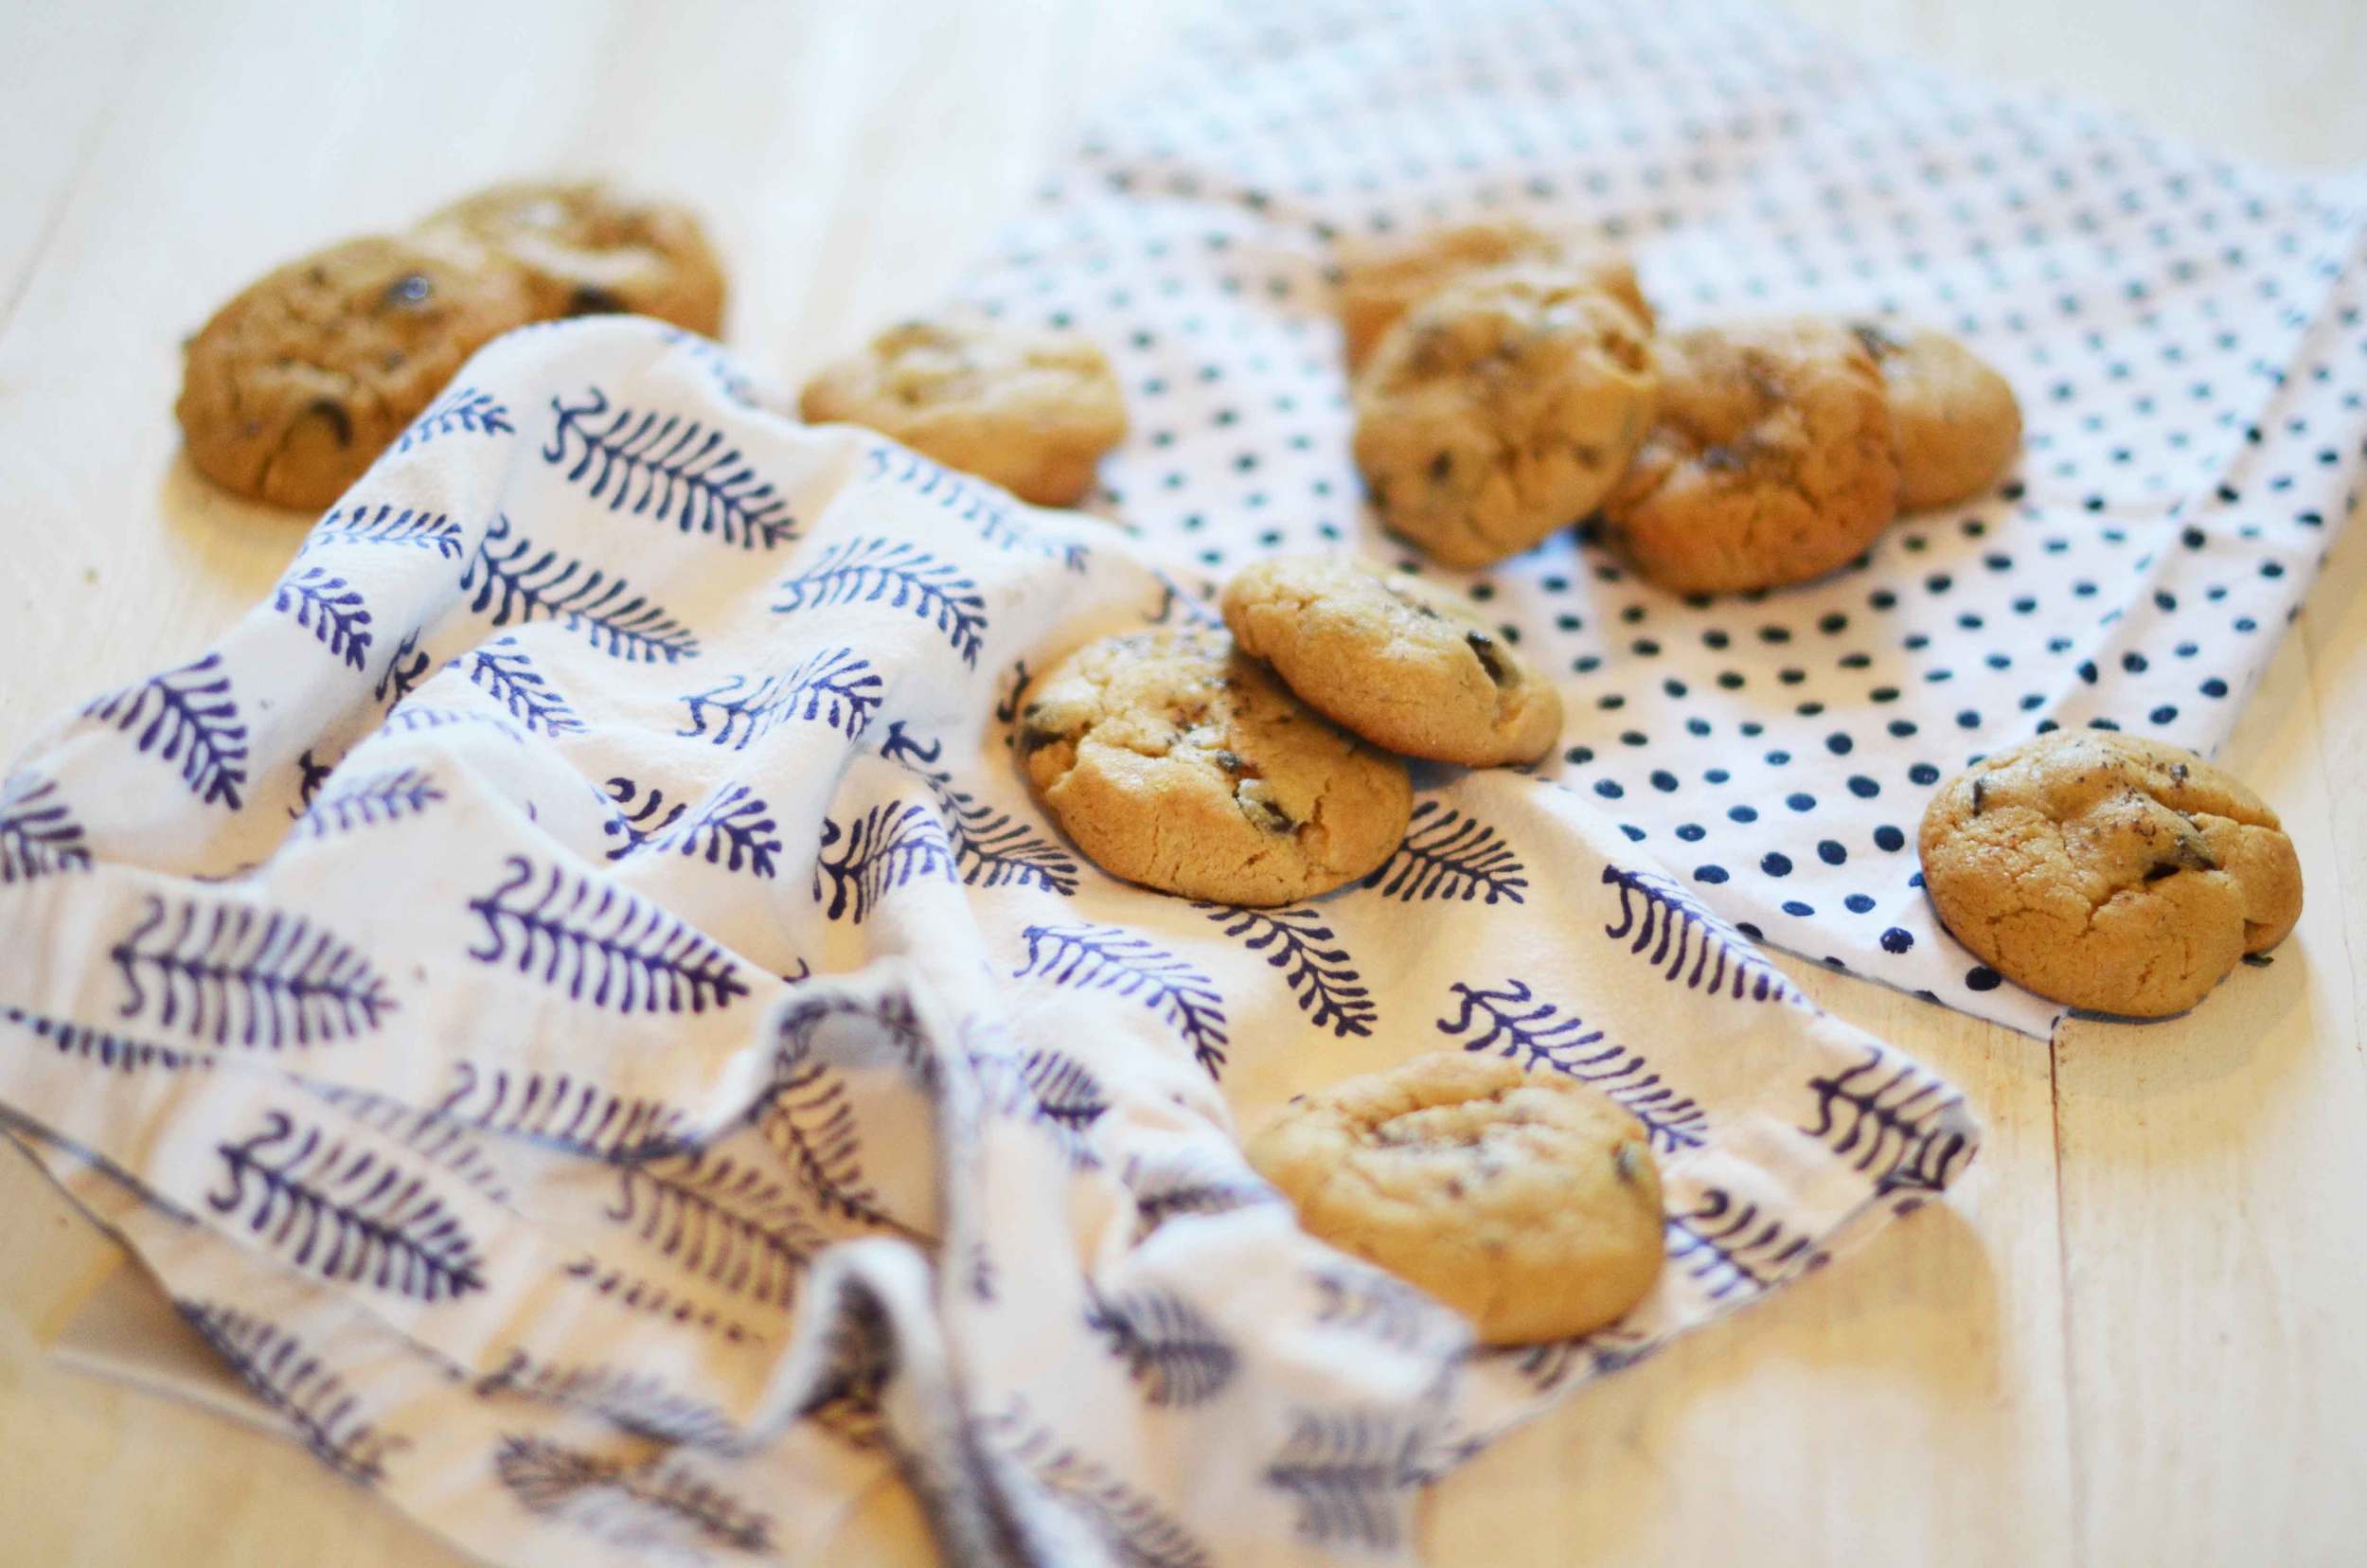
These cookies in particular are especially comforting. They are full of brown sugar and chocolate and copious amounts of peanut butter and sprinkled with Maldon salt on top for crunch. It will make you feel better when you’re sad, and that’s about all you can ask for from a cookie I think.


peanut-butter-cookie


Chocolate Chip Peanut Butter Cookies


1 cup Butter, room temperature


2 cups Brown Sugar


2 Eggs


1 ¼ cup Peanut Butter


2 tbsp Vanilla Extract

2 1/2 cups All Purpose Flour


2  tsp Baking Soda


1 ½ cups Chocolate Chips


Maldon Salt for sprinkling.


Preheat oven to 400F.


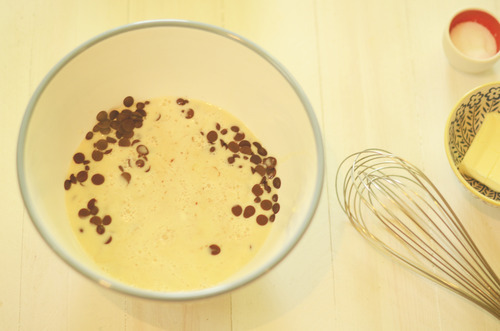
Cream together butter and sugar.


Add the eggs one at a time stir in between.


Slowly mix in the peanut butter until it is totally combined.


Mix in all the other ingredients except the Maldon salt. Chill dough for an hour.


Line baking sheets with parchment paper or a Silpat.


Roll dough into 2 tbsp pieces. Press them down a bit on top and sprinkle them with maldon salt.


Bake for 8-10 minutes until they are slightly browned but still very soft in the inside.


Cool for at least 20 minutes before eating too many at once!

Hot Cross Biscuits

tumblr_inline_n44y1hq2Ff1qfrmur.jpg

Apparently my Grammy made much more than just biscuits and pies and “Frenched” green beans. She also only served broccoli with hollandaise, always made her own bread and tended a beautiful garden that yielded an enormous bounty of fresh veggies. In the words of my mom, her adoring daughter “  My Mom grew up in poverty - emotional and financial - and her childhood home was chaotic.  No-one cooked or cleaned and there was never enough food.  So her home had to be perfect.  She was remarkable.”

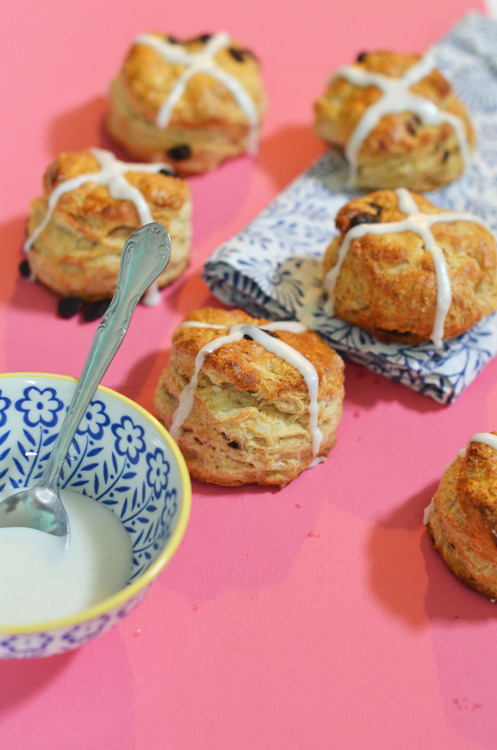
Hot Cross Biscuits

She was remarkable. And while she may have made a slew of other delicious foods, I will always think of her biscuits (“cloud biscuits” because they are heavenly and light). They were magnificent.

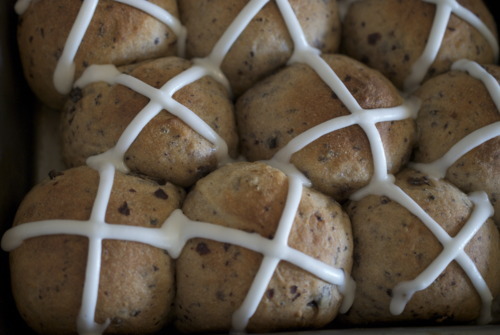
These are just a slight variation, I use butter instead of shortening, because I suspect she might have too, if it wasn’t for budgeting. And here of course, I’ve added some spices and currants to the mix, and topped them with an icing cross to be festive. But they are none the less my Grammy’s cloud biscuits, and they are remarkable, much like their creator.

[divider type="thin"]

Hot Cross Biscuit

  • 2 cups AP Flour
  • ¼ cup Sugar
  • 1 ½ tsp Cinnamon
  • ½ tsp Ground Ginger
  • ½ tsp Ground Nutmeg
  • 4 tsp Baking Powder
  • ½ cup Butter, cut into small cubes.
  • ½ cup Currants
  • 1 tsp Salt
  • 2/3 cup Buttermilk
  • 1 Egg
  • 1 Yolk
  • 1 cup Icing Sugar
  • 1 tsp Vanilla Extract

In a large mixing bowl mix together all of the dry ingredients.

Toss in the butter and using your hands (or a pastry cutter) and break the butter up into pea-sized pieces.

Add the egg to the buttermilk and whisk it until combined.

Add the liquids into the flour mixture and stir until it just starts to come together.

Add in the currants and press the dough out, and then fold it in half. Repeat this 5-10 more times until the dough has lots of layers and has formed a cohesive dough, but remains very soft- as soon as you start to feel the dough resisting stop.

On a lightly floured surface press the dough down so that it is ¾ inch thick. Cut the dough into circles- do not twist when you do this! Go straight up and down!

Put the circles on a parchment lined tray and put them in your freezer for 20 minutes.

Preheat the oven to 400F.

Mix the yolks with 1 tbsp of water. Brush the egg wash on all of the biscuits and bake for 20 minutes, or until the outsides are nicely browned. Allow to cool completely.

Meanwhile mix together the icing sugar and vanilla extract with 1 tsp of water. Put in a piping bag (or a Ziploc with a hole cut in it) and pipe on the crosses.

Eat immediately!

Tuesday Tutorials- The Mighty Macaron!

tumblr_inline_n2nl6keU3L1qfrmur.jpg

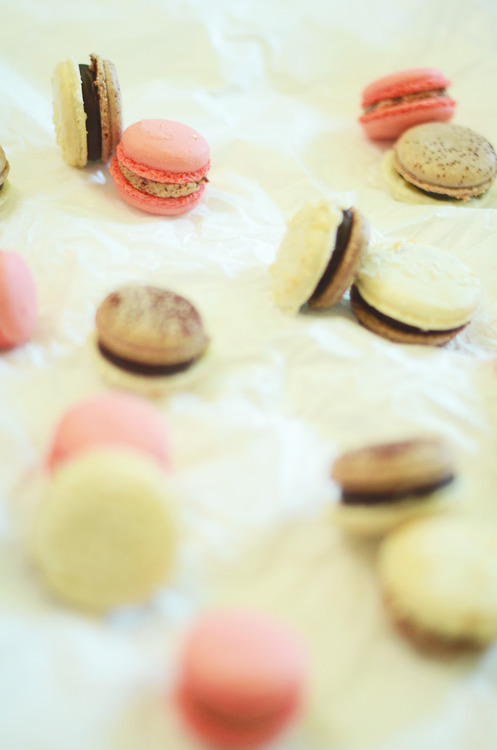
Oh le macaron. Those perfect jewel toned cookies that take you entirely out of where you are standing and promptly in front of Pierre Herme in Paris.

They are a glorious little things aren’t they?

Except when they’re not. And sometimes they really, really aren’t.

Sometimes they are dry little meringues with a sad dollop of filling that makes the whole thing downright miserable.

Macarons done right are magnificent. Done poorly, are no good at all.

So today, I’m going to show you how to make macarons, the proper way.

I have made literally every mistake I think it is possible to make with a macaron. I have sat on the floor and wept not understanding what it is I have done wrong, and that is sadly, not at all an understatement. I’m not being dramatic. I have wept.

But here’s the good news. I have made every one of those mistakes so that you don’t have to. I can tell you every trick I’ve learnt so that you can do them perfectly.

Let’s get started shall we?

Macarons

Recipe from Pierre Herme

  • 300g Sifted Ground Almonds
  • 200g Icing Sugar
  • 110g Egg whites
  • 300g Sugar
  • 110g Egg Whites

Filling of your choice (I’m a sucker for ganache- try this recipe!)

Sift the ground almonds and icing sugar into a large bowl.

Add the 110g of egg whites but do not mix them.

Put the remaining egg whites into the bowl of a standing mixer fitted with the whisk attachment.

In a small pot mix the sugar with a small amount of cold water so that the sugar has the texture of wet sand. Put a lid on it (if you don’t have a lid an upside down frying pan works well!) and put it on a burner over medium low heat.

When the mixture is boiling rapidly and all the sugar has dissolved you can remove the lid. You’re doing this so that the sugar doesn’t crystallize. By keeping the lid on, which encourages condesation in the pot, the sugar won’t crystallize against the edges. It’s a bit of a cheaters trick, and it works brilliantsly.

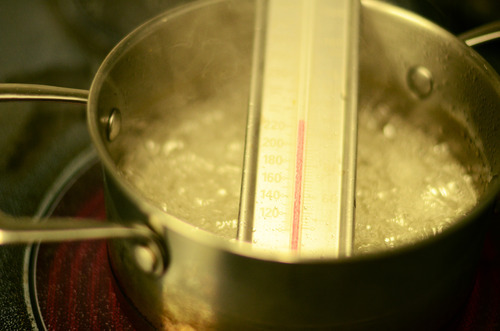
Now put your candy thermometer into the pot and turn the temperature up to medium high.

Cook the sugar mixture to 118C.

When the sugar get’s to 115C turn the mixer on medium and whisk the egg whites.

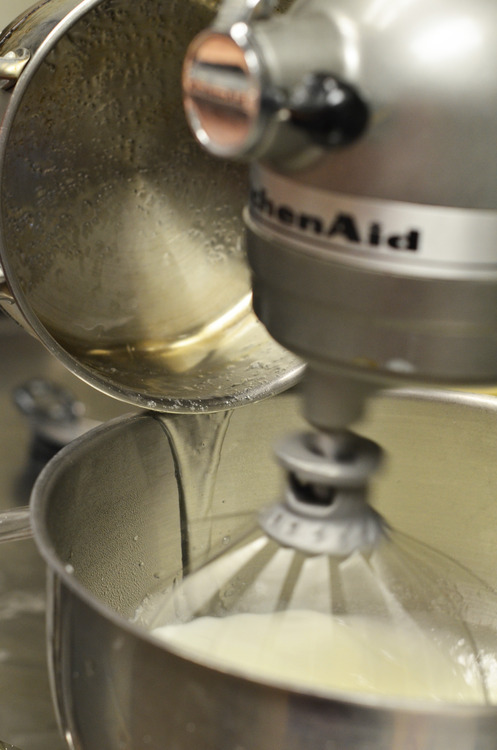
When the sugar gets to 118F carefully remove it from the heat and slowly pour it into the mixer with the motor running. You want to make sure you’re not pouring the sugar onto the whisk which it turn is splashing it on the side of the bowl. You’ll lose too much sugar, instead drip it down the side of the bowl in a thin stream.

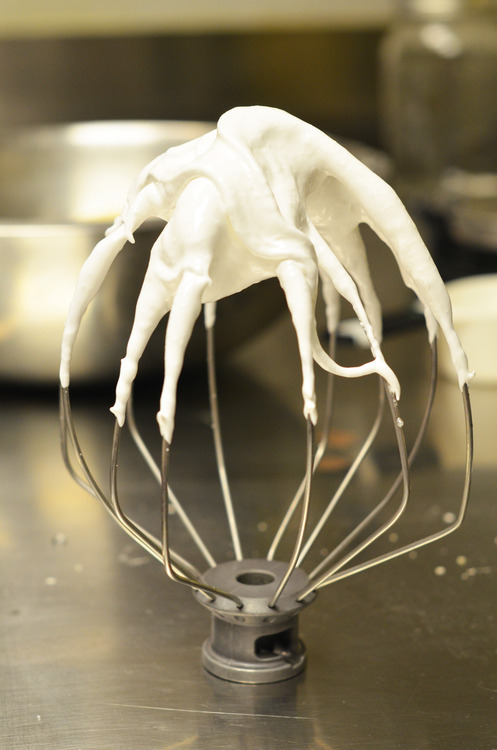
Once the sugar mixture is all in, keep the mixer running until it is very thick, but still slightly warm when you touch the side of the bowl. You want it to be just about body temperature.

Now you can fold the two mixtures together. This is the trickiest part. This isn’t like normal folding egg whites in where you want to deflate it as little as possible. Instead you’ll actually whip them together with a spatula. The trick is deflating it just enough.

You want the batter to still be thick, but when you life your spatula up and let the dough fall back down, you’ll want it to melt back into the batter, although not too quickly.

That sounds tricky but here’s the nice thing; as soon as you start piping your macaron shells you’ll be able to tell if you did it right or not. If you didn’t, you can just scrape up the batter, mix it up a bit more and then pip it again. No problem. Don’t stress okay?

Good.

Now that you’ve made your batter it’s time to pipe. Fit your piping bag with a round tip about 5mm wide.

Line 4 baking trays with 4 silpats. If you don’t have silpats you can use parchment paper, but the parchment is likely to bend a bit when you’re baking and they won’t be quite as perfectly round.

Pipe your macaron shells to be about 1.5 inches and space them about an inch apart.

Now let them sit. You want to wait roughly 30 minutes, or until the soft shiny-ness of the macarons has dulled slightly and turned a bit more opaque. This hardens the shell and ensures that the shell won’t crack.

Preheat your oven to 350F.

Bake your shells one tray at a time, for about 4 minutes, then turn them, then another 3 minutes in a convection oven. In a standard oven it would be more like 5 minutes turn 4 minutes.

When you think they’re done gently wiggle the top of one with your finger: it should still wiggle but also be a little bit firm. Take them out and let them cool completely.

Cook the other trays the same way.

When they are fully cooled use an offset spatula to pick them up off the silpats, they shouldn’t stick too much.

Match them up in rows of two with ones that they are closest to in size (uless your piping skills are totally spot on there will be a few differences in size!)

Now gently push in the base of each shell- this will make more room for the filling.

Pipe in your filling, and turn the tops over and gently sandwich them together.

Le macarons! C’est Finis!


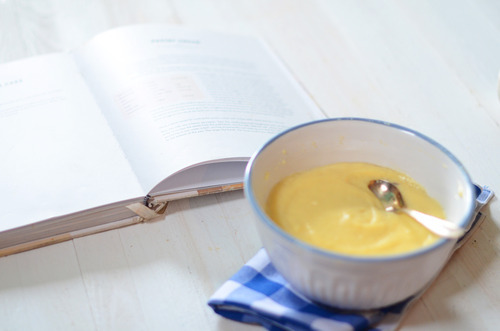
Tuesday Tutorials- Pastry Cream

Pastry cream is one of those things that I hated as a kid.  I was totally obsessed with these cinnamon danishes a local café made, only the cinnamon ones, because all the fruit ones had pastry cream in them, or as I called it as a kid “sweet mayo”. It was creamy, it was flavorless, and it was unessesary. Not into it.

And then I started working for pastry chef who made the most incredible blueberry tarts. Extraordinary blueberry tarts. They were made with the most beautiful wild blueberries, the softed shortbread crust, and the thinnest layer of the creamiest pastry cream known to man that had just had a hint of vanilla and lemon. It was a total revelation.

Now, pastry cream is a staple for me. They add a sophistication to tarts,  to pies, to cookies. To danishes.  The best part is that it is super easy to make.  You can make it with cornstarch or flour, if you’re gluten free, and you can easily change the milk to coconut milk if you’re dairy free. If you want a bit of a caramel flavour, you can change the sugar to brown sugar. It’s a wonderful thing.  Get into it!

Pastry Cream

(adapted from the Tartine Bakery)

2 cups Milk (or coconut milk)

2 Eggs

½ cup Sugar (or brown sugar)

3 tbsp Flour or Cornstarch.

½ tsp Salt

½ Vanilla Bean, or 1 tbsp Vanilla Extract

Zest of ½ a lemon

In a medium pot  bring the milk, vanilla, and lemon to a simmer.

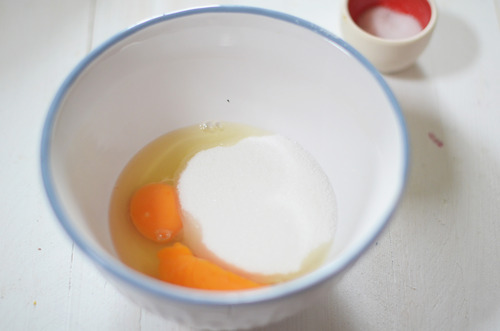
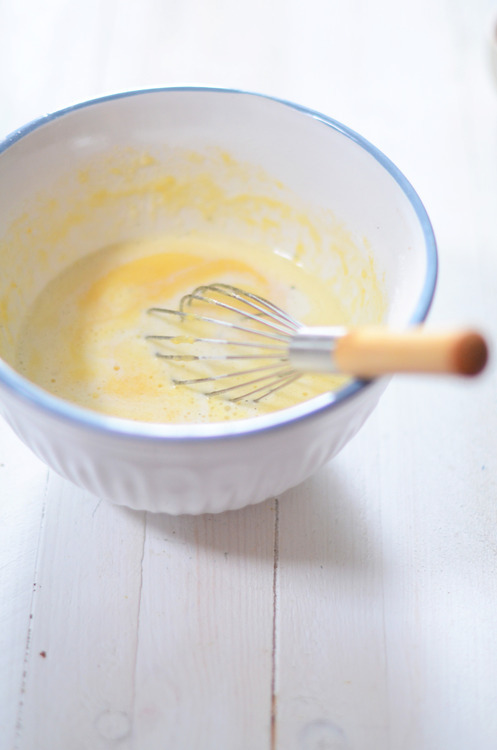
Meanwhile crack the eggs into a medium bowl. Mix with the sugar, and then add in the flour or cornstarch.

Slowly add in the hot milk mixture, whisking constantly, until it is all combined.

Pour this mixture back into the pot, and stirring constantly, cook over low heat until it has thickened consistently.

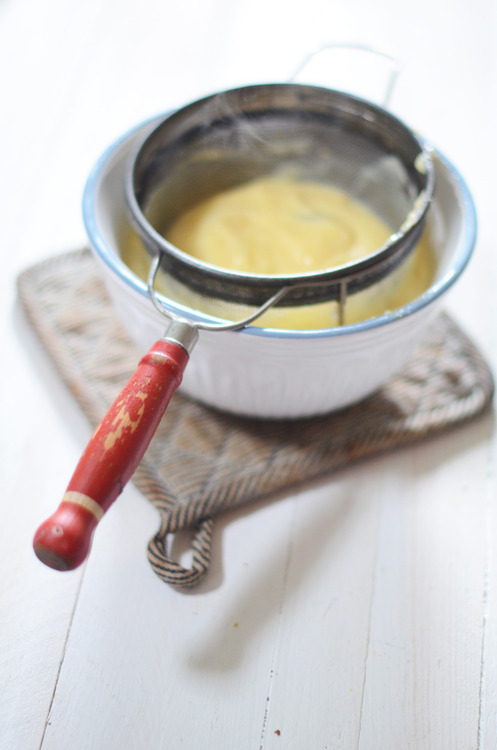
Strain into a clean bowl, cover with plastic wrap and cool completely. 

Tuesday Tutorials- Ganache and Coconut Truffles

Today, let’s take about Jordan.

He’s handsome, and charming. He’s so kind, sometimes it blows me away. He also has no problem saying no to me, which I find to be an incredibly great thing about him. He will bend over backwards to do anything for me, but if I’m bring a brat, he won’t hesitate to tell me.

He’s tall, but not too tall. He makes great cocktails.

Generally, he is an exceptional guy. I’m very fond of him.

His greatest fault though, is his lack of a sweet tooth. I am constantly shoving pastries around him, and he’ll eat a bite or two, and then move on. He’s supportive, he tells me if it’s great, but he’s not into eating a huge bowl of something.

Unless it’s chocolate. That man can down chocolate. Brownies, ice cream, cookies, consider it gone.  And above all, he has absolutely zero control when it comes to ganache.

He gets a sneaky look in his eye, and if I leave him near a bowl of it for an hour, the bowl will be scraped clean when I return. It’s actually kind of crazy.  And for that reason, I don’t make it often.

Except after Valentines. I always feel like guys have a rough go on Valentines, I mean, no one wants to be told that they have to be extra nice one day or they’ll get in trouble, even though no one really knows why they have to be extra nice. But none the less, off they go. Jord bought me some gorgeous flowers, made me a beautiful meal of pistachio roasted lamb and wild mushroom risotto, and took me to an awesome show. It was a wonderful night. And as such, I made some ganache.

This is the ganache recipe to end all ganaches. It is perfect in every way. I so wish that I had come up with it, but the geniuses at Eleven Madison Park did.

To make a ganache you are basically emulsifying chocolate with fat and liquid, and it can be a bit finicky. This one uses honey (well, if we’re being totally real here it uses cornsyrup, but I use honey because it’s more delicious and non GMO) and it helps the whole thing stay together. The butter we whisk in at the end makes it just the tiniest bit richer, and the whole thing has the perfect consistency for making truffles, or glazing cakes, or eating by the spoonful out of the bowl.

Sometimes, you have to give the man a treat.


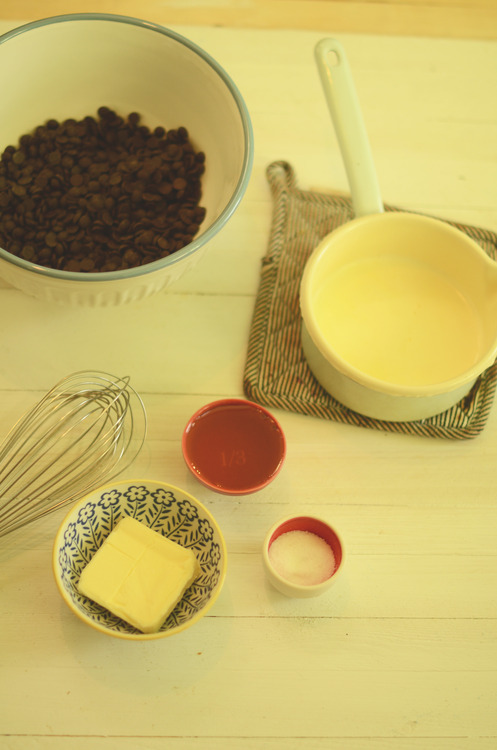
Honey Ganache

2 2/3 cup Heavy Cream (or Coconut Milk)

1/3 cup Honey

½ cup Butter

4 cups Chocolate chips, 60% cocoa or higher

1 tsp Salt


In a medium pot bring the honey, salt, and cream to a simmer.  Milk is apt to boiling over so be mindful.

Pour the cream mixture over top of the chocolate and let sit for 1 minute.

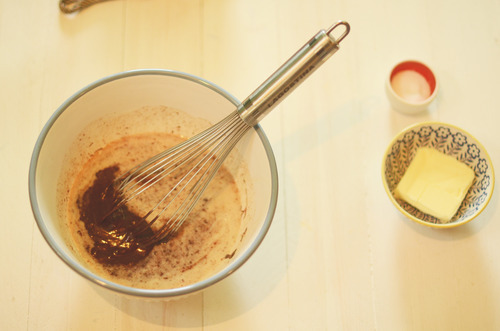
Use a whisk and gently stir the ganache to emulsify it, working just in small twirls in the center of the bowl until it is all mixed in together.

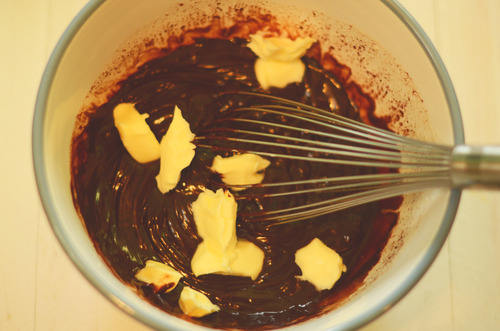
Add the butter piece-by-piece whisking until each piece is emulsified in before adding the next.

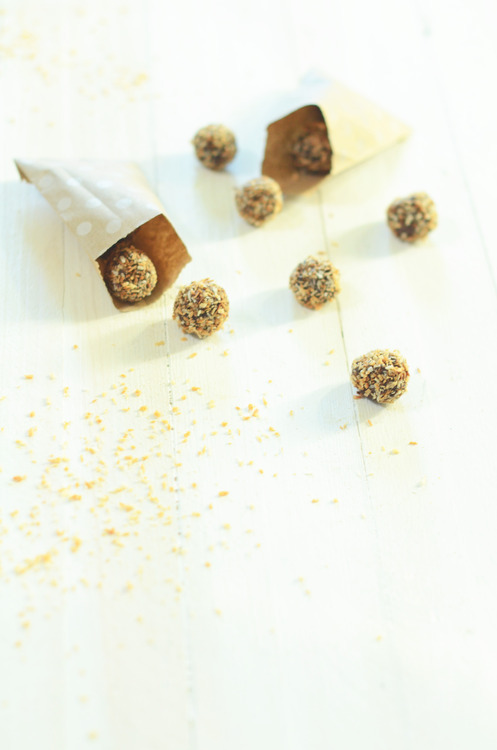
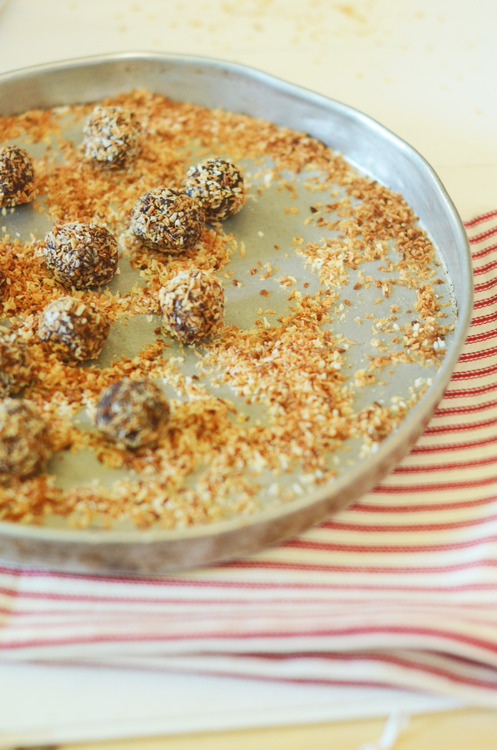
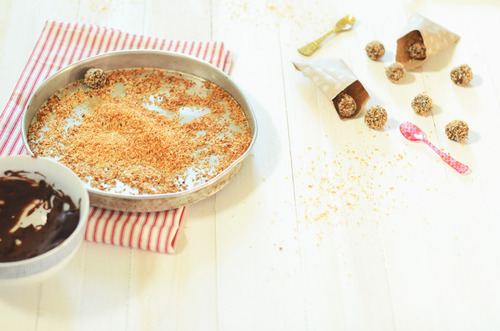
Use immediately if you are glazing a cake, if you want to make truffles or use it as a frosting allow to sit, covered with seran wrap at room temperature for at least 12 hours.  For these ones I used coconut milk instead of cream, and rolled the set truffles in toasted coconut. 

Pumpkin Loaf, and Fun New Jobs.

image

I think it’s safe to say that I always have a project on the go. I’m adding new things to roster all the time, and currently I juggle 6 jobs. Some of them pay, some of them don’t, some of them are things I love, and one of them, serving at a restaurant, is something I do just to make ends meet. It’s a hectic life. But it’s a fun one.

One of the best parts about it, is that I am always meeting new people, doing new things, trying new recipes. And one of my favourite projects right now is with my friend Brett Holland. He is an exceptionally handy guy, who built a solar powered coffee food cart on wheels, that he bikes throughout the city, selling great coffee, and some darn good pastries, if I do say so myself. It’s called On the Grind Cafe

As he’s working out the kinks of the cart, he’s parking at the corner of Union and Jackson (right on the Strathcona bike path!), and if you’re passing by the area, you should probably pop by, drink some coffee, and perhaps get a pastry that I’ve baked.

Right?

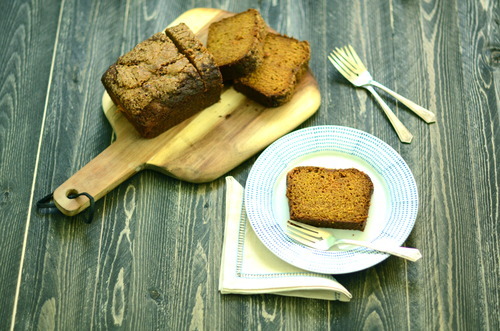
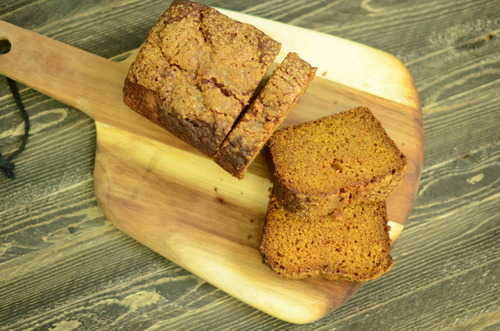
And if you don’t live close by, and can’t get a slice of my pumpkin loaf, you should definitely make some yourself.

It is so moist, and so simple to make, and it just feels like fall. It makes a great breakfast with a coffee in the morning, but it’s also darn good slightly warmed before bed, with a cup of tea.

image

Pumpkin Loaf

Loosely adapted from Smitten Kitchen

1 1/2 cups AP Flour (or whole wheat pastry flour)

1 tsp Baking Powder

1/2 tsp Baking Soda

1 tsp Cinnamon

1/2 tsp Nutmeg

1 cup Pureed Pumpkin

1/2 cup Olive Oil

1 1/4 cup Brown Sugar

2 Eggs

Coarse Sugar to sprinkle on top.

Preheat oven to 350F

Line loaf pan with parchment paper.

In a large bowl mix together to the oil and sugar.

Add in the eggs.

Mix in the pumpkin.

Gently stir the dry ingredients in until just combined.

Pour the batter into the prepared pan and level with a spatula.

Sprinkle the coarse sugar on top and cook until an inserted skewer comes back with only a few moist crumbs- about 30 minutes.

Allow to cool before removing from pan.

Tomato Tart Tatin

Here’s the thing about tomatoes. They might be my favourite veggie (I know I know, they’re a fruit, but you know what I mean.). They’re sweet, they’re savoury, they’re juicy.

Here’s the other thing about tomatoes. If you put them in the fridge, they suck. They get grainy, they get flavourless, they loose everything special about them.

Here’s the thing about my local green grocer: they put their tomatoes in the fridge at night.

So when I got all excited about fresh tomatoes the other day and they were all warm from sitting in the sun I grabbed myself a big bag full. And then I got home to find grainy sad tomatoes, far from their peak.

image

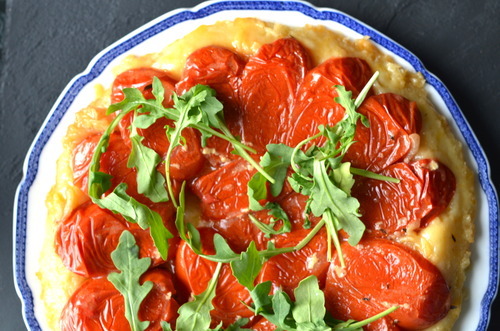
Here’s the thing about sad grainy tomatoes: they’re still pretty good when you cook them. Usually this means tomato sauce, but the other day it meant this fabulous tart tatin that was on Design*Sponge a couple weeks ago. This is a damn good tart, it’s very savoury (a lot of veggie tatins tend to be a bit sweet for my taste) the pastry is flaky and light, but just buttery enough to have enough flavour to hold it’s own with the tomatoes, and the onions and cheese help bring a depth to it that rounds the whole thing out.

I didn’t use the crust from the original recipe, because I tatins should always be made with puff in my books, and after last Tuesday’s Tutorial on quick puff we’re all pros right? Right.

image

Tomato Tart Tatin

(Adapted from Design*Sponge)

Dough:

1 cup Cold Butter, unsalted, cut into cubes

2 cups AP Flour

1/2 tsp Salt

1/2-3/4 cup Ice Water

For a full tutorial on making this dough with lots of pictures, click here!

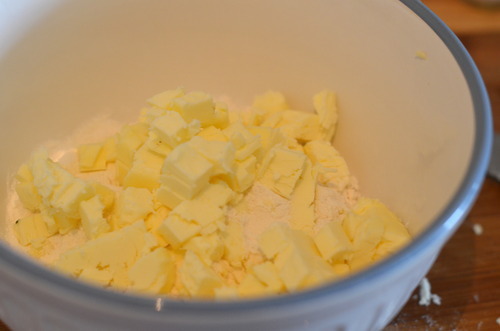
On a clean surface toss the butter cubes with the flour and salt.

With a rolling pin roll out the butter so that all of it forms into long thin strips.

Add the water, a couple tablespoons at a time and fold the dough, push it out, add more water, and fold the dough again.

Continue this until it has come together as a cohesive dough.

Wrap with plastic wrap and put in the fridge for at least an hour, or up to two days.

Tart Tatin:

1 recipe of quick puff pastry dough (aboce)

10 Roma Tomatoes

1/4 cup Grated Parmesan Cheese

1 Onion, thinly sliced

2 tbsp Olive Oil

1 tbsp Fresh Thyme Leaves

Preheat oven to 400F

In a medium pot over medium heat warm up 1 tbsp of the olive oil.

Add in the onion and cook, stirring often, for about 10 minutes, until they are soft and just starting to brown on the edges.

Grease a pie pan with the remaining olive oil. Cut a circular piece of parchment and line the bottom of the pan.

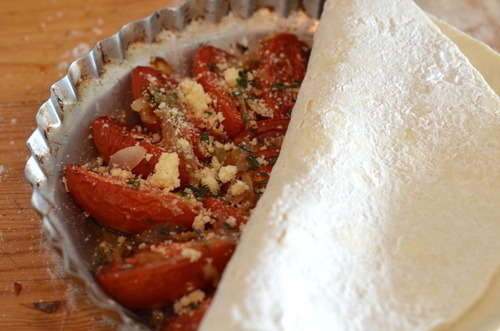
Slice the tomatoes in half and put them skin side down in the pan. They will shrink up as they cook so overlap them a bit so that when they are cooked they will still cover the bottom of the pan.

Top them with salt and pepper, the onions, parm and thyme.

On a lightly floured surface roll our the dough into a circle just larger than pie pan.

Cut the edges to clean them up and put it into the pan.

Bake for about 40 minutes, or until the pastry has turned a nice brown and the juices bubbling up the sides are browned as well.

Allow to cool for about 10 minutes before flipping it onto a plate.

Serve while warm or at room temperature.  

image

Tuesday Tutorial- Quick Puff Pastry

The rains have started. We’ll probably have a couple more sunny days, but mostly it’s Fall here. Our mountains won’t turn red and orange, they’ll stay a blackish green, but the tops will fall under a fog. Even though it’s still warm now, it will be sweater weather soon. As much as I love summer, and I still have a small vacation to take, I’m looking forward to the cold. The cozy feeling of watching the rain fall with a cup of tea in your hands. The gentle scratcing of wool scarves at your neck. New boots.

The time of year to take things a little bit slower, and to make pastries by hand.

This is my absolute favourite kind of dough to make, I remember my mom teaching me as a little girl. Gently breaking up the butter with my hands and kneading the dough were two of my favourite things as a kid. I have since made it hundreds, if not thousands of times in my life. It is the kind of pastry that normally takes a few tries to get right, but this little trick- curtesy of the Tartine Bakery Cookbook- in which you roll the butter, makes all the difference.

I like to call this dough a rough puff pastry, it’s not quite as light as a puff, but it’s not far off, and while the method is closer to a pie dough, it’s much flakier and crisper than that. I rarely have the energy or patience for puff pastry, and almost any recipe that calls for it gets this instead. I use it for pies, tarts, cookies, savoury tarts, mini cinnamon buns. Nearly anything that calls for pastry, you could use this. It’s the ultimate pastry in my books.

Rough Puff Pastry

2 cups AP Flour

1 cup Butter, unsalted, cut into cubes

1 tsp Salt

1/2 cup – 3/4 cup Ice Water

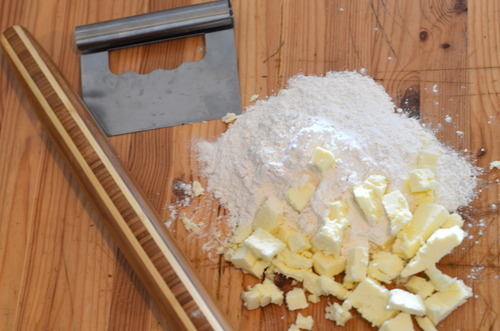
On a clean flat surface sprinkle the flour and salt.

Break the butter apart into the cubes and toss to coat them in the flour.

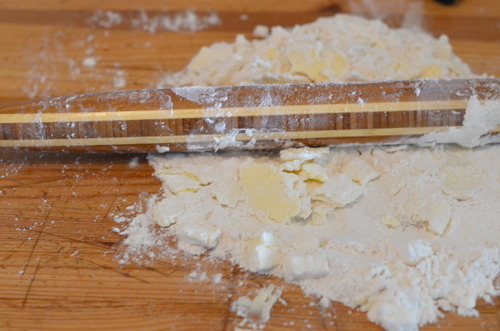
With your rolling pin begin to roll the butter out. It will stick to your rolling pin and the counter but don’t worry. Use a pastry scraper, or a spatula and scrape the pastry off. Then keep rolling.

Push the butter bits from the outsides in to make sure all of the butter has been rolled into thin strips.

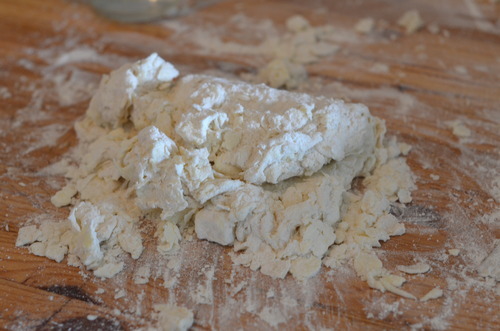
Pour about 1/4 cup of water on top of the flour mixture and, again using the pastry scraper or spatula, fold the dough on top of it’s self.

Add more water, a couple table spoons at a time, and keep folding the dough over, pushing it down, and folding it again until some flour remains on the surface but it’s holding together. It shouldn’t be sticky to the touch but it shouldn’t be falling apart either.

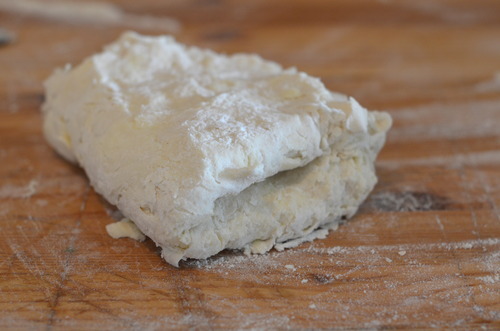
Keep folding the dough, pushing it out, and folding it again. This is putting the layers into your pastry that will make it so light and crisp.

The dough should be soft to work with, as soon as you start to notice it resisting your touch stop.

Wrap with plastic wrap and refridgerate for at least an hour. I usually make two batches and keep one in the freezer, so I always have some on hand.

It will last 2 days in the fridge, or a month in the freezer.

Tuesday Tutorials- Choux Paste + Strawberry Rose Eclairs

image

Choux paste is magical stuff. It’s a simple mix of eggs, flour, butter and milk, but the result is glorious. Mix some cheese into it and once it’s baked it becomes gougeres. Boil small pieces of it and it’s Parisienne gnocchi. Add some apples to the mix and fry it and it’s a fritter. Pipe it into little balls and your nearly at a profiterole, or cream puff. Pipe it a bit longer and you’ve nearly made an eclair.

Seriously, there is little that choux paste can’t do. It’s pretty amazing. You should learn how to make it. Stat.

I don’t know if this happens to everyone, but people always make professional jokes about me, the most common is calling me eclair. This is the lame joke that every man over the age of 65 says when I say I’m a baker

“Oh, really? Should we call you Eclair?” No dude, Claire will do just fine.

But to avoid being bitter and I’ve decided I just need to get crazy good at making eclairs. Somehow this feels like retaliation, even if almost no one knows how good I am at them but me. This way I can chuckle to myself and think at how awesome my eclairs are when old men say this to me.

It’s silly, I know it. But it makes me feel better.

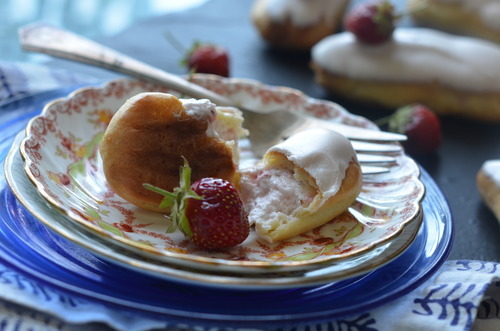
This eclairs are pretty fantastic, if I may. They are super fresh tasting, filled with a whip cream that’s spiked with crushed strawberries, and a bit of vanilla. Then they are carefully dipped into fondant that’s scented with rosewater.

These are kind of ridiculously good. I ate an astonishing number of them.

So many in fact, that I lied to my boyfriend about how many I made. And then I felt no guilt. About the eating or the lying. They were that good.  

image

Rose Eclairs

Adapted from the Bouchon Bakery Cookbook

1 1/4 c AP Flour

2tbsp Sugar

1cup Water

4oz Butter

1 tsp Salt

1cup Eggs

Strawberry filling:

1 cup Whipping Cream

1 cup Strawberries

2 tbsp Icing Sugar. 

Glaze:

1 cup White Fondant

1 tsp Rosewater, or as needed. 

In a medium pot, melt the butter. 

Add in the water and bring to a boil. 

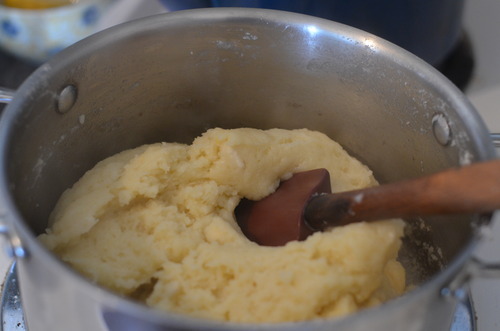
Mix in the salt and flour and stir for about 4 minutes, until it is very thick and the flour is cooked. 

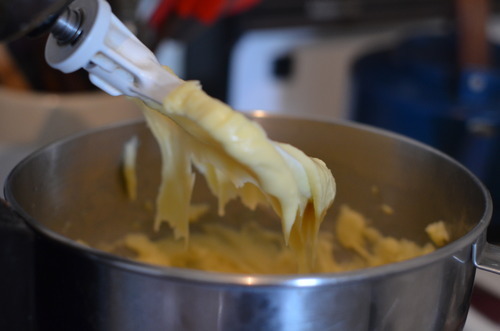
Put the flour mixture into the bowl of a standing mixer fitted with the paddle attachment. 

Start beating on medium speed. Add in one egg.

Wait until it is fully combined before adding the next, continueing this until all the eggs are combined and the mixture is soft, shiny and smooth. This is your choux paste!

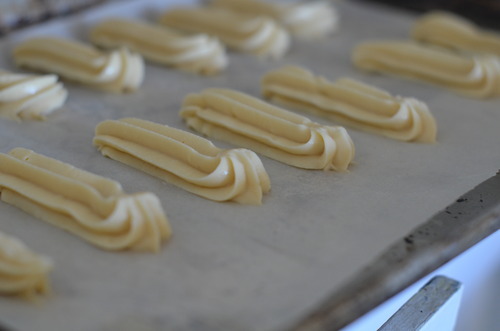
Fit a piping bag with a large star tip, and transfer the choux paste into it. Pipe the shape of an eclair onto your prepared trays, being as careful as you can to make them the same sizes. 

Bake for about 25 minutes, rotating the tray half way through baking. 

Allow to cool. 

Meanwhile make the filling:

Mash up strawberries as finely as you can- this can be done in the food processor or simply with a fork. Strain them through a fine seive. 

Whip the cream to stiff peaks, mix in the icing sugar.  

Fold the strawberry puree in. Transfer to a piping bag with a thin round tip and move to the fridge until ready to use. 

Glaze:

In a double boiler melt the fondant. 

Add in the rosewater and stir to combine. Check for taste. 

image

image

image

Cinnamon Roll Biscuits

image

People always ask me what my favourite thing is to bake. I tell them I’m a baker and it’s the first question. And here’s the thing of it; I never know what to say.

There are things that I don’t love baking- macarons for instance, which are delicious and wonderful, are also the bane of my existance. Puff pastry, with it’s tedious rolling and folding would fall into that category, but favourites? They’re harder to come by.

But recently I’ve decided. They’re something friends always ask me to make, and then continue to talk about long after the last one has been scarfed up, and they’re something I genuinely really enjoy making.

Biscuits.

Guys, I’m willing to put it down into the internet, a place where things are never deleted. I make great biscuits, and I love making them.

The simple act of cutting in the butter, folding in the buttermilk, pressing out the dough with my finger tips. They are my favourite. I love them.

Which is a good thing, because man oh man, have I made a lot of biscuits lately. I’d say about 300 last week alone.

Oy.

See I work for a Southern restaurant which opened up last week as a pop up fried chicken shack. And what is fried chicken without biscuits? Not much apparently, because those things were flying out of the kitchen. It was all biscuits all the time.

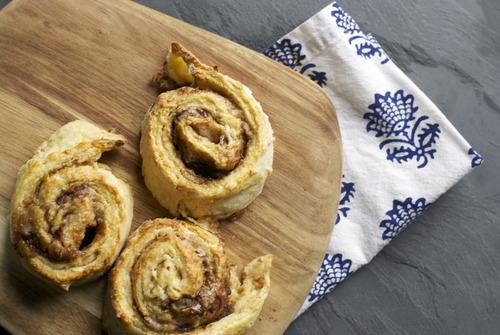
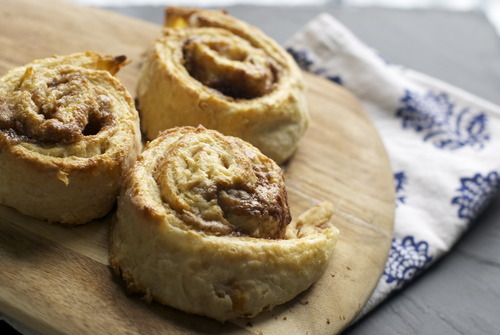
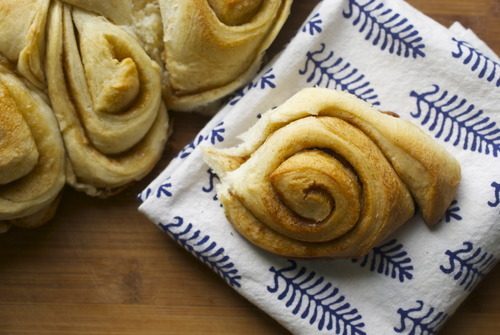
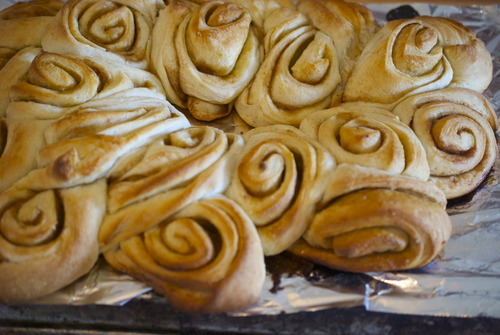
So with the scrappy bits that were left over and a bit to tough to serve, I rolled them out , sprinkled them with cinnamon and brown sugar and rolled them up. They’re like the cookies my mom used to make with left over pie dough, except much, much, bigger and fluffier.

And seriously, those things were delicious. Like, proper, all kinds of wonderful, I will sell these one day when I open a bakery, delicious.

They were one part biscuit, one part cinnamon bun, and all parts fantastic. So there you go.

Biscuits, they are my favourite, whether for dinner, or for breakfast, or for shoving in your face when they’re covered in cinnamon and sugar and still hot from the oven.

image

Cinnamon Roll Biscuits

Adapted from the Tartine Bakery Cookbook

3 3/4 cup AP Flour

1 tbsp Baking Powder

3/4 tsp Baking Soda

1 tsp Salt

1/4 cup Sugar

1 1/2 cups Buttermilk

1 cup Butter, very cold, cut into small cubes

Filling:

1 cup Brown Sugar

2 tbsp Cinnamon

Egg Wash:

1 egg yolk

1tbsp Cream/milk

Preheat your oven to 375F

In a large bowl mix together the flour, baking soda, baking powder, salt, and white sugar.

Put in the cold butter and with your hands break the butter into pieces. You want the butter to be in big pieces and very cold- it’s this cold big butter that goes into the hot oven and causes steam which makes the biscuits rise. The pieces of butter should be somewhere between a pea and a fava bean.

Slowly add in the buttermilk and fold it in gently, adding more if you need it, to make the dough just come together. Make sure your scooping all the dry bits from the bottom of the bowl.

On a well floured surface fold the dough, flatten it out, and fold it again, about 5 times until the dough has come together nicely but isn’t getting firm.

With a rolling pin roll out the dough to about 3/4 inch thick, being liberal with the flour so it doesn’t stick.

Sprinkle the brown sugar and cinnamon on top and roll up the dough into a log.

Cut the dough into 2 inch pieces.

Put on a baking tray and refridgerate for 20 minutes.

In a small bowl mix together the egg yolk and the milk/cream.

With a pastry brush, brush the tops of the scones with the egg wash and put into the oven right away.

Bake for about 20 minutes or until the tops are starting to brown and your whole house smells incredible.

Let cool for at least 10 minutes before digging in!

Tuesday Tutorials- Danishes!

When I was little my parents had it all figured out. They decided when we were very young, that we could make our own breakfast. And on Saturdays, starting when perhaps parents would decide was too young today, we walked the block and a half to Second Cup and bought breakfast. It was a tiny cafe, part of a larger franchise in Canada, but one where they did all the baking in house. And every Saturday in the summer we would get a cinnamon danish with peach drink, and every Saturday in the winter we would get a peach danish and a hot chocolate. We were creatures of habit.

The couple that owned it were endlessly sweet to us, and we adored this little tradition. Then they hired an extremely rude girl who would serve the adults instead of us and be mean to us kids, so we wrote a very stern letter and we wrote each line in a different colour marker, so you know we meant business. And we never went back. For a few months we tried different cafes that were close to us, but it was never the same. Not long after we started making our own elaborate breakfasts which was, in fact, the beginning of a whole other exciting era. BUT there was a very sweet couple of years in which my sister, my next door neighbour and I ate danishes every Saturday. And it was a wonderful time.

Which is all a long way of saying that I love danishes. An awful lot.

Danish dough is what’s called a laminated dough, because you roll out the dough with a big block of butter in the middle. And then you fold the dough, and roll and fold and roll and fold, and as you do this the butter laminates the layers of dough. This is the same premise behind puff pastry, but here the dough is also yeasted so it rises even more, and has more flavour. The dough is similar to a croissant dough, which I might do a tutorial for soon -let me know if you’d like that in the comments!

Danishes

Makes 32 danishes

3 1/2 tsp Dry yeast

1/2 cup Sugar

1 cup +2 tbsp Milk, warmed

7-8 cups AP Flour

1 tbsp Salt

1/2 cup Butter, soft

2 Eggs

1 1/2 lb (3 cups) Butter

Egg wash (1 egg yolk and 2 tbsp milk/cream)

And your filling! I used raspberry jam- about 2 cups of it.

*This makes a very large batch, which I like because then I freeze half of it, but you can half this easily as well.

Make sure the milk is not to warm, it should just be body temperature. If it’s too hot it will kill the yeast.

Mix the milk, yeast and sugar together. Let it sit until it gets foamy on the top, about 5 minutes. If it doesn’t get foamy it means the yeast is dead, start over!

In the bowl of a standing mixer or in a large bowl if you’re planning on doing it by hand, combine the dry ingredients, only 6 cups.

Add in the yeast-milk mixture in and combine until it starts to come together. If it is still very wet add in a bit more of the flour until the mixture is still soft but not sticky.

Add in the 1/2 cup soft butter bit by bit until it is fully combined, and keep mixing until the dough does the window test- when you take a small bit of dough and stretch it slowly in your hands, it gets so thin you can see through it. If it doesn’t keep mixing!

Now form the dough into the a ball and put it in a clean bowl, cover it with a clean tea towel and let it rise until it has doubled in size, about an hour.

In between two sheets of parchment roll out the butter into a square about 1 1/2 inches thick, put it in the fridge.

On a well floured surface place the ball of dough. Cut 4 slits into the dough at 12-3-6-9 o clocks, about half way in.
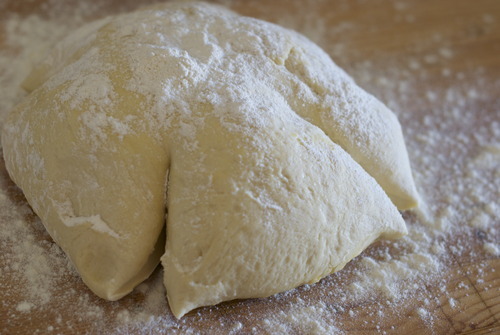
Now roll it out- so that you form a large x shape.

Put the block of butter into the middle
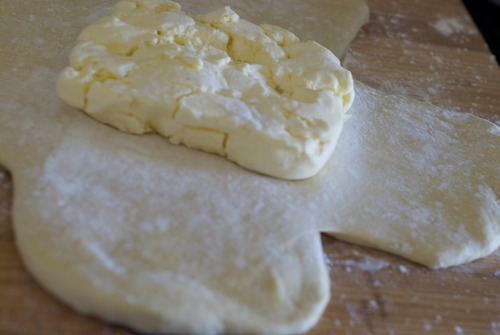
and fold the other pieces on top of it to seal it in.
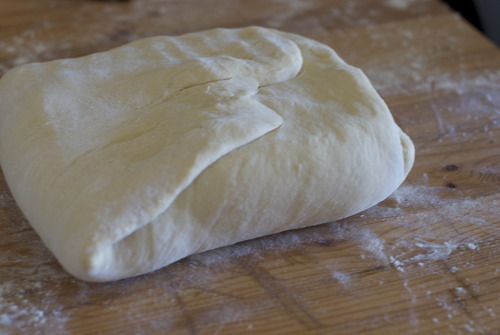
Flour your surface again and place the folded side down.

Roll out the dough to a large rectangle, being careful to make sure the dough is rolled evenly and keeps it’s rectangular shape.
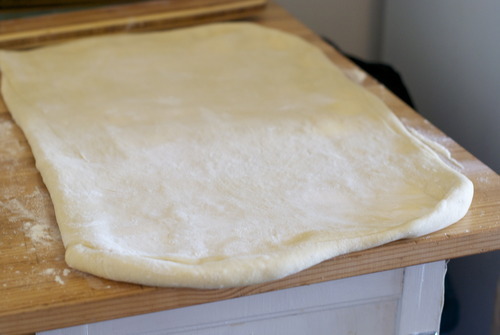
Now fold the dough in thirds like you were folding a letter.
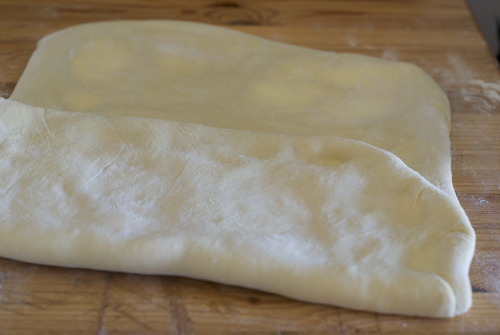
Wrap up this piece of dough, put it on a baking sheet and put it in the fridge for twenty minutes.

After it has chilled repeat this twice more, rolling, folding, and chilling.

Let the dough chill for another 40 minutes.

At this point I cut the dough in half and put half of it in the freezer, but if you are making a large batch you can use it all!
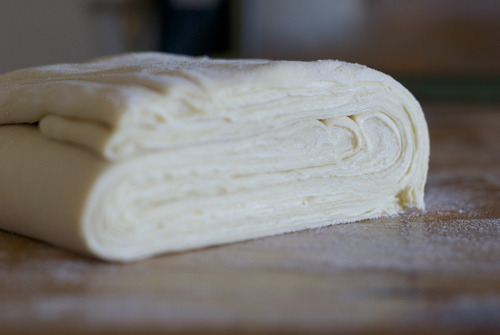
Now roll out the dough! Roll it until it’s about 1/3 inch thick into a large rectangle. You can make any number of shapes with this dough now. Here is how I like to do it best.

Cut it into squares- half a batch of this dough will make 16 danishes.

IMPORTANT! The way you cut the dough will make or break your danishes. You must cut straight down. DO NOT twist a cutter or slice through. Cut straight down. Otherwise your layers will be sealed together.

SO I cut them into squares, then fold them diagonally.
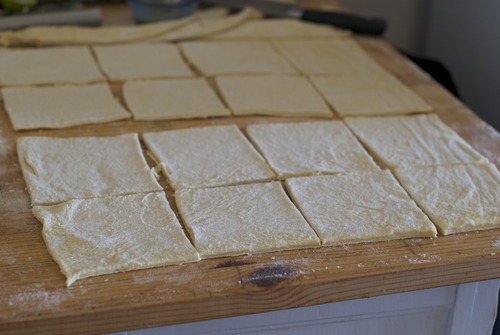
Cut slits in them so that the outsides are disconnected from the middles except on two opposing corners. Unfold them and put them on a parchment lined baking sheet.
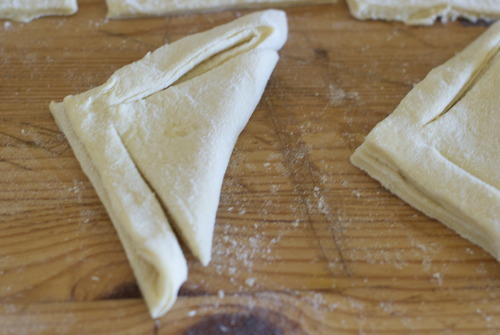
Brush with egg wash like I’ve shown here
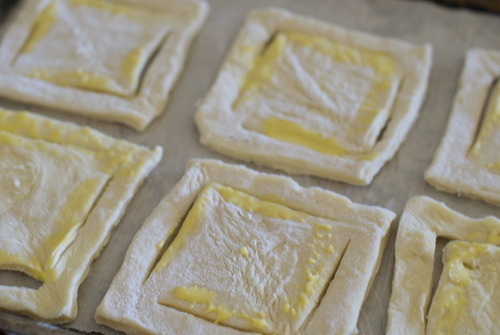
And fold the pieces over.

Now fill them up with whatever filling you have. I used raspberry jam.

Let them sit until they have puffed up nicely, about another 45 minutes.

If there are some scrappy bits of dough from the edges, I recommend sprinkling some cinnamon and sugar on them and rolling them up into straws. You can proof and cook them along with the others no problem.

Meanwhile, preheat the oven to 375F

Use your egg wash once again to brush the tops of the danishes.

Bake until the dough is nicely browned, about 20-30 minutes.

Allow to cool a bit before eating- and I like to top up the middle with some more jam!

And that’s that!
Raspberry and Mascarpone Brioche Galette with Almond Crumble

Now is the time of year I start to miss summer fruit. In the fall there are quinces and apples to get me through, and then the fun of Christmas takes over and I can get excited about mashed potatoes, but by mid January I am sick of it. I want red berries.

It was glee, pure, unadulterated glee that took over me when, at my local market, I noticed some local raspberries in the freezer.

Apparently this dive-y rundown market that I frequent for their unbelievable deals on pecans just froze all of the berries that they didn’t sell this summer. Firstly, this makes perfect sense. Secondly, how did I only just see them?

Oh lord. My week has been made.

We had some friends over recently, and as Jordan and I were flipping through cookbooks deciding what to make, he made several pointed comments about a brioche tart in the Ottolenghi book.. So I, being that lovely charming girlfriend that I am, (self proclaimed at least) decided to make it.

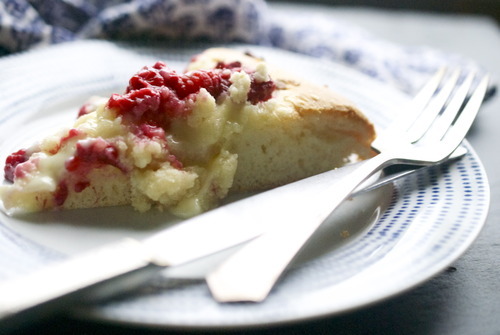
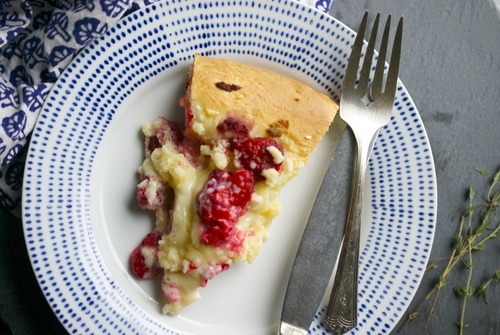
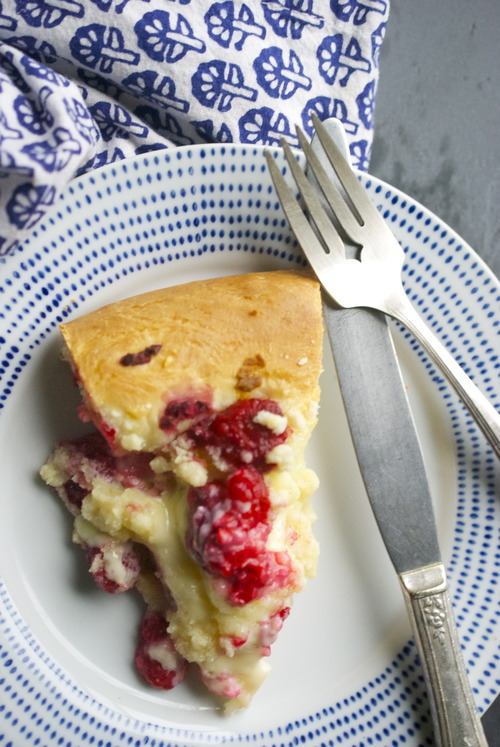
This is the most perfect breakfast. We ate it for dessert, and it was great, but for serious friends, eat this for breakfast. Next time you have people over for brunch, put this out on the table. I promise, they will be friends for life. The whole thing is somewhere between a coffee cake, a tart, and yet so much better. So very much better.

Raspberry, Mascarpone, Brioche Tart

Adapted loosely from Ottolenghi

Brioche:

2tbsp barely warm water

1tsp Dry Active Yeast

1 1/2 cups AP Flour

1/2 tsp Salt

2 tbsp Sugar

2 Eggs

1/2 cup Butter

Filling

3/4 cup Mascarpone

3 tbsp Icing Sugar

1 tsp Vanilla Extract

Zest of 1 Lemon

2-3 tbsp Cream

1 1/2 cup Raspberries, or other red berry

Almond Crumble

1/2 cup Ground Almonds

1/2 cup AP Flour

1/3 cup Brown Sugar

1/3 cup Butter, cut into small cubes

In the bowl of a standing mixer fitting with the dough hook combine all ingredients except butter and mix until it comes together. Continue mixing until you can take a small piece of the dough and, when you stretch it carefully, it will stretch so thin you can see through it. This is called the window test. If the dough rips then keep kneading the dough until you can.

OR You can do this in a food processor fitted with a dough blade, OR by hand. If doing it by hand just mix it all into a bowl until it comes together, then move the dough to a lightly floured surface and push your heels of your hands into the dough. Then fold it onto itself, and repeat this pushing and folding motion until you do the window test.

Put the dough into a clean bowl and let it rise until it has doubled in size, this should take about an hour.

Punch the dough down. You can use the dough right away, but if you’ve planned long enough in advance, the dough will be even better if you put it in the fridge overnight.

If you do put it in the fridge, you will need to take the dough out about an hour before you start to bring the dough back up to room temperature.

When the dough is ready put it onto a lightly floured surface and with your hands stretch the dough out into a large circle. Using a rolling pin will flatten lots of the air bubbles that the dough has been working so hard on producing, so instead use your hands to push from the center out. It does not have to be perfect. This is a free formed galette, and it being a little rough around the edges is totally okay. Pick up the dough carefully and put it on a well floured cookie pan.

Preheat oven to 375F

In a small bowl mix the mascarpone, icing sugar, lemon zest and vanilla together. Add in the cream, tablespoon by tablespoon until you get a texture that is thin enough to spread, but not so thin it will be runny.

Spread this on the brioche dough leaving about an inch around the edges.

Now top with the raspberries.

In another small bowl mix together all the ingredients for the crumble, and with your hands break the butter into the other ingredients. You don’t want to form a cohesive dough, just a crumbly mixture.

Sprinkle this on top of the raspberries. 

Let this sit out for about 20 minutes as a last proof, and then bake until the crust is nicely browned and the center just barely wiggles when you shake it. Take it out of the oven and let it cool for at least 20 minutes before serving.

Tuesday Tutorials- The Best Biscuits

The second instalment in my new weekly column, where I talk about food basics, and give you the step by step know-how to do it at home.

The restaurant where I work recently started to do brunch, and before we opened I was chatting with the chef about what kinds of pastries he might want. The original idea was croissants which, despite obviously being delicious, are also so tedious to make, especially in a kitchen with as little counter space as ours, so I threw out the idea of making biscuits.

This did not go over.

Biscuits are dry, biscuits are bland, biscuitsare over done, and never delicious.

So I, being the super competitive person that I am, decided to make him some. I made savoury biscuits, ones with chunks of cheddar and dots of scallions, and let the restaurant fill up with the smell of cooking butter and melting cheese. And then I dared him not to like them.

He is not the first person I have converted to a biscuit lover, but if we’re being real here, most of this credit can go to my Grammy.

Grammy made “Cloud Biscuits”, light, airy, full of layers and always moist. Growing up they were always made with fish chowder, or if we were lucky, for breakfast. Hers was a different recipe than this, because hers was a different time. In the Great Depression butter was a serious luxury, so the cloud biscuits were always made with shortening, and just a tablespoon or so of the good stuff to give it flavour. But it was the texture that got me hooked.

Which is funny, because most people complain about the texture, they think dry, over cooked, bland. So here is THE way to make the perfect biscuit.

Let’s start out with a couple basics first

  • The way you get layers is by using big chunks of really cold butter. When that cold butter goes into the hot oven it produces steam, and if you have the right formations of butter you get perfect light fluffy biscuits.

  • You need to knead, but not too much. Flour has gluten in it, and gluten will make your biscuits tough. But you need to knead your dough in order to get in the layers. This means really feeling the dough, as you knead it when it starts to get tough, it’s time to stop.

  • Use good ingredients. If your going to add cheese to your biscuit, make it good aged cheese. There are only a few things in your biscuits, make sure they’re adding something.

  • Be creative! There are a million things you can do to a biscuit, don’t limit yourself and have fun with the possibilities!
Biscuits

(Adapted from the Tartine Bakery Cookbook)

4 1/2 cups All Purpose Flour

1tbsp Baking Powder

1tsp Baking Soda

11/2 tsp Salt

1/4 cup Sugar

1cup Unsalted Butter, very cold, cut into cubes

1 3/4 cup Buttermilk

Eggwash

1 Egg Yolk

1tbsp Cream, milk, or buttermilk

Option

1 1/2 cup Aged Cheddar, chopped

1 bunch Scallions

In a large bowl mix together all the dry ingredients.

Add in the butter and with your hands, or a pastry scraper, break the butter up into lima bean sized pieces, or about the size of your pinky finger nail.

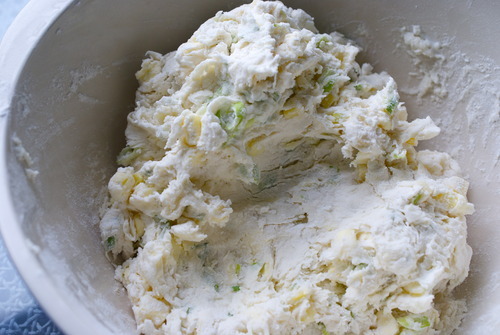
Add in any flavourings, in these ones I used cheddar and scallions, but the world is your oyster on this one.

Carefully pour the buttermilk in and mix it with a spatula or spoon until it just begins to come together.

Push the dough down with the palms of your hands and then fold the dough in half. Continue doing this 4-6 times or until you just start to feel resistance.

Put the dough onto a lightly floured surface and roll out to about 3/4 inch thick.

Cut the dough out into whatever shapes you like, traditionally savoury are round and sweet ones are cut into triangles.

Put them on a baking sheet lined with a silpat or parchment paper and put them in the freezer for 15 minutes.

While the biscuits are chilling preheat your oven to 400F

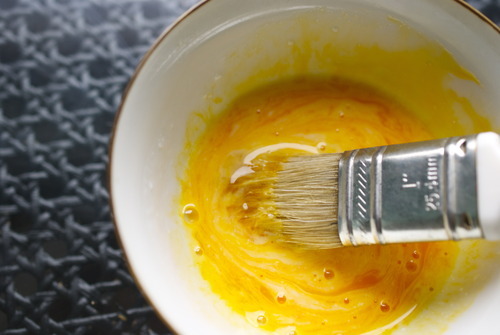
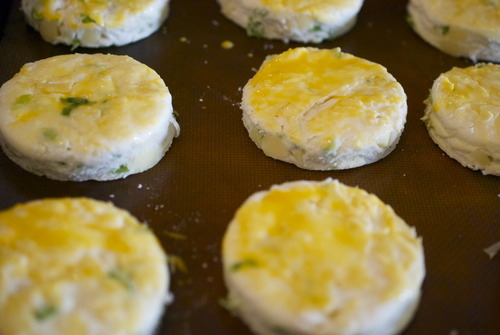
Take the biscuits out of the freezer and brush the tops with your egg wash.

Put them in the oven and immediately turn the temperature down to 350F

Don’t open the door for the first 12 minutes, afterwards you can open it and turn the pan so that it cooks evenly.

After about 20 minutes the tops should be nicely browned and you should be able to see a significant rise. Allow to cool before eating.

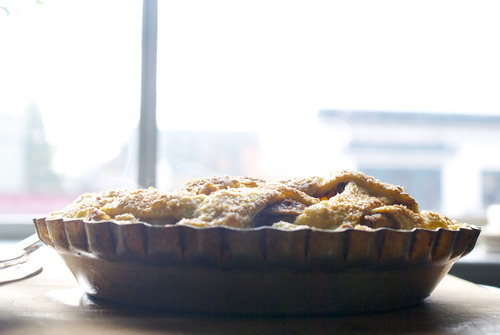
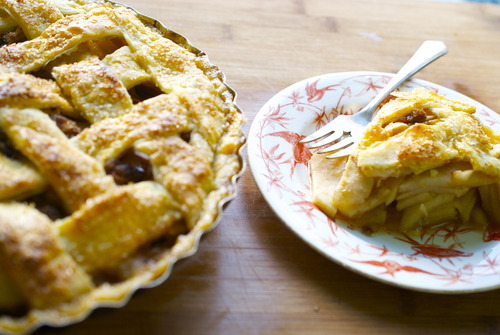
Tuesday Tutorials- Perfect Lattice Top Apple Pie

've been doing a lot of thinking about this little spot in the blogosphere lately. About what makes this little piece of the pie (no pun intended) more special, more worthy of your attention than any other, and the thing that kept coming to mind, is that I am a professional. I have not only gone to school to be a baker but I have worked for countless talented people who have shown me so many tricks along the way. Most people who write on the internet don't have that advantage, and so begins “Tuesday Tutorials” in which I share these tricks of the trade with you, my loyal readers. The idea being that once a week I will write something kind of fundamental, a basic, and show you how I make it, and the way I do that makes it so good.

And to start, pie.

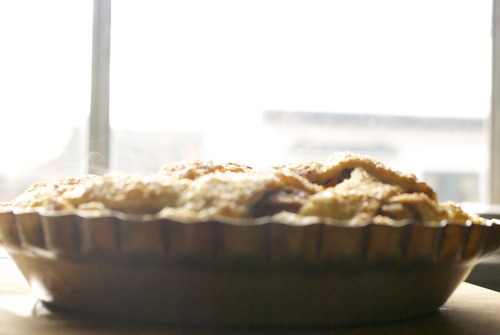
There are few things better than the smell of homemade apple pie. It is so quintessentially North American, so perfectly Fall, so designed for November weather. Apple pie is darn near perfect.

My mother makes a mean apple pie. A mean pie in general really, despite her absolute failings on many a cake, my mom kills pie. Seriously.

This is a recipe for a pie that is both hers and mine, I make mine with more butter than hers, she adopted her recipe from her mother, and growing up in The Depression, shortening was easier to come by than butter, but in these modern times I have no trouble at all with the subsition.

There are two ways of making pie filling though. You can cook the fruit before hand, add in corn starch or flour and thicken up the juices or you can put it all in raw. You get very different results with these methods, and in bakeries you almost always get the cooked before variety. And while I think this method is great for juicy berry pies, when I make an apple pie I put in the fruit raw, then top it all with brown sugar, cinnamon, and flour to thicken it up. It’s how my mom made it, and so it tastes like home to me. And that, good friends, is what apple pie is all about.

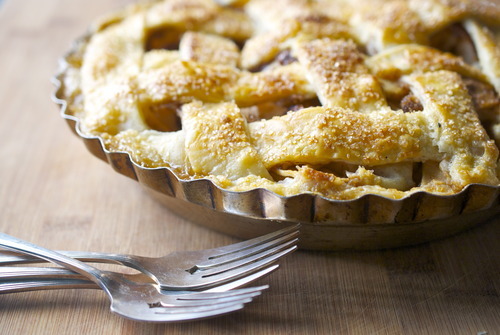
The real tutorial here though is how to make a perfect lattice top to your pie, the kind that friends will ooh and ahh over, and you can revel in self satisfaction when you sit it on the counter to cool. A lattice top pie is not something to brush off, it takes some skill, and it demands it when you put it on the counter. Unless of course, you follow this tip, which just makes it so easy.

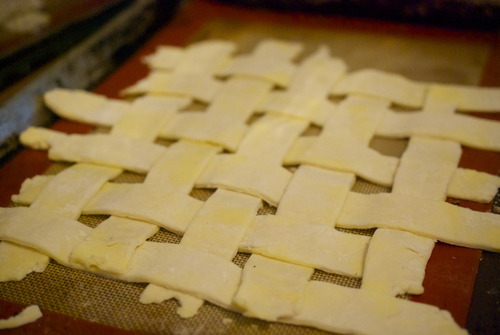
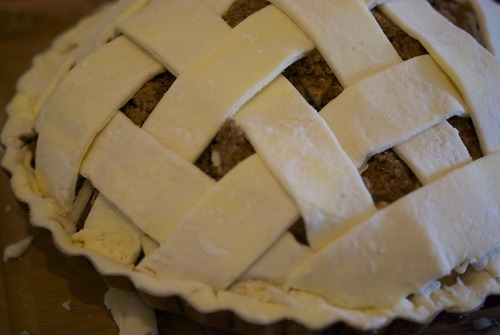
The thing to do is freeze it. Make the lattice on a baking sheet and freeze it, it will only take about half an hour, just enough time to cut up all the apples and make yourself a cup of tea. And then slowly put the top of the pie onto the pie crust, you get a perfect crust every time, and you save the stress of making the lines perfect on an imperfect surface like a rounded pie top. And you get to schedule yourself tea making time, and that friends, is always a perk.

Lattice Top Apple Pie

2c AP Flour

1c Cold, salted Butter, cubed

Ice water

Filling:

8 cups of chopped apples, a mix, I used ambrosia, pink lady, granny smith and macintosh.

1c AP Flour

2c Brown Sugar

1tbsp Cinnamon

topping

1 egg yolk mixed with 1 tbsp cream or milk

3 tbsp Coarse Sugar

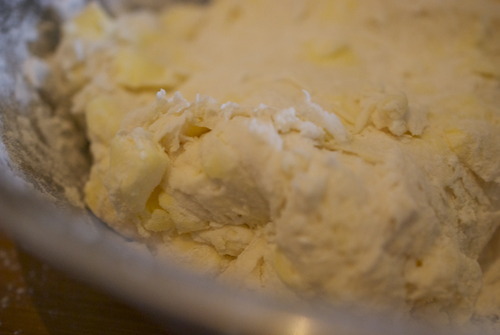
In a large bowl mix together the flour and butter. Using either a pastry cutter or, like I do, your hands, break apart the butter into lima bean sized pieces.

Slowly incorporate the water, stirring with a fork, adding just enough for the dough to follow to fork as you stir.

With your hands bring the dough together and knead it gently- squish it out with your palms and then fold it over. Repeat this 4-5 times or until the dough gets even the slightest bit tough. Wrap with plastic wrap and keep it in the fridge for at least 30 minutes.

Unwrap the dough and cut in in half.

On a lightly floured surface roll out one half of the dough in a large circle until it will fit your pie dish. Gently place your rolling pin the center of the circle, then drape one side of the dough over top. Pick up the rolling pin and place it on the pie dish and smooth out the dough.

Put this in the fridge.

Put a silpat of a piece of floured parchment paper on a baking sheet.

Roll out the other piece of dough in a long strip, making sure that it is as wide as your pie dish.

Cut this into strips widthwise.

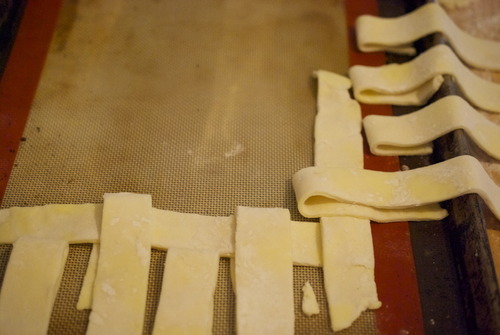
On the silpat arrange the strips as you see in the picture below, and slowly start weaving them together,

one over one under until you get a nice basket weave.

Now put this in the freezer and let it get nice and cold and hard. This is the trick- once the dough is hard you can just slide it on your pie, no finicking the edges or getting filling on the topping.

Preheat the oven to 400F

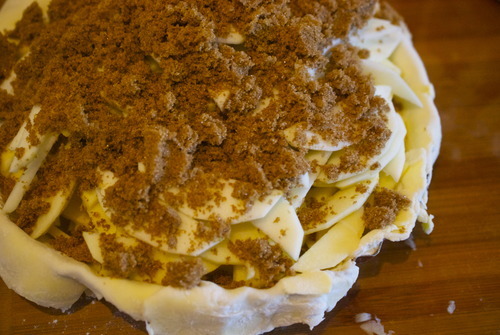
Pull out the bottom of the pie and shake half the flour onto the bottom of the crust.

While the top is freezing start chopping your apples. Peel and core then and slice them thinly and put them into the bottom shell, layering different kinds.

Top with the rest of the flour, the brown sugar and the cinnamon.

Take the lattice top out of the oven and gently put your hand underneath it and place it upon your pie.

Push the edges down into the corners and cut off any edges of your pie, or fold them over to create a a scalloped edge.

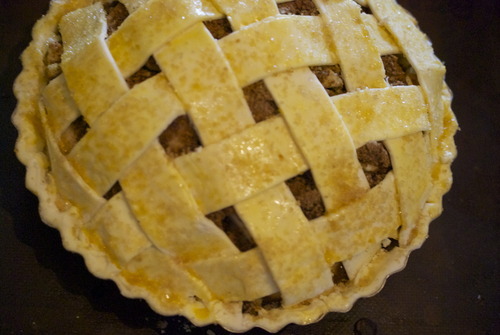
Wash with the egg wash and sprinkle with the coarse sugar.

Put in the oven and immediately bring the temperature down to 325F.

Do not open the oven door for at least the first 20 minutes or cooking.

After twenty minutes rotate the pie and cook for another half hour or until the juices start bubbling in the center an an inserted paring knife meets little resistance when pushed into the center of the pie.

And there you have it, the easiest most delicious apple pie.

Finnish Cardamon Bread

Sometimes in Vancouver it rains. Some might say that most of the time it rains but I’m feeling optimistic so I’m going to say sometimes.

Sometimes in Canada it gets bloody freezing. That doesn’t happen much in Vancity, but it has this deep humid chill that gets into your bones. It’s a wet cold that creeps into your shoes, and blows down your neck, and sneaks behind your ears.

Sometimes around here you wake up and think “I can’t possibly go outside, it is to cold, what can do to justify just not leaving the house.”

Sometimes, you need to stop feeling guilty and just make Finnish Cardamon Bread.

You need to have your whole house smell like rising bread, and you need to feel that comforting squish of yeasted dough between your fingers, and you need to sprinkle cardamon on it, which seems at first a wee bit crazy, but very quickly becomes the best idea you’ve had all day.

Sometimes you just need to let it rain, you need to make a strong cup of tea, and you need to eat Finnish cardamon bread.

And you need to be happy.

Finnish Cardamon Bread

Adapted from Pure Vegetarian By Lakshmi

2 cups Lukewarm water

1 1/2 tsp Dry Yeast

1 cup Sugar

1 tbsp Cardamon, ground

5-6 cups AP Flour

1 cup Butter

Brown sugar and cinnamon for sprinkling

In a small bowl mix together the water, yeast and a pinch of the sugar.

Let this get foamy on the top- that’s how you know your yeast is still alive. If after about 5 minutes you see no movement start over. Make sure the water is about the temperature of your hand- much hotter and you’ll kill it, much colder, and you’ll make it dormant.

In the bowl of a standing mixer fitted with the dough hook, OR in a food processor with the dough attachment, OR in a bowl with some serious arm muscles, put the remaining sugar, salt, cardamon and flour and mix in the yeast mixture.

Continue kneading the dough until it all comes together, and when you stretch a small piece of it, it gets thin enough to see light through.

Shape it into a ball, put back in the bowl and cover it. Wait until the dough has doubled in size, about an hour- an hour and a half.

Prepare a pan by covering it with parchment paper.

On a lightly floured surface roll out the dough into a large rectangle, about a foot and a half by 3/4 of a foot.

Sprinkle the brown sugar and cinnamon on top- use as much or as little as you want, I used about a cup and a half of sugar and a teaspoon of cinnamon.

Roll the dough a long the long end so that you have a long thin roll.

You can either cut them into rounds and place them on a pan, or you can cut slices almost all the way through, on a diagaonal. Then flip every other slice to the other side side so that going left right left right and you can see all the pretty slices.

This is easier to do on the pan then on a board and then have to move it.

Cover the dough with a tea towel and wait until it has doubled in size again, another hour or so.

Preheat the oven to 350F.

Bake your bread until it is golden brown.

Wait at least 15 minutes before getting into them! (Bread that is still hot is hard to digest!)

Birds Nest Scones- AKA Coconut and Jam Scones

It’s the time of year where my apartment starts filling up with canned goods. I swear it’s by osmosis, I couldn’t possibly spend this many hours, this often, making preserves and yet there they are, slowly taking over cupboards and shelves, the pickles(!), the peppers(!), the peaches(!). It gets out of control.

This is the sort of thing that drives someone a bit batty at times, but in the winter when all is dark, this is a glorious glorious thing, one that should not to be scoffed at.

However, it is also the time of year where scrap bits of jams begin to accumulate. The parts that don’t quite fill a jar, so get pushed into old jars and thrown in the fridge where I begin to forget about them. I do, I’ll confess to that.

So lately I’ve been trying to use up these scrappy bits, sandwich them with cookies, spread them on the morning toast, or today, bake them into scones.

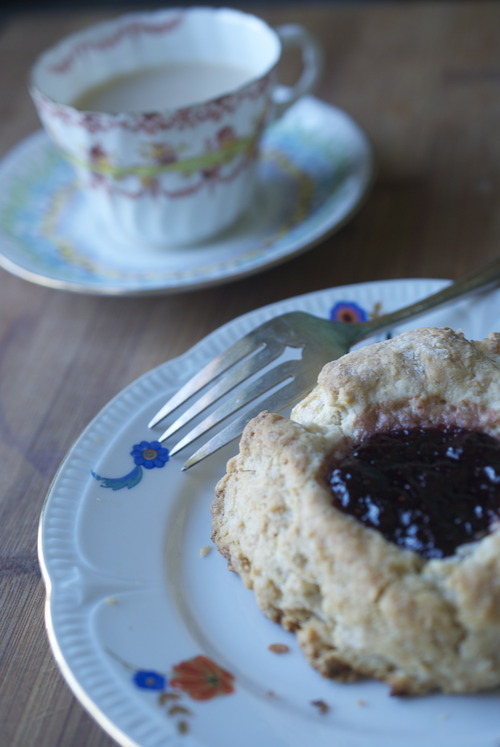
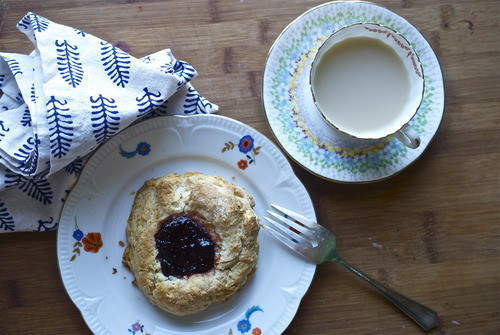
My favourite way is to put them into birds nest cookies, you know, the coconut ones with the raspberry jelly in the middle. But today I didn’t feel like cookies, I felt like breakfast, and while there is definitely overlap there, birds nest cookies lie firmly on the side of unhealthy inappropriate breakfast choices. So instead, I made coconut scones and put a big blob of jam in there. It’s like having someone put jam on your scone for you, and it’s also like eating a cookie for breakfast. By which I mean, it’s the best thing ever. And you should probably make these. Stat.

1 cup AP Flour

1/2 cup Spelt flour/whole wheat flour/AP flour, whatever you prefer

2 tbsp Baking Powder

1 cup Unsweetened Shredded Coconut

1/4 tsp Salt

1/2 cup Butter, very cold, chopped into cubes

2/3 cup Coconut Milk

1/2 cup Jam (any flavour you like)

Preheat oven to 400F

In a medium sized bowl mix together all the dry ingredients.

Add in the butter and mix with your hands until the pieces of butter are the sizes of large peas.

Add in the coconut milk and mix until just combined.

Carefully mix in any bits of flour that are on the bottom of the bowl by folding the dough a few times, in half pressing it down, then folding it in half again. You’ll want to do this at least 5 or 6 times. If the dough gets wet add a speck more coconut milk.
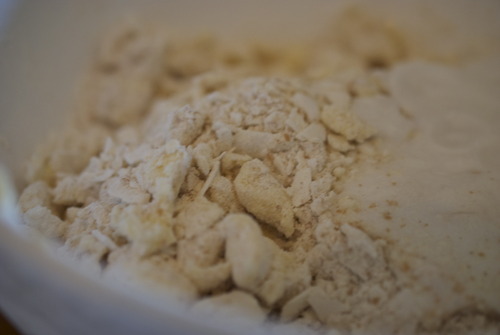
Chill dough for at least 20 minutes.

Remove from freezer and divide into 6 pieces.

Without squishing or removing the layers you’ve just folded in shape them into circles and then press deep imprints in the middle. I don’t think I added enough, so if your judging by the pictures above, I’d use a bit more.

Divide the jam in the middle of the scones and chill for another 10 minutes.

Bake for 20 minutes or so, until the tops are getting golden brown and the jam has set a bit in the middle.

Allow to cool slightly before serving!

Blackberry Slump

There is something deeply nostalgic about blackberries for me. As a kid we never bought the berries they were always picked. They were grabbed along the sides of trails by my grandparents house in Nova Scotia and beside the dirt road that led to the cottage. We found them on hiking trips and they covered the sides of rivers we canoed down in Maine. Blackberries taste like summer vacation and freedom, and they taste a little bit like the fear of bears.

Blackberries might be my favourite berry but I feel pretty strongly that they shouldn’t be turned into anything fussy, blackberries should be rustic and simple and mostly just show off how perfect they are just on their own.

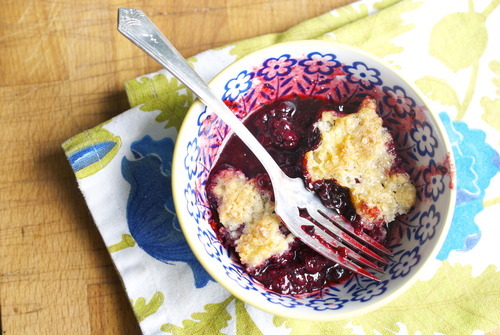
For me this blackberry slump is just the ticket. The berries are cooked until they just start to get soft and the pastry on the top both gets crisp and soaks up the juice and turns into something that tastes like home.

4 cups Blackberries

1 cup Sugar

2 tbsp Corn Starch

3/4 cup AP Flour

1/2 tsp Baking Powder

1/2 tsp Baking Soda

1/4 tsp Salt

4 tbsp Chilled Butter

3-4 tbsp Buttermilk

3 tbsp Coarse Sugar

Preheat the oven to 375F

In a 8 inch casserole dish mix the blackberries, sugar and corn starch.

In a separate bowl mix the remaining dry ingredients except the coarse sugar. Add in the butter and break it into pea sized pieces.

Carefully mix in the buttermilk adding more if necessary until the dough is quite soft. Do not over mix.

Place the dough on a lightly floured surface and with your fingers press the dough into the shape of the casserole dish.

Place the dough on top of the fruit and sprinkle the sugar on top.

Bake the slump for 45 minutes or until the sugar on top has started to caramelize, and the blackberries have started bubbling up around the edges.

Lemon Glazed Baked Mini Donuts

One of the best parts about being a baker is that at Christmas time instead of getting socks, or bottles of wine that only last an evening, people buy you kitchen stuff. Stuff that most people would never use, and stuff that you might not be able to justify buying yourself. Things like vintage bundt pans and ice cream scoops, or teflon scoops that are only to be used for scooping out dry ingredients. And the pans. The one use kind of pans that are hard to spend money on because you know you’ll only use them a couple times a year. I have lots of those.

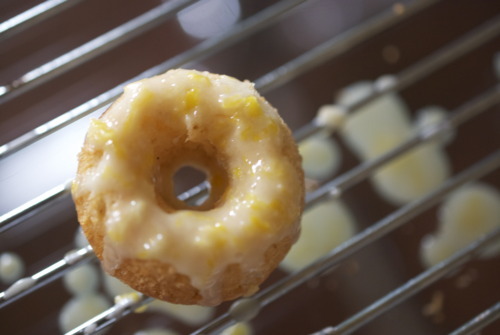
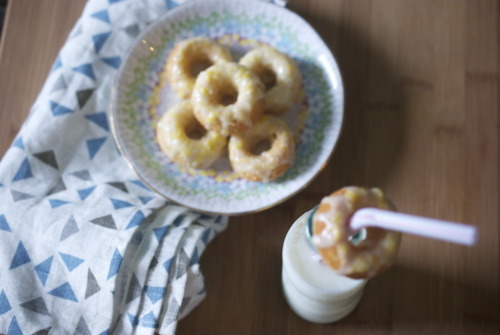
I have a mini baked donut pan that I got last year. I mean the name says it all doesn’t it? You can only make it if you want baked donuts and you want them mini. I don’t think I have that urge all that often, but yesterday morning I was very happy to have such a pan because it made these little numbers.

Here’s the thing about baked donuts. People always say at the top of recipes that it’s just like the fried ones and you can’t tell the difference. And I am going to tell you these are not just like the fried ones. The fried ones are yeasted and take ages and then you have to heat up a gallon of oil on your stove top. And you can produce incredible donuts like that, but you also have to be very aware and awake at a very early time if you want donuts on Saturday morning.

I do not like frying things on my stove top that early. I just don’t.

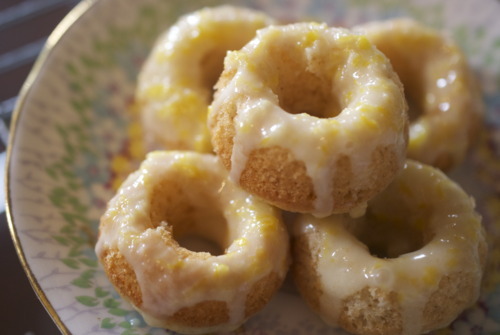
One of these days I will do this for you, but in the meantime you can have these. These aren’t crispy and light the way a fried donut is, because it’s not fried. But it is bright and citrus-y and the hint of cinnamon makes them taste a tiny bit like the cinnamon sugar donuts you get at a fair. They are not fried but that does not stop them being delicious. Which is why you’ll notice that because their so tiny you haven’t noticed how just how many you’ve shoved in your mouth!

Lemon Glazed Baked Mini Donuts

Donuts

1 cup AP Flour

1/2 cup Sugar

1 tsp Baking Powder

1/2 tsp Baking Soda

1/2 tsp Cinnamon

3 tbsp Yoghurt or Buttermilk

3 tbsp Melted Butter, plus more for pans

2 Eggs

Glaze


1 cup Icing sugar

1-2 tbsp Lemon Juice

Zest of 1 lemon

Preheat the oven to 400F

Grease pans very well- there isn’t much fat in this recipe and they will stick.  Even if it’s a non stick pan. 

Mix the wet ingredients in a bowl and whisk until they get a bit frothy and are pretty well emulsified. Mix the dry ingredients in a larger bowl.

Add the wet ingredients to the dry ingredients and mix until barely combined. 

Put the batter in a piping bag or a ziploc bag with the end cut off and pipe the batter about half way up the pans.

Bake for 7-10 minutes until the outsides are starting to get brown and when you push the top it springs right back at you.

Let them sit in the pan for another couple minutes before carefully easing them out of the pans. Hopefully you greased yours more than me, because mine took some serious work to get them out. 

Let them cool. 

Meanwhile make the glaze:

Mix all the ingredients together. Yup, that’s it.

Once the donuts are cooled drizzle the glaze on top and dig in!


Hot Cross Buns

My mom does not like to bake. I don’t remember her ever making bread or pizza dough, there was a good bakery near us growing up and that was good enough for us. The only time she ever got the yeast out and used it, was for hot cross buns.

She would make it right before bed and put it in the fridge over night. In the morning she would wake up before all of us and pull it out, and let it proof and we would wake up to the incredible smell of freshly baked bread. It was such a treat.

My mom loyally made Marion Cunningham’s for years, and they are darn good. But I had some at a friends house a few years ago that had more of a spice to them, and when I saw this Jamie Oliver recpie I just had to try it.

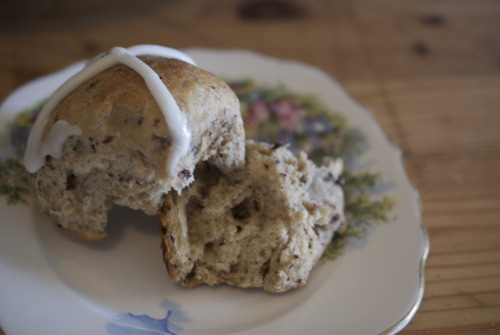
These are beautiful hot cross buns, with more then a vague hint of spice they are very soft and gently sweet. I made a few changes, I use honey instead of sugar, and I added salt, because everything tastes better with a bit of salt, and they are splendid. And officially my new go to hot cross bun recipe!

Hot Cross Buns

(adapted from Jamie Oliver)

1/4 cup Honey

2 1/4 tsp Yeast

2/3 cup Water- warm but not hot, about the temperature of your body.

3 cups Flour

1 tsp Cinnamon

1/2 tso Ginger

1/2 tsp Nutmeg

1/2 tsp Cardamon

1/2 tsp Salt

1 cup Currants

Zest of 1 Orange

1/4 cup Butter- melted

1/4 cup milk- warmed slightly

1 Egg

Egg wash

1 Egg Yolk

2 tbsp Milk or Cream

Icing

1 cup Icing Sugar

1-2 tbsp Cream or Milk

Make Hot Cross Buns

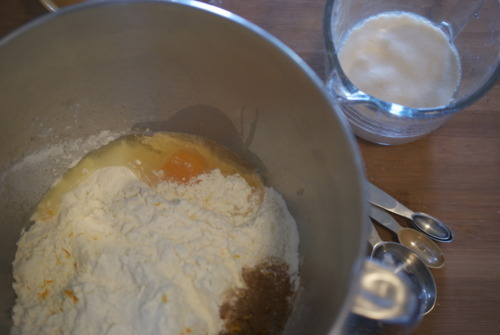
Mix 1 tablespoon of the sugar with the yeast and water, and let it sit until it gets frothy on the top.

Meanwhile, in the bowl of a standing mixer fitted with dough hook mix all the other ingredients.

Make a well in the middle and Pour the yeast mixture into it.

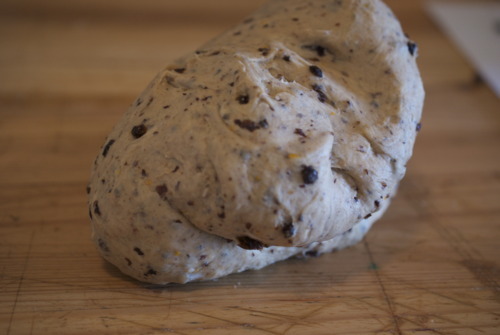
On slow to medium speed mix the dough until it becomes soft and elastic, and if you stretch a little piece of it with your fingers you can get it so thin you can almost see through it.

Put it in a bowl and let it sit in a nice warm place for about an hour or until it has doubled in size.

Once it’s nice and big take it out of the bowl, put it on a work space- if it’s sticky you can add a bit of water but you shouldn’t need to.

Cut it in half and then roll out each half into a log and cut into 6 equal pieces.

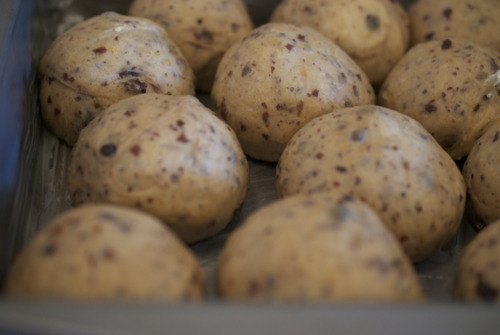
Roll them into balls- put the palm of your hand over each piece, apply a decent amount of pressure and slowly move your hand in circles. After about 4 circles flip the piece upside down- it should be sealed on the bottom. If it isn’t, push it into a few more circles. This takes some practice, but don’t worry if they’re not perfect.

Put them into a buttered baking dish- I used an 8x8 inch square pan.

(Note: If you want to bake these the next day, cover with saran wrap and put them in the fridge. The next day take them out and let them come to room temperature and double in size- this will take about 2 hours.)

Cover with seran wrap and let sit until they’ve doubled in size again.

Preheat your oven to 350F

Mix your egg wash and gently brush it on top of the buns.

Put into the oven and cook until the buns are gently crisped on the top, have turned a nice brown colour, and are cooked inside- about 25 minutes

Once they have cooled mix your icing- Combine 1 tbsp of milk or cream with the icing sugar and mix until they’re totally combined and lump free. If it’s too thick add a little more cream, if it’s too thin add a little more icing sugar. You want it to be reasonably thick so it will stay in nice lines.

Put the icing in a piping bag and pipe on the crosses.

C’est Finis!